


To see if this custom-fit item will work for you please tell us what vehicle you'll use it with.


Thank you! Your comment has been submitted successfully. You should be able to view your question/comment here within a few days.
Error submitting comment. Please try again momentarily.


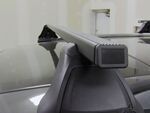
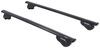
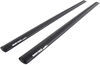
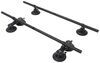
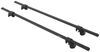
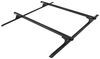
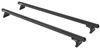
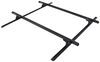
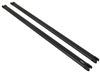
When you’re hauling a kayak, paddleboard, or a loaded cargo box, you want solid support that doesn’t flex or shift. The Sportz Roof Rack gives you that confidence with full-length aluminum crossbars built for stability and balanced load distribution. Each bar measures 50" and supports up to 165 lbs—perfect for carrying the extra gear you don’t want inside your vehicle.
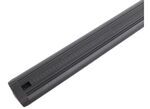
Wind noise can make long drives frustrating. These aero-style crossbars are shaped to guide airflow smoothly over your roof, cutting down on that constant hum. Dual rubber strips in the top channels help reduce drag and whistling while keeping debris out of the track. Your drive stays quieter and more comfortable, even when the rack is loaded up.
Trips are easier when your rack works with all your gear. The Sportz system pairs with both channel-mount and clamp-on accessories, so you can use it for bikes, kayaks, skis, or cargo boxes—whatever the weekend calls for. It’s also compatible with Rhino-Rack accessories that use the Zwifloc fastening system, giving you plenty of mounting options without extra adapters.
You don’t have to worry about your setup when you park at the trailhead or stop overnight. The Quick Mount legs come with lockable cover plates that secure the rack to your vehicle’s tracks. Once installed, everything stays tight and locked in place, so you can focus on the adventure ahead instead of checking your gear every stop.
From cross-country drives to rough backroads, this rack is ready for it all. The aluminum construction resists rust and wear while keeping weight low. Finished in black for a clean look, it’s made to handle years of hauling without losing performance or style—and it’s backed by a 5-year warranty for added peace of mind.
 Alternate Instructions
Videos are provided as a guide only. Refer to manufacturer installation instructions and specs for complete information.
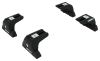
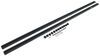
Hi, I'm Daniel with etrailer, and today we're going to take a look at and I'll show you how to put on the Rhino-Rack Sports Roof Rack that goes into your tracks on our 2023 Honda Odyssey. If you own a Honda Odyssey that doesn't have raised rails, then you're going to want to get the Rhino-Rack's RT-style tracks with this kit to get everything to work properly. This is going to be a track that gets riveted into your roof. And then this kit, this comes with everything you need to get this slid into those tracks. I think a roof rack to your Honda Odyssey is going to allow you to put accessories up here and items that you can't fit inside your vehicle. So you can put bike racks up here, kayaks, you can put cargo boxes, which is really common.
Our neighbor actually today is getting a cargo box. He's getting the Thule Force 3 just for some extra luggage when he's out on those trips. With this roof rack, you can easily put on your clamp-on accessories or your T-slot accessories. You'll just have to remove this cap and then they'll slide right in the middle there. And with this style, it's actually really easy to take these on and off, the easiest I've seen.
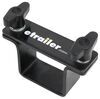
All you have to do is you take your key. And another nice thing I'll point out is it has locking cores with it. A lot of times it'll be plastic with other kits and you'll have to upgrade later on, but this, they come with it. So I'll unlock that cover. And then you just want to push in on these two red tabs and that will unlock that.
You just want to do that on the other side and this will pop right off. So if you do want to pop these off maybe for the season, you're not using them or you want to go through a car wash, you can put this cover on this bracket and that way it keeps the rain out, keeps the elements out, and it looks a lot nicer. Now I'll get you a couple of measurements. So from the top of your roof to the bottom of your bar here, that's going to be about two and three quarters. So that can be helpful for larger clamp-on accessories, but you should be fine there.
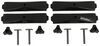
And the next one is going to be to the top of our bar, and that's going to be about four inches. So you can add that on to taller accessories like cargo boxes, and that can help you determine if you can pull in and out of garages safely. Overall, this setup is going to be the best option to get your roof rack on your Honda Odyssey. Now when it comes to the rails here that we had to install, it is pretty in depth. We do have videos on our site you can check out if you want to do this yourself, but you are having a drill into your roof and that can be kind of daunting and you do need a pneumatic rivet gun. So if you don't have the tools or time, you can check out our installer locator and we can find an installer local to you to help you get this installed if need be. If you want to do it yourself, you can check out that video, like I said. Now, as far as getting your roof racks on, it's super simple, so follow along and I'll walk you through it. Starting off, I already got the front crossbar already on there, and I'll show you how to do the rear. So I'm going to get our tower and our key. I'll unlock this and that reveals some red tabs. We'll squeeze in on those and then push in to unlock those two pins on the sides. And then underneath there's going to be a bolt will loosen up with the provided Allen key to loosen this up, and we're wanting this square on top to be able to slide in the slot in our crossbar. We'll come to the end of our crossbar. We'll take the end cap off, flip this over, take our weather stripping out. We'll cut this later to length. Now we can slide in our tower with the red facing outward. Get that slid in. And then I'm going to tighten that up just a little bit, just enough so this can still slide around. We'll take our track leg base, and I'll get our bolt. I'll put a split washer and then a flat washer. Then I'll put one through one of the outside holes and one through the other outside hole. Flip this around, get our blocks, thread it on just a little bit so this can slide in our track. And then through that middle hole, the one we're not using, I'm going to get this rubber piece and get that pressed in there. Take our track leg base and I'll slide this in, the opening on our track. And I do have to go in a specific way. And we'll repeat that on the other side. When it comes to setting your crossbars on the track, you can really put them anywhere that makes sense. If you already have your accessory, you can measure that and put them exactly where you need them. It does say in the instructions to put them from 700 millimeters to 800 millimeters as a minimum. So 700 millimeters is roughly 27 and a half, so that's where I'm going to put them. And for our front bar, I just measured from the end of our track to where our tower is going to sit. I did that on both sides to make sure that was even. And now I can measure off of that my 27 and a half. With this track bracket set, we can tighten these down fully and I'll do the same thing on our other side. Now we can take our crossbar and put that into our track brackets. On both sides, we'll pull out on these red tabs and push them back, and this is going to lock those pins into that track bracket. Now we can get this even. So I'll take a tape measure, put it against our foot, and I can move this side to side until that measurement's equal. And I got the same measurement on this side, so we're all good. With your crossbar even, we can get these tightened down to our feet by using that Allen wrench. We're going to be tightening that same bolt that's going through that square piece. Get this snug down on both sides. With everything tightened down, we can put back in our weather stripping. And on the back, there's going to be a slide. So you can just slide that all the way to your foot, and that covers that opening and then this will cover the other opening. So this is so wind doesn't get in there and make a whistling noise when you're driving down the highway. So I got that slid in, and then I'm just going to use a sharp knife to get this as accurate as possible. Cut those sides. I can take this out, and I have my mark of where I'm going to cut this. You can cut this with some scissors or a sharp razor knife. I'll slide this in and then put our end cap back in place. And lastly, we can put the cover on our foot. And there is a back piece, and this is going to cover that screw so no one can come and loosen that up. Put that on there and lock this up. Once you got everything locked on up, the last thing to do is throw your accessory up here and hit the road with your new Rhino-Rack Sports Roof Rack on your 2023 Honda Odyssey.
Ratings & Reviews



Adam

4/16/2024
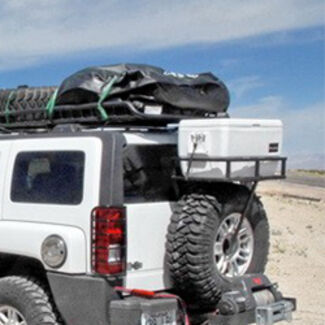
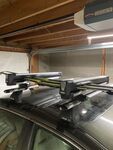
Still on the roof of the 02 excursion and has been used multiple times with the thule cargo box, ski trips camping etc. still great still works flawlessly.

Jeff S.
8/3/2018
I like the products pretty much considering it was the only option available for my vehicle. The roof racks do cause a bit more wind noise than I had hoped but Im used to it now and just turn the radio up a bit more. I did go back and read my reviews again and they are still accurate a year later.
Do you have a question about this Roof Rack?
Info for this part was:
At etrailer we provide the best information available about the products we sell. We take the quality of our information seriously so that you can get the right part the first time. Let us know if anything is missing or if you have any questions.



































Louis D.
8/15/2022
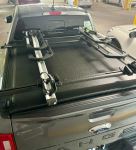
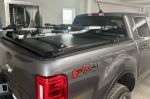
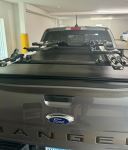
So far So Good