
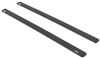
Thule WingBar Edge Roof Rack for Raised Rails - Aluminum - Black - Qty 2


To see if this custom-fit item will work for you please tell us what vehicle you'll use it with.


Thank you! Your comment has been submitted successfully. You should be able to view your question/comment here within a few days.
Error submitting comment. Please try again momentarily.


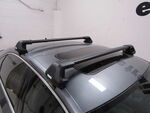
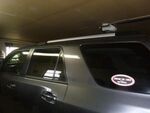
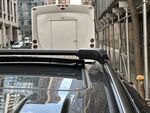
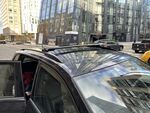
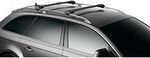
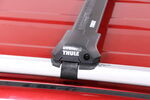
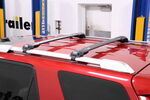
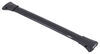
The flush design keeps the crossbars tight to the roofline, giving your vehicle a clean, from-the-factory look. Nothing sticks out past the sides, so it feels like it belongs there—not like an add-on. The Thule WingBar Edge Roof Rack for Raised Rails has a streamlined profile that sits close to the roof and blends in seamlessly for a sleek finish.
Wind noise can get annoying fast, especially on long highway drives. The aerodynamic shape of these aluminum crossbars helps reduce drag and noise while you’re on the road. The top channels use split rubber strips that close back around your mounted accessories, minimizing whistling and vibration. The result is a quieter, smoother ride even when the rack is loaded up.
Whether you’re hauling kayaks to the lake, skis to the mountain, or a cargo box full of camping gear, these bars are ready to go. The WingBar Edge system works with most bike, watersport, snow, and cargo carriers. You can mount gear using either the top channels or clamp-on attachments, giving you flexibility for whatever adventure is next.
Durability matters when you’re carrying heavy gear. The aluminum construction keeps the rack lightweight but tough enough to handle serious loads. With a weight capacity of 165 lbs (always follow your vehicle’s maximum roof load limit), it’s built for everything from long road trips to weekend projects. The 41" long crossbars are sturdy and corrosion-resistant, ready for years of use in all conditions.
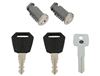
You can boost security by adding Thule’s One-Key System locks (sold separately). They lock both the rack and any channel-mounted accessories so you can leave your vehicle parked without worry. It’s an easy upgrade that adds peace of mind when your gear is out of sight.

Videos are provided as a guide only. Refer to manufacturer installation instructions and specs for complete information.
Hello neighbor, this is Curt with etrailer and today we're taking a look at the Thule WingBar Edge roof rack and we're gonna see how it fits and how it installs on our 2022 Nissan Armada. Roof rack is a great way to carry those extra items with you on your journey that either won't fit in the vehicle with you or you just don't want them riding in the vehicle with you at all. The kind of accessories you can get for these are gonna be, you know, platform racks. You can get cargo boxes, cargo baskets, bike racks, kayak carriers, any number of things that could go up there on your roof. Now there is a generous cargo area here in the Armada. However, if you have a full load of passengers, maybe you're using the third row of seats too, that can actually take up a lot of that extra cargo space pretty quickly.
So having a roof rack that can hold an accessory that can carry those extra items with you is gonna be a huge bonus. Now the Thule WingBar Edge is going to mount to the raised rails on your Armada using this strap right here. It is a flush crossbar, meaning that the crossbar dead ends inside of the tower. It doesn't extend out beyond it. So that actually gives you a really nice factory type of look.
It looks very streamlined without having any of the overhang on it. The flip side to that would be that you're gonna have to mount things up here closer to the center of the vehicle and you don't have as much bar space or as much opportunity to put two accessories side by side. But with that being said, these do take a weight capacity of 165 pounds. However, you always wanna double check the roof capacity in your owner's manual and make sure that you know that number isn't gonna be lower than that. If the number is lower than the 165 pounds of the crossbars, that will end up being your weight capacity.
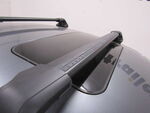
The crossbars that we have are what they call an arrow style. They're wider in the front, narrow in the back. That makes them much more aerodynamic than your typical square or round bars. It's also gonna have this split weather stripping up here at the top. So you can mount your T-mounted accessories and you're gonna be able to use your clamp mount accessories around the bar as well.
The T-track is accessible by removing your tower cover and sliding it down over it from there. But that's just a little bit about what these crossbars can do and how they look. Let's get up on the roof on the other side with the measuring tape and see how it actually fits. Now when you're on raised rails, you can actually have the freedom to kind of move your crossbars around wherever you want. We place these specifically where they're at so that they're accessible very easily from your second road door threshold like I'm standing in right now and let's just take the opportunity to see what kind of crossbar spread we end up with. The crossbar spread I'm gonna measure from the middle of the back crossbar to the middle of the front, so right the center of the T track. And it's an important number to know because every rooftop accessory has a minimum and a maximum crossbar spread allowable in order to use that accessory. And we've got this set up to be just under 29 inches, and that to me is kind of a perfect crossbar spread. 25 to 35 inches is where you find most of the minimums and maximums when it comes to accessories going up here. So having it be around that 29 inch mark is just perfect. I'm not too worried about not finding accessories that are gonna go up here with this fit. The other thing we're gonna take a look at too is how much bar space do we actually have Because these dead end into the towers, it's gonna be an important number to know, and we're gonna come up with 39-1/2 inches of crossbar space that you're gonna be able to use. So keep that in mind as well as the crossbar spread. That should help you determine what kind of accessories you could put up here. We're also gonna take a look at just how much clearance we have under our bar, and we actually have about one inch of clearance under here. Now that should be enough to get your clamp mounted accessories around the bar without that much issue, but it is something to keep in mind. These do sit a little bit lower on the roof than a lot of roof rack systems with taller towers that you know, but honestly, I think that would kind of take away from the look of these being so streamlined and aerodynamic with the vehicle. So let's see how much height these actually add to your vehicle. From the center of the roof to the top of the crossbar, it's gonna add about 2-1/2 inches to your vehicle height. So if you're worried about roof clearance and you know your vehicle height and you know your accessory height, just add that 2-1/2 inches and you'll get your overall vehicle height in case you run into an area with low clearance. And one more thing to add. With the length of these rails and the length of the roof here of the Armada, you also have the opportunity to add or the space rather to add a third bar if you wanted to, to get that extra support. But with all that being said, installation on these is actually a really, really simple process. It is something that you can do on your own without any help if you needed to. So follow along and we'll show you exactly how we got these on the roof of our Armada. We're just gonna get all the parts laid out here. We've installed our front bar already. We're gonna walk you through how to install the second one. They go on exactly the same, so there's no difference in putting on the front bar as there is the second bar. You're really only gonna need two tools, the one that Thule actually provides for you, and a tape measure that you'll have to provide yourself. So where we're gonna begin is with our tower here, and we'll start by removing the tower cover. It'll slide right off like that. And then as we look in here, there's a couple of, you know, different little mechanisms and hooks that we're gonna be getting into. What we're gonna be doing with it open though is actually putting on our strap. So the way that that's going to work is there's these numbers here, one, two, three and four and that's gonna indicate how long and how short your strap needs to go. Now you're gonna find that out by measuring the circumference of the rails up on your roof. So the circumference we measured was at about 117, 118 millimeters according to the instructions, we're looking for slot two. So where we're gonna put that into is right here. There's a little hook mechanism here that's gonna hook through this tab. We just wanna hook that through slot number two. And once we get it good and secure there, we're gonna grab this piece here. It's gonna have a long spring attached to it, and that's gonna be slotted in right here on the edge on the narrower end of our crossbar. At this point, we're gonna go ahead and grab our tower. Now if you get confused about which tower goes on which side, they are driver and passenger side specific. The portion here, this round cutout for the keyhole is always gonna be facing the rear of the vehicle. So at this point, what we're going to end up doing is this section is gonna go in right through here, just like so. The spring, there's an open end here with a little tab on the end of it. And what we're gonna do is make sure that we feed that through there and into that tab, there's a tab located at the end of this bolt that's gonna end up popping out of that hole right there on our crossbar. Just like so. Now we've got this end locked in and we're gonna do the exact same thing on the other side of the crossbar. Both of our towers attached. Next thing we need to do is add the weatherstripping to our crossbar. So it's gonna come like this, you're gonna need to separate it first. Then you'll notice that one of the pieces of weather stripping has these arrows and those need to be facing the front of the bar. So that would be the wider end of the bar. It's got this little section here that's just gonna slide right into there. Now this is going to end up being a little bit longer than the crossbar, and that's okay. You know, just make sure that you're not leaving any gaps up here in the crossbar itself. So you can go over this a little bit if you need to, but we're just gonna depress that into that slotted section there and just work our way all the way down. We got a little bit extra on the end there, but again, that is okay. Next we're gonna take the plane side of it, and there we have the same exact way to attach through that slot. So we're just gonna start over here, press it in and just work our way down. But if you've got a friend to help you out with this, that makes it a bit easier, but it by no means do you have to have somebody with you to do this. What I'm gonna do is I'm basically working it so that that rubber strap is going under the bar. I'm just gonna kind of put it in place a little bit, and that spring we installed is gonna allow us to compress our bar a little bit in order to get the other end around. So I'm gonna feed that under the bar just to press this in a little, bring it out the other side, and I'm gonna make sure that this kind of cups around over the top without folding in or anything like that. And I'm moving this back so that the strap ends up butting up right against this support structure here. You're pretty much free to put your bars wherever you really want to, but it's a good idea to make sure that you have a good crossbar spread, meaning how far apart your bars are to accommodate those different rooftop accessories. And I'm setting these up specifically right here so that I don't have to carry a ladder or a step stool with me. I got the bars positioned right in the middle of the second row door threshold where I'm standing now, so I'll be able to access those accessories up here that much easier. But once I've got it in position on the driver's side here, I'm just gonna move over to the passenger side and I'm gonna do the same thing. Wrap this rubber strap around our rail and it's gonna hook into these two hook tabs right here. We're gonna take the tool that Thule provided for us, and we're going to use it through this bolt right here that's located right underneath the weather stripping of our crossbar. And we're just gonna start tightening it in. And as we do, it's pulling these hooks that hold our strap inward underneath the bar, which is why this has such a long stem to it. But what I'm gonna be doing is just kind of tightening this down a little bit, and I'm gonna be kind of alternating back and forth between the driver and passenger side. What I don't want to do is tighten one side down completely and kinda risk making the other one go a little bit askew. So once I get this to where the loop is kind of a little more snug on here, I'm gonna go do the same on the driver's side and just work my way back and forth as I'm tightening it down. Now, as you get it tighter, your bolt is probably gonna go under the bar, which is why they made the stem of this so long. So as you're in there getting it tightened down, you're gonna feel it start to really get tight on you and then you're gonna hear it click like that. This is actually a torquing tool, so when you hear that click, you know that it's tight enough according to Thule's standards. And once that's done on both sides, we're ready to grab our tower covers. Gonna notice a gap right here, that's where your lock core is gonna go. Now, when you get these outta the box, Thule is gonna provide you with these plastic lock cores, and those go in really, really simply. There's a tab here on one side. If you look in, there's a groove here at the bottom, so I'm just going to insert it like that and snap it in just like so. My recommendation would be, however, for the security of towers to go ahead and get yourself a set of metal key cores and the keys that match it. Those are available right here at etrailer.com. And you have the opportunity to get them keyed alike to your other Thule accessories through Thule's one key system. Now to get the tower cover on is a pretty simple process. Remember, our key core there, or our lock core there is gonna go toward the back of the vehicle. There's these tabs here that are gonna slide in on either side, just like so and clicked into place. Now with this right here, you can use a coin or something like that to get it open or shut. We're just gonna use a flathead screwdriver today to get this down and locked onto our roof. But with that, everything is in place. If we give it a good shake on each one the bar isn't slipping anywhere, our towers aren't slipping anywhere. So we're ready to load up and hit the road on our next adventure. So that's a look at the Thule WingBar Edge roof rack on our 2022 Nissan Armada. And if after watching this video you decide that this will be the roof rack for you, once you get it, install it and use it a few times please share what you think about it in the comments below. We would love to share your experience with other neighbors just like you in order to help them make the best decision for themselves. Once again, this is Curt with etrailer. Thanks for stopping by.
Ratings & Reviews




Jenny N.
3/15/2023
I agree with you that the rack should include the keys however Thule only offers the one lock system separately as part # TH450400 for a 4 pack. They do it this way so that if you have other Thule accessories like a Thule kayak or bike carrier then you can have the option of ordering enough keys to swap them all out to key them the same. For example you can also buy a six part part # TH450600 or an eight pack like part # TH450800.

Victoria H.
3/20/2025
That's impressive Clare! Its always nice when install is a breeze. What are you planning on mounting on your roof rack?
Do you have a question about this Roof Rack?
Info for this part was:
At etrailer we provide the best information available about the products we sell. We take the quality of our information seriously so that you can get the right part the first time. Let us know if anything is missing or if you have any questions.


















Gwendolyn Y.
1/8/2026
Congrats on your new Benz! Sounds like a fun and exciting Christmas morning. I'm only slightly jealous of that tandem bike, I've always wanted to ride one.