


Thank you! Your comment has been submitted successfully. You should be able to view your question/comment here within a few days.
Error submitting comment. Please try again momentarily.


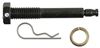
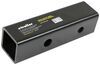
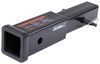
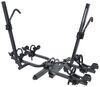
Replaces the hitch receiver shank on your Yakima HoldUp bike carrier for 2" hitches (Y02443 or Y02443-2), or convert your HoldUp bike carrier for 1-1/4" hitches (Y02445) for use with a 2" hitch.
Features:
Fits:
Note: If converting your Yakima HoldUp bike rack for 1-1/4" hitches (Y02445) to work with the 2" hitch on your vehicle, you will also need a replacement hitch bolt (Y8890200) sold separately.
Videos are provided as a guide only. Refer to manufacturer installation instructions and specs for complete information.
Hi everyone. It's Evangeline here at etrailer. And today, we'll be taking a look at the replacement shank or tongue for your Yakima HoldUp bike racks right here at etrailer. So, if you have the Yakima HoldUp bike rack, and remember this is the one that has the black paint on it and not the gray, those are slightly older, then what may happen over time is there may be some wear and tear that happens to the tongue or the shank on your bike rack. Or you might have the inch and a quarter shank and just wanna upgrade to a two inch one because you have a two inch hitch receiver. Whatever reason there may be for it, we do have the replacement part for that.
So, through this video, I'm gonna guide you through the process of installing it as well as explain what it's used for. So, the Yakima HoldUp 2 can be upgraded to a four-bike bike rack with the add-on but it has some different parts involved. So, if you want to replace your bike rack with something that is used for that, let's say, you have the inch and a quarter and you wanna add it on to two so you can get four, what you need for that is the actual replacement spine plus shank. But if you wanna stick with the Yakima HoldUp 2 and just replace from your inch and a quarter to a two inch, then all you need is this right here, which is the replacement shank. So, this includes the replacement shank itself plus this bright red bolt right over here.
It does not include the bolts that hold the spine to the shank or the anti-rattle bolt. So, if those are also maybe broken, maybe you've cross threaded the anti-rattle area, you will need to replace that too. So, some other things you may need for this process is I have a 24 millimeter wrench as well as two 3/4 inch wrenches in order to install this replacement part. So, let's take a look at that process. So, here we have our new replacement shank and then we have our old shank right beside it.
So, you can already see the difference we have. Our paint's been scuffed up a little bit. We have a little bit of dirt on it and dust, so you can see why we needed replacing. Now, what might also happen is maybe you've cross threaded some bolts, or you've cross threaded some of the threads inside, and that's why you need to replace this shank. So, I took it off of our original Yakima HoldUp bike rack.
So, what you need to do is remove this bolt on top, and this uses a 3/4 inch wrench. With that bolt removed, you can then remove the original shank and then prep your new one. So, this is gonna be the new one and it includes this bolt. So, this is going to thread right into the shank itself. So, this is the new bolt and this is the old bolt. It may take a little bit of effort to remove this, but notice how some of our threads we're kind of cross threaded just because of improperly being put in there. So, definitely worth replacing it with this nice and shiny new one. So, this threads right into there, and it may be kind of tricky at first. Just try to hand thread it as far as you can. And then once you can't thread it down by hand anymore, use a 24 millimeter wrench just like this. And that's what you'll use to just line it up with the flat parts on that bolt and tighten it down. The next step is to attach the new shank to our older bike rack. Now, I could just lift this up and then put the bolt right in, but to make it easier on myself, I'm gonna just put it into a hitch receiver. You can do this at home in the hitch receiver on your car. So, I'm just gonna fit this into this hitch receiver. Next, we're gonna lift this onto our shank. So, it's kind of on the heavier side, so just be mindful of that. So, then we're gonna use this bolt to hold our spine into place. So, this goes in through the top hole. You are gonna have to lift up on the bike rack though just to get parallel as you thread that through. Once you get the bolt through just enough so it can now support itself, just use a 3/4 inch socket or wrench to tighten it down. You're gonna need two 3/4 inch wrenches just because there is a bolt that goes on the other end and that needs to be tightened down too. Once you confirm that all your bolts are tightened down, that's it for the install process. You now have a brand new shank or a tongue on your Yakima HoldUp bike rack. And that was a look here at the replacement shank or tongue for your Yakima HoldUp bike racks right here at etrailer. My name is Evangeline and I hope you enjoyed the journey..
Customer Satisfaction Score:
92% were satisfied with this product
8% of customers were not satisfied
Ratings & Reviews


Denis

7/1/2024
No issue



Sierra K.
8/10/2021
Thank you for your review. Unfortunately the hitch pin is not included. The part needed is Item # Y8890200.
Sierra K.
8/11/2021
Unfortunately the hitch pin is not included. You will have to order part # Y8880128.


Do you have a question about this Accessories and Part?
Info for this part was:
At etrailer we provide the best information available about the products we sell. We take the quality of our information seriously so that you can get the right part the first time. Let us know if anything is missing or if you have any questions.


















Vicky
11/20/2025
Perfect. Still standing strong!!