Draw-Tite Activator IV Trailer Brake Controller w/ Custom Harness - 1 to 4 Axles - Time Delayed

 Arrives before Christmas

with factory Tow Package
Will this fit?
To see if this custom-fit item will work for you please tell us what vehicle you'll use it with.
- All Info
- Reviews (355)
- Q & A (0)
- Videos (14)
- Photos
Draw-Tite Trailer Brake Controller - DT65AV
- Electric
- Time Delayed Controller
- Up to 4 Axles
- Draw-Tite
- Under-Dash
- Plug-In
- Under-Dash Box
- Single Trailer Only
- LED Display
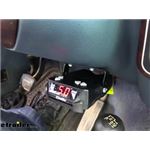
This stout brake controller has easy-to-reach button controls up front and a simple slide-lever manual override. The digital display is large and easy to read. And the included harness lets you just plug the controller right into your vehicle.
Features:
- Time delayed: activates trailer brakes with preset intensity
- Convenient buttons adjust power output and sync settings
- LED digital display shows you the output setting, sync setting, and error codes
- Slide lever manual override is within easy reach
- Built-in short circuit protection keeps your vehicle, trailer, and controller safe
- No mounting restrictions
- Installs at any angle
- Includes mounting bracket, hardware, and custom wiring harness
Specs:
- Application: trailers with up to 4 axles (8 brake assemblies)
- Compatible with electric brakes only
- Dimensions: 4-3/16" long x 2-3/4" wide x 1" tall
- Harness length: 8"
- Limited lifetime warranty
Power Output and Sync Adjustment

Power output is the maximum amount of power that will be applied to your trailer's brakes. How much braking output you need is determined by the weight of your trailer; a heavier trailer will need more power to bring it to a stop. You want to go as high as you can without the trailer brakes locking up. It adjusts on a scale of 0 to 10.
Once you have the power output set, you can fine-tune your braking by adjusting the sync control. This controls the aggressiveness of your trailer's braking, meaning how quickly the brakes reach the maximum braking level. If your vehicle takes too long to come to a stop, increase the setting. If it stops too abruptly, decrease the setting. The sync setting is shown as a number followed by the letter "o" to differentiate it from the output reading. The least aggressive sync setting is 0o and the most aggressive is 9o.
LED Display
The Activator IV displays the power settings as you adjust them. While braking, the unit will display the power output setting. To see or adjust the sync setting, step on your brake pedal and press either the plus or minus button to increase or decrease the setting.
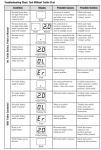
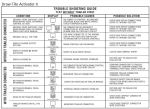
The display will also show trouble codes to alert you to any potential problems, such as short circuits or overloads, or if there is an internal problem with the controller.
Installation
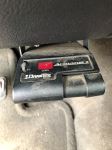
Because inertia plays no role in the functioning of this controller, you do not have to mount the unit at any particular angle. Your mounting options are limitless, so long as you can still easily access the controller and manual override. And because the included wiring harness is custom fit for your vehicle, you can just plug the controller in. No cutting or splicing needed!
Note: If you don't already have a 7-way plug at the back of your vehicle, take a look at our exclusive 7- and 4-way brake control installation kit (ETBC7 - sold separately).
Time-Delayed Braking
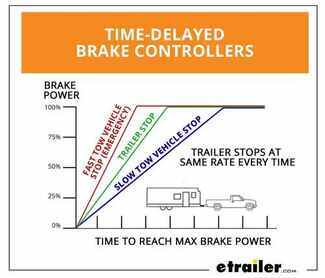
Time-delayed braking means that when you apply the brakes in your vehicle, the controller activates the trailer brakes at a pre-set intensity and rate. Both the amount of braking power (gain) and rate of application (load) can be adjusted to suit your preference, the road conditions, the type of trailer, and the weight of your load. To determine which levels are best for your application, test your towing setup and choose what feels right.
5504 Draw-Tite Act IV Electric Trailer Brake Controller - Time Based
Replaces 5500
307000 Tekonsha Brake Control Wiring Adapter with 2 Plugs
Replaces 3070-P
Installation DetailsCalifornia residents: click here


Videos are provided as a guide only. Refer to manufacturer installation instructions and specs for complete information.
Video Transcript for DIY 2014 Dodge Durango Installation for the Draw-Tite Activator IV Trailer Brake Controller
Today on our 2014 Dodge Durango, we're going to take a look at and also show you how to install the Draw-tite Activator 4. This is a time delayed, trailer brake controller that'll work for one of the four axles. Part number is 5504. We're also going to be using the Tekonsha Plug-In Wiring Adapter, part number 3045-P. The Draw-tite Activator 4 is going to be a time delayed brake controller set up. What that means is when we hit the brakes on our vehicle the brake controller is going to pick up on that and it's going to bring up the brakes on our trailer in a specified kind of a time.
We're going to time delay it fast and so it's slowly going to ramp that up. That speed is going to be dependent on how we got our sink set. You can see we've got two buttons up here in the top, plus and minus. The higher we go on that sink setting, the quicker and more aggressively our brakes are going to engage. See we can bring that down. That allows us to fine tune this for the trailer itself.
Basically, the size and the weight of the trailer in relation to the size and weight of your vehicle. We also have a gain adjustment here. You can see those are adjustable in half number increments. That allows us to fine tune for the terrain. It also allows us to fine tune the amount of braking power that we're sending back to our trailer.
On lighter trailers we want our gain to be adjusted lower. If we're on flat terrain we want our gain to be adjusted lower. As we start to raise that gain, our trailer weight is going to get heavier and heavier and our terrain is going to become more hilly. That's the amount of power being sent back to the trailer. You want to be just enough where it's not going to actually lock up the tires on the trailer, which can cause flat spotting. Get a nice manual override lever here.
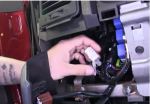
As you can see we bring that all the way over maxed out and it's going to go right up to whatever we've got the maximum gain set up. In an emergency if we need to apply those trailer brake without applying the brakes in the car, we can pull that over. It's going to go right up to what we've got set and that's going to prevent us overpowering the tires on the trailer and locking them up. Another benefit of a time delayed brake controller is that you don't have to worry about mounting angles. These could be mounted in any position in any configuration. You just really want to keep in mind, you want it to be close enough where it's in arms reach and you can operate your manual override. For the first step in our installation is going to find the plug underneath the dashboard that matches our 3045-P. As you can see this is going to have a plug that will go right into the connection in the brake controller. It's going to come right from our factory connector, which this will plug into. To find that we need to look up here behind the emergency brake petal. Some vehicles are going to have a felt panel down here. You can kind of see it here. We're going to get this pulled down and out of the way. We've got two push fasteners. We've got one located right here. If we come over there would be another one right here in this area. To remove these I'm going to use a trim panel tool. You can also use a screw driver. You just want to get in behind the head of it there. Just pull down. See there. We'll pull that down and out of the way. May have a little plug here for the light. Just take that off. We'll set this aside for now. If you look right back there, it's going to be our plug. There's a zip tie holding it in place there. Let's trim that so we can get it angled up here, so we can work with it. There we go. On the back side of that plug, or right above where that plug as located, that's our brake pedal arm. We don't want to get anything back behind there so we're going to run our plug. Our brake controller's going to be going over here on the right side the steering wheel so we know we want our plug over in this location. I'm going to run this up over a few of the braces that are up here on the dashboard that way you'll have plenty of support. Got a few things we can zip tie too off of up here. That floor vent would be a good area to use there. Back on this side we're just going to plug in our two connectors. Then I'm going to bring it up and we can zip tie it off right to this wire loop. We'll bring out as much as we need here of our pig tail to make a connection with our brake controller an then we can zip tie it off right underneath here so the vent for the floor heat or for the heat that hits your feet. I'm going to go right around that using a pretty good length of zip tie and once we have that where we can get to it you see we can pull out some or be able to bring out back just depending on how our connection needs to be. We'll want that to come out there and then we can put the panel back in that we removed out earlier. All right that should work out real well for us. This is what our bracket is going to look like that we'll use to install the brake controller on our dashboard. Here's where the previous brake controller was installed. You want to kind of stay over on the right side of the dashboard. You can mount it on the left side, but when you get in and out, you run the risk of bumping your leg on it. We're going to mount right up there where the old one was. There's a little bit of a difference in those panels, so we're going to be using those small, flat washers to help accommodate for that. Then we can take our provided hardware or self-tapping screws. We can get those started there and thread it in. Now they give us a great, solid attachment point. At that point we'll bring in our brake controller. You'll have to decide whether you want it to be on the bottom set of holes or on the top set of holes. It looks like the upper set of mounting holes here give us just enough room to slide our fingers in there and get to those adjustments, so I'm going to set it there to keep it as far away from our legs as possible. Your application may be a little bit different. What I like to do is a use a little bit of electrical tape here and just wrap up the wires coming out of the controller. That's going to give us a cleaner look rather than having four different color wires, we'll just have one black wire running down. You want to simply plug those together. Just touch your manual override lever there. Make sure it's working. Then we can tuck these right back up underneath that panel. With everything working as it should, that's going to complete our installation of the Draw-tite Activator 4 trailer brake controller part number 5504. Also using the Tekonsha Plug-In Wiring Adapter, part number 3054-P, both on our 2014 Dodge Durango.
Ratings & Reviews
4.9
355 reviews
Worked great!
The ordering, follow up and fast delivery were excellent.
It plugged in and worked as advertised,Thank you so much,
Fantastic brake controller. Even better website.
Great controller, we install it on almost every system we do.
Good overall product. Meets needs and is inexpensive.
this controller is great. etrailer delivery, packaging, pricing were ALL great...
Love it.... Installed in my 2011 chevy in about 5 min and it works great. Recommend to anyone
Perfect fit for the 2012 Honda Pilot 4WD (with factory tralier hitch)!
Works great, very easy to use, and very easy to install thanks
Product works great. It shipped right away and was at a great price.
The item appears to be well made and as expected. I'm having some difficulties, but with my camper, not with the unit.
Probably not a really useful review.
Very easy to install. Works very well. I like the digital number readout to show power level being applied to brakes.
Top notch products,Service and Customer service help line.
You guys know your stuff.
Thank you so much for the help everything went flawless and works perfect.
Thank you so much.
Terry
This product went in like a dream, little trouble finding the vehicle end plug though. will definitely buy from this outfit again!!
Installing this into my 2005 Tahoe was a breeze. If you just follow the directions and check out etrailers videos you should have no problem. I went from a small popup to a bigger hybrid so I had to get the EBC system. This sure beats taking it to the RV or Dealer store and paying retail plus labor. Thanks etrailer.com
Easy to install. simple instructions, I have it wired up but just have not towed anything yet to get the settings set for my application.
Installed on a 2008 Ridgeline with a Voyager. Plenty of wire, plugged right in, and the connections seem to be solidly made.
Quality product. The video of how to install clinches the deal. Setup instructions worked perfectly.
Nice product, easy to useEasy to use an upgrade from my Activator I unit. Has the same manual brake control that failed on the Activator I unit. Hopefully this one does not fail.
thank you for the fast delivery ,and for the easy installation vid
was a breeze,ty
Plugged into my existing factory plug like etrailer said it would.
Great Product, VERY Easy to install. The only thing I would change is the length of the pig tail. The short length of the pigtail limits your options of product placement.
Great prices, quality products, great customer service and reasonable shipping!!!
See what our Experts say about this Draw-Tite Trailer Brake Controller
- Troubleshooting a Draw Tite Activator Brake Controller part # 5504 that Only Displays a DotSounds like the problem lies somewhere in the brake output circuit. When a trailer is connected to the Draw Tite Activator Brake Controller part # 5504 and all that is displayed is a decimal point it means that the controller is not sensing a trailer being connected. Typically the problem lies in the trailer connectors. Usually there is corrosion on this circuit that prevents the circuit from being completed. Check both the inside and outside of the connector for corrosion or exposed...
view full answer... - Troubleshooting ER Code on Draw Tite Activator Brake ControllerI wish I had better news, but the ER code means that there is an internal problem on the Draw Tite Activator part # 5504 and that it needs to be replaced. For a new brake controller I would recommend the Prodigy P2 Brake Controller part # 90885. This is our best selling brake controller because of how well it works and how easy it is to setup. This is a proportional brake controller that senses the amount of braking the tow vehicle is applying and applies a proportionate amount to the...
view full answer... - Troubleshooting A Draw-Tite Activator IV Trailer Brake Controller That Won't Sense The Trailer Hey Phil, Are you hitting the manual override when you're testing the output of your Draw-Tite Activator IV Trailer Brake Controller # 5504 or are you just hitting the brake pedal? Is the decimal point always on the display or only while you're pressing down on the brake pedal. If you are seeing the decimal point all the time then you have the red wire from the brake controller harness spliced into the wrong wire for the sold side of the brake light switch. LED lights don't really have...
view full answer... - Factory Brake Controller Port Location on 2017 Nissan TitanTo install the Draw-Tite Activator Trailer Brake Controller # 5504 that you referenced to your 2017 Nissan Titan, all you will need is the Plug-In Wiring Adapter # 3050-P if the truck is equipped with the factory 7-Way. One end of the harness will plug into the brake controller itself, while the other end will connect directly to the factory port on your Nissan Titan. The factory brake controller port should be located behind the dash, on the left hand side by the emergency brake pedal....
view full answer... - Where Is Factory Brake Controller Plug Located On 2010 Ford Explorer Sport TracOn your 2010 Ford Explorer Sport Trac the factory plug for your brake controller will be located under the dash, on the left side of the steering wheel, just above your left leg. The wiring adapter you will need to connect the Draw-Tite Brake Controller # 5504 to your vehicle is the Draw-Tite Brake Control Wiring Adapter # 3035-S. This adapter will have a 6-pin plug that will connect to your factory brake controller plug and the 4 wires on the other end will be butt-connected to the 4...
view full answer... - Why is my Brake Controller Reading Overload and How Can I Find Where the Problem is?If your controller, item # 5504, is reading overload without the trailer connected then that means there is a short in the blue trailer feed wire on the vehicle. If the controller is reading overload only when the trailer is connected then there is a short or overload in the trailer wiring or breaks. Use a circuit tester, item # 3808 if you need one, to test the wiring to find out where the short is. If it is on the trailer end and you cannot find a wiring problem then the problem may...
view full answer... - Where is the Brake Switch Wire on a 2014 GMC Savana Van to Install a Brake ControllerI can tell you were to access the correct brake switch wire to install a brake controller on your 2014 GMC Savana Van. You will need to access the wire behind the BCM (body control module) located behind the dash on the passenger's side of the vehicle. There should be a brown connector coming out of the back of the BCM. At that connector you should find a light blue/white wire. This is the wire that carriers the dedicated brake light signal. Use a circuit tester such as # PTW2993 to confirm...
view full answer... - Troubleshooting Trailer Wiring That Stopped Working on 2005 Chevy SilveradoI'd check the backside of the connector for the condition of the wiring. Most likely something damaged some wiring if several of the circuits just stopped but one is left working. Another possibility is corrosion on the pins of your 7-way. You can try cleaning them with sandpaper. Or you can also check the trailer wiring fuses underhood to see if you can find any blown fuses.
view full answer... - Best Brake Controller & Harness For A 2017 Chevrolet Silverado 3500Yes, the Trailer Brake Control Harness part # 3016 4-pin connector is a direct plug-and-play fit for your 2017 Chevrolet Silverado 3500 HD and compatible with all Tekonsha brake controllers. The pigtail harness is located underneath your drivers side kick panel. The next step in choosing a brake controller is to decide between a proportional and time-delayed brake controller. A timed delay controller functions with a slight delay between the time that you initially apply the brakes in...
view full answer... - Replacement for Malfunctioning Draw-Tite Activator Trailer Brake ControllerBased on your description of the problem with your Draw-Tite brake controller I suspect an internal fault within the controller itself. There is a chance that the red input signal wire could be loose, and this would cause the unit to stop generating output, but it would not explain the varying power level displayed. That specific issue makes me think that the internal circuitry has finally given up the ghost and the controller needs to be replaced. I recommend the # 5504 in its place....
view full answer... - Troubleshooting Poor Brake Performance and Low Brake Output VoltageFirst thing I would check is the blue wire that is at the rear of your vehicle for voltage when you apply the brakes and when you slide the manual override of this controller. You could also try sliding the manual override a few times and adjusting the gain knob up and down to help clear the contact points. I attached a link to the manufacturers instructions for your Draw-Tite Brake Controller, part # 5504, below for you to check out also. If all this checks out it sounds like the problem...
view full answer... - Troubleshooting a Tekonsha Draw-Tite ActivatorIt sounds like there is either a problem with the wiring of your Activator Brake Controller # 5504, the wiring of your vehicle/trailer 7-way or the # 5504 is bad. The first thing to check will be the 7-way of your vehicle. You will want to visually inspect the front and back of the connector looking for loose wiring or corrosion and fix as necessary. Next, you will want to test the brake output circuit of the 7-way with a circuit tester, like our # PT89ZR, for the correct voltage when...
view full answer... - DrawTite Activator Brake Controller 5504 Flashing Error CodeIt sounds like you installed the Draw-Tite Activator Trailer Brake Controller 5100 in a vehicle with an integrated factory brake controller. If that is the case, installing an aftermarket brake controller like the Activator will cause the instrument cluster to flash the error code you mentioned. While this can be annoying to look at, it does not interfere with proper functioning of the aftermarket brake controller. The only way to clear the code is to take the vehicle to your local dealer...
view full answer... - What is the Red Wire Function on an Electric Trailer Brake ControllerThe red wire on the brake controller connects to the stop light wire on the brake switch located above the brake pedal. You will need to use a circuit tester like # PTW2993 to probe the wires. You need the one that shows a signal ONLY when the brake pedal is pressed. If you find a wire that has a signal when the headlights are on or when the turn signals are engaged, it is not the correct wire. Brake Controller Wire Colors and Functions: The white wire is ground The blue wire is output...
view full answer... - Display of the Draw-Tite Activator II Brake Controller When Not Connected to a TrailerThe Draw-Tite Activator II Brake Controller, # 5500, will not display numbers under any function when the trailer is not connected. You should only see a single decimal on the display. Check out the video that I made showing you how the brake controller should function without a trailer connected. If you do not have any signal on the display, then there could be an electrical issue that is preventing power from reaching the brake controller. If this is the case, I would recommend using...
view full answer... - What Does Sync Control On Brake Controller Do For Trailer With Electric BrakesSetting the sync on a Draw-Tite Brake Controller # 5504 allows you to set the amount of power the brake controller will put out. If you set the sync power low it does not matter how hard you hit the brakes, as they will be applied with the amount of pressure you set the controller at. If you are traveling where there is gravel or loose rock or even in the rain you may wish to set it a bit lower so that the brakes do not lock up on the trailer when you press the pedal. If you are on the...
view full answer... - Locating The brake Switch Wire To Install A Brake Controller On 2009 Nissan MuranoWhen trying to locate the correct wire on the brake switch to install your # 5504, you will need a circuit tester like part # PTW2993. You will need to find the wire that shows power only when the brake pedal is depressed. The colors of the wires may vary which is why we always recommend using a circuit tester to find the right wire. It sounds like the manufacturer may have used the same color wire for multiple locations. I have attached a photo of the switch located under the dash at...
view full answer... - What Does ER Error on an Activator Brake Controller IndicateIt sounds like you meant to type the ER code that would be on an Activator IV part # 5504. That indicates that there is an internal problem and the controller would need to be replaced. For a brake controller replacement I would recommend the Prodigy P2 Brake Controller part # 90885. This is our best selling brake controller because of how well it works and how easy it is to setup. This is a proportional brake controller that senses the amount of braking the tow vehicle is applying and...
view full answer... - Troubleshooting Brakes Not Working on One Side in MountainsHi Vincent; have you tried checking the voltage at the brakes with a circuit tester # PTW2993? Perhaps one side has a weak ground compared to the other or for whatever other reason isn't getting the same amount of power. Since the brake controller sends power down a single brake output line and the brakes function I don't think the brake controller is your issue. However, it wouldn't hurt to check the brake output line just to be sure. It sounds like you're getting more braking force...
view full answer... - Draw-Tite Activator 2 Diagnosing Decimal/Period Error CodeIf the trailer is connected to the vehicle when this happens, it means "NO CONNECTION BETWEEN BRAKE CONTROL AND BRAKES - BLUE WIRE CIRCUIT", possible solution is "CONFIRM CONNECTION TO TRAILER CONNECTOR, CONFIRM CONNECTOR TERMINAL POSITIONS, CHECK TRAILER". In other words, there is possibly a connection issue somewhere between the brake controller and the trailer's brakes, which is all along the blue wire. If the trailer is NOT connected to the vehicle when this happens, it means "RED...
view full answer... - 5th Wheel Trailer Hitch and Install Bracket Kit for a 1995 Chevrolet 1500 with 6-1/2 Foot BedI do have a solution for you but the Curt E16 Fifth Wheel Trailer Hitch with Universal Install Kit # C16616 is not confirmed to fit your 1995 Chevrolet 1500. The E16 hitch will work just fine for you. It's a sliding hitch which will help with turning clearance since you have a short bed truck. For the hitch use # 16516. Then you need a bracket install kit with base rails. A universal it that does fit your truck is # RP30035. This fits just fine with the Curt hitch. You may also want...
view full answer... - Wire Diagram for Installing a Voyager Brake Controller on a 2002 Ford F-250On your 2002 Ford F-250 you will need to connect the Red wire to the Black wire on the brake controller for +12 Volts power and the Light Green wire to the Red Stoplight wire on the brake controller. The Dark Blue wire is connected to the Blue wire from the brake controller to send power to the Trailer Brakes, and the White wires are connected to each other providing a ground for the brake controller. I posted a diagram with your wire colors added to it for you, see drawing at right. The...
view full answer... - Meaning of Flashing OL Code on Draw-Tite Activator Brake ControllerThe OL code on your Draw Tite Activator # 5504 has a different meaning depending on if the trailer is connected or not, but in both situations it indicates an overload or a short on a wire. If the OL code is flashing without the trailer connected, then the short is in the Blue wire from the back of the controller. You'll want to trace this wire starting at the brake controller back to your vehicle's 7-Way to find the damaged or pinched section of wire that is causing the short and repair...
view full answer... - Troubleshooting the Draw-tite Activator II Displaying Random Power Settings Hey John! Sorry but it sounds like your Draw-tite Activator II is going out. The numbers bouncing all around happening on multiple trailers rules out a few possible issues. There is a chance that the red input signal wire could be loose, and this would cause the unit to stop generating output, but it would not explain the varying power level displayed. I recommended replacing it with the newer Draw-Tite Activator IV Trailer Brake Controller item # 5504.
view full answer... - Parts Needed to Install Brake Controller in 2014 Honda PilotHey Mike, the 7-way kit part # 118265 does fit your 2014 Honda Pilot to provide it with a functional 7-way but it does not come with the brake controller install port you'd need for a brake controller. So you can hardwire in a brake controller or have a Honda dealer install one for you so that you could use a # 3070-P to install a brake controller like the P2 part # 90885. If you'd prefer to hardwire let me know and I'll walk you through that process as well.
view full answer... - Troubleshooting Compatibility Issues With A Tekonsha P3 In A 2024 Honda RidgelineHey Jonathan, We haven't heard of any issues with the P3 # 90195 and plug-in harness # 3070-P with a 2024 Honda Ridgeline. How are you sure that the brakes are being applied on your Honda when applying the manual override on the P3? What are you experiencing?
view full answer... - How to Find the Towing Capacity of a 2011 Honda Pilot 4WDAccording to the owner's manual the maximum towing capacity of your 2011 Honda Pilot depends on the number of occupants. It maxes out at 4,500 pounds if you only have 2 people in the vehicle and decreases if you add more passengers. This is the 4-wheel drive model like you have, this decreased to 3,500 pounds for the 2-wheel drive model. This figure assumes each person weighs an average of 150 pounds and is seated from the front of the vehicle back. So the two passengers need to be...
view full answer... - How to Install a Brake Controller on a 2018 Honda PilotThe best brake controller we have for your 2018 Honda Pilot is the Tekonsha Prodigy P3 Trailer Brake Controller part # 90195. This a proportional brake controller that has integrated safeguards to protect the vehicle/trailer and continuous diagnostics checks for easy troubleshooting. In order to install this controller you will first want to take a peek under the driver's side kick panel up near the emergency brake lever to see if there is an adapter port present (see video). If there...
view full answer... - Where is the Brake Controller Connector Located Under the Dash on a 2009 Honda RidgelineThe factory brake controller connector under the dash is not all that visible but it is fairly easy to locate. It is a 4-pin connector that is located underneath and left of the steering column. It will be taped to another harness near the brake pedal. Once you locate the connector you will know it is the right one if it mates to the Tekonsha Wire Replacement for Honda Ridgeline and Pilot, item # 3070-P. A little bit of searching is required. Sometimes the connector is completely covered...
view full answer... - Wiring Tekonsha Primus IQ Trailer Brake Controller To Honda Factory Brake Controller PigtailTo connect the Tekonsha Primus IQ Trailer Brake Controller # TK90160 to your Honda Pigtail the wiring will connect in the following orientation. Primus Pigtail to Honda Pigtail Black (battery) Blue (battery) Blue (trailer brakes) Brown (trailer brakes) Red (brake light switch) Sky Blue (brake switch) White (ground) Black...
view full answer... - Will the Tekonsha Pigtail # 3070-P Transfer from My 2006 Honda Ridgeline to My New 2020 Ridgeline?Hello Dave, I was able to look-up your previous orders. I see that you ordered the Tekonsha Plug-In Wiring Adapter for Electric Brake Controllers - Honda # 3070-P back in 2018. The # 3070-P will work great in your new 2020 Ridgeline as well! What kind of trailer are you pulling?
view full answer... - Fuse Installation to Activate Brake Controller Power in 2019 Honda RidgelineUsually, for your vehicle all that is needed is the # 3070-P and the brake controller.The circuit that supplies 12V power to the brake controller is activated by a fuse that's located in the fusebox on the firewall next to the brake fluid reservoir. The fuse location is # 3, and you'd need to install a 20A fuse in that location to activate the controller. I've also seen references stating that the fuse is located in location # 14, so you can look at the fuse box lid, which will list the...
view full answer... - Troubleshooting Brake Controller that Won't Power On In 2015 Honda PilotIt sounds like you are missing the fuse in your smaller, secondary under-hood fuse box that powers the brake controller. I checked in a manual for a 2012 Honda Pilot, and it was the number 14 fuse labeled Trailer E-Brake. It should be close if not identical in your 2015 model. There should be a diagram on the underside of the fuse box cover you can use to verify this.
view full answer... - Parts Needed to Install 7-Way and Brake Controller in 2017 Honda PilotHey Mark, to install a brake controller and 7-way on your 2017 Honda Pilot you mentioned everything you need. You need the part # 118274 for the 7-way, the P3 brake controller part # 90195, and the install harness part # 3070-P and you'd be set. The 7-way kit does activate all of the wiring needed to connect to the 3070-P.
view full answer... - Can Redarc Tow Pro Liberty Be Used On 2017 Honda RidgelineHello Joel, thanks for reaching out. It is possible to use the Redarc Tow Pro Liberty # RED52VR in your 2017 Honda Ridgeline, however, Redarc does not make a custom pigtail for the Ridgeline. So, there are two routes we can go here. The first, and recommended solution is to actually make your own Redarc Custom pigtail. To do this you will need to order the Tekonsha pigtail for the Ridgeline part # 3070-P. What you do is cut off the end for the brake controller, then connect the wires to...
view full answer... - Brake Controller Options For A 2023 Honda RidgelineHi Bob! We can definitely get you a proportional brake controller that will plug right into your 2023 Honda Ridgeline. Just be aware, the two I have listed below do require you to have the factory towing package. First is the Tekonsha Prodigy P3 Trailer Brake Controller - 1 to 4 Axles - Proportional # 90195. This is the best brake controller on the market and with the Tekonsha Plug-In Wiring Adapter for Electric Brake Controllers - Honda # 3070-P, it will plug right in. It's easy to use...
view full answer... - Recommended Brake Controller for 2023 Honda RidgelineFor your 2023 Honda Ridgeline I recommend the Redarc Tow-Pro Liberty Brake Controller # RED24FR. The main unit of this brake controller will install behind the dash so only the control knob will be visible in the vehicle. This gives it a nice clean look that won't take up space or be in the way. The knob controls the braking power and also acts as the manual override. It also uses colored LED signals for diagnostics. Since you have the tow package, you will also need the # 331-TPH-017 and...
view full answer... - Parts Needed to Install the Prodigy P3 Brake Controller on a 2024 Honda PilotThe parts needed to install the Prodigy P3 # 90195 on your 2024 Honda Pilot all depends on if you have the factory tow package or not: With Factory Tow Package - Wiring Adapter # 3070-P Without Factory Tow Package - Curt Powered Wiring Kit # C59496 - Universal Wiring Kit # ETBC7 If you have the tow package then all you have to do is plug in the adapter under your dash and then into the back of the P3 and you're good to go, otherwise you'll have to splice in the wiring kits I referenced...
view full answer... - Redarc and Tekonsha Brake Controller Connector for 2022 Honda Pilot w/out the Tow PackageThe Tekonsha Plug-In Wiring Adapter item # 3070-P you were looking at is confirmed to fit the newer Honda's with the tow packages. In order to use that on your 2022 Honda Pilot without the tow package you will need the T-One Vehicle Wiring Harness for Factory Tow Package item # 118286. This harness has all of the connectors necessary to activate the a 7-way at the rear of your Pilot. The port you are referencing should be activated once you connect this harness. To use the Tekonsha Plug-In...
view full answer... - Recommended Brake Controller For A 2022 Honda Passport LEFor your 2022 Honda Passport LE, I recommend the Tekonsha Prodigy P3 # 90195. This is a great all around controller. Large accessible buttons and an LCD display make this very easy to use, even for first time towers. This will also be very easy to install. Provided your vehicle does have the factory tow package, you can use the plug and play pigtail # 3070-P. Just mount the controller and plug in. It really is that easy. I have linked our install and review videos below if you want to...
view full answer... - Recommended Brake Controller for a 2022 Honda RidgelineFor a trailer brake controller, I recommend the Tekonsha Prodigy P3 Trailer Brake Controller, # 90195 with the Tekonsha Plug-In Wiring Adapter for Electric Brake Controllers, # 3070-P which is completely plug-in-play. The Tekonsha P3, # 90195 is the best selling brake controller for good reasons. Aside from being a cost effective option it automatically levels due to its internal sensor that detects deceleration even if controller is not mounted flat. You can mount this at any angle up...
view full answer... - How To Install a Trailer Brake Controller On a 2021 Honda RidgelineIt's very easy to install a trailer brake controller on a 2021 Honda Ridgeline. I recommend the Tekonsha Prodigy P3 Trailer Brake Controller part # 90195 which comes with a harness that you could simply attach to the one that came with the vehicle. If you don't want to join any wires whatsoever then you can get the Tekonsha Plug-In Wiring Adapter for Electric Brake Controllers part # 3070-P for a complete plug-in-play install. There should be no other steps needed like fuses etc.
view full answer... - Recommended Brake Controller for a 2022 Honda Pilot w/out the Factory Towing Package Yes, you are correct. One of the features in the towing package for the 2022 Honda Pilot is a port to plug in a brake controller. Without this port you will have to hardwire your brake controller or use one like the Curt Echo item # C51180 that plugs directly into your 7-way. If you are wanting a traditional hardwired brake controller that you can adjust manually you will want to use the Redarc Tow-Pro Liberty Brake Controller item # RED24FR. The Liberty is a proportional brake controller...
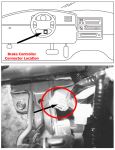
view full answer... - Where is Brake Controller Install Port on 2016 Honda PilotYes, there is a port under the dash of your 2016 Honda Pilot for installing a brake controller like our best selling P3 part # 90195. All you need is the install harness part # 3070-P which is a confirmed fit. I attached an install video that shows this harness installing a brake controller in a similar Honda Pilot as yours as well. I also attached a picture that shows where you'll find the harness.
view full answer... - Trailer Brake Controller Installation in 2017 Honda Pilot with Factory Tow PackageSome late-model pickup trucks offer the option of a factory-installed trailer brake controller but a vehicle such as a 2017 Honda Pilot does not. In your Pilot you can use a superior aftermarket brake controller. In fact many folks with factory controllers ultimately end up replacing them since the aftermarket units like the Prodigy P2 # 90885 and P3 # 90195 work so much better. If your Pilot came from the factory with a tow package already installed then brake controller installation...
view full answer... - Brake Controller Installation on 2013 Honda PilotThe Prodigy P2 # 90885 is an excellent choice, being one of our most popular and easy to use brake controllers of all time. To install the brake controller, first look under the dash under the steering column over the brake pedal as shown in the diagram and photo I've provided. If you can find the brake controller install connector, your install will be super easy. You'll need the brake controller wiring adapter harness, part # 3070-P and the trailer connector assembly, part # 118265. If...
view full answer... - Adding 7-Way to 2020 Honda Pilot for Trailer TowingWe have the T-One Wiring Kit # 118286 from Tekonsha which comes with everything you need to install a fully-functioning 7-Way connector on your 2020 Honda Pilot. Then for a brake controller I highly recommend the Tekonsha Prodigy P3 # 90195 which installs to the plug under your driver's side dash with the adapter # 3070-P. I have attached an installation video of this wiring kit on a 2020 Pilot and a review video of the P3 for you to check out. If you don't already have a trailer hitch...
view full answer... - Parts Needed to Install 7-Way and Brake Controller in 2019 Honda PassportYou are on the right track to install the 7-way and brake controller in your 2019 Honda Passport. The first thing you need is the 7-way part # CU86FR and then to install the P3 part # 90195 you'd just need the part # 3070-P and you'd be set. Then the mounting bracket part # HM48625 would work to mount the 7-way as well.
view full answer...
Do you have a question about this Trailer Brake Controller?
Info for this part was:


At etrailer.com we provide the best information available about the products we sell. We take the quality of our information seriously so that you can get the right part the first time. Let us know if anything is missing or if you have any questions.









Thank you! Your comment has been submitted successfully. You should be able to view your question/comment here within a few days.
Error submitting comment. Please try again momentarily.