Tekonsha Prodigy P3 Trailer Brake Controller w/ Custom Harness - Up to 4 Axles - Proportional

 Arrives before Christmas

with factory Tow Package
Will this fit?
To see if this custom-fit item will work for you please tell us what vehicle you'll use it with.
- All Info
- Reviews (6614)
- Q & A (0)
- Videos (9)
- Photos
Tekonsha Trailer Brake Controller
- Electric
- Electric over Hydraulic
- Proportional Controller
- Up to 4 Axles
- Tekonsha
- Under-Dash
- Plug-In
- Under-Dash Box
- Multiple Trailers
- LCD Display
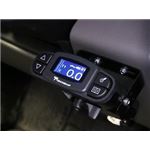
The Tekonsha P3 is a brake controller beloved for its reliability and useability. You're able to save your settings and multiple profiles. It's easy to install, and with the custom harness, it's plug-and-play.
Features:
- Proportional - Smooth, safe, and good for your brakes long-term
- Great for a fleet - Save and customize multiple profiles
- Installs quickly - Mount the bracket to the dash, then attach the unit to the bracket
- Plug-and-play - Custom harness included
- Simple controls - Large, accessible buttons for all your settings
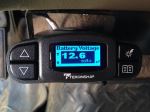
- Easy-to-read display includes diagnostics - Straight-forward messages get you to the root of the problem quickly
- Safe - Built-in safeguards protect vehicle, trailer, and controller
- Quick disconnect - Easy to unplug and remove the controller when you don't need it
- Automatic leveling - Must be parallel with direction of travel and horizontally level
Specs:
- Application: trailers with up to 4 axles (8 brake assemblies)
- Compatible with electric or electric-over-hydraulic trailer brakes
- Overall dimensions: 5" long x 3-1/2" wide x 1-3/8" tall
- LCD display dimensions: 1-3/16" wide x 9/16" tall
- Mounting range: 360 degrees vertically
- Warranty:
- Limited lifetime on brake controller
- Limited 1-year on wiring harness
Braking Output

Braking output is the maximum amount of power that will be applied to your trailer's brakes. How much braking output you need is determined by the weight of your trailer; a heavier trailer will need more power to bring it to a stop. You want to go as high as you can without the trailer brakes locking up.
Use the arrow buttons on the front of the module to set the output.
Power Boost for Heavy-Duty Towing
The boost setting controls the aggressiveness of your trailer's braking, meaning how quickly the brakes reach the maximum braking level. If your vehicle takes too long to come to a stop, increase the setting. If it stops too abruptly, decrease the setting.
Depending on the level of boost, your trailer brakes can start at either 13 percent or 25 percent of the set braking output. So instead of starting at 0, the brakes will start at 25 percent and get to 100 percent sooner. This keeps the trailer from pushing your tow vehicle forward.
Boost Levels:
| Approximate Gross Trailer Weight | Boost Level | Increase in Initial Power Output |
|---|---|---|
| Less than tow vehicle GVW | B1 | 13% |
| Equal to tow vehicle GVW | B1 or B2 | 13% or 25% |
| Up to 25% more than tow vehicle GVW | B2 or B3* | 25% |
| Up to 40% more than tow vehicle GVW | B3* | 25% |
*Both B2 and B3 offer a 25-percent boost in initial power. But the braking curve for B3 is more aggressive than that of B2. This means that, even though you will start out with the same intensity when using these boost levels, you will get an overall more aggressive braking experience with the higher level. So if you use B3, you will reach maximum braking sooner than if you use B2.
Manual Override
To engage the manual override, twist the rotary-style lever from right to left. This will activate the trailer's brakes and brake lights independently of your vehicle, great for stopping sway or controlling your trailer's momentum in an emergency.
Save Your Settings in Multiple Profiles
The P3 is able to store your settings in multiple profiles so that you can have them ready to go for different trailers and drivers. Even the display is super customizable: you can change the screen color, brightness, and language to make it easy to use.
Troubleshoot with Detailed Diagnostics
The P3 makes it easy to troubleshoot problems as they come up, with comprehensible and detailed diagnostics displayed on the screen.


Diagnostic troubleshooting messages include:
- Battery voltage
- Voltage supplied by stop light switch when brake pedal is depressed
- Output voltage to trailer brakes
- Output current to trailer brakes
Diagnostic warning signs include:
- Open ground
- Overload
- Output short
- Power loss
- No trailer connection
Safety Features
The Prodigy P3 offers advanced safety features to prevent damage to various components of your towing setup.
-Integrated reverse battery protection shields the brake controller and your trailer's breakaway system from shorts.
-When the P3 is not in use, it draws only 3.6 milliamps, minimizing drain on your vehicle's battery.
-Any time your vehicle and trailer are at a standstill with the brakes applied for more than 5 seconds, the hold feature will kick on and reduce power to just 25 percent. This will keep your trailer in place without your brakes overheating.
Installing the Tekonsha P3
Installing the P3 is incredibly simple. You'll mount the bracket to your dashboard then mount the unit to the bracket. Plug the custom harness into your vehicle and into the unit. Done!
Keep in mind that the P3 must be horizontally level and parallel with the direction of travel to work correctly.


With a replacement wiring harness (sold separately) and replacement bracket (TK5906 - sold separately), you can even transfer the Prodigy P3 to another vehicle.


Note: If you don't already have a 7-way plug at the back of your vehicle, take a look at our exclusive 7- and 4-way brake controller installation kit (ETBC7 - sold separately).
What is Proportional Braking?
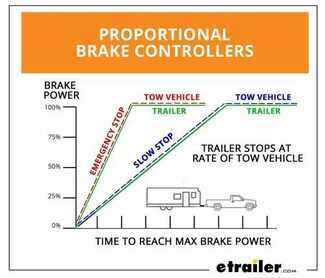
Proportional braking means that your trailer brakes mimic your tow vehicle's brakes. If you slam on the brakes, your trailer brakes will activate with the same intensity; if you brake lightly, your trailer brakes lightly too. The trailer's braking is in proportion to your vehicle and trailer.
The Prodigy P3 uses an internal inertia sensor to detect how your vehicle is braking so it can send the right amount of braking power to your trailer. It measures the inertia of your tow vehicle and activates the trailer's brakes to slow at the same rate. The result is uniform braking across your towing setup. No push-pull action - just smooth, proportional braking every time.
90195 Tekonsha Prodigy P-3 Proportional Trailer Brake Control
Replaces 39526 Hidden Hitch and 20195 Draw-Tite Intella-Stop Xtreme Proportional Brake Control
308200 Tekonsha Brake Control Wiring Adapter with 2 Plugs
Replaces Tekonsha 3045 and 3082-PInstallation Details
California residents: click here


Videos are provided as a guide only. Refer to manufacturer installation instructions and specs for complete information.
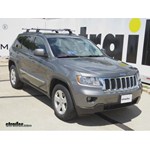
Video Transcript for Mount: Tekonsha Prodigy P3 Trailer Brake Controller on a 2018 Jeep Grand Cherokee
Speaker 1: Today in our 2018 Jeep Grand Cherokee, we're going to be installing Tekonsha's Prodigy P3 Trailer Brake Controller, part number 90195, and in conjunction with that, we'll be using Tekonsha's Plug-In Wiring Adaptor, part number 3045-P.This is a premium brake controller with an abundance of extra features in addition to a regular trailer brake controller's uses. This braking system is proportional, so the faster you're moving and the harder you apply the brakes, the more that it's gonna transfer back to your trailer, allowing it to stop the same way that your vehicle stops.It can be mounted in the 360 degree rotation, 'cause it'll auto level itself. This is nice so you can get the most out of the locations where you can place it on your vehicle. The buttons located on the left allow you to set the power. Higher power settings will give you a more aggressive braking and lower settings will be less sensitive. This is useful if you have different trailer loads.
So if you have a lighter load, you can turn that down or if you have a heavier load, you can turn it up.For further fine tuning of your trailer loads, it has a boost setting using the top right button. This boost setting will allow the brakes to be more sensitive on a braking application. And when the boost is set off or on boost setting one, this is ideal for trailer loads that are less than the weight of the vehicle.If your trailer weighs roughly the same as the vehicle, boost one and two can be used and if your trailer load is more than the vehicle, you can use settings two and three. There's a manual lever located at the bottom. This way you can manually apply your brakes in an emergency situation or just during testing.It has an easy to see and use interface with the LCD display.
The lower right button with the picture of the open book on it will allow you to open up the settings menu. Here you can change your display options such as brightness, color and contrast. You can also change your brake type so you can have electric, hydraulic or electric over hydraulic. And last, you have your help where you can change your language and troubleshooting settings.Now if you are using the boost feature and you want to reverse, sometimes that extra sensitivity from the boost can make it a little difficult to back up. So to temporarily disable the boost, you can hold the brake pedal and hold the boost button for five seconds.
You'll then see the 'R' flashing in the top right indicating that boost has been temporarily disabled. This will go on for about three minutes making it easier for those backing up maneuvers. You can end it early by pressing the boost button.Now that we've gone over the features, let's show you how to get it installed. It's one of the easiest out there with the factory wiring harness. We'll start our installation here at the driver's lower left kick panel.
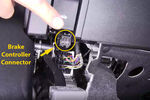
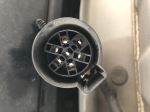
We'll need to remove the cloth under shield. You can do that by pushing away towards the front of the vehicle, rotating it to the side and just kicking it down. It can rest against the brake pedal here.Your trailer brake controller connector's going to be located directly above the large harness right behind this covering. It's hard to see but you can get a small glimpse of it. It's a four pin gray connector that'll match our plug and play adaptor here. We'll go ahead and take our gray end and just plug it right in. You have to kind of work it up in there, get your hand in place and just make sure you go all the way in until it clicks.Now that it's plugged in, you get a little better idea of where it's located. Now we can run our wiring back and reinstall the cloth under shield that just pushes right back into place.Due to the mounting restrictions on the P3, the only place we can mount it is gonna be located here on the left side of your steering column. Use the two self tapping screws to thread it into the panel. We're gonna kind of line up the bottom of the bracket with the bottom edge of the control panel here. After you've got one screw started, go ahead and start the other. We're just using a Phillips head screwdriver. You could also use a power drill with a Phillips head bit on the end.We're going to use the quick release bracket to go with the small bracket. Go ahead and line up the two holes on the quick release bracket with the small bracket that we just threaded into the dash. We're gonna use the machine screws to thread into this bracket, and then thread in the other side. Before you thread 'em all the way down, you're gonna want to set the angle that you want it to be located at. We're gonna put ours right at about this angle here and then tighten it down. They can rotate up or down. Refer to your instructions to ensure that you're not exceeding the angle in which it can be mounted.Now to the wiring up there, we are going to come back up from the bottom panel and down through the square opening in the panel. We want to make sure that the wiring is routed in front of your emergency brake pedal here so it doesn't contact it when you apply your emergency brake. Once you've got that set, just go up and plug it into your controller.When everything's connected properly, your controller will light up when you plug it in. Now you can hook it to your trailer manually activate the brakes using the sweeper on the bottom and verify that it applies the brakes on your trailer. We've got our trailer tester plugged in and as you can see here when I swipe the brakes, it applies back on our tester.That completes our installation of the Tekonsha Prodigy P3 Trailer Brake Controller and the Tekonsha Plug-In Wiring Adaptor on our 2018 Jeep Grand Cherokee.
Customer Satisfaction Score:
92% were satisfied with this product
8% of customers were not satisfied
- Wrong item was ordered
- Did not arrive in time
Ratings & Reviews
4.9
3505 reviews
See what our Experts say about this Tekonsha Trailer Brake Controller
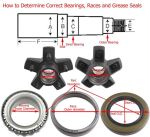
- Can I Add Electric Brakes To A 1993 EZ Loader Boat TrailerHello Mike. It sounds like you are wanting to add electric brakes to your boat trailer that currently has no brakes. This is possible, but you will first need to make sure that your axle is equipped with a brake flange at the base of the spindle. The brake flange is necessary for adding brakes. If you do have a brake flange, you will next need to determine your bearing sizes. Electric brakes will require new hubs and drum assemblies, and we need to be sure that there is a drum available...
view full answer... - Hitch, Weight Distribution and Brake Controller Recommendations for a 2017 Toyota Sienna XLEWe can get you everything you need for towing with your 2017 Toyota Sienna XLE. By plastic shield, I believe you are referring to the appearance panel underneath the Sienna, and that will have to trimmed a bit in each of the hitches available for the vehicle. A great Class III hitch would be the Curt # C13105, which is rated for weight distribution and has been given a nearly 5-star review on our site by the over 500 customers that have rated it. As for a brake controller, the wireless...
view full answer... - Will The Curt Echo Manual Override Button C83HR Work Without The App?Hey John, good question. The app must be running in order for the separate manual override button part # C83HR to work. If your phone is not connected to the controller with the app running, the button will not do anything. I know the connectivity issues can be frustrating, but it might not necessarily be something you are doing wrong so much as the controller just being unreliable. This is by far the most common complaint we get about the Curt Echo # C51180 wireless controller. Most...
view full answer... - Difference Between Curt & Draw-Tite Trailer Hitches For 2018 Jeep Wrangler UnlimitedHi Ken, Starting with the wiring harness, I can verify for you the correct fit for the 2018 Jeep Wrangler Unlimited without a tow package is indeed the T-One Vehicle Wiring Harness with 4-Pole Flat Trailer Connector # 118786. Then for the hitches, the biggest difference between the Curt Trailer Hitch Receiver # C13392 and Draw-Tite Trailer Hitch Receiver # DT78MR is the length of the receiver. The Draw-Tite has a shorter receiver that can make it a bit more of a pain to add a ball mount...
view full answer... - Comparing the Universal Installation Kit # ETBC7 and the 7-Way RV Upgrade Kit # ETBC7LThere are a few differences between the Universal Installation Kit part # ETBC7 and the 7-Way RV Upgrade Kit part # ETBC7L. The biggest one is that part # ETBC7 comes with both the power and brake output wire you will need to run to the cab/battery whereas the part # ETBC7L only comes with the power wire you will need to run to the battery. The reason for this is because part # ETBC7L is geared more towards wireless brake controllers like the Curt Echo Mobile Trailer Brake Controller part...
view full answer... - Disc Brake Conversion Kit For 2021 Grand Design Solitude 310GKR With 7,000 lb AxlesHello Rick, thanks for reaching out. The 7,000 lb axle on your 2021 Grand Design Solitude 310GKR uses a standard bearing combination, so finding compatible disc brakes will be easy. Here is what I recommend: - DeeMaxx Disc Brake Kit - 13" Hub/Rotor - 8 on 6-1/2 - Maxx Coating - 9/16" Bolts - 7K # DE68YR - Hydrastar Electric Over Hydraulic Actuator Kit for Disc Brakes - 1,600 psi # HBA16-252-82 The disc brake kits are enough for one axle, so you will need two kits if you want brakes on...
view full answer... - Parts Needed to Add 7-Way to 2024 Hyundai Palisade LimitedThe factory wiring for both the 2023 and 2024 Hyundai Palisade has been a complicated subject. The pre-wiring you're referring to is not an actual trailer connector. You should have factory wiring and connectors which will allow you to add an OEM 7-way. I understand it says they all have this, but I would make sure you can find it on your particular vehicle if you plan to use it. There have been a lot of reports on forums where people said the connection was missing. At this time, nobody...
view full answer... - Will the Redarc Tow-Pro Liberty Controller Work with a 2023 Ford RangerHey Jacques, thanks for reaching out! The Redarc Tow-Pro Liberty # RED52VR will work just fine on your 2023 Ford Ranger, and it will install by splicing into a bundle of wires under your driver side dash. We have a video of this same process of the Prodigy P3 # 90195 on a 2021 Ranger that I'm linking for you to reference, but we don't have anything of the Liberty on a Ranger at this point in time. I'm not sure why we don't have this listed out to fit "with the tow package", but I'll send...
view full answer... - What is the Difference Between the Tekonsha Prodigy P2 and the P3 Brake ControllersActually, the P3 now has the upgraded axis accelerometer like the P2. The Tekonsha P3 Trailer Brake Controller # 90195, will work with both electric over hydraulic brakes on the trailer as well as electric brakes. It has a menu option on the display that allows the user to switch between the two systems. I have included a link to the installation details for the P3. The P2, # 90885, will also work with both electric brakes and electric over hydraulic brake systems but the mode is selected...
view full answer... - Parts Needed For Towing a Camper Behind a 2023 Toyota Tacoma Without Towing PackageSorry for the confusion on the details for the Tekonsha OEM Replacement Vehicle Wiring Harness # 22117 for your 2023 Toyota Tacoma. Since it can be used as a replacement for the OEM tapping into that connector is easier on those vehicles. Since you do not have the connector on your Tacoma you can simply use a Test Light # PTW2993 to find the correct wire on your brake switch which is on the brake pedal mount. Then you will be able to connect a controller like the Prodigy P3 # 90195. I personally...
view full answer... - No Trailer Connection on Tekonsha P3 Brake Controller 90195 on a 2000 Toyota TundraI would start by inspecting the connector on your trailer and the vehicle to make sure there is not corrosion in the connector which could be causing a bad or weak connection. If there is corrosion in the trailer side connector, you would need to replace it with 7-way Connector, part # A7WCB. For the replacement vehicle side connector, you would need Adapter 4 Pole to 7 Pole, part # 30717. For future use, I would recommend using Dielectric Grease for Electrical Connectors, part # 11755,...
view full answer... - Parts Needed To Add Hopkins 7/4 Pole Connector To a 2020 Ford F-150 With Factory 4-WayI have a couple ways you can install the 7- and 4-Pole Trailer Connector Socket # HM40975 on your 2020 Ford F-150 with a 4-way flat factory connector. The first is going to be the easiest but is more costly. You will use the harness from the Curt 7-Way # C56413 and connect to the connector you found. The Curt harness will connect to the factory wiring as seen in the installation video I have linked near the bottom of the page. Otherwise we do have the Hard Wire Connector # 20147 which...
view full answer... - How to Pick Out Brakes for 3,500 lb Boat Trailer with Tandem AxlesInstalling brakes on a trailer really isn't too bad. The install is pretty basic and a DIYer like yourself wouldn't have a problem at all. To determine the parts you need though we need to for sure know what axles/spindles you have so that we pick out the right parts. I attached a couple guides for that down below for you to check out. There are a lot of boat trailers that have great results with electric drum brakes so if that's a route you are interested in that's what I would recommend...
view full answer... - Trailer Hitch And 7-Way Wiring Package For 2019 Kia Sorento Without Factory Tow PackageHello Anton, thanks for reaching out. For your 2019 Kia Sorrento I recommend the etrailer Class 3 Hitch # e98843. This has a 2" receiver, 5,000 ls towing capacity and 750 lb tongue weight capacity. Install video and instructions are linked for you below. For your wiring, there are two kits you will need to complete everything. You will need the Tekonsha T-One Wiring Harness # 118583, as well as the Universal Installation Kit # ETBC7. These will contain everything you need to wire your...
view full answer... - Troubleshooting a Tekonsha P3 Brake Controller that Reads Trailer Not ConnectedIf you sever the blue wire leaving the P3 controller part # 90195 leaving enough room to reconnect it and test the end of the wire leaving the controller with a circuit tester like part # PTW2993 you should see voltage when you slide the manual override lever. If not, then the brake controller is bad. If you see voltage there instead then the problem is somewhere on the brake output circuit of your vehicle or trailer. Corrosion on the trailer connector typically causes this problem. If...
view full answer... - Electric Over Hydraulic Brakes Don't Work w/Brake Pedal on Newer GM Trucks w/OEM Brake ControllerLike you said, many factory integrated brake controllers will not work well with electric over hydraulic trailer braking systems. Some of the newer versions of these controllers now have an electric over hydraulic mode. Check to see if any of your trucks have this mode and, if they do, if the braking starts working with the pedal. Otherwise there are a couple of solutions to solve this issue. First, there may be an adapter that will allow the factory controllers to work but it depends...
view full answer... - Showing 12V Power On The Red Wire From Tekonsha Prodigy P3 PigtailIt sounds like you are hardwiring the Tekonsha Prodigy P3 Trailer Brake Controller part # 90195. The red wire should only show power at the brake controller when the brake pedal is depressed. It should be connected to the stop light wire on above the brake pedal that only shows power when the brake is depressed. If it is showing power when the brake pedal is not depressed than it is not connected to the correct wire at the brake pedal. The 12V should be showing on the black wire which...
view full answer... - Troubleshooting Only One Side of Trailer Brakes Locking UpYes, when the electric signal is sent from the Tekonsha Prodigy P3 Trailer Brake Controller # 90195 to the trailer's brakes, it should cause both sides to lock up. Since only one side is locking up, it could indicate that one brake assembly needs to be manually adjusted. I attached a video that shows how to do this process. If that doesn't get it to respond then there is possibly an issue with the wiring going into the brake assembly which you can test using a circuit tester like # PTW2993....
view full answer... - Does Prodigy P3 Brake Controller Eventually Shut Itself Off With No ActivityAfter 10 minutes of inactivity the Prodigy P3 part # 90195 will go into sleep mode which means it basically shuts itself off without losing presets.
view full answer... - Recommended 7-Way Trailer Wiring On 2007 Ford E-350 Super Duty VanIf you don't already have a 4-way wiring harness, we need to start there to get your 7-way. For a 4-way, I recommend the Curt T-Connector Vehicle Wiring Harness with 4-Pole Flat Trailer Connector # C56020 which plugs in behind the tail lights of your 2007 E350. You will have to remove the tail light assemblies and interior trim paneling to access the factory connections. I've attached a video to help. Then you will use the Universal Installation Kit for Trailer Brake Controller - 7-Way...
view full answer... - Timbren Axle-Less Trailer Suspension System Rated for Higher Than 2,000 PoundsThe Timbren Axle-Less Trailer Suspension System, part # A20RS545, is rated for a total of 2,000 pounds. Essentially, it's designed to work in place of a suspension system and a 2,000 pound standard axle. If you need a 3,500 pound system use part # A35RS545 that has idler hubs with the same 5 on 4-1/2 bolt pattern. If you want to add brakes instead use part # A35RS545E that includes the hub and drums, as well as the brake assemblies. There really isn't anything to retrofit. You just...
view full answer... - Stealth Hitch And Towing Kit For 2024 Volvo XC90Hello Geoff, thanks for reaching out. We do offer a stealth hitch and wiring package for the 2024 Volvo XC90. For that, I recommend the following: - Stealth Hitches Hidden Trailer Hitch Receiver w/ Towing Kit - Custom Fit - 2" # SH27FRT This comes with everything you need to pull a trailer. You get the stealth hitch and rack receiver, plus the towing kit with active harness. The hitch has a max towing capacity of 6,000 lbs so this will be plenty strong for a 2,500 lb enclosed trailer....
view full answer... - Parts Needed to Add Disc Brakes to Trailer with Dexter 12K Axles w/ Electric Drum BrakesThe Kodiak # K2R1258L12 Disc Brake Kit is compatible with a 12K Dexter axle with a 7-bolt brake mounting flange. Your current wheels/hubs should have an 8 on 6-1/2 inch bolt pattern. You'll also need an electric over hydraulic brake actuator, a brake line kit, a break away system and a brake controller that's compatible with electric over hydraulic brake systems. For the electric over hydraulic actuator, I'd recommend going with the Hydrastar # HBA16. Our install techs have found it to...
view full answer... - How to Convert a Trailer with Surge Brakes to Electric Over Hydraulic BrakesYou can convert surge brakes to an electric over hydraulic braking system. To do this, you will need an electric over hydraulic actuator and a brake controller. For an electric over hydraulic actuator, I recommend looking at the Carlisle HydraStar units. If your trailer has drum brakes, you will want part # HBA-10. If your trailer has disc brakes, then you will want part # HBA16. I have also attached a link to all of our electric over hydraulic actuators for you to check out your options. The...
view full answer... - Is There a Trailer Brake Controller Plug On a 2023 Jeep Grand Cherokee WLYes, there is a trailer brake controller plug on a 2023 Jeep Grand Cherokee WL. In order to utilize this you'll need a trailer brake controller like the Tekonsha BRAKE-EVN Trailer Brake Controller part # TK63VR and an adapter harness like the Tekonsha Plug-In Wiring Adapter for Electric Brake Controllers part # TK93VR which all makes for a plug-in-play installation. Please note, if you don't want to search under the dash for the plug or drill into the dash to mount the controller you can...
view full answer... - Brake Controller Installation In 2020 Chrysler PacificaGreat question Mark! There is a brake controller plug and play wiring adapter for the 2020 Chrysler Pacifica to plug into the tow package with part # TK93VR. Tekonsha is currently the only manufacturer that has one available that we are aware of. This will plug into the built-in port under the dash of the Pacifica for an easy installation. For the brake controller I recommend the Tekonsha Prodigy P2 Trailer Brake Controller part # 90885. The P2 is one of our most popular brake controller...
view full answer... - Brake Controller Plug Location on 2021 Jeep Grand CherokeeThe factory brake controller connector on your 2021 Jeep Grand Cherokee is located under the dash behind the hood latch, as shown in the provided photo. Keep in mind, the connector will only be there if the vehicle has the factory tow package which includes the 7-way trailer connector at the rear bumper. If you have the tow package, to install the Tekonsha # TK90160 Primus brake controller on your 2021 Grand Cherokee you'll need the Tekonsha # TK93VR wiring harness. One end plugs into...
view full answer... - How Does Brake Controller Install in 2017/2018 Dodge Durango with Factory 7-WayI wasn't sure if you meant 2017 or 2018 Dodge Durango but the good news the fit info applies to both of them. Since you have a factory 7-way at the rear of your vehicle all you need to install a brake controller is the correct install harness part # TK93VR which plugs into a port under the dash. For a brake controller I would recommend the Prodigy P3 Brake Controller part # 90195. This is our best selling brake controller because of how well it works and how easy it is to setup. This is...
view full answer... - Electric Brake Compatibility on a Boat TrailerElectric brakes on a boat trailer are able to be used without much issue at all. There obviously is an issue with water and electricity, so it is recommended to disconnect the trailer connection when your trailer is being submerged for launch. A few seconds after pulling out of the water, you can connect your wiring without any issues and have the functioning braking system that is easier to maintain. Many boat trailers are moving to electric systems. I do recommend using dielectric...
view full answer... - Recommended 7-Way Wiring for 2014 Jeep Grand CherokeeFor your 2014 Jeep Grand Cherokee, if you have the factory wiring, then all you need is the 7- and 4-Pole Trailer Connector Socket w/ Mounting Bracket, Chrysler/Dodge OEM Plug Adapter # HM40975-11933. If you do not have the factory wiring, then you will need the T-One Vehicle Wiring Harness with 4-Pole Flat Trailer Connector # 118727 to get a 4-way connector. Then you will need to use # ETBC7 to upgrade that 4-way to a 7-way. You will also need a brake controller for full 7-way function....
view full answer... - Brake Controller for 2025 Ram 1500 LaramieHi Doug; this has been a frustrating experience for many people. As far as we know they have moved wiring around and some models don't come with it. If you aren't seeing a factory port under the dash you probably don't have one. You would need the factory plug along with a controller module behind the rear seat, and some lack the controller module even with the plug. On top of that, it looks like if you have these you also need the dealer to put in a code to allow the controller to work. What...
view full answer... - Can a Tekonsha Prodigy P2 Trailer Brake Controller Be Moved From a 2015 to 2024 Jeep Grand Cherokee?While you will be able to install a Tekonsha Prodigy P2 Trailer Brake Controller # 90885 on your 2024 Jeep Grand Cherokee the how is difficult to give you an exact answer. It appears the even on some 2024 Grand Cherokees with a factory tow package the connector is not always under the dash. You will want to start by checking behind the removable panel on the left lower kick panel to see if you can find the connector a Harness # TK93VR will plug into. This is the same harness that would...
view full answer... - What Vehicles Does The Tekonsha Plug-In Wiring Adapter for Electric Brake Controllers TK93VR Fit?Hello Jenni, thanks for getting in touch. The Tekonsha Plug-In Wiring Adapter for Electric Brake Controllers # TK93VR is not listed for the 2024 Jeep Grand Cherokee L because the manufacturers fitment list does not include this vehicle. According to Tekonsha, this adapter will only fit the 2011-2021 Jeep Grand Cherokee L. As of right now, it looks like Tekonsha does not show a custom adapter for the 2024 model. Here is the complete list of vehicle fits for the # TK93VR adapter: 2011 -...
view full answer... - How to Choose the Correct Ball Mount for a 2018 Jeep Grand Cherokee LimitedIn order to choose the correct ball mount for your 2018 Jeep Grand Cherokee Limited and 19’ Airstream Flying Cloud, you will need to do a bit of measuring. For this, you will need to measure from the ground to the top of the inside edge on your receiver tube opening and from the ground to the bottom of the coupler on your trailer while level. The difference between the above two measurements will give you the correct amount of rise/drop you will need to look for in a ball mount. I have...
view full answer... - What is the Difference Between The Tekonsha 3045-P and Your TK93VR? I completely understand your confusion Michael. The Tekonsha part number 3045-P was replaced by the 3082-P which is our part # TK93VR. I hope this helps to clear things up.
view full answer... - Custom Brake Controller Wiring Harness for 2019 Jeep Grand Cherokee and Installation LocationFor your 2019 Jeep Grand Cherokee, the harness connection point is under the dash to the left hand side. I've attached a photo to help as well as a video of this installation. If you are using a Tekonsha Brake Controller like the Prodigy P3 # 90195 then you will use # TK93VR for your wiring harness. If you are using a Curt controller like # C74VV you will use harness # C51446. Finally if you are using a controller like the RedArc Tow Pro Elite # RED44FR, then you will use the pigtail...
view full answer... - Comparison of Tekonsha Prodigy P3 and Primus IQ Brake ControllersAlthough the Tekonsha Prodigy P3 # 90195 and Primus IQ # TK90160 electric brake controllers are very similar they do have some key differences as well. For one the P3 is designed to work with electric and electric over hydraulic brake systems. The Primus IQ will work with electric brakes. Also the Primus IQ will operate a maximum of 3 axles and the P3 will work with 4. The display on the P3 is more informational as opposed to only showing one feature at a time. Take a look at the two...
view full answer... - Installing an Electric Trailer Brake Controller in a 2018 Chrysler PacificaSince you already have a 7-way trailer connector and a brake controller all you should need is the adapter to connect the controller. That's assuming the 7-way is factory installed. If you've installed it yourself, or had it installed aftermarket let me know. If it's a factory 7-way there's going to be a connector under the dash above the steering column not far from where it goes through the firewall. The connector you're looking for probably has a green cover over it. Once you find...
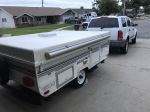
view full answer... - Parts Needed to add Electric Trailer Brakes to 1990 Skamper 190cYou are able to install an electric braking system on your trailer. The parts needed are going to be determined by the axle that your camper is equipped with. From what I can tell from your picture, it looks like this is a 4 lug axle which is going to likely mean you have a 2,000-lb axle with a 1-3/4" diameter. In order to verify that is correct you will need to confirm that the Inner and Outer bearings on your trailer wheel hubs match L44649. You can verify this once you've taken it apart...
view full answer... - Parts Needed to Add a Brake Controller on a 2013 Jeep Grand Cherokee With or Without the Tow PackageSince you don't have the trailer towing package on your 2013 Jeep Grand Cherokee you do need to start off by installing a 4-Way connector. I recommend the Tekonsha T-One # 118425 as we have found Tekonsha to be one of the most reliable wiring companies that we carry. To have 7-Way and 4-Way connectors on your Jeep you also need the Universal Wiring Kit # ETBC7. This connects to the T-One and give you both connections that you need. It also includes everything you need for the 7-Way to...
view full answer... - Where Is The Brake Controller Port On A 2025 Ram 1500?Hi Randy! We haven't done an install on a 2025 Ram1500 yet, but it looks like the plug you want is either to the right of the steering wheel or just to the right of the emergency brake (I couldn't find a definitive answer saying which spot). Which pigtail are you using for your Voyager? It looks like the new Rams switched the port over to what is used on like the Jeep Grand Cherokee and Wagoneer (part # TK93VR). I included a picture of what I mean.
view full answer... - Brake Controller Fit and Compatibility for a 2016 Jeep Grand Cherokee with Factory 7-WayYes the Hayes Blackbird Brake Controller HA81726 will work for your 2016 Jeep Grand Cherokee, but you will need to use the adapter # HA81796-HBC to plug into your vehicles wiring. Can I offer one bit of advice? Instead of going with a Time Delayed Brake Controller I would instead suggest a Proportional Controller like the P2 # 90885 with adapter # 3045-P. The P2 is a proportional brake controller which means it senses how the tow vehicle is slowing or stopping and applies the trailer's...
view full answer... - Parts Needed To Install Tekonsha Prodigy P2 Trailer Brake Controller in 2023 Jeep Grand WagoneerThe Plug-In Wiring Adapter # TK93VR will allow you to connect your Tekonsha Prodigy P2 Trailer Brake Controller # 90885 to your 2023 Jeep Grand Wagoneer. We do have the Replacement Mounts # 7686 & # P7685 should you decide to leave the mounting bracket in your Escalade or they become lost or damaged. The electrical connection for the controller can be hard to find under the dash. I have included a installation video we did for the P3 # 90195 near the bottom of the page you can watch to...
view full answer... - Recommended Brake Controller For A 2022 Jeep Grand Cherokee Trailhawk 4xeAs far as I can confirm there is not a plug-in port available for a 2022 Jeep Grand Cherokee 4xe. You can try reaching out to Jeep/Mopar but I can't find anything from them stating that there is a plug-in option so you'll have to go with a splice in option. For this I recommend the Redarc Tow-Pro Liberty Brake Controller # RED24FR along with the Universal Wiring Harness # RED69FR. This brake controller has the smallest footprint on the market for more mounting versatility and a cleaner,...
view full answer... - Does A 2024 Jeep Grand Cherokee 4xe Trailhawk Have A Plug-In Brake Controller PortThere currently aren't any listings showing the 4xe models having a tow package that includes a plug-in port for a brake controller so at this time the only available option would be a splice-in wire harness. For a 2024 Jeep Grand Cherokee 4xe I still recommend the Redarc Tow-Pro Liberty Brake Controller # RED24FR along with the Universal Wiring Harness # RED69FR because it has the smallest footprint on the market for more mounting versatility and a cleaner, factory look. The wire harness...
view full answer... - How to Make Extension for Tekonsha Brake Controller Wiring Adapter TK93VRBrake controllers are usually mounted so that they are within easy reach of the driver for emergency stops, typically near the driver's right knee. The quick-connect wiring adapters we offer, such as # TK93VR, are long enough for such installations but if you want your controller to be positioned elsewhere you can simply add on Pigtail Wiring Harness # 7894. This 34-inch extension will splice to your existing adapter, color for color, using the included butt connectors. For mounting your...
view full answer... - Recommended Trailer Brake Controller Harness for a 2023 Jeep Grand CherokeeIn order to install a Curt trailer brake controller like the Curt TriFlex Trailer Brake Controller part # C24VV on a 2023 Jeep Grand Cherokee you'll need the Curt Custom Wiring Adapter for Trailer Brake Controllers part # C51446. In order to install a Tekonsha trailer brake controller like the Tekonsha Prodigy P2 Trailer Brake Controller part # 90885 you'll need the Tekonsha Plug-In Wiring Adapter for Electric Brake Controllers part # TK93VR.
view full answer... - Correct Plug In Adapter Harness For a 2023 Jeep Wagoneer Using A Tekonsha Voyager Brake ControllerThe Tekonsha Plug-In Wiring Adapter for Electric Brake Controllers 3045-P you're referring to has actually been discontinued and replaced by the Tekonsha Plug-In Wiring Adapter for Electric Brake Controllers # TK93VR. With that said, the new # TK93VR harness will work with your 2023 Wagoneer as well as your Tekonsha Voyager brake controller.
view full answer... - Will The Tekonsha Prodigy P3 Brake Controller Work On A 2023 Jeep Grand Wagoneer Series II Obsidian?Hi Becky! Not sure why it isn't showing the P3, but the # TK28ER will fit your 2023 Jeep Grand Wagoneer Series II Obsidian. It also include the pigtail wiring harness that plugs right in. This plug is located under the dash to the left of the steering column near the e-brake pedal. I included an install we did on a '22 Jeep Wagoneer for you to check out as well. Good choice with the Prodigy P3 as well! It's the best one on the market and one of my go-to brake controllers. What will you...
view full answer... - Parts Needed To Tow RV Trailer Behind 2026 Jeep Grand WagoneerHello Raymond, thanks for reaching out, and congrats on the new Jeep! We actually rented a Grand Wagoneer when I was in California last summer and it was fantastic! The 2026 Grand Wagoneer should come with an OEM trailer hitch and factory 4-flat wiring. So assuming your RV trailer has electric brakes, you will need to add a 7-way plug and brake controller. For that you can use the following: - 7-Way RV Upgrade Kit for Trailer Brake Controller Installation - 12 Gauge Wires # ETBC7L - Tekonsha...
view full answer... - Brake Controller Recommendation for 2021 Jeep Grand Cherokee with Tow PackageHey Rob, for your 2021 Jeep Grand Cherokee I would recommend the Prodigy P3 part # TK28ER which comes with a custom fit harness designed for your Grand Cherokee. The P3 is the nicest controller around due to how easy it is to use and setup and how well it performs so it's a really great option.
view full answer... - Does the Tekonsha Prodigy P3 for a 2018 Jeep Grand Cherokee Include Custom HarnessHey Aaron, the Tekonsha Prodigy P3 Trailer Brake Controller w/ Custom Harness # TK28ER already comes with the Tekonsha Plug-In Wiring Adapter for Electric Brake Controllers # TK93VR, so you do not need to buy that as well.
view full answer...
Do you have a question about this Trailer Brake Controller?
Info for this part was:


At etrailer.com we provide the best information available about the products we sell. We take the quality of our information seriously so that you can get the right part the first time. Let us know if anything is missing or if you have any questions.











Thank you! Your comment has been submitted successfully. You should be able to view your question/comment here within a few days.
Error submitting comment. Please try again momentarily.