
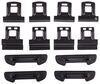
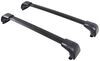
Yakima SightLine Roof Rack for Flush Rails - JetStream Crossbars - Aluminum - Black - Qty 2


To see if this custom-fit item will work for you please tell us what vehicle you'll use it with.

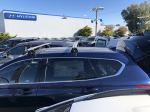
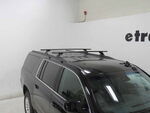
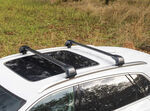
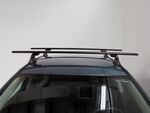
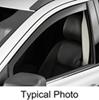
This stylish, aerodynamic Yakima roof rack gives you the space to carry gear on your vehicle. Rubber strips in the top channels push down to load carriers or accessories - no need to trim. Installs to flush rails on your vehicle's roof.
Features:
Specs:
 Alternate Instructions
California residents: click here
Videos are provided as a guide only. Refer to manufacturer installation instructions and specs for complete information.
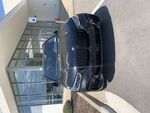
Hi, I'm Dean with etrailer, and today we're gonna take a look at, I'm gonna show you how to install the Yakima SightLine roof rack system. This is gonna be for flush rails on our 2025 Kia Sportage. If you're looking into getting a roof rack system, then most likely, you're wanting to put an accessory on top, which is nice if you're going on long trips. You could put a cargo box up here or maybe a kayak even. So adding roof rack to your Kia is gonna be a great idea. Now, the Yakima here is gonna extend a little bit further out.
So you can put clamp-on accessories out here and it's a little more useful. But if you want a cleaner look, we do have different roof rack systems that will stop right at your flush rails. Now this kit is gonna be for your flush rails, not your raised rails. And all that means is there's not gonna be a pass-through in the rails here. There's gonna be a solid piece on your vehicle.
So if you do have that pass-through, then you're gonna need the raised rail kit. If you're somebody who's planning on taking these on and off your vehicle, they're not too bad. You're just gonna have to take that off and you will need a flathead or a coin or something in order to unlock this and take this off. And then you will need an Allen key to unscrew it, and that's really it. Then you can take 'em on and off.
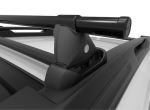
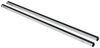
It's not too bad. You can use an Allen key, or they give you one in the kit, which is really nice. These are 50-inch crossbars, and to get your accessory in there, you can use T-tracks or clamp-on. Of course the clamp-on's just gonna clamp on there. The T-track's gonna be right here.
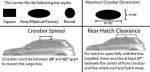
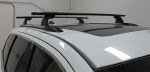
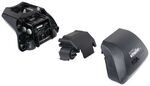
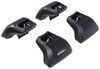
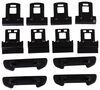
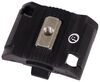
You will have to take the end cap off. Now, I don't love these 'cause they're very difficult to take on and off. You just have to pull that tab on the bottom and kind of wiggle it, and then put your T's accessory in there. It is nice they give you some weather stripping and you can just push that down. You don't have to cut it to your accessory. But if you're somebody who doesn't wanna take this on and off, we do have a Thule that does have a flip up option so that you don't have to take this off. You just flip that up, put your accessory in, and flip it back down. If you have those clamp-on accessories, I'll give you a measurement that you may need to know. So from the center of the roof to the bottom of the roof rail is gonna be about three and a half. So that's a decent amount, so most of those clamp-ons will fit. Now next measurement is going to be to the top of your rails and that's gonna be about four and three quarters. So that's a good measurement to know. If you know the height of your accessory, maybe you have a cargo box, you can just add that measurement, and then you'll know if you can safely pull in and out of your garage. As far as install goes, these aren't too bad once you get the hang of it. There's a ton of little measurements and little things to keep in mind, but we go over that all in this video so it shouldn't be a problem for you. Now, if you have any questions about what roof rack system's gonna be best for you or if you have a flushed rail or raised rail, don't hesitate to reach out to us here at etrailer. But if you're looking to get this installed, follow along and I'll walk you through the process. First off, we've got some of our parts laid out. I've already installed the front crossmember, and I'll show you how we installed the rear. And first, we wanna grab the tower, we wanna take this cover off. And we wanna take this cover off as well. I'm gonna take a flathead, turn this, and that'll just come right off. And then we'll take our Allen key that comes in the kit and get this loosened up. It's on the left side here. And just enough so you can have visibility of this bolt on the bottom. So I'm gonna do a little bit more. And now you can see, you can access that. So on the top, we're gonna take a plastic piece, we're gonna get that pushed on. And then we're gonna take our metal piece and get this threaded on. So I'll flip this back around and get this threaded, just enough so it's on there. I don't wanna go too tight. And once I got all that, I can slide this whole assembly onto our crossbar. So I'll take the end cap off. Just wanna pull up. And get that off. And we can slide this to where we need it. And there's gonna be an M1 measurement, and that's gonna be for your specific vehicle. So that should be in the specific fit kit you're gonna get. But if it's not, you can find that information on this product page. But I'll move that over. There's actually numbers on our crossbar, so we'll move that over to our number. So I'll get that set and tighten this down. And I'll torque this down as well. This actually comes in your kit. It's gonna torque it down to the specific amount you're gonna need. It's just gonna give you a click, and then you're all good. Take the rubber pad and there's gonna be an arrow on it. You want that arrow to be facing out away from the crossbar. So I'm just gonna click this in right in the middle here. When getting your clamps on, I'm gonna loosen this up with our Allen key. It's a little easier if this is backed almost all the way out. Don't go all the way out of course, just until the end of it is inside. There's gonna be a front and back, and there's gonna be numbers on there and you can find which is which, but the easiest way I found is the one with the singular hole, that's gonna go on the outside, and the one with the two holes, that's gonna go on the inside. And then that pad, of course that's gonna be facing each other 'cause that's what's gonna clamp around your flush rail. So I'll start with the inside, and there's gonna be some wire and you just wanna push in on those and get that disengaged so it's came right out of those holes right there. And push this in. And then those two holes gonna go around and grab those two prongs. Then I'll put our wire back in place. I'll do that same thing for our clamp that goes on the outside. I'll take those wires out, put this, put in place. Your kit will come with some weather stripping that you can cut so you can fit in these spots so it doesn't create wind noise, but I would recommend putting it up there and making sure everything's right before you cut these to length. So now I'll take our crossbar and I'll get it set on our roof. Now there is a specific way to do this. Of course this is gonna be a teardrop shape and you want that thicker part to be facing the front of your vehicle. Now let's go over here and get this set on top. Now we've got that rear crossmember in place. We'll show you how we got the measurement for where this front crossmember is going to sit. So from the front of the windshield, they give you this soft tape measure to make it a little easier. And to the end of our tower should be about 17 inches. We can measure from your front crossmember. And this rear one can be up to 32 inches, so I'll set that at that 32 mark on both sides. And now we can tighten it down. First, I'm gonna tighten that screw inside the tower. That's the one we loosened up to get to that screw underneath. And now I'm gonna tighten up the towers themselves. So these will just tighten those clamps around your rail. We'll make sure this is gonna be torqued. And I'll do that to the other side. Can put our cap back in place. And we can get our pieces back onto our tower. Get that put in place and lock it down. We'll put our cover plate back on. You can give this a good test, shake it in every direction. Make sure this isn't gonna go anywhere. And once you've done that, you can put your accessory up here and start using your Yakima SightLine roof rack on your 2025 Kia Sportage.

Do you have a question about this Roof Rack?
Info for this part was:
At etrailer we provide the best information available about the products we sell. We take the quality of our information seriously so that you can get the right part the first time. Let us know if anything is missing or if you have any questions.


Thank you! Your comment has been submitted successfully. You should be able to view your question/comment here within a few days.
Error submitting comment. Please try again momentarily.