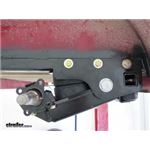
Hey Nate, We do not have a 3/4" spindle nut or washer, the smallest option is the 7/8" spindle nut #165931and a 1" washer #SW1000. I cannot find anything smaller. Are you sure the threads on you're spindle are 3/4"? If they…
Hey Eli! The first thing you want to do is make sure you have brake flanges on those axles. You also need to take a look at the axle tags and find the axle capacity. More than likely they're 3,500 lb axles so I'll answer based on that. If you…
In order to determine the torque rating for the lug nuts on your trailer you will need to know check out the chart I attached that shows all of the torque specs for all the trailer lugs available based on stud size, wheel material and wheel size.
Hey Arkadius, welcome back! Yes, the ducted version of the Chill Cube comes with a remote. However, you're going to need the complete system for a replacement. You can choose from the following based on color: -Furrion Chill Cube RV Air…
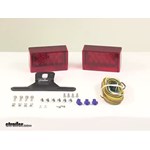
A trailer that is over 80 inches wide is required by DOT regulations to have rear clearance lights. An over 80 inch taillight kit, like part #TL16RK, will have the side clearance light built into it. An under 80 inch taillight does not have the…
Hey Ed, yes the solenoid of the reverse lock out is going to click when it is activated. You would definitely be able to hear it too. Have you tried this already?
The Wesbar 271594 is a sealed light which means the lens is not replaceable. The only solution is to replace the entire light. The parent company for Wesbar recently changed, so as of May 2023 this particular light is on indefinite backorder. I…
The light dimensions of the Optronics LED #TLL12RK are 7-9/16" long x 2-3/4" tall x 1-3/4" deep and the hole size needed is 6.75" by 2.5 inches. I confirmed this with my contact at the manufacturer and I've attached a template…
Hey Glen. We've got a couple of options for Optronics Smoke Series lights but we don't have the STL87DSRSHB which is a part number for a 10 pack. It looks like Optronics is phasing out the STL87 smoke series as well so I can't get them.…
Hey Rick. Unfortunately that's correct the Wesbar Tail Light 271594 has been discontinued. Our best option for replacing it is the LED Trailer Tail Light item #STL36RB for the passenger side and item #STL37RB for the driver side. The Wesbar light…
Hey Harry, thanks for reaching out. Your Coachmen Freedom Express is set up for 30 amp service and we do have twist lock power inlets that will work for you. What you'll need is one of the following: - Mighty Cord Replacement RV Power Inlet -…
That's a very good question, we tend to be extra cautious and say to use 10 gauge wire because that would be more than enough. When you get into longer trailers that will end up using a lot of wire the heavier gauge wire becomes more necessary.…
Rectangle Trailer Lights: Perfect Fit for Your Needs
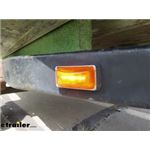
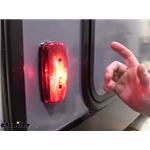
Rectangle trailer lights are a great choice for replacing old or broken lights on your trailer. They offer a sturdy, durable design with a true color lens and bright reflector. Easy to install, these lights fit perfectly into existing mounts, making them an ideal upgrade for any trailer enthusiast.
Rectangle trailer lights are known for their durability and perfect fit. They are easy to install, often snapping right into place, and provide a bright, true color light. Their sturdy design ensures they withstand the elements, making them a reliable choice for any trailer.
Rectangle trailer lights offer a bright reflector and true color lens, enhancing visibility on the road. This design ensures that your trailer is easily seen by other drivers, improving safety during travel, especially in low-light conditions.
Yes, rectangle trailer lights are designed for easy installation. Many models feature a plug-and-play design, allowing them to be installed in seconds without the need for a ground wire. This makes them a convenient option for quick replacements or upgrades.
Rectangle trailer lights are a cost-effective choice due to their durability and ease of installation. They offer a high-quality build at an affordable price, ensuring long-lasting performance without breaking the bank. Their design also fits existing mounts, saving time and money on modifications.
Rectangle trailer lights are built to withstand harsh weather conditions. They feature a sealed design with a rubber grommet for weather sealing, ensuring that rain and moisture do not affect their performance. This makes them a reliable choice for all-weather use.


 Filters