Draw-Tite Activator IV Trailer Brake Controller w/ Custom Harness - 1 to 4 Axles - Time Delayed
2017 Ford Focus
Will this fit?
To see if this custom-fit item will work for you please tell us what vehicle you'll use it with.
- All Info
- Reviews (357)
- Q & A (0)
- Videos (17)
- Photos
Draw-Tite Trailer Brake Controller - DT37KV
- Electric
- Time Delayed Controller
- Up to 4 Axles
- Draw-Tite
- Under-Dash
- Plug-In
- Under-Dash Box
- Single Trailer Only
- LED Display
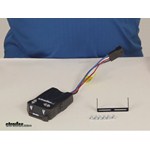
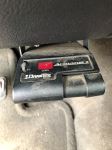
This stout brake controller has easy-to-reach button controls up front and a simple slide-lever manual override. The digital display is large and easy to read. And the included harness lets you just plug the controller right into your vehicle.
Features:
- Time delayed: activates trailer brakes with preset intensity
- Convenient buttons adjust power output and sync settings
- LED digital display shows you the output setting, sync setting, and error codes
- Slide lever manual override is within easy reach
- Built-in short circuit protection keeps your vehicle, trailer, and controller safe
- No mounting restrictions
- Installs at any angle
- Includes mounting bracket, hardware, and custom wiring harness
Specs:
- Application: trailers with up to 4 axles (8 brake assemblies)
- Compatible with electric brakes only
- Dimensions: 4-3/16" long x 2-3/4" wide x 1" tall
- Limited lifetime warranty
Power Output and Sync Adjustment

Power output is the maximum amount of power that will be applied to your trailer's brakes. How much braking output you need is determined by the weight of your trailer; a heavier trailer will need more power to bring it to a stop. You want to go as high as you can without the trailer brakes locking up. It adjusts on a scale of 0 to 10.
Once you have the power output set, you can fine-tune your braking by adjusting the sync control. This controls the aggressiveness of your trailer's braking, meaning how quickly the brakes reach the maximum braking level. If your vehicle takes too long to come to a stop, increase the setting. If it stops too abruptly, decrease the setting. The sync setting is shown as a number followed by the letter "o" to differentiate it from the output reading. The least aggressive sync setting is 0o and the most aggressive is 9o.
LED Display
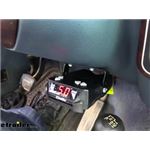
The Activator IV displays the power settings as you adjust them. While braking, the unit will display the power output setting. To see or adjust the sync setting, step on your brake pedal and press either the plus or minus button to increase or decrease the setting.
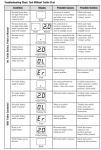
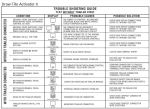
The display will also show trouble codes to alert you to any potential problems, such as short circuits or overloads, or if there is an internal problem with the controller.
Installation
Because inertia plays no role in the functioning of this controller, you do not have to mount the unit at any particular angle. Your mounting options are limitless, so long as you can still easily access the controller and manual override. And because the included wiring harness is custom fit for your vehicle, you can just plug the controller in. No cutting or splicing needed!
Note: If you don't already have a 7-way plug at the back of your vehicle, take a look at our exclusive 7- and 4-way brake control installation kit (ETBC7 - sold separately).
Time-Delayed Braking
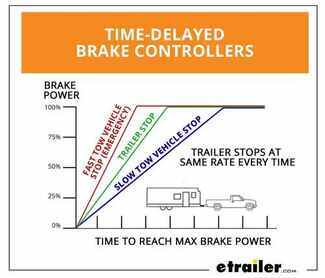
Time-delayed braking means that when you apply the brakes in your vehicle, the controller activates the trailer brakes at a pre-set intensity and rate. Both the amount of braking power (gain) and rate of application (load) can be adjusted to suit your preference, the road conditions, the type of trailer, and the weight of your load. To determine which levels are best for your application, test your towing setup and choose what feels right.
5504 Draw-Tite Act IV Electric Trailer Brake Controller - Time Based
Replaces 5500
303400 Tekonsha Brake Control Wiring Adapter with 2 Plugs
Replaces 3034-P
Installation DetailsCalifornia residents: click here


Videos are provided as a guide only. Refer to manufacturer installation instructions and specs for complete information.
Video Transcript for DIY 2014 Dodge Durango Installation for the Draw-Tite Activator IV Trailer Brake Controller
Today on our 2014 Dodge Durango, we're going to take a look at and also show you how to install the Draw-tite Activator 4. This is a time delayed, trailer brake controller that'll work for one of the four axles. Part number is 5504. We're also going to be using the Tekonsha Plug-In Wiring Adapter, part number 3045-P. The Draw-tite Activator 4 is going to be a time delayed brake controller set up. What that means is when we hit the brakes on our vehicle the brake controller is going to pick up on that and it's going to bring up the brakes on our trailer in a specified kind of a time.
We're going to time delay it fast and so it's slowly going to ramp that up. That speed is going to be dependent on how we got our sink set. You can see we've got two buttons up here in the top, plus and minus. The higher we go on that sink setting, the quicker and more aggressively our brakes are going to engage. See we can bring that down. That allows us to fine tune this for the trailer itself.
Basically, the size and the weight of the trailer in relation to the size and weight of your vehicle. We also have a gain adjustment here. You can see those are adjustable in half number increments. That allows us to fine tune for the terrain. It also allows us to fine tune the amount of braking power that we're sending back to our trailer.
On lighter trailers we want our gain to be adjusted lower. If we're on flat terrain we want our gain to be adjusted lower. As we start to raise that gain, our trailer weight is going to get heavier and heavier and our terrain is going to become more hilly. That's the amount of power being sent back to the trailer. You want to be just enough where it's not going to actually lock up the tires on the trailer, which can cause flat spotting. Get a nice manual override lever here.
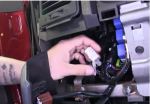
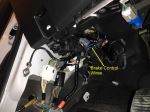
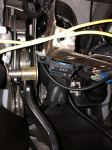
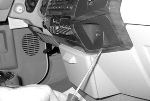
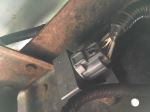
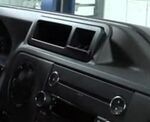
As you can see we bring that all the way over maxed out and it's going to go right up to whatever we've got the maximum gain set up. In an emergency if we need to apply those trailer brake without applying the brakes in the car, we can pull that over. It's going to go right up to what we've got set and that's going to prevent us overpowering the tires on the trailer and locking them up. Another benefit of a time delayed brake controller is that you don't have to worry about mounting angles. These could be mounted in any position in any configuration. You just really want to keep in mind, you want it to be close enough where it's in arms reach and you can operate your manual override. For the first step in our installation is going to find the plug underneath the dashboard that matches our 3045-P. As you can see this is going to have a plug that will go right into the connection in the brake controller. It's going to come right from our factory connector, which this will plug into. To find that we need to look up here behind the emergency brake petal. Some vehicles are going to have a felt panel down here. You can kind of see it here. We're going to get this pulled down and out of the way. We've got two push fasteners. We've got one located right here. If we come over there would be another one right here in this area. To remove these I'm going to use a trim panel tool. You can also use a screw driver. You just want to get in behind the head of it there. Just pull down. See there. We'll pull that down and out of the way. May have a little plug here for the light. Just take that off. We'll set this aside for now. If you look right back there, it's going to be our plug. There's a zip tie holding it in place there. Let's trim that so we can get it angled up here, so we can work with it. There we go. On the back side of that plug, or right above where that plug as located, that's our brake pedal arm. We don't want to get anything back behind there so we're going to run our plug. Our brake controller's going to be going over here on the right side the steering wheel so we know we want our plug over in this location. I'm going to run this up over a few of the braces that are up here on the dashboard that way you'll have plenty of support. Got a few things we can zip tie too off of up here. That floor vent would be a good area to use there. Back on this side we're just going to plug in our two connectors. Then I'm going to bring it up and we can zip tie it off right to this wire loop. We'll bring out as much as we need here of our pig tail to make a connection with our brake controller an then we can zip tie it off right underneath here so the vent for the floor heat or for the heat that hits your feet. I'm going to go right around that using a pretty good length of zip tie and once we have that where we can get to it you see we can pull out some or be able to bring out back just depending on how our connection needs to be. We'll want that to come out there and then we can put the panel back in that we removed out earlier. All right that should work out real well for us. This is what our bracket is going to look like that we'll use to install the brake controller on our dashboard. Here's where the previous brake controller was installed. You want to kind of stay over on the right side of the dashboard. You can mount it on the left side, but when you get in and out, you run the risk of bumping your leg on it. We're going to mount right up there where the old one was. There's a little bit of a difference in those panels, so we're going to be using those small, flat washers to help accommodate for that. Then we can take our provided hardware or self-tapping screws. We can get those started there and thread it in. Now they give us a great, solid attachment point. At that point we'll bring in our brake controller. You'll have to decide whether you want it to be on the bottom set of holes or on the top set of holes. It looks like the upper set of mounting holes here give us just enough room to slide our fingers in there and get to those adjustments, so I'm going to set it there to keep it as far away from our legs as possible. Your application may be a little bit different. What I like to do is a use a little bit of electrical tape here and just wrap up the wires coming out of the controller. That's going to give us a cleaner look rather than having four different color wires, we'll just have one black wire running down. You want to simply plug those together. Just touch your manual override lever there. Make sure it's working. Then we can tuck these right back up underneath that panel. With everything working as it should, that's going to complete our installation of the Draw-tite Activator 4 trailer brake controller part number 5504. Also using the Tekonsha Plug-In Wiring Adapter, part number 3054-P, both on our 2014 Dodge Durango.
Ratings & Reviews
4.9
357 reviews
Worked great!
Easy to install
It plugged in and worked as advertised,Thank you so much,
Fantastic brake controller. Even better website.
Great controller, we install it on almost every system we do.
Good overall product. Meets needs and is inexpensive.
Product was shipped very fast and arrived well before expected time. Good Service, good products....great experience.
this controller is great. etrailer delivery, packaging, pricing were ALL great...
Love it.... Installed in my 2011 chevy in about 5 min and it works great. Recommend to anyone
Love the digital display! Digital display is now a requirement when I order a brake controller. It is amazing how much better brake control I have knowing before hand how much brake will be applied.
Works great, very easy to use, and very easy to install thanks
i had to re-pin the truck side plug, etrailer support was prompt and right on the money. ok product, great vendor support.
The item appears to be well made and as expected. I'm having some difficulties, but with my camper, not with the unit.
Probably not a really useful review.
Very easy to install. Works very well. I like the digital number readout to show power level being applied to brakes.
Top notch products,Service and Customer service help line.
You guys know your stuff.
Thank you so much for the help everything went flawless and works perfect.
Thank you so much.
Terry
Easy to install. simple instructions, I have it wired up but just have not towed anything yet to get the settings set for my application.
Quality product. The video of how to install clinches the deal. Setup instructions worked perfectly.
Nice product, easy to useEasy to use an upgrade from my Activator I unit. Has the same manual brake control that failed on the Activator I unit. Hopefully this one does not fail.
thank you for the fast delivery ,and for the easy installation vid
was a breeze,ty
Great Product, VERY Easy to install. The only thing I would change is the length of the pig tail. The short length of the pigtail limits your options of product placement.
Great prices, quality products, great customer service and reasonable shipping!!!
ordered on a monday afternoon, received my order on wed after 3 pm...everything was in good condition..these are really good people...thank you so much for the fast service......max
See what our Experts say about this Draw-Tite Trailer Brake Controller
- DrawTite Activator Brake Controller 5504 Flashing Error CodeIt sounds like you installed the Draw-Tite Activator Trailer Brake Controller 5100 in a vehicle with an integrated factory brake controller. If that is the case, installing an aftermarket brake controller like the Activator will cause the instrument cluster to flash the error code you mentioned. While this can be annoying to look at, it does not interfere with proper functioning of the aftermarket brake controller. The only way to clear the code is to take the vehicle to your local dealer...
view full answer... - Troubleshooting a Draw Tite Activator Brake Controller part # 5504 that Only Displays a DotSounds like the problem lies somewhere in the brake output circuit. When a trailer is connected to the Draw Tite Activator Brake Controller part # 5504 and all that is displayed is a decimal point it means that the controller is not sensing a trailer being connected. Typically the problem lies in the trailer connectors. Usually there is corrosion on this circuit that prevents the circuit from being completed. Check both the inside and outside of the connector for corrosion or exposed...
view full answer... - Troubleshooting ER Code on Draw Tite Activator Brake ControllerI wish I had better news, but the ER code means that there is an internal problem on the Draw Tite Activator part # 5504 and that it needs to be replaced. For a new brake controller I would recommend the Prodigy P2 Brake Controller part # 90885. This is our best selling brake controller because of how well it works and how easy it is to setup. This is a proportional brake controller that senses the amount of braking the tow vehicle is applying and applies a proportionate amount to the...
view full answer... - Factory Brake Controller Port Location on 2017 Nissan TitanTo install the Draw-Tite Activator Trailer Brake Controller # 5504 that you referenced to your 2017 Nissan Titan, all you will need is the Plug-In Wiring Adapter # 3050-P if the truck is equipped with the factory 7-Way. One end of the harness will plug into the brake controller itself, while the other end will connect directly to the factory port on your Nissan Titan. The factory brake controller port should be located behind the dash, on the left hand side by the emergency brake pedal....
view full answer... - Where Is Factory Brake Controller Plug Located On 2010 Ford Explorer Sport TracOn your 2010 Ford Explorer Sport Trac the factory plug for your brake controller will be located under the dash, on the left side of the steering wheel, just above your left leg. The wiring adapter you will need to connect the Draw-Tite Brake Controller # 5504 to your vehicle is the Draw-Tite Brake Control Wiring Adapter # 3035-S. This adapter will have a 6-pin plug that will connect to your factory brake controller plug and the 4 wires on the other end will be butt-connected to the 4...
view full answer... - Troubleshooting A Draw-Tite Activator IV Trailer Brake Controller That Won't Sense The Trailer Hey Phil, Are you hitting the manual override when you're testing the output of your Draw-Tite Activator IV Trailer Brake Controller # 5504 or are you just hitting the brake pedal? Is the decimal point always on the display or only while you're pressing down on the brake pedal. If you are seeing the decimal point all the time then you have the red wire from the brake controller harness spliced into the wrong wire for the sold side of the brake light switch. LED lights don't really have...
view full answer... - Why is my Brake Controller Reading Overload and How Can I Find Where the Problem is?If your controller, item # 5504, is reading overload without the trailer connected then that means there is a short in the blue trailer feed wire on the vehicle. If the controller is reading overload only when the trailer is connected then there is a short or overload in the trailer wiring or breaks. Use a circuit tester, item # 3808 if you need one, to test the wiring to find out where the short is. If it is on the trailer end and you cannot find a wiring problem then the problem may...
view full answer... - Where is the Brake Switch Wire on a 2014 GMC Savana Van to Install a Brake ControllerI can tell you were to access the correct brake switch wire to install a brake controller on your 2014 GMC Savana Van. You will need to access the wire behind the BCM (body control module) located behind the dash on the passenger's side of the vehicle. There should be a brown connector coming out of the back of the BCM. At that connector you should find a light blue/white wire. This is the wire that carriers the dedicated brake light signal. Use a circuit tester such as # PTW2993 to confirm...
view full answer... - Troubleshooting Trailer Wiring That Stopped Working on 2005 Chevy SilveradoI'd check the backside of the connector for the condition of the wiring. Most likely something damaged some wiring if several of the circuits just stopped but one is left working. Another possibility is corrosion on the pins of your 7-way. You can try cleaning them with sandpaper. Or you can also check the trailer wiring fuses underhood to see if you can find any blown fuses.
view full answer... - Best Brake Controller & Harness For A 2017 Chevrolet Silverado 3500Yes, the Trailer Brake Control Harness part # 3016 4-pin connector is a direct plug-and-play fit for your 2017 Chevrolet Silverado 3500 HD and compatible with all Tekonsha brake controllers. The pigtail harness is located underneath your drivers side kick panel. The next step in choosing a brake controller is to decide between a proportional and time-delayed brake controller. A timed delay controller functions with a slight delay between the time that you initially apply the brakes in...
view full answer... - Replacement for Malfunctioning Draw-Tite Activator Trailer Brake ControllerBased on your description of the problem with your Draw-Tite brake controller I suspect an internal fault within the controller itself. There is a chance that the red input signal wire could be loose, and this would cause the unit to stop generating output, but it would not explain the varying power level displayed. That specific issue makes me think that the internal circuitry has finally given up the ghost and the controller needs to be replaced. I recommend the # 5504 in its place....
view full answer... - Locating The brake Switch Wire To Install A Brake Controller On 2009 Nissan MuranoWhen trying to locate the correct wire on the brake switch to install your # 5504, you will need a circuit tester like part # PTW2993. You will need to find the wire that shows power only when the brake pedal is depressed. The colors of the wires may vary which is why we always recommend using a circuit tester to find the right wire. It sounds like the manufacturer may have used the same color wire for multiple locations. I have attached a photo of the switch located under the dash at...
view full answer... - What Does ER Error on an Activator Brake Controller IndicateIt sounds like you meant to type the ER code that would be on an Activator IV part # 5504. That indicates that there is an internal problem and the controller would need to be replaced. For a brake controller replacement I would recommend the Prodigy P2 Brake Controller part # 90885. This is our best selling brake controller because of how well it works and how easy it is to setup. This is a proportional brake controller that senses the amount of braking the tow vehicle is applying and...
view full answer... - What is the Red Wire Function on an Electric Trailer Brake ControllerThe red wire on the brake controller connects to the stop light wire on the brake switch located above the brake pedal. You will need to use a circuit tester like # PTW2993 to probe the wires. You need the one that shows a signal ONLY when the brake pedal is pressed. If you find a wire that has a signal when the headlights are on or when the turn signals are engaged, it is not the correct wire. Brake Controller Wire Colors and Functions: The white wire is ground The blue wire is output...
view full answer... - Brake Controller for MotorcycleHi David; are you using this for some kind of side car or are you towing a trailer? If you're towing a small trailer I would use the Autowbrake Electric Brake Controller # 3430001 since it mounts on the trailer. This means you don't have to worry about finding a spot for it on the motorcycle. It uses a small wireless remote you could mount anywhere with ease. If it is for the side car I would use a time delayed controller like # 5504. It would be difficult to properly mount a proportional...
view full answer... - Display of the Draw-Tite Activator II Brake Controller When Not Connected to a TrailerThe Draw-Tite Activator II Brake Controller, # 5500, will not display numbers under any function when the trailer is not connected. You should only see a single decimal on the display. Check out the video that I made showing you how the brake controller should function without a trailer connected. If you do not have any signal on the display, then there could be an electrical issue that is preventing power from reaching the brake controller. If this is the case, I would recommend using...
view full answer... - What Does Sync Control On Brake Controller Do For Trailer With Electric BrakesSetting the sync on a Draw-Tite Brake Controller # 5504 allows you to set the amount of power the brake controller will put out. If you set the sync power low it does not matter how hard you hit the brakes, as they will be applied with the amount of pressure you set the controller at. If you are traveling where there is gravel or loose rock or even in the rain you may wish to set it a bit lower so that the brakes do not lock up on the trailer when you press the pedal. If you are on the...
view full answer... - Draw-Tite Activator 2 Diagnosing Decimal/Period Error CodeIf the trailer is connected to the vehicle when this happens, it means "NO CONNECTION BETWEEN BRAKE CONTROL AND BRAKES - BLUE WIRE CIRCUIT", possible solution is "CONFIRM CONNECTION TO TRAILER CONNECTOR, CONFIRM CONNECTOR TERMINAL POSITIONS, CHECK TRAILER". In other words, there is possibly a connection issue somewhere between the brake controller and the trailer's brakes, which is all along the blue wire. If the trailer is NOT connected to the vehicle when this happens, it means "RED...
view full answer... - Troubleshooting Poor Brake Performance and Low Brake Output VoltageFirst thing I would check is the blue wire that is at the rear of your vehicle for voltage when you apply the brakes and when you slide the manual override of this controller. You could also try sliding the manual override a few times and adjusting the gain knob up and down to help clear the contact points. I attached a link to the manufacturers instructions for your Draw-Tite Brake Controller, part # 5504, below for you to check out also. If all this checks out it sounds like the problem...
view full answer... - Troubleshooting Brakes Not Working on One Side in MountainsHi Vincent; have you tried checking the voltage at the brakes with a circuit tester # PTW2993? Perhaps one side has a weak ground compared to the other or for whatever other reason isn't getting the same amount of power. Since the brake controller sends power down a single brake output line and the brakes function I don't think the brake controller is your issue. However, it wouldn't hurt to check the brake output line just to be sure. It sounds like you're getting more braking force...
view full answer... - Troubleshooting a Tekonsha Draw-Tite ActivatorIt sounds like there is either a problem with the wiring of your Activator Brake Controller # 5504, the wiring of your vehicle/trailer 7-way or the # 5504 is bad. The first thing to check will be the 7-way of your vehicle. You will want to visually inspect the front and back of the connector looking for loose wiring or corrosion and fix as necessary. Next, you will want to test the brake output circuit of the 7-way with a circuit tester, like our # PT89ZR, for the correct voltage when...
view full answer... - 5th Wheel Trailer Hitch and Install Bracket Kit for a 1995 Chevrolet 1500 with 6-1/2 Foot BedI do have a solution for you but the Curt E16 Fifth Wheel Trailer Hitch with Universal Install Kit # C16616 is not confirmed to fit your 1995 Chevrolet 1500. The E16 hitch will work just fine for you. It's a sliding hitch which will help with turning clearance since you have a short bed truck. For the hitch use # 16516. Then you need a bracket install kit with base rails. A universal it that does fit your truck is # RP30035. This fits just fine with the Curt hitch. You may also want...
view full answer... - Wire Diagram for Installing a Voyager Brake Controller on a 2002 Ford F-250On your 2002 Ford F-250 you will need to connect the Red wire to the Black wire on the brake controller for +12 Volts power and the Light Green wire to the Red Stoplight wire on the brake controller. The Dark Blue wire is connected to the Blue wire from the brake controller to send power to the Trailer Brakes, and the White wires are connected to each other providing a ground for the brake controller. I posted a diagram with your wire colors added to it for you, see drawing at right. The...
view full answer... - Meaning of Flashing OL Code on Draw-Tite Activator Brake ControllerThe OL code on your Draw Tite Activator # 5504 has a different meaning depending on if the trailer is connected or not, but in both situations it indicates an overload or a short on a wire. If the OL code is flashing without the trailer connected, then the short is in the Blue wire from the back of the controller. You'll want to trace this wire starting at the brake controller back to your vehicle's 7-Way to find the damaged or pinched section of wire that is causing the short and repair...
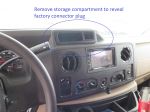
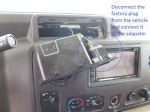
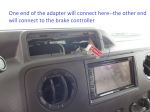
view full answer... - Brake Controller Wiring for Ford E-450 MotorhomeIf your vehicle has a factory brake controller plug, you can simply use the Tekonsha Plug-In Wiring Adapter for Electric Brake Controllers – Ford, Item # 3034-P, which will connect to the vehicle plug and the brake controller. On the new E-450 vehicles, the plug is located behind the storage compartment above the radio. Once you remove the storage compartment, you can plug in the adapter and run the cord behind your dash to the brake controller. I've attached several images showing where...
view full answer... - Ford Integrated Brake Controller Not Working Well with Trailer with Electric/Hydraulic SetupThe integrated brake controller of a 2012 Ford F-350 is SUPPOSED to be compatible with electric over hydraulic brake actuators on trailers but what we've found is that a lot of integrated truck brake controllers just don't work consistently well with them. The best solution is to replace the controller with an aftermarket one like the P3 part # 90195 which is rock solid with EOH brake setups. The Ford factory brake controller that is in the dash does not have to be removed. You will need...
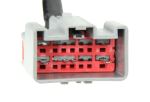
view full answer... - What Color Are The Brake Controller Wires On a 2018 Ford E-450 CutawayThe trailer brake controller wires on a 2018 Ford E-450 are blue for brake output, yellow/red or gray/red for 12 volt power, violet/white or yellow/green for stop light, and black/gray or black/violet for ground. These wires will all be located inside a 14 pin grey connector located behind the dash. I understand that you said you have a 2019 Ford E-450 which may be why you were told there is not a plug-in harness available however, the schematics for a 2019 Ford E-450 have not yet been...
view full answer... - Brake Controller Installation in 2019 Ford RangerWe have not yet (as of April 2019) had a chance to install any wired trailer brake controllers on a 2019 Ford Ranger so for guidance I checked with my most trusted brake controller expert at Tekonsha. Based on what I could learn about the truck if the Ranger has a factory-installed 7-way it should have a standard brake controller connection port above and to the left of your left knee when seated; this will be near the kick panel. You will want to look for a connector that matches the...
view full answer... - Can A Redarc Tow-Pro Liberty Be Installed In A 2019 Ford E-Series Cutaway Hey Gary, Brake controllers are pretty universal so even though it's not listed as a fit you would still be able to get the Redarc Tow-Pro Liberty # RED24FR installed in your Ford. To make the installation super easy you'll want to pick up the Tekonsha Plug-In Wiring Adapter # 3034-P. This will plug into your vehicle's wiring so that you don't have to cut and splice or run wire back to the 7-way. To connect this to the brake controller you can either cut off the Tekonsha connector and...
view full answer... - Setting Up a 2009 Ford E-350 Van without Factory Towing Package for Brake Controller WiringThere are 3 options from the manufacturer for the 2009 E-350 Ford Van. Factory 7-Way trailer wiring, factory 4-Way trailer wiring, and no existing trailer wiring. I will go over all three since you did not indicate which one your vehicle has. If you have the factory 7-Way trailer wiring, you will be able to use the 3034-P wiring harness that you selected to easily install your prodigy brake controller. When looking for a port under the dash, it will be near the top of the instrument cluster,...
view full answer... - Brake Controller Plug Location on a 2014 Coachmen Freelander with Factory 7-Way Trailer ConnectorThe connector that you found under your dash is actually the OBD-II port which is why it doesn't quite match up with a brake controller adapter, like part # 3034-P which fits Tekonsha and Draw-Tite brake controllers. Typically we find on motorhomes that the brake controller plug is up under the driver's side dash, next to the steering column, or under the driver's seat. From what I could find it looks like your 2014 Coachmen Freelander was built on a 2013 Ford E-350 chassis. If you skip...
view full answer... - Location of Trailer Brake Controller Connection Port in 2016 Ford F-250 Super Duty PickupOn a 2016 Ford F-250 with a factory-installed 7-way trailer socket the under-dash connection port for a trailer brake controller will be found behind the plastic dash panel to the left of the radio. You can see this connector being accessed in the linked video at the 3:28 mark. In your Ford pickup you'll use quick-connect wiring adapter # 3034-P to install a Tekonsha P3 brake controller # 90195.
view full answer... - Where is the Brake Controller Plug In Located on a 2011 Ford F-250 Super DutyOn the 2011 Ford F-250 Super Duty, the brake controller port is located behind the center dashboard access panel on the passenger's side. One end of the # 3034-P adapter will plug into the back of the brake controller and the other end plugs into the brake controller port on your vehicle. If your vehicle has the factory 7-Way connector on the rear of your vehicle, then all of the wires for the brake controller have already been run. If you have a factory 4-Way connector on your vehicle...
view full answer... - Brake Controller Recommendation for a 2015 Ford E-450 Class C MotorhomeI just checked with Tekonsha and they confirmed that the Tekonsha Plug-In Wiring Adapter # 3034-P that you referenced will work on your E-450 Class C motorhome. If you are also looking for a brake controller check out our Tekonsha P2 Brake Controller # 90885. This is one of our best selling controllers because of how well it works and how easy it is to setup. I attached a picture that shows where to locate the port.
view full answer... - Where is the Brake Controller Plug On a 2014 Thor Four Winds MotorhomeThe brake controller port on a 2014 Thor Four Winds Motorhome should be located under the dash, usually near the emergency brake pedal. That said, they are generally taped to other wires on the main harness so it just takes some digging. We have not yet had a 2014 Thor Four Winds Motorhome in our shop to get a better idea of the exact location but I would say the above is true for about 95% of applications. If you don't already have a brake controller in mind, I recommend the Tekonsha...
view full answer... - Which is Actually Better? a Proportional or Time-Delayed Trailer Brake ControllerProportional brake controllers like the Prodigy P3 part # 90195 are by far the better choice over time delayed. Proportional controllers use internal sensors to determine how hard your trailer brakes should be applied based on how hard they sense you are applying the vehicles brakes. A time-delayed controller applies a set amount of braking force that ramps up over a set amount of time and then stays at that force till the brakes are released. If you think about how often you apply the...
view full answer... - Help Finding 7-Way Socket for 2011 Ford VanYour van most likely has the 7-way connector/harness at the rear of it but you'd need to get up behind the rear bumper and look for a round connector that a socket like part # A10-7072VP could plug into. If that's not there you could contact a Ford dealer to see about getting that intermediate harness you would be missing. Then you can use factory brake controller harnesses like what you referenced with the part # 3034-P with a controller like the # TK63VR.
view full answer... - Is there a Vehicle Specific Brake Controller Pigtail for My 2014 Ford Van e350?Hello Jenna, It looks like you already found it. I am showing that the Tekonsha Plug-In Wiring Adapter for Electric Brake Controllers - Ford # 3034-P is the correct one for your 2014 For e350. What kind of brake controller do you have, maybe you need a different brand?
view full answer... - 2008 Ford F-250 Super Duty OEM Brake Controller Replacement RecommendationHey Terrance! Go ahead and pick up the Prodigy P3 # 90195 and the Plug-In Wiring Adapter # 3034-P for your 2008 F-350. We've already had a few customers grab this combination and were really happy with the controller as well as how easy the swap was from a Ford OEM controller (check out the attached photo). The Tekonsha line of electronics are arguably the best on the market, and their controllers are crazy reliable, so I know you'll be more than happy with this once you get it all set...
view full answer... - Brake Controller Install Harness that Fits 2014 Ford E-350 VanHey Jenna, for your 2014 Ford E-350 the correct brake controller install harness for a Tekonsha brake controller would be the # 3034-P. Do you have a brake controller picked out already?
view full answer... - Parts Needed For Brake Controller Installation On a 2021 Ford E-450 Cutaway Chassis For Class C RVTo verify if your 2021 Ford E-450 cutaway chassis for your Class C motorhome is pre-wired for a brake controller you will need to remove the storage slot in the top of your dash. I have included a install video below that shows how to remove the storage tray to access the connector at the 16:30 time in the video. With the factory connector you can use the Tekonsha Plug-In Wiring Adapter # 3034-P to install the Redarc Tow-Pro Elite Brake Controller # RED63RR. This will allow you to add...
view full answer... - Where Does a Brake Controller Plug Into on a 1999 Ford F-150On your 1999 Ford F-150 with factory 4-Way flat, the brake controller port is located under the dash close to the center console. It is near the OBDII diagnostic port. I have included a link to a video showing installation of a brake controller that shows this location. Your truck uses harness # 3035-P and not # 3034-P. You will also need to add a 7-Way connector. For that I recommend # 118242 which also includes the relays and fuses to make the harness functional. You might want to check...
view full answer... - Brake Controller Connector Location on a 2019 Ford E-350I would be happy to help you find the right connector. It is behind the dash at the very top of your console on your 2019 Ford E-350. You will need to pop that panel out and the connector you are looking for will be plugged into the insert. I have attached a picture and an installation video below. You will need the Tekonsha Plug-In Wiring Adapter for Electric Brake Controllers item # 3034-P. This will make connecting your Tekonsha Prodigy P3 item # 90195 a complete plug and play installation.
view full answer... - Recommended Electric Over Hydraulic Conversion Kit for a Tandem Axle Boat Trailer w/ Disc BrakesTo convert your tandem axle boat trailer to a electric over hydraulic braking system, I recommend the Hydrastar Vented Marine Electric Over Hydraulic Actuator for Disc Brakes item # HS481-8067. This kit includes the required breakaway kit and the 7-way connector. It has 1,600 PSI capacity and is rated specifically for disc brakes. If you do not want the 7-Way you will want the Hydrastar Electric Over Hydraulic Actuator Kit for Disc Brakes item # HBA16-252-82. I've attached an article...
view full answer... - How to Install a Brake Controller on a 2017 Thor Motor Coach Vegas MotorhomeThe process to install a brake controller on a 2016 Thor Motor Coach Vegas Motorhome will be the same as the process to install a brake controller on a 2017 Thor Motor Coach Vegas Motorhome assuming they both have the same trailer connector installed from the factory. For a brake controller, I recommend using either the Tekonsha Prodigy P2 Trailer Brake Controller part # 90885 or the Tekonsha Prodigy P3 Trailer Brake Controller part # 90195. The P2 and P3 are our two top selling brake...
view full answer... - Recommended Plug-And-Play Brake Controller For A 2008 Ford F-350 Hey Scott, If you're wanting a brake controller that will plug into your factory wiring harness and won't give you any errors then I recommend going with the Tekonsha Prodigy P3 # 90195 along with the Tekonsha Plug-In Wiring Adapter # 3034-P. The P3 is one of the most reliable brake controllers on the market and it comes with a lot of customization to make your life easier. It can store settings for up to four trailers so that you can easily switch your settings over to handle varying...
view full answer... - Brake Controller for an RV Built on a 2016 Ford E-450 Van ChassisAs far as I know the factory integrated Ford brake controller cannot be installed on the E-Series van chassis because it was not designed or set up for it. But that isn't a bad thing for you because the factory controllers are not nearly as effective as an aftermarket controller can be. And the price is usually much lower. Since 2014 was the last year the E-Series vans were available to the public brake controller manufacturers can no longer test them to confirm if a brake controller wiring...
view full answer... - Engine Will Not Start with Brake Controller and # 3034-P Wiring Adapter Installed on 2009 Ford F-150It looks like you have an incorrect wiring harness connecting the P2 brake controller, # 90885, to the factory brake controller port on your 2009 Ford F-150. The # 3034-P brake controller wiring harness is designed for the Ford E series vans and the Super Duty trucks, not the F-150 trucks. The correct harness for your truck is the Brake Control Wiring Adapter for Ford F-150, # 22292. This harness has the same connector but a different wiring configuration. I produced a short video, see...
view full answer...
Do you have a question about this Trailer Brake Controller?
Info for this part was:


At etrailer we provide the best information available about the products we sell. We take the quality of our information seriously so that you can get the right part the first time. Let us know if anything is missing or if you have any questions.








Thank you! Your comment has been submitted successfully. You should be able to view your question/comment here within a few days.
Error submitting comment. Please try again momentarily.