
")
")


")


 customer photo")
 customer photo")
 customer photo")
 customer photo")
 customer photo")
 customer photo")
 customer photo")
 customer photo")
 customer photo")
 customer photo")
 customer photo")
 customer photo")
 customer photo")
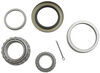
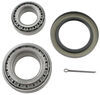
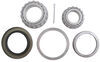
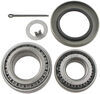
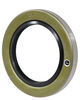
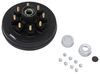
Trailer Hub Grease Seals
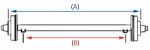
| 2.250 | 3.376 | E-Z Lube End Units |
Videos are provided as a guide only. Refer to manufacturer installation instructions and specs for complete information.
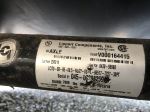
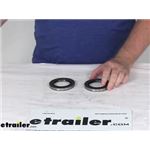
Today we're going to show you grease seals from Truryde, part number RG06-070. With this part number you get one pair of seals. It has an inside dimension of 2.250" and an outside diameter of 3.376". This seal is typically used in applications where you have an easy lube axle and you can also use it on normal axles as well. It has two seals to help keep out water and road grime. When you replace your seal you want to verify you have the right side so you can go by outside, inside dimensions but also look for a number that's on the seal.
In this case, our new it's easy to see, you have the GS-2250DL a lot of times this number will also be printed on the rubber edge as well. You can use these numbers to cross reference to find an exact seal. A couple tips on removing the old seal first before we can install the new seal is that you want to go ahead and just catch an edge right here. You can use a chisel like this and tap it in behind it and pop it out that way, a little bit less desirable but still works is an old screwdriver you don't want anymore, you can beat it up, pop it up like that as well. When you remove the old seal and you use a screwdriver or a chisel, make sure that you only go partway down and try to work it out from there, it is possible you can go through the seal and actually start hammering on the bearing underneath and then you may have to go ahead and replace the bearing at that point. If you can secure a hub, maybe put it in a bench vice, you can actually get ahold of the edge of the seal with a pry bar and using wood blocks, your fulcrum 00:01:35 and pop it up that way. This is not going to come up as easy as I have here of course because mine's been started already, but that'll give you an idea of how to pop it out.
The key to making this work is having to make sure you have your hub secured first. To install the new seal, pretty simple, you just drive it in until it's flush but there is a couple things you want to look out for. The ideal tool is a driver that basically is a completely flat metal surface that you can hammer into place and that's the best way to do it because what you want to do is make sure it fits flush in there. You don't want it oscillating on the spindle otherwise that kind of makes it wear out a little bit faster. If you're on the side of the road or if this is a one off deal, you can also get away with a wood block. Make sure your surface that you use is completely flat and what you want to end up is your seal flush with the hub.
You don't have to drive it fully, it just has to be flush with this edge. With that inaudible 00:02:32 grease seals from Truryde, part number RG06-070.
Customer Satisfaction Score:
99% were satisfied with this product
1% of customers were not satisfied
Ratings & Reviews

Do you have a question about this Trailer Bearings Races Seals Cap?
Info for this part was:
At etrailer we provide the best information available about the products we sell. We take the quality of our information seriously so that you can get the right part the first time. Let us know if anything is missing or if you have any questions.


Thank you! Your comment has been submitted successfully. You should be able to view your question/comment here within a few days.
Error submitting comment. Please try again momentarily.