


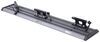
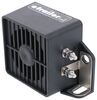
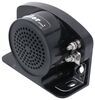
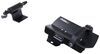
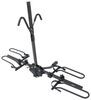
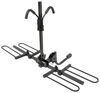
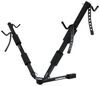
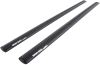
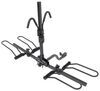
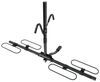
Carry 1 bike on your vehicle's SeaSucker Monkey Bars roof rack with this fork mount bike rack. Carrier clamps onto your Monkey Bars in seconds. Removes quickly for storage in your trunk when not in use.
Features:
Specs:
Videos are provided as a guide only. Refer to manufacturer installation instructions and specs for complete information.
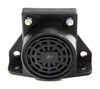
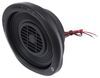
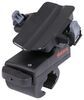
Hi everyone. I'm Evangeline here at etrailer. If you're looking to get a SeaSucker rack or accessory, or maybe you have an old one, here's everything you might need to know about taking care of it, maintaining it, and using it so that you can get the best experience out of it. SeaSucker is really expanded to the point that they now have several mounts of different shapes, sizes, and functions, from their oval mounts on their Ridge Ready roof racks to their four-and-a-half inch multipurpose mounts to their larger capacity large diameter mounts. They all work the exact same way, though, which is that they are vacuum mount accessories. You have your rubber base, and then you have your vacuum plunger.
So this utilizes a small tip that fits into the vacuum mount, and then you depress the plunger to create that vacuum. But over time, things happen, especially for those who use their SeaSucker accessories for some really cool adventures. A lot of people use this with their water sport things, so they're exposed to water, sea spray, things like that. So let's start with some basic maintenance. The most important thing is these right here are not packaging.
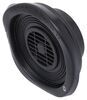
They are protective covers for your vacuum mounts when they're not in use. This is really important, because a lot of people tend to throw these away the first time they get their SeaSucker accessory. You wanna make sure that this is on there every time this isn't mounted up, because this will then protect the rubber of your vacuum mount. It's good to regularly check your vacuum mount. This one has actually been in our shop for about three years now, and it looks really good, because we keep that cover on it.
Now we do have some dirt and some dust that has accumulated on it because of its use. So if you find that that happens, just go ahead and either just pour some water on it, or use some just mild dish detergent to make sure that that is clean. Water is always the first thing I add whenever some vacuum just isn't securing properly. Now that's gonna be something that you may experience with the oval or the smaller diameter mounts just because there's less for them to work with. So always just add some water.
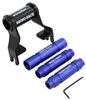
That helps create the seal along the edges. Double-check that rubber pad, double check your surface. But water always helps combine them both. If you did everything right but that plunger just still isn't plunging, well, you can always replace it. So oftentimes your accessory is gonna have a base, and this is usually secured where you can just remove that bolt with an Allen key. This Allen key is often included with your SeaSucker accessory. If not, I'm using a 5/32 wrench. Once this bolt is out, you'll then really reveal the base underneath, and this is often secured with four screws. You can just go ahead and use your Phillips head screwdriver to loosen those screws, and then pop that base off. Now I actually took the vacuum cup with me, but sometimes the whole thing will come off, and that vacuum will stay in. Now this is what we're gonna either fix or replace. You can pull that plunger out with some force, and that will reveal the springs as well as its hip. So this hip is what sometimes gets gunky. You can use lube tube to clean and then relubricate that end, and then you can pop that back in, making sure that that goes all the way in, pushed in. And then you use a plunger a couple times to make sure that it's fully lubricated, or you can use a replacement pump. Many times SeaSucker includes these replacement pumps just as an extra benefit when you get some of their accessories, especially the larger ones that like their roof racks or their larger bike racks. And if you didn't get one, you can always reach out to us right here at etrailer. We do have replacement parts available for you, and if you need help figuring out which one you actually need, well, feel free to give us a call. We'd love to help you get it sorted out. Maintaining your SeaSucker accessories is super straightforward. A quick recap is always hold on to those protective cases and put them on your accessory when not in use. You can always double-check the rubber amount to make sure that you're getting a good seal, and add water to help you out. And finally, if you need to maintain or replace your pump, you just saw how easy of a process that was. So if you're looking into decking out your rig with some fun SeaSucker accessories, maybe you wanna add an awning, a roof rack, a bike rack, or even a waste basket, it's gonna be really easy to do so and easy to maintain from this point on. So hopefully this video helped you out. My name is Evangeline, and I hope you enjoyed the journey.
Info for this part was:
At etrailer we provide the best information available about the products we sell. We take the quality of our information seriously so that you can get the right part the first time. Let us know if anything is missing or if you have any questions.


Thank you! Your comment has been submitted successfully. You should be able to view your question/comment here within a few days.
Error submitting comment. Please try again momentarily.