
To see if this custom-fit item will work for you please tell us what vehicle you'll use it with.
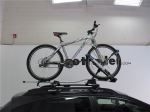
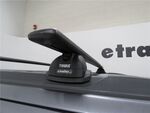
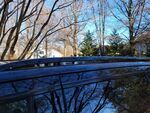
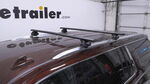
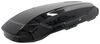
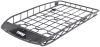
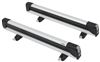
This Thule roof rack lets you carry cargo and gear on your vehicle. Aerodynamic crossbars with split rubber strips in top channels work with channel-mount and clamp-on accessories. Installs to flush rails on your vehicle's roof.
Features:
Specs:
 Alternate Instructions
California residents: click here
Videos are provided as a guide only. Refer to manufacturer installation instructions and specs for complete information.
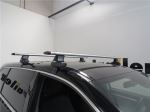
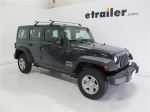
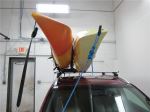
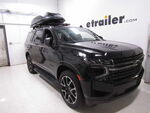
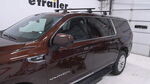
Hi, everyone. I'm Evangeline right here at etrailer, and today we're talking about this Thule roof rack as seen here on our 2021 GMC Yukon. If you have a Yukon and you're looking to carry around some things on your roof, whether it's kayaks, a rooftop tent, or all types of other cargo, you're gonna need a roof rack first. This one is gonna secure to the flush rails of your systems. We'll talk about what you get with that, and I'll also show you to how to get this all installed. For roof rack options for your Yukon, this is usually the one I would first start with because it has a very easy clamping system around your flush rails.
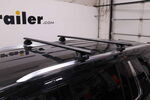
You don't have to make major, major changes, and it's really easy to install. We'll get to that later in this video. You'll also see different color options as well as size options for roof racks. Thule also has a flush version, which is worth looking into if you want a very seedy look. For the Yukon though, I personally recommend getting the longer bars like this one just because it makes it so much easier to load and unload cargo on there.
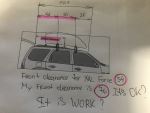
Now, something that always gets asked the best about is overhang. So if you measure from the tower to right before the end cap there, that's gonna be about 3 1/4, 3 1/2 inches of overhang. That will be enough to load some accessories on the edge of your bars, even though they have clamp styles, which, again, makes it easier to get things onto your taller vehicle. And with the clamping style, you can clamp this pretty much anywhere you want on your flush rails, which is nice, because depending on what you're carrying around may change where you want your roof rack. You can put this further back if you want more sun roof access.
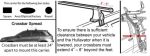
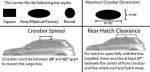
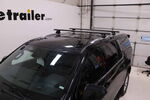
You can put this further forward if you're carrying around a really long kayak and you want hatch access, things like that. Crossbar spread is measured from one crossbar to the other. So being able to adjust means that if you have, like, a roof box or a ski carrier that requires a specific distance apart, you can get it all by yourself. Something I always think about too is how easy is it to get into the car and load things up onto the vehicle So here on the Yukon, this is actually my recommended positioning for the crossbars where it's accessible but not in the way for you getting into the car. Here you can see as the sunroof opens that there is clearance underneath the crossbars.
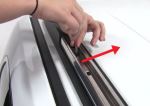
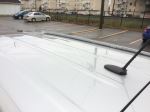
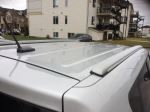
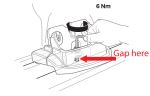
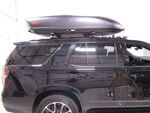
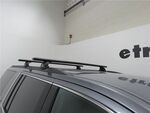
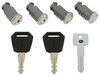
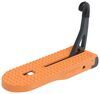
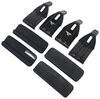
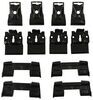
So a measure for roof clearances, there's two measurements there. One is that space underneath the crossbar for if you have items clamped around, with the sunroof up, as well as this crossbar sitting over it, it's about two inches, I'd say closer to 1 3/4 inches of space. In the back, without the sunroof, that's gonna be about 3 1/2 inches of clearance. And that's something to consider if you have large U-bolt style clamps that take up a lot of space. Many modern accessories have smaller clamps, or you also have the option of just using T-track mounted accessories where they stay on top of the roof and there's nothing underneath. So that's something worth considering with the placement of your roof rack and where you have your item. Oh, also how high is the roof rack up and off your roof Well, from the roof to the top of the roof rack, I have it around 5 1/4 or 5 1/2 inches, depending on where you measure, and that's gonna be where your cargo sits. So be mindful of garage doors, garage clearances, low bridges, whenever you have, items on your roof, as well as if you have skis, to make sure you have clearance where you're not scratching up your roof with that cargo. Now, here at etrailer we offer the full roof rack kit, and that's because there are multiple components here. You have your crossbar up top available in different sizes and colors. You have your tower, which is what gives you the base and the structure, but most importantly, you have your custom fit kit. You can see that our fit kit here has rubber that sits perfectly contoured against our flush rails as well as hooks that grab onto the flush rail ridges. That all works together to create our crossbar system. That's why if you use our fit guide here on our website, put in your year, make, model, that will guide you to the options that are confirmed fits for your Yukon. As someone who installs a lot of roof racks and has owned different roof for my car, this is a good fit. I like how it sits on our Yukon. You have a little bit of a overhang, so you can put some accessories out over there, but it doesn't stick too far out where it looks obnoxious. I like how it looks. The black version of these Thule bars are sleek against our white Yukon, but this is also available in a silver or aluminum color variant. With that in mind, if you're looking between the different brands of the different sizes, feel free to ask questions at any point trying to find the right fit for you, but I think this is gonna be a great fit. At this point, you're just gonna have to figure out, what are you gonna put on it for your adventures So, taking a look at the install of our Thule crossbars with the 60-inch bars, the Evo feet, and the custom fit kit for 2021 GMC Yukon. Stick around. We're gonna start from the very beginning with putting all of our little pieces together. Now, it might seem a little confusing at first because there's a lot of small parts, but the process is pretty straightforward once you know what you're doing. I already installed the rear crossbar, so we get to install the front crossbar together. Setting up your crossbar, you have these rubber fill-ins for the channels. You're gonna have to split these apart and then fit them into your crossbar. The arrow portion faces the high end of your bar, and then the flat channel is towards the back right where your Thule logo is. Underneath you'll have this measuring stick, and this really just slides underneath the channels. You're gonna have that top tab facing up, and you'll use this later when you get the tower on. To assemble the tower, since this has clamps, these parts have A, B, and C on them just to guide you along that process. So we're going to start with A, and this will fit into the tower just like that. We are gonna hold that in place with B, which is the rubber pad, and then C will fit onto that first hook and then will be held in place by this included nut. So all of this is included with your tower as well as your fit kit box. Your tower will then slide onto the side of your Thule bar. We're not gonna put the measurements just yet simply because that will be different depending where we put this on the roof, but we can put on our end cap, which just pops right in. (end cap thudding) Included with your tower end caps are going to be these plastic lock cores, which really just push right in. If you we inchesre to be using the metal lock cores, and that is sold separately, as the one key system packs, this is when you would switch that out. Now, that's something people use if they want everything in their whole Thule system, not just a roof rack, to all be keyed alike. The Yukon is a tall and large vehicle, so even with that, we can still get our roof rack on here as long as we do this carefully. We're gonna line up the towers with our flush rails, and then we're going to figure out, where's the best spot to put them Now, make sure first that your crossbar is facing the right way, tall part up front, tapered part towards the back, and then we're going to go for a specific crossbar spread and then make sure that's even on both sides. For crossbar spread, I measure front to front, and we have about 27 inches, which is pretty good in terms of works with a lot of accessories. And then for your overhang, I measure at around from the tower to before the end cap, around 3 3/4 inches. And that might change a little bit, but if it measures the same on both sides, then you can go ahead and tighten down. Whenever I tighten down roof racks, I always try to evenly tighten them down. So one side I'll go till the hook touches the rail and then I'll go further on this side and then I'll go back and tighten that one down fully. So just that back and forth means you're not pulling the whole system one way to the other. Thule includes this torque tool to tighten down at these towers, and you're gonna tighten down until the tool clicks, and this function will prevent overtightening. Now, there's a good amount of torque in that. (tool clicks) And there we go. We'll tighten down all four towers until all of them click. To prevent whistling down the road, we'll make sure that every part of the crossbar is covered. So you have these rubber fill-ins that are included as well. And we're just gonna do this while our crossbars are installed where I push the fill-ins similar to our wind strips up top, and then make sure this is cut right where the end path is. (scissors snipping) And then push that piece into the crossbar. Notice how flush that is. That will help prevent whistling down the road. Final step is to put your end caps on, and these just push into these towers, making sure it's fully clicked in. You can then get a flathead screwdriver and just turn that plastic lock core until it goes into the up-and-down position, showing that it is locked. And that's gonna be it for your install. I like to just give these towers a good old shake just to double-check that they're all good before I start loading it up with all kinds of fun accessories to hit the road.
Ratings & Reviews


Do you have a question about this Roof Rack?
Info for this part was:
At etrailer we provide the best information available about the products we sell. We take the quality of our information seriously so that you can get the right part the first time. Let us know if anything is missing or if you have any questions.


Thank you! Your comment has been submitted successfully. You should be able to view your question/comment here within a few days.
Error submitting comment. Please try again momentarily.