
To see if this custom-fit item will work for you please tell us what vehicle you'll use it with.


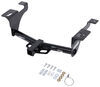
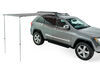
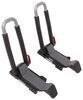
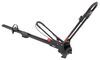
This heavy-duty, versatile Yakima roof rack comes with strong, aluminum crossbars. It works with channel-mount and clamp-on accessories, plus each bar has tie-down points on the endcaps. Installs to raised rails on your vehicle's roof.
Features:
Specs:

California residents: click here
Videos are provided as a guide only. Refer to manufacturer installation instructions and specs for complete information.
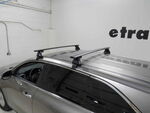
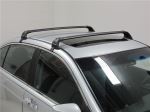
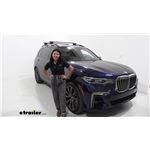
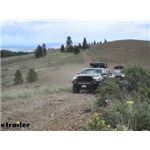
Hi everyone, it's Evangeline here at etrailer and today we have our Yakima Roof Rack. We're gonna take a look at how it fits as well as how it installs here on our 2022 BMW X7. If you're looking to carry around some fun accessories, maybe a roof box or a kayak on your X7, well you're gonna need a roof rack system first. Fortunately, you do have these raised rails on your SUV, which makes it a lot easier to find a roof rack as well as install the roof rack. Now for the Yakima Roof Rack, this is gonna be one of your more premium options. We have extra stability, there's an extra way to tighten it down, but I think it's great because it looks a lot more low profile compared to some other brands, but there are some downsides to this specific fit too.
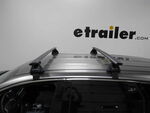
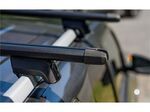
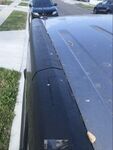
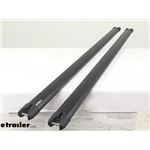
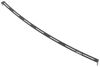
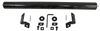
So these are the 50 inch long JetStream crossbars, which are the recommended fit for your vehicle. But if you ask me, I would actually recommend these 60 inch long crossbars. Now this is a recommended fit because it's more low profile. Doesn't stick out past your vehicle much, you barely even notice it from the ground. But if you really wanna fully utilize having a roof rack, then getting a longer crossbar may help out with overhang because currently you have 1/2 and inch of overhang, which is measured from the edge of your tower to the crossbar.
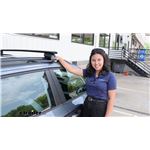
So you really can't clamp much around that end. But if you had a 5 inch longer to this side crossbar system, it'd make it a lot easier to reach as well as get things onto your roof. Having raised rails also helps a lot with versatility, so it did make it easier to get your roof rack on there, but if you needed to adjust this forward or backwards, you can do so. So let's talk about crossbar spread. That's a distance from one crossbar to another.
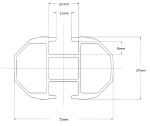
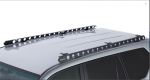
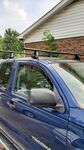
I currently have it at 26-1/2 inches apart and that's measured to the center. The maximum distance you can have it apart is up to 59 inches, which is very impressive. Now let's talk about roof clearances. So there's two measurements here. One is distance below the crossbar and the next is the height of the crossbar.
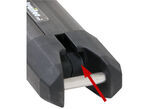
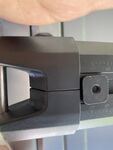
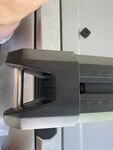
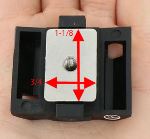
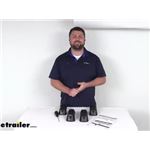
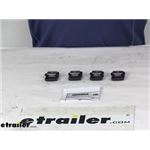
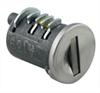
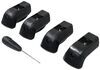
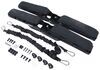
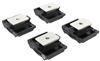
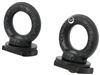
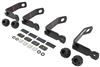
So measuring from the bottom of our crossbar to the bottom of our roof, I have it at 3-1/2 inches. So that's a measurement that's important if you have it over your sunroof to make sure that there's clearance for that sunroof window to open up. The next is to see if there's clearance for clamps and straps from your accessories to make sure they don't hit the roof. The next one is gonna be that height. So top of roof to top of crossbar, I have it at about 4-1/2 inches and that's gonna be where your cargo sits. So sometimes maybe you're carrying around skis with extra tall bindings and you you need to make sure that there's enough space for those bindings. If you don't, that's when you start investing in accessories that give you more height. The JetStream bars are aerodynamic bars, so they're taller in the front and they're tapered over in the back just to guide that wind through to be more aerodynamic, especially compared to your traditional round and square bars, which are a bit noisy on the road. Now the JetStream bars are also different in that they have these wind strips or these T tracks in the center, so you can slide those T track rounded accessories through if you don't wanna have to deal with any clamps going around your bars. The way the Timberline Towers work is they have this strap that goes around your rails and secures your whole system. Inside the strap you have a metal strap and that way you can't just cut through the tower. The tower is loosened and accessed by these bolts on the inside and then that creates that really secure fit. Now compared to some other brands that are just clamps that pinch the side, I like this style more because it provides that all around grip. So personally, if you're looking for a premium rack for your BMW X7 then the Yakima Roof Rack is probably gonna be the first one that I would suggest. If anything though, I do recommend considering the 60 inch long crossbars, especially since your vehicle's a bit high up there and it makes it a lot easier to reach. But if you do want a more low profile sleek almost factory look, then the 50 inch bars are the way to go. This roof rack is gonna get include everything you need to install it from the tools to the tape measure to of course your kit. What's not included is gonna be your lock core. So those are gonna be the same key system lock cores and you can get them in a larger pack of multiple quantities. Another thing that included is the Moki Door Step. This is what I use to install this roof rack. I hook it into the door and this gives me a lot of extra height to tighten things down and load things up. Now let's take a look at that install. So for setting up your towers and your crossbars, it's actually a very simple process, although there is a couple extra steps compared to your usual raised rail system. So the first thing we're going to do is we're gonna get our crossbars and we're gonna set up our towers. Since we're using the JetStream crossbars today, I already have the JetStream adapters installed. We're gonna get our tower and we are going to open up that door. If you are using these separate same key system lock cores you can replace them here. And what we're gonna do is we're just gonna double check that this is loose and this middle one is loose. Now you want this loose enough where you can pull the strap out and then get access to the center. I'm gonna actually push the strap in so you can get access to that center bolt right in there. That is something that needs to be tightened down once the tower's on the bar. To get the tower on the bar we're gonna take off this end cap first. Now this is gonna come off and we have used this bar several times. We do have some wear and tear but it's still definitely usable. We're gonna get our tower on there. So what I like to do is I like to slide both of them through from one side. So there's one and then here's the other one. This just makes it so I don't have to take off two end caps. Notice here before I slide them all the way through the orientation of the straps, you can tell this is having the straps open on both sides. With both towers in place we're then going to put the end cap back on. So from here, usually you would get your cross bar, put it onto your roof, figure out where on your raised rails you need it to be, figure out the distance your towers need to be at from each other and then take it off to tighten it back down. Now I already did that whole thing with our rear crossbar, so I don't need to do that test fit 'cause I know exactly where it needs to sit and I'm gonna tighten it down while it's right here on the table. So for a quick example, I have it at the 36 inch mark. It's gonna be pretty close to the end since you don't need much overhang and that's where we're gonna tighten down. So remember that hole we looked at earlier. Once you push the strap in, well we're gonna tighten that rack down and that's gonna fully secure and seat the crossbar to the tower. Now do this until your torque tool clicks like that. So every time you need to tighten down a bolt you need to make sure you tighten it down properly to where it clicks. Now it's time to get our crossbars onto our roof. So you want this at a distance that makes sense for whatever you are carrying. For example, if you're carrying like a longer kayak, you'll want it further apart. If you have a specific roof box, you need to make sure you have it at the spot that the roof box may require. And once you've found that spot then we're gonna tighten this down. So this strap goes up and into the tab like that. Once you've done that on both sides you then tighten down this bolt as well as we bolt up top. Once all four towers are tightened down and they all click, let's put the end caps on. These fit right onto your towers. And again, if you are using the same key system lock cores double check that you switched them out. And that right there was a look at our Yakima Roof Rack with a 50 inch long JetStream crossbars and the Timberline Towers and you saw it on our 2022 BMW X7.


Do you have a question about this Roof Rack?
Info for this part was:
At etrailer.com we provide the best information available about the products we sell. We take the quality of our information seriously so that you can get the right part the first time. Let us know if anything is missing or if you have any questions.


Thank you! Your comment has been submitted successfully. You should be able to view your question/comment here within a few days.
Error submitting comment. Please try again momentarily.