


Thank you! Your comment has been submitted successfully. You should be able to view your question/comment here within a few days.
Error submitting comment. Please try again momentarily.


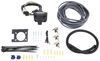
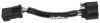
Hooking up a gooseneck or 5th wheel trailer usually means long cable runs to the bumper socket. This Pollak wiring harness solves that by teeing into the existing rear 7-way and providing that same connection inside the bed. You get full 7-blade functionality right where you need it for easy hookups and cleaner cable routing.
The harness uses a T-connector that plugs directly into the round U.S. Car Connector at the factory 7-way. There’s no need to cut wires or tap into circuits. Just unplug the factory connector, insert this inline, and you’re ready to run power, lights, brakes, and reverse signal to the new port.
One end of the harness comes pre-terminated with a 7-pole plug while the other has unconnected wiring leads. That gives flexibility if you want to use your own 7-way socket or integrate with an existing setup. The color-for-color wiring scheme makes connecting easy and keeps everything consistent.
Built around Pollak’s trusted 7-blade configuration, this harness handles the same heavy-duty towing circuits as your main connector—running lights, turn and brake signals, reverse lights, brakes, and 12V power. The molded connectors and locking keeper ensure a secure fit that stands up to frequent use and road vibration.
Videos are provided as a guide only. Refer to manufacturer installation instructions and specs for complete information.
Today in our 2013 Chevy Silverado, well be installing the Hopkins Endurance 6-Pole Trailer Connector Socket part number HM48420. This will be in conjunction with the Pollak 5th Wheel and Goose Neck Trailer Connector Wiring Harness part number PK11932. To begin our install, well take our Hopkins 6-Pole and make sure we have a hole saw large enough so that the 6-Pole can be mounted in our bedside. Were going to mount it about right here, so well go ahead and take our hole saw and drill a hole in the bed liner and side. Now we can take our wiring harness and feed it from underneath up and out the free drilled hole. Once we feed it through, well go ahead and pull it out so we can work with the end. Typically we would install a seven blade end that would connect to this wiring harness, but because we need a 6-pole trailer connector to connect to our trailer end, were going to go ahead and remove each one of these connectors.
The yellow wire will not get used at all. Well go ahead and cut off the ends. Well then go ahead and remove some of the wire loom to give us a little more working room. Ill simply take my utility knife and cut off some of the wire loom. Ill go ahead and take the yellow wire and run it back into the wire loom as it will not be used for this application, then well strip back our wires. Next well take the connector and feed the wires through it.
Well go ahead and loosen this set screw on the top connection which would also be TL for taillight. Well take our brown wire, put it into the connector and then tighten down the set screw to hold it in place. Well go clockwise around our connector, loosening the set screws, installing the wires and then securing them with the set screw. Next, its marked as AX/EB for the electrical brake connection point. Our wiring harness, that will be the blue wire. The next connection is marked RT for right turn signal will be the green wire.
Then well have LT for left turn signal will be our red wire. The center post will be for the black wire which is power to our trailer. Then we have GD for ground that will be our white wire. This ground wire is a little bit larger than our connector will allow for so were just going to trim off just enough wire to get it into the connector. Once we have it in, well tighten it down. Now once we have all the wires installed, tightened down and secured, we can wrap it up with some black electrical and then install the cover.
Well lock the connector in place and tighten down the set screw then well go ahead and finish wrapping up our wires with a black electrical tape. Once weve got it wrapped up, were ready to install it. We can secure it here directly to the bedside with some long self-tapping screws to go all the way through the bed liner into the sheath metal of the bedside. Take the wiring harness, feed it up over the frame and follow the manufacturers wiring down behind the bumper. Here behind the bumper, we can locate the manufacturers electrical connector going to the manufacturers seven blade. To remove it, well release the locking tab on it, a little easier with a flat blade screwdriver and gently prying out. Press on it releasing the connector from the back of the 7-pole. Next, well take the new wiring harness, plug directly into the manufacturers wiring, firmly pressing it together and reconnecting the connector lock. Well take the other end of our wiring harness and replace the manufacturers connector in the back of the 7-Pole, plugging in line with the manufacturers wiring, well firmly press it in place, lock it in position and then push on the connector lock. Then once we have it all connected, well go ahead and secure it with some black zip ties as necessary. Now that we have the wiring secured, well go ahead and cut off the excess zip ties to clean up our install look. That completes the install of the Hopkins Endurance 6-Pole Trailer Connector Socket part number HM48420 in conjunction with the Pollak 5th Wheel and Goose Neck Trailer Connector part number PK11932 on our 2013 Chevy Silverado. .
Customer Satisfaction Score:
99% were satisfied with this product
1% of customers were not satisfied
Ratings & Reviews


Larry

2/23/2022
Still working great!
Steven
1/23/2018
The Custom Fit Vehicle Wiring is still working as advertised. It makes hooking up my Fifth Wheel easy. Thanks for everything,


Brooke M.
3/1/2025
Simple is always a plus!


Do you have a question about this Custom Fit Vehicle Wiring?
Info for this part was:
At etrailer we provide the best information available about the products we sell. We take the quality of our information seriously so that you can get the right part the first time. Let us know if anything is missing or if you have any questions.


























Glenn D.
11/10/2020
No malfunctions. Thx again