
 Product Experts Available Now!
Call 1-800-940-8924


Thank you! Your comment has been submitted successfully. You should be able to view your question/comment here within a few days.
Error submitting comment. Please try again momentarily.

Videos are provided as a guide only. Refer to manufacturer installation instructions and specs for complete information.
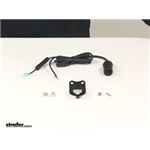
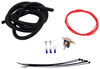
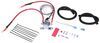
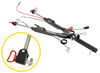
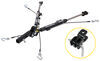
Speaker 1: Today on our 2017 Ford Edge you're going to be taking a look at . I'm going to show you how to install the Roadmaster 12 Volt Outlet Kit, Part Number RM-9332.This is what our 12 volt power outlet looks like when it's installed. Do you see here I have it installed in the corner of the dash This is going to give us that extra 12 volt power that we may need for a portable braking system or maybe we just want an extra outlet.This one is going to work with the key in the off position. It's going to have two wires that come off to it. One's going to be a ground and the other one's going to hook to a fuse.Now that we've taken a look at it, let me show you how to get it installed.First thing we need to do is we need to find a fuse, the hot fuse. There's actually a fuse panel.
Our directions are going to tell us to run the wire outside. We don't have to.Back behind our panel here there's actually the fuse panel up on the left side of the steering column. We're going to take this, and we're going to pull this out, so we just pull out like this, kind of lift up on the bottom. It will pop loose, and we'll pop it out.If you see these fuses here, what we're looking for is a 20 amp fuse that's going to be hot when the ignition is turned off. For right now we have our ignition turned off.
We're going to take a test light, and we're going to test our fuses.Is this bottom on I don't have anything. Okay, so that 20 amp fuse right there is going to be our fuse.The next thing we need to do is remove that fuse. You can get up underneath the dash inaudible 00:01:38 remove it unless you have a pair of pliers like this. They're pretty long. They have a little bend at the end like this.
Just reach in. Pop that fuse out.Next thing we want to do is we want to test each side of where that fuse was installed and find the hot side.Once you've determined your hot side for your fuses, you're going to have a fuse tap in the kit. It looks like that. We're going to slide it on one side and you're going to make sure that it slides all the way down on there, so end result, this is what we want our fuse tap to look like when it's on.Now we want to make sure that the fuse tap goes on the hot side that we tested and located on our fuse panel. In our case if our fuse is installed like this, it's going to be on the outside or towards the door.So now we put our fuse back in place.
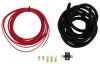
We're going to have our bracket. We're going to have our plug.Our plug actually is going to sit like this in our bracket so we got to take our wiring, feed it through our bracket just like that.Now we can connect our terminal to our fuse tap, and this is going to be for our ground. Now your kit's going to come with a self tapping screw for your ground, unless you can find a suitable place that already has a screw on it that's metal to metal that you can ground it to.I'm going to go ahead and separate these just a little bit, go ahead and install my terminal onto my fuse tap.Next we're going to mount our ground wire. Right behind this carpet we got some metal from the inside of the body. I'm going to use that. I'm going to use the 5/16" socket and then my smaller self tapping screw that comes in the kit. If you don't have a magnetic socket, which this one is not, take a little piece of paper towel like this, put it over the end, and then put your self tapping screw in. That will actually hold it while you're screwing it in.I'm going to start the hole first before I put my wire on.Now what I did is I pull my wires kind of up through here. I'm going to get this set in place. I'm going to actually mount it right there. Then I can reach in here and zip tie my wires all up inside here so they stay up out of the floorboard here of the driver.We'll take our two larger self tapping screws that come in our kit, 3/8" socket, this one happens to be magnetic. That's secure.Now we can zip tie up our wires behind our panel here.We're going to test it out to make sure it's working properly. You see that very center rivet there That's what we're going to be touching. This whole thing is metal so we only want to touch that center, so we're going to wrap this with some electrical tape all the way down to the tip there.Now we'll touch. See where we're working That's with the ignition off.If you have a braking system, you just want an extra 12 volt power outlet in your vehicle, this is going to work great. You can put your braking system in, plug it in, and it's ready to go even when your vehicle is in the off position.Now that we've got it installed, we know it's working. We go ahead and put that back into place, and we're ready to go.That will do it for look at an installation on the Roadmaster 12 Volt Outlet Kit, Part Number RM-9332 on our 2017 Ford Edge.
Customer Satisfaction Score:
96% were satisfied with this product
4% of customers were not satisfied
Ratings & Reviews


James L.

7/14/2022
It performs perfectly. I am extremely satisfied with the product.
Jimd
7/28/2018
Still performing great. Easy installation. I recommend this kit.

Do you have a question about this 12V Power Accessory?
Info for this part was:
At etrailer we provide the best information available about the products we sell. We take the quality of our information seriously so that you can get the right part the first time. Let us know if anything is missing or if you have any questions.





























































Jim H.
1/2/2021
Awesome. Great power source for cell phone charging or an inverter for powering a laptop