


Thank you! Your comment has been submitted successfully. You should be able to view your question/comment here within a few days.
Error submitting comment. Please try again momentarily.


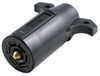
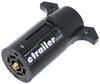
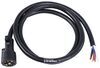
This molded, 7-way, RV-style, trailer-end connector allows you to connect your trailer to your vehicle. Durable molded rubber construction and corrosion-resistant terminals withstand the elements.
Features:
Specs:
Videos are provided as a guide only. Refer to manufacturer installation instructions and specs for complete information.
Speaker 1: Today we'll be having a look at, and showing you how to install the Mighty Cord, 7 way RV style trailer connector. Part number A10-7W8. Now your cord can become damaged in many ways. Most commonly, you forget to unplug it when you uncouple from your fifth wheel trailer or your other type of trailer that you have, and it breaks off or tears. Something of that nature. Or it drags on the ground somehow when you're towing your trailer and it wears holes in the wire.
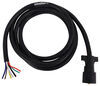
That's a good situation where you're justified replacing it.Now the replacement cord that we have here today is a molded design. What that means is that our connector is molded onto the cable end to help prevent moisture from getting inside. We have a total length of eight foot of wire to go to our junction box or our unions where our wires will meet the rest of the wiring on our trailer.This is an ideal replacement for broken, damaged, worn out, frayed connectors for your trailer. This will work with fifth wheel trailers, gooseneck trailers. Any trailer out there with a seven way connector, this will work for it.
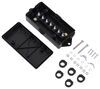
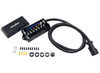
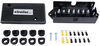
This seven way connector is available in various different sizes to fit your needs or your application. It's super easy to plug in. Just line up the tab on the top of it, and slide it into your seven way on the back of your vehicle.Here's what it looks like installed in conjunction with a junction box. A junction box makes it easier for you to add replacement lights down the road, or to add additional lights or other features to your vehicle or trailer that can work off of your seven way connector. Now that we've gone over some features of our Mighty Cord seven way connector, we'll show you how to get it installed.
We're going to cut off our existing seven way wire past all the damaged section, making sure we leave enough slack in it to reuse our junction box.You want to make sure that you have your batteries disconnected on your trailer at this time if you have any. This is the junction box we're using. We're going to take our cord, measure a little bit less than the full length of it, and we will cut off the outer sheathing. Okay, once we have it cut all the way through, we can pull back the sheath, exposing our wires inside.Now, we'll open up our junction box. Now inside the junction box, you can see it's labeled with the corresponding colors.
You have your white, your black, your yellow, your red, green, brown and blue and the corresponding functions which are correct in most applications. But because we're just using this to combine our old seven way wiring with the new seven way connector, we'll just match them up by color.Now we'll take one of our grommets that comes with the junction box. Slide our wires through it. Make sure the sheathing goes inside of it. Take our junction box now, take out one of the knock outs, slide the grommet into that hole. Okay, now we'll secure the wire with a clamp and our provided screws and we'll tighten these down so the wire can't be pulled out. On our replacement seven way, I went ahead and cut off some more of the sheathing. I'll slide another one of those grommets over the wires and down onto the sheathing itself. We'll go through another hole and we'll clamp it in place just like we did the other one. Now I'll pull back and make sure it's secure.Now we can start stripping back our wires, cutting them to length, and matching up with the corresponding colors. We'll start with our blue ones first. We'll strip back some insulation from both blue wires and on each blue wire we will attach some small yellow ring terminals which we have available on our website, clamp them in place. Slide them over the stud for our blue terminal. Place on one of our star washers followed by a nut, and we'll tighten that down.We'll continue this process for all of our colored wires, matching them up color to color. All right, with them all secured and matched up properly, we now have a proper electrical connection and if we need to add any accessories later to our trailer such as extra lights, we can easily do it inside of our junction box.With all of our connections made, we'll put the cover on, resecure the screws and now we're going to mount our junction box up next to this other electrical box in our king pin box. We'll be using a couple self tapping screws to secure this. Just like that, with our screws installed, our junction box is secure, and is readily accessible in case you need to make any repairs or add any electrical accessories such as additional lights.Now that we have everything installed, we'll take our new plug and we'll plug it into a seven way in the back of a truck the test out all of our functions to make sure everything is working correctly. Okay, we'll start by turning our headlights on. See our taillight running lights are working properly. Do a left turn signal. That works. Right turn signal. That works. Step on the brakes. Those are working. While we're stepping on the brakes, we'll make sure our turn signals work correctly.That's all good. Everything is working properly. That completes our look at and showing you how to install the Mighty Cord Seven way RV style trailer connector, part number A10-7W8.
Customer Satisfaction Score:
99% were satisfied with this product
1% of customers were not satisfied
Ratings & Reviews



Taha

8/20/2018
Its been a year since I got this. The cord has stood the test of time. I dont store it outside so weather isnt the challenge. Its more like the long summer drives. Condition wise it is 98 good, just minor scraps and scratches. No connectivity issue or shorts. I would highly recommend this over others.


Mike L.
3/4/2019
There is more than one accepted color code for wiring a 7-way trailer connector. We explain the color code above in the product description.
Mike L.
2/27/2018
The trailer connector you purchased does indeed use a different color code, which is why we specifically mention this on the product page. The connector would wire up as follows- White wire is Ground, Red wire is Left TurnBrake lamp, Brown wire is Right TurnBrake lamp, Green is Taillights, Blue is Trailer Brakes, Black is 12-Volt power from battery and Yellow is an auxiliary circuit, frequently used for the reverse lamps.
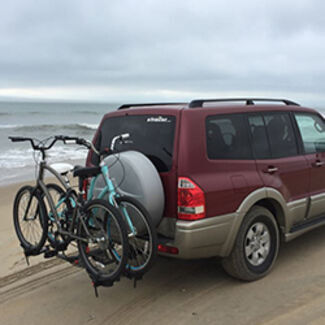
Mark P.
2/2/2018
Holding up very well

Sierra K.
12/30/2021
Brown is for tail lights on the traditional SAE board, but for this particular wiring, it is green. In this attached help article, it shows the color chart under the RV standard wiring. It is necessary to test each color as it may be completely different on your set up.
Helpful Links

Captain H.
7/26/2019
Still happy as on day 1

Steve
3/6/2020
Just fine, no problem
Charlie S.
8/9/2018
it works fine, no problems this year
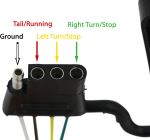
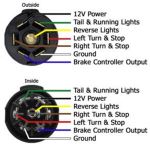





Do you have a question about this Trailer Wiring?
Info for this part was:
At etrailer we provide the best information available about the products we sell. We take the quality of our information seriously so that you can get the right part the first time. Let us know if anything is missing or if you have any questions.





















Mike L.
7/2/2026
There's more than one 'accepted' wiring configuration, which is why we list the correct color code on the product description page.