
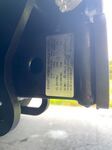
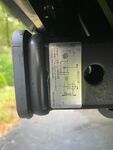
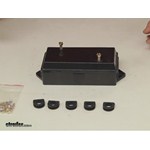
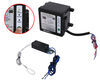
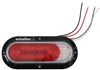
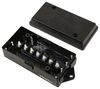
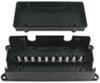
This Spectro trailer wiring junction box provides a fast, easy way to connect the wires from the trailer connector to the wiring for either a 6-way or 7-way connector. Makes replacing your trailer's connector simple.
Features:
Specs:
Videos are provided as a guide only. Refer to manufacturer installation instructions and specs for complete information.
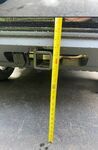
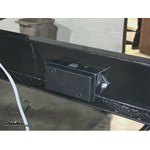
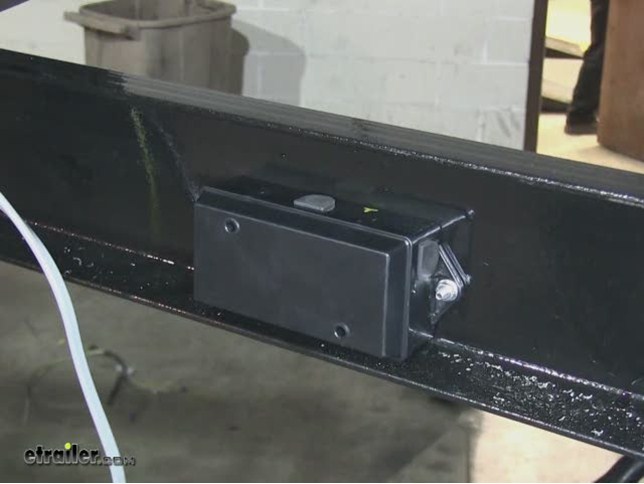
Today were going to install part number 38656. This is a trailer wiring junction box. First thing were going to do is find the location for our junction box. Were going to go ahead and install on the inside edge of the tongue. Well go ahead and hold it up to the tongue and then well go ahead and use a drill to mark it for our holes. We have our holes marked, well go ahead and remove the box, and then go ahead and drill out our hole.
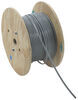
Now well go ahead install our hardware and install our box. Now were going to use a quarter inch hardware to install the box to the frame. This hardware does not come with the box. With our box installed, we can go ahead and start getting our wiring ready. Well go ahead and cut our wires to the length of what we need and then well take our excessive length from our gray cable and use the white wire for our ground lead.
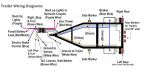
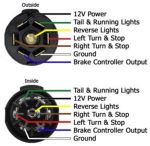
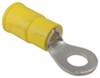
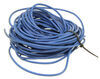
Were going to take the white wire, well add a couple of ring terminals, and well go ahead and connect it to the post labeled white and ground. Well also change out one of solid grommets for a hollow ground. With our new grommet installed, well go ahead and fish our wire through, and attach it to the box, and then were going to use a self-tapping screw to attach it to the frame. Now well go ahead and get the rest of our break cable ready, the gray cable will be for our electric brakes. Well cut back the gray sheath to expose our two wires.
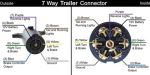
Our white wire will go to ground, our black wire well go ahead and post to label blue, blue is only the function for brakes. Well go ahead add some ring terminals to it, then temporally put them into position. Now well go ahead and hook up our wires for our trailer lighting, well also go ahead and run it through the grommet and then go ahead and install our ring terminals. Now the brown wire on our trailer will be even running light circuit that will go to the post labeled brown, it will also say taillights on there. The green wire will be our right turn signal, well go ahead and connect that wire to a post labeled green, and it will say right turn.
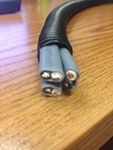
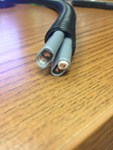
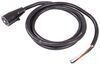
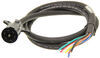
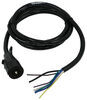
The yellow wire well be our left turn signal and that will be connected to post labeled yellow and left turn. Now these wires have been loosely installed. Next well go ahead and wire our trailer connector, this is going to be a seven molded trailer wire connector, eight foot long, part number h20046. You see the seven pole and we have our wires. Once thing to know about this is that the functions do not match the colors better on the trailer. Now on the other side of the box well go ahead and replace them with solid grommets with a hollow grommet and well go ahead and run that over our wire that we can go ahead and push the wire back into the box. Then well go ahead and add our ring terminals to our wires. Now well go ahead and start attaching our wires, well start off with the green wire from the seven-pole which will be our running lights; this will be connected to the post with the brown wire from the trailer lights. The brown wire will be our right turn so that it will be connected to the post with the green wire from the trailer lights. The red wire will be the left turn function on the seven-pole, so well connect that to the post with the yellow wire from the trailer lights. Our blue wire will be our brake control power, so well hook that up to the post labeled blue. Now our yellow wire is usually reserved for reverse light or whatever function youd like. However, this application is not being used, so well just ignore that wire. Our black wire will be our 12 volt power supply, however this trailer is not using it right now, but well keep it to the junction box for our upgrade in the future. Well now go ahead and take our white wire push it to the ground from our towing vehicle that will be transferred to the trailer and well connect that back up to the white post, well get two white wires. With all of the wires in place well go ahead and tighten down the nuts. Next well go ahead and install the clamp from the wires that come in from the trailer side. Looking at the box on the left hand side there is provision for a clamp. Well make sure everything is pushed together properly and wont get pinched, well go ahead and install the cover. Well fasten and replace of these two bolts. Thats what it takes to install our junction box. All right with that it will finish it for our install of part number 38656, a trailer line junction box on this new trailer.

Perfect for home made trailer
Good quality. Good Price.
good product for easy wiring
Will Do Business Again!!!
excellent product... easy install ...
Great product, weather proof...
excellent product
Merchandise as described
Good Quality
nice way to keep wire organized.....
Fast shipping and super easy install!
nice for keeping wires sep. and a good test point
Great product, A little tight when you get everything hooked up though.
LIghtning fast shipping and the product is exactly what I had hoped for.
Thanks
Excellent item when replacing a cable/connector. Sure beats a regular splice. Good product. Fast Service.
Works well on my trailer. Easy to install.
Very High Quality, Sealed from the Elements. Do not expect to have to redo for some time......
A real must have for wiring a trailer. Large capacity and weather tight.
Just the right product at the Right Price.
Works great! Makes for a nice tidy connection.
Nice product! Like how they label termials inside.
Just what i needed to make the wiring job nice and neat, and at half the price locally
Great box. would be nice if there was a clamp on both ends so you could clamp down wires in and wires out.
2nd time purchasing from E-trailer, always easy to order, aways prompt delivery, and always ready to help you. Product is what I expected in great shape when delivered. I recomend using this splice box when installing your next wiring set up, easy to install and easy to trouble shoot your wiring.
Great Communication throughout entire order. On-time, Everytime! Truly a World Class Company! Thanks!

Do you have a question about this Accessories and Part?
Info for this part was:
At etrailer we provide the best information available about the products we sell. We take the quality of our information seriously so that you can get the right part the first time. Let us know if anything is missing or if you have any questions.


Thank you! Your comment has been submitted successfully. You should be able to view your question/comment here within a few days.
Error submitting comment. Please try again momentarily.