


Thank you! Your comment has been submitted successfully. You should be able to view your question/comment here within a few days.
Error submitting comment. Please try again momentarily.
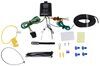
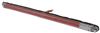
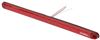
Auxiliary indicator lights adds visibility and safety to a cargo carrier, bike rack, or other towable accessory. LEDs in each strip correspond with brake, turn, and running lights. Includes 2 light strips, adhesive backing, and wiring harnesses.
Features:
Videos are provided as a guide only. Refer to manufacturer installation instructions and specs for complete information.
AJ What's up everybody. It's AJ with etrailer.com. Today we're gonna be checking out the Curt Auxiliary LED Indicator lights. Now you can put these on a bunch of different accessories we've got them installed on our cargo carrier here today. It's a four-pole that plugs in. And then now you have lights that match your taillights on your cargo carrier or bike rack.
Let's check it out. Take a closer look at them. You see the LED lights here. There's LEDs up on the top layer, and then there's going to be a bottom layer of those. Those are going to come on when we activate our taillights or our hazards.
So we're gonna run through the functions real quick right now we're gonna hit the brake lights first. You see how it lights up a little bit brighter that way, matching the brake lights on your vehicle. Then we can hit the hazards. You don't see that bottom one light up too. You see right there, it's lighting up.
That's going to be the flashing function of it. It's right here as well. It's going to attach via a four pole. So we have our vehicle wiring here, plugged in. And you're gonna get 71 inches of cords.
That's going to be more than enough. You see me kind of bumbled ours up here beside is just for demonstration purposes, but you should have plenty of cord. And if you have access, you can roll that up and tie that off right there like that. Now we've run it down. Our cargo carrier, it's got two points to hook up. It's going to be labeled left and right. And they're even color coded. So we have the blue and the yellow. So of course plugged the yellow and the yellow and the blue into the blue. And it's that easy. We come back out here, we've got both of our lights, like I said, that mark left and right now routing the wire's up to you. We you just kind of used some things just to set up as a demonstration today, you probably want to use more zip ties for more permanent on the backside of the lights. There's also some adhesive double-sided tape. You can peel off and that's what we use to stick it. Now we use electrical tape cause we didn't want to rip off that seal on that tape today. We have them on our cargo carrier today. This is going to apply to bike racks as well. There's a lot of people online and say they don't like that their bikes are covering up their taillights and even a cargo carrier, you can stack your gear up and cover up those lights as well. Now I know that this car care has reflectors on there too, but this is going to work in tandem with your brake lights and your blinkers. So this is going to have that functionality. These are going to be way brighter, pop. That way you're gonna have less to worry about people are going to see when you're stopping or where you're turning because it's on the back of your car carrier or your bike rack the LEDs and the housing are going to be weatherproof So you won't have to worry about the elements, getting to them or damaging them. You're also going to get 24 diodes on the inside. So that's what's going to keep it nice and bright. When setting them up and putting them where you want on your cargo carrier or bike rack I would recommend also getting some wire loom from us just to keep things nice and neat on the other side and protect that wire, Make sure it's not going to be issues with cutting. It's just going to protect it for longer. Overall. I think it's going to be a very helpful thing to have on your car carrier or your bike rack, just because if you're already stacking up full of stuff or you have those bikes loaded people can't see your taillights. I'd be a little worried about that. I want people to know when I'm stopping. So there's no issues. This is going to prevent that. That does it. Thanks for hanging out. And I hope this out..
Customer Satisfaction Score:
98% were satisfied with this product
2% of customers were not satisfied
Ratings & Reviews


Heather A.
5/8/2026
Okay, I really love the look of these LED lights. What bike rack did you install them on?

Mike L.
8/25/2026
That's awesome Lance, I'm happy we had what you needed!!
Mike L.
8/30/2026
Thanks Dave!

Heather A.
4/11/2026
This looks awesome, seriously. It kind of looks like a spaceship just landed in your garage. Those lights paired with the X3’s tail lights really pop, it almost looks like it came that way from the factory.

Lazer S.
2/10/2026
Glad you are happy with them, Sally Jane! I have every confidence these ones will hold up just as good as your previous set! : ) What bike rack did you install them on?

Do you have a question about this Accessories and Part?
Info for this part was:
At etrailer we provide the best information available about the products we sell. We take the quality of our information seriously so that you can get the right part the first time. Let us know if anything is missing or if you have any questions.























Heather A.
5/26/2026
Really appreciate you taking the time to share such a detailed comparison especially coming from someone who already went through the fabrication process yourself. That kind of real-world feedback is incredibly helpful. Nice solution as well with the plastic trim bar to correct the angle on your Kuat Cadet that’s a smart workaround while still keeping it easy to remove when needed. Out of curiosity, how has the brightness and visibility been for you on the road compared to your original setup? Any noticeable difference in daytime visibility?