bing tracking image

trailer lights - Command Electronics

Filter by Style of Light

Filters
1


What our customers are saying:
Fast Shipping They are AOK Thanks
John
Lynchburg, VA


Trailer Lights from Command Electronics for easy replacements

Clean, factory-style replacements are easy with Command Electronics trailer lights. Choose from oval amber marker options and dual or triple LED tail lights, including versions with stop, turn, tail, and backup functions and flush-mount installs with a 4-wire pigtail. For lasting results, seal the perimeter to prevent leaks and use stainless, aluminum, or zinc-plated screws on aluminum surfaces, with heat-shrink butt connectors on the wiring.
Tighten the screws evenly and avoid overtightening to help prevent cracking. Make sure the mounting surface is flat; if a wire protrusion causes bowing, add rubber washers or spacers. If holes don't line up, installing the light upside down can match existing holes while still sealing properly.
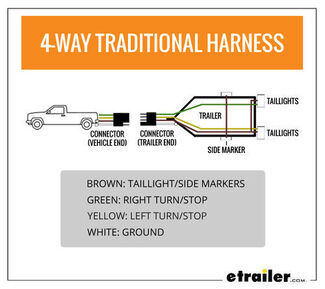
Some options include stop, turn, tail, and backup. Confirm the listed functions match what your trailer uses. Check the wiring color code printed on the back when available and verify the connector or pigtail style you plan to use.
Enhance the seal with a high quality silicone or a non-sag sealant around the screw holes and the light perimeter. Check whether a gasket is included; if not, reuse the old one if it's in good shape or add sealant. Recheck the seal after installation to reduce the chance of moisture getting in.
Match the overall size and shape and make sure the functions line up with your original light. Check whether you need recessed or flush mount and compare the mounting hole pattern; you may need to flip the light to match existing holes. Verify the wiring layout and color code printed on the back when present.
Use stainless steel, aluminum, or zinc plated screws to help avoid corrosion. Self-tapping screws work well in aluminum. Seal your wiring with heat shrink butt connectors to keep moisture out.