Pro Series Pilot Trailer Brake Controller w/ Custom Harness - Up to 3 Axles - Time Delayed
2017 Lexus NX Turbo
Will this fit?
To see if this custom-fit item will work for you please tell us what vehicle you'll use it with.
- All Info
- Reviews (1)
- Q & A (0)
- Videos (8)
- Photos
Pro Series Trailer Brake Controller - PS82CR
- Electric
- Time Delayed Controller
- Up to 3 Axles
- Pro Series
- Under-Dash
- Plug-In
- Under-Dash Box
- Single Trailer Only
- LED Display
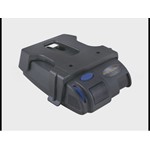
Simple and rugged, this time-delay brake controller is able to install in any direction, even upside down. Includes a large digital display with a dark smoke lens that can be read even in direct sunlight. Activates brakes with a preset intensity.
Features:
- Brake controller activates trailer brakes with a preset intensity
- Adjustable power output lets you select the amount of braking force
- Simple thumbwheel lets you change settings
- Large, easy-to-read digital display shows your braking status
- Built-in short circuit prevention protects your vehicle and trailer
- Quick and easy installation with no mounting restrictions - can be installed in any direction
- Microprocessor allows controller to be mounted upside down and still have a readable display
- Wiring adapter eases installation of the brake controller
- Custom connector end plugs into the built-in port beneath the dash of your vehicle
- Other end plugs into the back of the controller
Specs:
- Application: trailers with up to 3 axles (6 brake assemblies)
- Dimensions: 4-3/4" long x 3-1/2" wide x 1-9/16" tall
- Limited lifetime warranty
Time-Delayed Braking
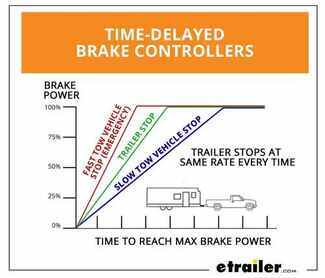
The Pro Series Pilot comes equipped with time-delayed braking. Every time you apply the brakes in your vehicle, a signal is sent - via the brake switch - to the Pilot. The controller then sends power out to your trailer brakes to activate them with an intensity set by you, at a rate determined by you. The amount of braking power (output) can be adjusted to suit your preference, the road conditions, the type of trailer, and the weight of your load. To determine which levels are best for your application, test your towing setup and choose what feels right.
Built-In Controls for Adjustable Power

Braking output is the maximum amount of power that will be applied to your trailer's brakes. How much braking output you need is determined by the weight of your trailer; a heavier trailer will need more power to bring it to a stop. You want to set the braking output as high as you can without locking up the brakes. Once you've set up the brake controller the first time, you shouldn't need to adjust the settings until the trailer load changes, you switch trailers, or road conditions change. Use the thumbwheel on the side to change the braking output level. The output setting will appear as a number on the digital display, with a higher number indicating higher braking power.
Manual Override
The Pro Series Pilot keeps the manual override within easy reach on the front of the module, great for stopping sway or controlling your trailer's momentum in emergencies. Push the slide-bar to activate the trailer's brakes and brake lights without you having to apply the brakes on your tow vehicle, perfect for limiting trailer movement while you're cruising.
Quick, Simple Installation
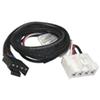
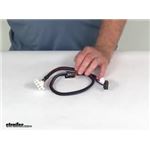
Because inertia plays no role in the functioning of this controller, you do not have to mount the unit at any particular angle. Your mounting options are limitless, so long as you can still easily access the controller and manual override. The Pilot is especially flexible; its microprocessor allows the controller to even be mounted upside down, and it will still give you a readable display. The Pilot can go wherever you need it. Plus, the included wiring adapter eases installation overall. The custom connector end plugs into the port on your vehicle and the other end plugs into the controller.
Installation Accessories
You can use etrailer's exclusive 7- and 4-way brake control installation kit (ETBC7 - sold separately) if you don't already have a 7-way plug at the back of your vehicle.
80550 Pro Series Tekonsha Pilot Brake Control for 1 to 3 Axle Trailers - Timed Actuated
302000 Tekonsha Brake Control Wiring Adapter with 2 Plugs
Installation DetailsCalifornia residents: click here


Videos are provided as a guide only. Refer to manufacturer installation instructions and specs for complete information.
Video Transcript for Mount: Tekonsha Plug-In Wiring Adapter for Electric Brake Controllers on a 2008 Dodge Ram Pickup
Today on this 2008 Dodge Ram pickup 1500 series quad cab, we're going to install part number 90885 from Tekonsha. This is a Prodigy P2 Trailer Brake Controller. Now to help us with our install, we're also going to be using part number 3020-P from Tekonsha. This is a plug-in wiring adapter for electronic brake controllers with Dodge tow packages. We're underneath the dash on the driver's side of the truck, and we'll go ahead and look for a tow package port. Now on this truck, this is the blue connector right here. That's a tow package port.
Now from the factory, it's not going to be sitting there. In fact, in this particular vehicle, it was buried behind the wires right here, and taped to the wires going to the grommet. It was almost impossible to see, so you have to kind of go by feel to pull it out. Then we'll go ahead and use our adapter cord to go from the tow package to our brake controller. This will simply plug together until it snaps. Let's go ahead and look for our brake controller. First off, we've got a choice how to mount our brake controller.
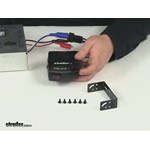
If you want permanent attachment, you can use the metal bracket right here, or if you want to switch it between vehicles, it may be a good idea to use the pocket here. Now the customer was nice enough to let us know where our brake controller should sit, so this is our location, and we're going to use our pocket right here. We'll go ahead and use one of the sheet metal screws that comes with the kit, and we'll go ahead and attach it to the plastic. Now, we want to make sure that the pocket sits in a straight line with the truck. It's not anything like this. And that way our brake controller will be the same way. And then we'll go ahead and user our second screw to permanently attach it. Should go for tight.
Now we'll take our cord, and run it to the back of the pocket, then plug into the back of our brake controller. Then, put the brake controller in the pocket. We'll take a few moments to go ahead and zip tie our wire and make sure it's safe and secure and out of the way. Now the zip ties we're using doesn't come with any of the parts shown today, so it's always a good idea to get zip ties when you do any electrical on your vehicle. Let's go ahead and check out our brake controller. We have power going to it, so it shows two dots. One dot's for power, and one dot's going to be your boost setting.
We'll go ahead and touch the boost button and we'll cycle through. Let's go ahead and put it back to the factory setting. And then we'll go ahead and check out the manual override. See it says "NC" for "no connection" because there's no trailer hooked up to it. Let's go ahead and hook up a trailer and see how it works from there. With our trailer connected, it shows a "C" for a "connection". We'll go ahead and use the manual override and see how it scrolls through the numbers. This is what's set right now for our total output. Now we control the output of the power from this knob right here. All the way to zero, and it actually shows you zero, to all the way back up to eleven. In this case, it's always good to start off with setting it about in the middle, say around six. Now we'll go ahead and hit the brake pedal, and we'll get a small amount of numbers to show up, and that tells us we got signal from our brake pedal as well, so it looks like everything works. And that'll do it for our install, part number 90885 from Tekonsha, Prodigy P2 Brake Controller on our 2008 Dodge Ram quad cab 1500. .
Ratings & Reviews
5.0
1 reviews
Great service and great quality parts.
Plugged right in.
great service and product
Very simple installation.
makes life simple
The installation was a snap...
The right part for my job. thanks
Great product.
Very easy to install.
Perfect fit!
Product is correct for my needs!
Worked perfectly.
Fit perfectly, worked without any problems
fast shipping and the part was just as described
Great description of product, took 5 min to install!
Works as advertised, could not be simpler!!!
Made the install a snap. Couldn't have been easier...
Had exactly what I was looking for and shipped promptly. Thanks!
Adapter worked perfectly with my 2009 Ram 1500. No problems.
Right product. Good price. Quick shipping. Wh not to like?
If life was this easy, Plug and Play wow!
with this adapter the brake controller was installed in less than 5 minutes.
good value but the swivel mount being optional should be made more clear
Plugs right in. Easiest installation you could ask for.
This was extremely easy to install. It only took a few minutes.
See what our Experts say about this Pro Series Trailer Brake Controller
- What Does Reese Brake Conroller ER Code MeanAn ER code on a brake controller indicates an internal problem and would mean it's time to replace it. For a replacement the Brake EVN # TK63VR is a very reliable and better performing controller than the Reese you have now.
view full answer... - Troubleshooting Hopkins Impulse Trailer Brake Controller Error Message OEThe troubleshooting guide for the Hopkins Impulse trailer brake controller does not list an error code "OE" but if the unit displays a flashing code "SC" this indicates a short on the brake output circuit or a defective brake magnet, which is unlikely on a new Aliner. Those error codes can sometimes be difficult to read. My Hopkins contact said much older versions has error codes E1, E2, E3 but not OE. I suggest taking a close look at your Tacoma's trailer connector. Corrosion issues on...
view full answer... - Installation of Electric Brake Controller on 2012 Isuzu NPR ConnectFor your Pilot 2-6 Brake Electronic Brake Controller - Time Delayed # 80550, you will need to connect the black power wire to the battery of your vehicle using a circuit breaker like # PK54530 and # 12-1-1 wire. Then you will connect the red wire on your controller to the cold side of your brake light switch. From my research it looks like that is the green with white tracer, but you can check it with your circuit tester # PTW2993. The correct wire will show no power when the brake pedal...
view full answer... - Troubleshooting Pilot Electronic Brake Controller Not Activating Trailer BrakesWhen the trailer is connected to your vehicle and the brake pedal or manual lever is not activated, the Pilot Electronic Brake Controller # 80550 should display a ".C" to indicate that the controller is reading the trailer. If your controller only ever shows the dot, the brake controller is not recognizing that the trailer is connected. The first thing I recommend checking is the trailer connector at the back of the vehicle and on the trailer. You will want to make sure that the connector...
view full answer... - No Power on Blue Brake Output Wire on Reese Brake ControllerAssuming that the compact unit and the old unit use the same connection point, then you may be correct in saying that your compact unit is toast. Before pitching your compact unit, you may want to do some testing first. The first thing that I would check is the connection between the blue wire from the brake controller and the brake output wire going to your 7-way connector. If you use a plug in style connector, then make sure there is not any corrosion, damaged wires or bent pins. If...
view full answer... - Should a Reese Pilot Brake Controller Show a Decimal Point When Trailer Brakes are AppliedActually the decimal point of the Reese brake controller part # 80550 that you have should only come on when the manual slide or vehicle brakes are applied without a trailer connected. It sounds like yours is working properly. Have you tried connecting a trailer to the tow vehicle to see what happens? If it doesn't show a connection most likely the problem is corrosion on the trailer connector of the vehicle or trailer. I attached a help article on troubleshooting brake controllers for...
view full answer... - Display of Pilot Brake Controller # 80550 Is Blank When Trailer is Not ConnectedThe Pilot brake controller will not show anything on the display unless a trailer is connected or the manual brake switch or vehicle brake pedal is pressed. If you apply the brake or the manual brake switch, and see the decimal point on the display, then the controller is correctly installed and all is well. I've linked you to a copy of the owners manual for the Pilot brake controller, as well as to a copy of our brake controller troubleshooting article that you might find helpful in the...
view full answer... - What Brake Controller is Better, Tekonsha Prodigy P2 or Pro Series Pilot for 2019 GMC Terrain?Hello Patrick, Between the 2 brake controllers that you mentioned I would go with the the Tekonsha Prodigy P2 # 90885. The main reason is because the Pro Series Pilot # 80550 is time delayed, so there will be a delay from the time that you hit your brakes in your GMC for the brakes to be applied on the trailer. Honestly, I am surprised that they still make the time delayed brake controllers. The Tekonsha P2 # 90885 is a proportional brake control, meaning that it works at the same time...
view full answer... - Troubleshooting the Pilot 2-6 Brake Electronic Brake Controller Part # 80550Can you send me a photo of the display you are seeing?
view full answer... - Video and Info to Help Troubleshoot Brake ControllerWe have videos that cover how to test and troubleshoot a brake controller. I attached the link to this video on this page. Testing the brake controller is fairly easy. Sever the blue brake output wire near the brake controller leaving enough room to reconnect it and then apply the manual slide. Using a circuit tester like the Quickee Tester, part # PTW2993, you should get output to the controller side of the wire you severed. If the manual slide activates the trailer brake output wire...
view full answer... - Horse Trailer Brakes Activate Without Vehicle Brake PedalThe '.C' means that there is a trailer connected and isn't an indicator of a problem. Are you by chance using an adapter in the 7-way connector to change it to a 6-way? If you are, there are two common ways to wire that connector. One uses the center pin as the brake output, the other use the center pin as the constant 12-volt power supply to the trailer. If the vehicle is wired one way and the horse trailer the other, it would certainly explain why the brakes immediately apply when the...
view full answer... - Troubleshooting a Reese Electric Trailer Brake Controller OL Error MessageAn OL error code would indicate an overload error. The cause of this is most likely a bad ground or a short to the blue brake out put wire. The first thing I would check is the connector on the back of your vehicle. Any dirt or corrosion can be causing a bad ground or a short to the brake out put pin. The solution is to clean out the connector and get rid of any dirt or corrosion. It would also be a good idea to clean out the trailer side connector as well. There could also be a bad ground...
view full answer... - Low Power Output on Reese Pilot Brake ControllerI took a look in the owner's manual for the Pilot 2-6 Brake Electronic Brake Controller part # 80550 which is included for you and in the troubleshooting chart it shows that if power output is less than "1.0" on the digital display the error could be attributed to one or more of the following: 1. Power set too low. 2. Poor connection on brake line (blue wire). 3. Black and white wires reversed, control destroyed. Since you have stated that you turned the gain up on the brake controller...
view full answer... - What does ".C" Mean on Trailer Brake Controller DisplayThe ".c" display on your Pro Series Pilot Brake Controller # 80550 is simply an indication that the unit has power and is connected to a trailer load. If you are hooked up to your trailer, this is exactly what you want to see on the controller screen and means that everything is working properly. I recommend applying the manual slide on the controller to see if the display changes to a number, indicating power being sent back to the trailer brakes. You can also take your trailer to...
view full answer... - Recommended Brake Controller For 2008 Subaru LLBean OutbackThe best brake controller for your 2008 Subaru Outback is the Tekonsha Prodigy P3 # 90195. This brake controller is similar in size to many others, but the functions are much easier to understand with the LCD screen. This controller runs constant diagnostics and will allow you to see issues without needing to decipher codes. It is customizable to driver perferences and has 3 levels of boost. For your 2008 Outback, you will need to use the Universal Brake Controller Wiring Kit # ETBC7....
view full answer... - Connecting Reese Pilot Brake Controller to OEM Nissan Brake Controller Harness on 2012 Nissan TitanI can certainly help you with that. The Nissan OEM brake control pigtail would connect to your Pilot brake controller as follows: Harness Red Wire to Black Wire on Controller Harness Red/Green Wire to Red Wire on Controller Harness Black Wire to White Wire on Controller Harness Brown/White Wire to Blue Wire on Controller The Red/Blue wire on the harness is for an illumination circuit that is NOT used. This wire should be bundled up out of the way and the end capped off so it does not...
view full answer... - Troubleshooting a Reese Brakeman Brake Controller That Only Works In Manual OverrideHey Mike thanks for stopping in! It could be a number of things, honestly, so the best thing you could do is check everything. Most likely it's a wiring issue, so I'd suggest checking all of the wires for any loose wires. You'll also want to check for any shorts, broken wires, and bad grounds. If all that looks fine, and you're getting the appropriate voltage, then the issue is going to be with the controller and it would need to be replaced with something like the Tekonsha Prodigy P3...
view full answer... - Troubleshooting Aggressive Braking and Only Red Light on Pro Series Pilot Trailer Brake ControllerHi Matt; is this the Pro Series Pilot Trailer Brake Controller # 80550? Assuming it is, the red dot alone indicates that a trailer is not connected. You should also have a "c" on there with the trailer connected. That also probably means there is some kind of internal issue with the brake controller if the brakes are working even though it thinks a trailer isn't connected. I would double check the connections on the brake controller, test the brake output circuit on the 7-way, make sure...
view full answer... - Why Would Pilot Brake Controller Only Show Red Dot When Trying to Apply BrakesOn the Pilot brake controller # 80550 the red dot appears when you step on the brake pedal or use the manual override WITHOUT a trailer connected. If a trailer is connected and you only get the red dot then the controller is not reading that a trailer is connected. This could be from a dirty or corroded trailer/vehicle side connector, a wiring problem to the brake magnets on the trailer, or a break in the wire from the controller to the vehicle trailer connector. I have included some links...
view full answer... - Recommended Brake Controller for Motorcycle Trailer with BrakesFor your trailer, you can add brakes since there is the flange already mounted to your axle. You will need to pull one of the hubs off your trailer spindle to see if you can get the bearing numbers off the face of the inner and outer bearing of that hub. If the numbers are not legible, then you will need to use a digital caliper like # to measure the spindle where the bearings rest on the spindle. I have attached a photo to assist. That will help me get you the brake assemblies and...
view full answer... - Troubleshooting Reese Pilot Brake Controller Showing No NumbersYour Pilot 2-6 Brake Electronic Brake Controller - Time Delayed # 80550 is not getting proper power to the unit. I reached out to my contact at Cequent who makes that controller and they said that the flashing dot means the black wire is not getting enough power. I recommend you trace that wire and check its voltage with a multi-meter like # PT89ZR. When it is getting the 12 volts necessary the light will stay lit with trailer connected and you will get the number readout as well when...
view full answer... - Pilot Trailer Brake Controller Staying On After Releasing the Brake PedalIt sounds like you may need to check the connection on the red wire. Use a circuit tester like # PTW2993 if needed to test the wiring. Make sure the red wire is attached to the wire that only shows a signal when the brake pedal is pressed. Also make sure that it has a good connection. Next you can sever the blue wire a few inches back from the brake controller and use the circuit tester to test the brake controller end. Apply the manual override, it should show a signal when the override...
view full answer... - Should Red Dot Appear on Reese Pilot Brake Controller With Brake Pedal when Trailer Not ConnectedWhen the brakes are applied with the Brake Controller part # 80550 installed the dot should appear on the display. When the dot does not appear in this situation the issue is that the red wire of the controller is not connected to a circuit that sees 12 volts of power with the brakes applied. You need to verify first that the red wire is making a solid connection and then that the circuit has 12 volts when the brakes are applied.
view full answer... - Unidentified Error Codes on a Reese Brakeman Trailer Brake ControllerDo the error coeds appear with or without a trailer connected or both? Based on what you are seeing I believe there is an overload condition on your Brakeman controller. This could happen for several reasons. First, sever the blue wire from the back of the controller. Next use a circuit tester like # PTW2993 if needed to test the end coming from the controller. It should only show a signal when you apply the manual override. If it shows power at any other time, then there is something...
view full answer... - How to Install a Brake Controller on a 2002 Dodge Ram 1500There are plug-in brake controller adapters for your 2002 Dodge Ram 1500 but only for certain brake controllers and if you have a factory trailer connector. If the above is true then please let me know what brake controller you have and I will be glad to see if we have the correct plug-in brake controller adapter for you. For example, if you have the ever popular Tekonsha Prodigy P2 Trailer Brake Controller part # 90885 then you will need to use the Tekonsha Plug-In Wiring Adapter for Electric...
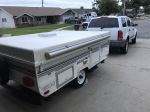
view full answer... - Parts Needed to add Electric Trailer Brakes to 1990 Skamper 190cYou are able to install an electric braking system on your trailer. The parts needed are going to be determined by the axle that your camper is equipped with. From what I can tell from your picture, it looks like this is a 4 lug axle which is going to likely mean you have a 2,000-lb axle with a 1-3/4" diameter. In order to verify that is correct you will need to confirm that the Inner and Outer bearings on your trailer wheel hubs match L44649. You can verify this once you've taken it apart...
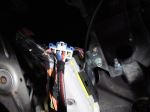
view full answer... - Where Does a Brake Controller Plug Into on a 2006 Dodge Ram 1500 Big HornOn the 2006 Dodge Ram 1500 that came with either a factory 4-Way or 7-Way trailer connector the receptacle to plug in a brake controller with a harness such as # 3020-P will either be on top of or along the side of a white rectangular box back along the firewall to the right of the emergency brake pedal. I have included a picture showing this for you. The factory plug is blue. If your Ram did not come with a factory installed 4- or 7-Way trailer wiring harness then it is possible that...
view full answer... - Brake Controller Connector Location in 1997 Dodge RamYour dealer should be able to provide the details you're looking for based on the VIN. I'd agree, since that fuse is installed, you very likely have the factory 7-way tow package. Although most 1997 Dodge Ram trucks will have the connector under the dash, not all of them will. If present, the connector will be located atop or next to the white rectangular box on the firewall behind the emergency brake pedal, as shown in the provided photo. If you've found a flat blue 4 pin connector...
view full answer... - Where Is Brake Controller Port Located On 2001 Dodge Durango For Installation Of Adapter, # 3020-PIf your 2001 Dodge Durango has the factory installed 7-way trailer connector on the rear bumper, the port for the brake controller should be located near the emergency brake pedal. I am sending a video link of a brake controller installation on a 2003 Dodge Dakota and at the 45 second mark it shows the location of the brake controller port under the dash that should help you locate the port on your vehicle. You can check the port with a circuit tester to see if one of the pins supplies...
view full answer... - Recommended Brake Controller for a 2005 Dodge 1500 Hey Abby thanks for all the questions! The first thing I need to mention is you will only have a port to plug in a brake controller if your 2005 Dodge 1500 came with either a 4-way connector or a 7-way connector from the factory. If yours has an after market trailer connector you'll need to manually wire a brake controller. The brake controller port on a 2005 Dodge 1500 is located by the left side firewall. I have attached a picture below along with an installation video so you can find...
view full answer... - Brake Controller Recommendation for 2008 Sterling Bullet (Dodge Ram) TruckWith the # 3020-P, wiring harness, any of the Tekonsha brake controllers will plug right into the factory harness. The Tekonsha # 39523 PowerTrac brake controller would work for you, but I'd urge you to go with a proportional controller like the Tekonsha Primus, part # TK90160. A proportional controller will sense how quickly the tow vehicle is slowing, and will send the appropriate amount of power to the trailer brakes so the trailer and tow vehicle stop at the same rate for safer, more...
view full answer... - Recommended 7-Way Wiring and Brake Controller Installation on 1996 Dodge Ram 2500 with 4-Way WiringFor your 1996 Dodge Ram 2500, I recommend the Tekonsha Prodigy P3 # 90195 for your brake controller which will connect to the factory harness you mentioned using wiring harness # 3020-P. This brake controller is easy to use with its presets and LCD screen. For the 7-way, you will then use # ETBC7 and splice into the factory wiring located under the driver's side wheel well. This will give your the wiring functions needed to complete your 7-way and give you the brake controller functionality.
view full answer... - Where is the Brake Controller Plug on a 2008 Dodge Ram Pickup I cannot be sure as to what the plug you have found is for but I can assure you it is not for a brake controller. The brake controller plug (if equipped) for a 2008 Dodge Ram is rectangular with four pins like the photo I have attached for you, there are no exceptions. If you just randomly look under the dash of your Ram, there are going to be several unused connectors. That is why it is important to look in the correct place which can be seen at the 0:50 mark in the attached video. This...
view full answer... - Factory Port Location for a Brake Controller Wiring Harness on a 1999 Dodge RamI show that the Tekonsha Plug-In Brake Control Wiring Adapter, Dodge, item # 3020-P, and it works on all Dodge Ram Pickups from 1995 - 2009. You should be able to use the adapter that is connected to your Tekonsha Voyager brake controller, item # 39510, on your 1999 Dodge Ram. I believe you are looking at the wrong connector under the dash. You will need to look under the dash, near the emergency brake pedal for a white or blue connector that is above a white junction box. This is where...
view full answer... - Parts Needed to Tow a Trailer with Brakes Using a 2006 Dodge DurangoI was not able to locate an exact towing capacity for your 2006 Dodge Durango online but I do have a way for you to determine this. What you are going to want to do is open the driver door and look for a white info tag which will display both the gross vehicle weight rating (GVWR) and the gross combined weight rating (GCWR). If you take the GVWR and subtract that from the GCWR that will then give you your maximum towing capacity. Assuming the gross trailer weight (GTW) is within the maximum...
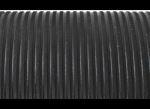
view full answer... - Should SUREHOOF Ribbed Rubber Mat Be Used With Ribs Horizontal Or VerticalThere are no installation instructions for the Ribbed Rubber Trailer Mat, part # 3622RM. As far as traction, it would make sense that installing the mat with the ribs running horizontal would provide a bit more traction than vertical, but I have not heard anyone mention traction issues with the mats installed. If the ribs are running vertical on a ramp it would allow water or snow to run off the mat which could help. This mat measures 36-inches wide and 22-feet long, so you can cut the...
view full answer... - What is the Correct Wiring Adapter for Prodigy P3 Brake Controller on 2008 Dodge Ram 1500?Thank you for the photo it was very helpful; you are correct that the wiring harness # 3020-P is not what is shown in your photo though I believe you are looking at the wrong connector. Take a look at the other photo that I've attached which shows what the connector should look like in your 2008 Dodge Ram. I've also linked a video to a brake controller installation on an '08 Ram and at the 2:30 mark it will show you where that connector can be found, which is to the far left next to a white...
view full answer... - Cost-Effective Quality Brake Controller for a 2007 Dodge Ram 1500For a brake controller I highly recommend going with a Tekonsha brand. We have found that these are the most reliable brake controllers out there and all of them have received numerous feedback from our customers that is positive. The Prodigy P3 # 90195 is definitely the best option to go with as it has been created with an easy-to-read LCD screen that displays a lot of information for you. For a more economical option I recommend going with the Primus IQ # TK90160 which is a proportional...
view full answer... - Can The Draw-Tite Activator IV Be Installed On A 1995 Ram 1500Hello Adam, thanks for reaching out. Does your 1995 Ram 1500 have the factory tow package with the 7-way? If so, the brake control port should be present under the dash. My concern is the plug in your picture does not appear to be a match to the other Ram brake control ports we have seen. The plug should look like the one in the image below and yours does not appear to be a match. Are there any other plugs up under the dash? If you have the tow package the plug should be there, and it...
view full answer... - Brake Controller And Plug-In Harness For 2003 Dodge Durango SLT 5.9 V8Hello Mario, thanks for reaching out. What I recommend for you is the Tekonsha Prodigy P3 # 90195 since it is our most durable and well reviewed controller. You can use the Tekonsha Plug-In Wiring Adapter # 3020-P for a plug and play install. The # 3020-P adapter is custom fit for the 2003 Dodge Durango SLT 5.9 V8 with the factory 7-way.
view full answer... - What Wires Connect to What On for a Brake Controller On a 2008 Dodge Ram Hey Kevin, we unfortunately do not have that info handy here so what you'd have to do is test each wire for it's function and hook up the wires from the brake controller accordingly. So coming off the pigtail from a standard brake controller like the Tekonsha Prodigy P3 # 90195 that you were looking at, you'd need to identify your 12V power and attach it to the black wire, find the stoplight switch and connect it to the red wire, connect the ground to the white, and attach the trailer...
view full answer... - Comparing the Redarc Tow-Pro Elite vs Tekonsha Prodigy P3 Brake ControllerThe RedArc Tow-Pro Elite # RED44FR is comparable in reliability and performance to the Tekonsha Prodigy P3 # 90195. The difference is really in the design and features. One of the greatest aspects of the P3 is the LCD screen and presets. One of the greatest aspects of the Tow-Pro Elite is the size and mounting location. Both have very usable features and use different methods of communication for diagnostics and modes. Both have the manual override options and are top of the line controllers....
view full answer... - Brake Controller Installation for a 2005 Dodge Ram 1500The brake controller port on a 2005 Dodge Ram 2500 equipped with the appropriate tow package is located under the dash near the emergency brake pedal. It will be taped to another wire bundle and will have the harness, part # 3020-P, connected to it. I have included a link to part 3020-P so you know what it looks like as well as the instructions that describe where to find the brake controller port. I also attached a picture of the # 3020-P. If the connector you have found matches the...
view full answer... - How To Determine if 2002 Dodge Ram With Mopar Hitch Has Factory 7-Way Trailer ConnectorThe Tekonsha Plug-In Wiring Adapter, part # 3020-P, you have referenced is for connecting a Tekonsha brake controller to the brake controller port located in the cab of your vehicle. It will be used if you have the factory 4-Way or the factory 7-Way on the rear of your vehicle. If your Ram did not come with a factory trailer connector the # 3020-P wiring adapter is not needed since there will not be a factory brake controller port under the dash. You would have to hardwire the brake controller...
view full answer... - Brake Controller Recommendation for a 2006 Dodge Ram 2500The Mopar brake controller is identical to the one they put in at the factory on certain Ram trucks. It is made specifically to fit the trucks it was designed for. In the aftermarket options there is nothing that is going to fit the same but they are also much, much less expensive and actually work better than factory integrated controllers. I recommend the P2, # 90885, because it is easy to set up and use and it is reliable. You will also need wiring harness # 3020-P to plug the controller...
view full answer... - Two Ways to Install a Trailer Brake Controller on a 2008 Dodge Ram 1500 with Factory 4-Way WiringThere are 2 ways you can install a brake controller. On a 2008 Dodge Ram with a factory 4-Way, we usually recommend a hardwire installation using a 4 and 7-Way installation kit # ETBC7. It includes an adapter that is just like # C57674 but it also comes with everything else you will need to complete the installation of your P2, # 90885. However, there is an alternate method which I will also explain after the ETBC7 explanation. The 4-Way on your truck has the lighting functions for a trailer...
view full answer... - Brake Controller Installation in 2006 Dodge Ram 2500In order to actuate your trailer brakes, you'll need to install a brake controller to operate them, as your truck doesn't already have a brake controller. Since your Dodge Ram 2500 doesn't have the factory 7-way, not all the brake controller wiring was sent to the rear of the vehicle. I'd be happy to suggest parts to install a controller and a 7-way, plus provide links to some install footage that will help walk you through the process. For a brake controller, I'd recommend the Brake...
view full answer... - Brake Controller Recommendation for 2008 Dodge Ram with Factory Install WiringThe correct install harness you need for a brake controller in your 2008 Dodge Ram is the part # 3020-P for our most popular Tekonsha brand brake controllers. For a brake controller I would recommend the Prodigy P3 Brake Controller part # 90195. This is our best selling brake controller because of how well it works and how easy it is to setup. This is a proportional brake controller that senses the amount of braking the tow vehicle is applying and applies a proportionate amount to the...
view full answer...
Do you have a question about this Trailer Brake Controller?
Info for this part was:


At etrailer we provide the best information available about the products we sell. We take the quality of our information seriously so that you can get the right part the first time. Let us know if anything is missing or if you have any questions.













Thank you! Your comment has been submitted successfully. You should be able to view your question/comment here within a few days.
Error submitting comment. Please try again momentarily.