bing tracking image
  1. Accessories and Parts
  2. Demco
  3. Flat Tow Brake System
  4. Second Vehicle Kit
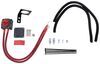
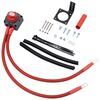
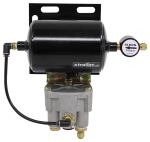
Second Vehicle Kit for Demco Air Force One Flat Tow Brake System
Demco

Second Vehicle Kit for Demco Air Force One Flat Tow Brake System

In Stock
$1,065.00
Retail:$1,241.00
You Save: $176.00
Accessories and Parts
zoom in icon
slider vertical icon
zoom out icon
Comment field cannot be left empty.
Name field cannot be left empty.
By submitting this form, you understand and agree to our Terms of Sale, Website Terms of Use and Privacy Policy.

Thank you! Your comment has been submitted successfully. You should be able to view your question/comment here within a few days.

Error submitting comment. Please try again momentarily.

Product Images

In Use/Installed

Customer Photos

Need help with installation?
Locate installers near me
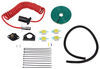
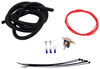
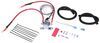
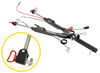
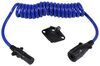
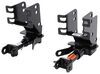
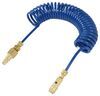
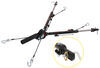
Use your Demco Air Force One supplemental braking system on a second towed vehicle with this kit. Includes all the components needed to install on the vehicle side with no extras. 1-800-940-8924 to order Demco accessories and parts part number SM99209 or order online at etrailer.com. Free expert support on all Demco products. Great prices and Fastest Shipping for Second Vehicle Kit for Demco Air Force One Flat Tow Brake System. Accessories and Parts reviews from real customers.
  • All Info
  • Reviews (219)
  • Q & A (0)
  • Videos (4)
  • Photos

Demco Accessories and Parts

  • Flat Tow Brake System
  • Second Vehicle Kit
  • Demco

Use your Demco Air Force One supplemental braking system on a second towed vehicle with this kit. Includes all the components needed to install on the vehicle side with no extras.


Features:

  • Lets you use your Demco Air Force One braking system on an additional vehicle
  • Includes all the components needed to set up your other vehicle for towing
  • Made in the USA
  • 5-Year warranty


6271 Demco SBS (Formerly SMI) 2nd Vehicle Kit for Air Force 1 Supplemental Braking System - Proportional

Replaces Demco SBS SM99209 and SM99213

Item # SM99209


Video of Second Vehicle Kit for Demco Air Force One Flat Tow Brake System
Video Thumbnail Video Player Dialog

Videos are provided as a guide only. Refer to manufacturer installation instructions and specs for complete information.


Video Transcript for Install: Second Vehicle Kit for Demco Air Force One Flat Tow Brake System on a 2021 Ford Ranger

Hey everybody, Ryan here at etrailer. Today on our 2021 Ford Ranger, we're gonna be taking a look at and showing you how to install the Air Force One Supplemental Braking System Second Vehicle Kit. So something that we run into quite often here at etrailer with customers flat towing their vehicles is a lot of times they have a couple of cars that they like to pull behind their motor home. Or they have a vehicle for a couple of years, sell it and get something new and they wanna flat tow that behind their coach. Well, the thing is if your coach is already set up for an Air Force One Braking System, it don't make much sense to change everything just to pull your vehicle. So a solution to that problem would be to use the second vehicle kit.

And what that's going to allow you to do is set up just your towed vehicle sign with those braking system components. That way you can hook it up to your motor home and pull it down the road safely without really having to change or modify anything else. So chances are pretty good. If you're looking into the second vehicle kit you're probably already familiar with how it works and some of the features, things like that. But just to be on the safe side let's say maybe you're new to flat towing and you purchased a motor home that is already equipped with the motor home side of the Air Force One.

Let's just go ahead and kind of touch base on some of the features that the second vehicle kit has to offer us. That way you can familiarize yourself a little bit with it. The Rangers brake pedal is going to be applied at the same rate that you apply the brake pedal up here in the motor home. So just to kind of give you an example on how that's gonna work, let's say if we're rolling up to a red light and you're kind of just halfway on the brake, you know just kind of pushing a little bit, Ranger's gonna do the same thing. On the other hand, let's say maybe there's an accident up ahead on the interstate, something like that.

And we really have to come to an emergency stop and really hammer on that brake pedal, Ranger's gonna do the same thing. So overall, it's gotta be really smooth and much more of a safe stop. A nice touch that I like is the fact that we have an indicator light on our Ranger. And so whenever the brake pedal is applied, we're hooked up to our motor home, we can see that light illuminate red. And that's just a very quick way to keep an eye on things and make sure that the brake pedals actually being pushed down in our Ranger when we're going down the road.

So at the end of the day, probably my favorite kit for motor homes that have air brakes. It's very solid and one you can count on which is really important when you're over the road. So to begin our Air Force One installation on our vehicle side, first thing we're gonna do is just route a couple of wires and an airline tube. And that's because we're installing this when we have our bumper removed. Because we did our base plate and everything else at the same time. So if that's your case, you definitely want to do this before you put the bumper back on, it can be done with the bumper on, it just a little more tricky. So what I did was take our airline tube 'cause this'll get plugged into our fitting eventually that'll be mounted to our bumper. And then I just took two wires that way if we need to extend our breakaway switch wires which will also be mounted here, which chances are good, we won't need to extend them. You have them right here. They'll be easy to work with and easy to hook up. So with that said, I just loosely routed everything, kinda alongside here kind of up and behind our headlight where it goes up into the engine compartment. And from there, we can kinda just let them hang until we're ready to get them hooked up. So now that we have our bumper on, you can understand a little bit better why we routed our airline tube and a couple of wires beforehand. With that said, once their bumper is on we can mount up some of our components. And the first one is gonna be the breakaway switch which is this right here. This is really straightforward. There's actually a factory pre-drilled hole in our bumper bracket, all right. And all I did was take the included bolt that comes with our breakaway switch, run it through the hole on the bracket, on our bumper beam and secure them. Now while we're right here, go ahead and get the breakaway switch wires hooked up. So there's gonna be an orange one and a black one. And all I did was connect them to those two extra wires that you ran down here earlier. So I put the black one from the breakaway switch to the black wire that I ran down and the orange wire from the breakaway, I connected that to the brown wire that we ran down and I just use some heat shrink butt connectors which you can grab in etrailer. The ones in the kit work just fine but I definitely prefer the heat shrinks to give us a lot more protection against corrosion things like that. But with that said, we can then hook up our air fitting. And all I did was straighten this bracket out. There's usually a 90 degree bend on the back of it. I straightened it out and drove a hole in the middle of it. Then actually just use the bolt that's holding on our a six way plug here to secure it to that bracket so I think it turned out really well. And we're right here as well. We might as well hook up our air line tube, all right. So this simply just plugs in to the back of the fitting and that's how all of these airline fittings are gonna work. But there is something you do need to pay attention to and that is the type of cut that's on the end of it. You want it to be nice and clean and straight. You don't want any burrs or anything like that. So what you wanna avoid is using a regular pair of snips. What you can you use is a razor blade, a tubing cutting tool. I like to use a tool like this. You just wanna make sure it's nice and crisp, no burrs or anything. And that's a really good example of how all of these cuts look when we plug them in. These are just quick connects. So you simply just push it right into place make sure it's seated. And that's really all there is to it. So as you know, we previously routed our couple wires and our airline tube up into this area. And that's exactly where I mounted up our main operating unit. Pretty simple stuff here. I just use some self tapping screws and ran this into the core support. Nice and solid, not gonna go anywhere. With that said, the air line that goes to the front of our truck, you're gonna cut that the length and plug it into this fitting here just like we did the other one. That fittings gotta be labeled air end. And that's where the air from our motor home or coach is gonna come into our operating unit. With that said, we have our black wire, that extra one we ran. And I just used again, buck connector which I've yet to heat shrink and I will seal up the ends here in a moment but that's just gonna get connected to one of the black wires coming out of our main operating unit. It doesn't matter which one in our case I use the one closer to the top. Push it out of the way. The brown wire that came up, this is it right here. What you're gonna do is take the remaining length of brown wire, you should have about four or five foot left at this point. Strip back the ends and twist them together. And what we're gonna do in a moment is connect a fuse holder to this. But that said, we'll kind of just set that aside for now, and we'll move back to our operating unit. Let's talk about this other black wire that's coming out of it. This is simply just going to need to get grounded. And you've got to connect the ring terminal to it and utilize this factory ground right here. You're gonna pull that bolt out using an eight millimeter socket, put the ring terminal over the bolt and simply tighten it back down. Let's go ahead and move on to our brown wire here that comes from our breakaway switch. Once you have these tunes tied together, you're gonna take one of your butt connectors, put it over both ends and if you're gonna crimp it down, the other end is gonna get connected to the included fuse holder. So this is our fuse holder. Make sure the fuse is not installed. I already went ahead and strip back the installation and crimped on a ring terminal. We're gonna strip back the other end, expose that bare wire underneath, that is gonna get plugged into the other end of that box connector there. Go ahead and crimp that down. We'll come back with our heat source and seal up the ends. Now we need to do is find a spot to hook up our ring terminal here on the positive side of our battery. I'm gonna choose a stud right here, just 'cause there's no wires or fuses, anything like that going to it so kinda isolate that one. We'll remove that nut using a 10 millimeter socket. Slide over the ring terminal, simply tighten it back down. Now, let's go ahead and focus on getting our vacuum line hooked up to our main operating unit there. We're first gonna do is take one of the check valves and maybe enter two long piece of included hose. Put the black end of the check valve into the hose. This is push in through barbed, the hose isn't gonna come off very easily at all. We're gonna take the big length of hose, put that on the other end like so and then this side is gonna plug on-site barb fitting on our operating unit. All right, you wanna make sure that the black portion of the check valve is gonna face towards the operating unit. So go ahead, get in there and slide it on. Now, we can do this kind of prepare all of our other fittings and lines that way we can tap into our factory vacuum line. It's just easier to kind of piece everything together like this as opposed to trying to do it one by one, you know, bent over in the engine compartment. So to make things easier, I'm actually using this adapter fitting and this end will plug directly into the brake booster. I suggest using one of these, we actually sell these here at etrailer. They look a little bit different but the concept is the same and they work exactly the same. So what we're gonna do this side here with the seal is gonna go to our brake booster. So we'll leave this empty. This T fitting, this one comes out of here, that's eventually gonna plug into that long three eighth line that we ran off of our operating unit. And this side will connect to our factory vacuum line. So with that said, what we're gonna do is use a piece of hose, this is a larger piece of hose. You will have to pick it up separately. I believe this is eleven-sixteenths id in diameter. You can grab this at your part store. And honestly, you only need about a foot of it. And we're gonna slide this on this end here, take one of the hose clamps loosely put that over it for now. And then we can grab our other check valve, all right And this needs to go in the hose. Well, the check valve is way too small. We're never gonna get a good seal on it. So what I figured out is if we cut it maybe about half-inch piece off our three eighth line, put that over the check valve on both sides. That'll fill up that difference. So now we can slide that over. When we put this in, you want the white portion of the check valve face the base of brake booster. Black portion of the check valve to face towards the engine. So that'll slide on like so. I'm gonna use our clamps here just 'cause those aren't barb fittings like the other ones have more of a chance of coming undone. Then I'm just gonna take maybe a few inch piece of this larger line. Again, push that over. Take our hose clamp and put that on as well. Now with this as a unit it's gotta be much easier to get installed. So I'll snug these up a little bit. You don't need to be crazy tight and we can go to our factory line and get this random place. Now, if you look here on our brake booster, that's the line that plugs into it, the factory line. A lot of times you can just kind of pull on it get it to pop out. May need to take a flathead screwdriver, something to pry behind there. And what I did too, there's a plastic push pin fastener that kind of holds this assembly. I pried that out too, that way we can actually move it around and have some room to work. So when it's gonna work, we'll take our fitting assembly there. This is get a plug in to our brake booster. So once you get that pushed in, what we can do is just kind of eyeball where we need to cut our factory line. I think I'm gonna go right here in this area and play it safe. You can always cut a little longer than you think 'cause we can always come back and trim more off if need be. But you know, we can't really add hose so we'll give this area a shot first. This is going to plug right in. All right, so I went ahead re-outed that lengthy hose from our main operating unit over to the T, cut out the length and simply push it over that barb fitting. So earlier we talked about routing the length of the brown wire inside the cab of our Ranger. We can do that now but while we're at it, you might as well route the nine on air tubing in there as well. So again, you could've want a length of this. The tubing that's inside of the Ranger is gonna get plugged into our main operating unit here into this fitting and that'll be air out. That's what it will be labeled. But I just took the same path for our tubing in our brown wire, just kind of ran it along the side here. And it kind of just comes behind this area. You can see here's where our tubing comes up there and our brown wire and the way I got them inside is there's actually some factory grommets. Little tricky to see from out here, but actually pretty easy to see from the inside. They're solid. And so you will have to take a drill bit and just kind of punch a hole through them. And those are what I use to route our air tubing and the brown wire inside under the dash. So now underneath the dash here on our driver's side just to give you a better view, this is where airline tubing and our brown wire came through. So the airline tube is going to route to an actuator cylinder that we're gonna bolt up on our brake pedal arm. And the brown wire is more or less gonna run to the same place. There's it's gonna be a switch on that actuator cylinder that the brown wire is gonna connect to. So here's what our actuator cylinder looks like. And this is relatively straight forward. The first thing you're gonna need to do is take that switch I talked about this is called the Reed switch, and this just slides into this little housing here. And you use a small flathead screwdriver just to barely snug down that bolt. You don't need to crank on it or anything. You just wanna keep the switch from moving around. From there, you're going to take the whole actuator cylinder itself and use the clamp that's on it to bolt it around your brake pedal arm. We are then going to have a cable that comes off of the actuator cylinder that runs down to an anchor that gets connected to the firewall as opposed to drilling new holes in the firewall and everything else, I figured I'd utilize his factory stud right here. This was originally kind of like a plastic nut that just kind of held down the carpet. But since we had to cut the carpet out anyway give us an area to bolt everything up. I figured why not use this So I just found a flange nut. This has not come included, but the thread pitch is gonna be an M six by 1.0, so you can grab that from hardware store or something and tighten it down. And what we're looking for, you want this cable to be nice and straight with the actuator cylinder so give you an example, if I push down on the brake pedal and pull back on that cylinder that you see that cable's nice and straight, we're also gonna want a little bit of slack in that cable. We wanna be able to move the cylinder around a little bit. Oh, it's not super tight. And to accomplish that on the bottom of that anchor, It's hard to see, but say around the bottom of it there's gonna be a four millimeter hex head set screw. And so you can tighten the cable up or loosen up. Once you find the desired tension you can just snug down that hex head set screw and that'll keep everything in place. So once you have the tension set, the way you want it, you can hook up the airline tube that we routed inside here, cut it to length, nice and clean and plug it right in. With that said, there's gonna be some wires that come off of our actuator cylinder. All right. Off of that reed switch. This kind of got them loosely hanging in here right now. And we're gonna need to hook these up. We're just gonna use some butt connectors to do that. All right, so the black wire from our reed switch is gonna get connected to the red wire from our indicator light. I haven't showed you where I put that yet but we can kind of run through it backwards and get it hooked up. So black wire from the reed switch, red wire to the indicator light. We'll then have the brown wire from the reed switch that goes to that brown wire that we ran inside of the cab here. Last but not the least we're going to have the blue wire from the reed switch. That's gonna get connected to the black wire from our indicator light. And we're also gonna put in at least about a foot and a half two foot piece of wire, put in an extra piece of wire there and that one side of the butt connector and that's gonna be a ground. So that's this black wire here. Where I grounded that, we pull our dash down here. This pops down, just routed that wire right up through this opening from the ring terminal, hold out this bolt using an eight millimeter socket and re-secured it. And that provides us with that ground we need. So now we can go over our indicator, light wires. So the small red and small black one they run for a little ways. And then eventually turn into this. They're in like one big sheathing here. It makes a little bit easier but what I did just run them right up through here and you kind of just sneak it right behind your kick panel. And if you just pull off this weather stripping a little bit you can actually just use that channel to route our wiring up. So just continues along behind the weather stripping through there. And once we get to this pillar, which you can do kind of just peel this back a little bit, just kind of sneak that wire in there and then you can just tuck that wire above your headliner and in between the glass and just feed that all the way through. We're gonna have this plastic piece here in front of our mirror. Again, you can kind of just sneak it in that opening there. And right here on the front side of this plastic is where I stuck the indicator lights. So this is simple. Some two sided sticky tape, peel it off, make sure the surface is clean and just push it right in the position. So now that our vehicle has everything hooked up what you're gonna go ahead and do is install the included fuse into the holder like so, and close up that cap. Now we can hook it up and test it out. And that'll finish up our look at and our installation of the Air Force One Supplemental Braking System on our 2021 Ford Ranger..

Customer Satisfaction Score:

Ratings & Reviews

4.8

219 reviews
5 Stars
(196)
4 Stars
(14)
3 Stars
(4)
2 Stars
(3)
1 Star
(2)
Review Sort Icon
by:
I ordered the second vehicle kit Air Force One because the coach is already equipped with AFO components. It was very well packed all items were sent. The shipping was right on time. I decided to perform the install myself and along with the instruction videos it was not as bad as I had imagined. A couple of suggestions, on the videos they talk about using weatherproof connectors that aren’t in the kit so had to go purchase them. I did not see any one cutting into the vacuum hoses and making those connections or installing the cable to the firewall of the Jeep. That was the biggest challenge due to no room to move or position the plate and anchor. All in all I would do it again. The install estimate was $2000 at a dealer and I felt I could do it myself after watching the videos. At this time I have not gotten to test the system but plan to shortly.
Eddie profile picture

Eddie

9/16/2026

Following up after installing the Air Force 1 system on our Jeep. I would highly recommend this to anyone needing a braking system for their towed. I would not waste the money on the cheap systems out there and make the one investment in a high quality braking system. It is so easy to connect and the piece of mind the goes into knowing you have the best available equipment is unmeasurable.

Jameson C. profile picture
Etrailer Expert

Jameson C.

9/17/2026

@Eddie That's great feedback thanks for sharing!
by:
Everything works as describe and with the personal telephone conversation you were able to resolve any issue I had with the order and the delivery was delivered on time. I will always make my first call directly to ETrailer, as I have since 2005. Thanks again for your continued patience with me support over the years.
by:
Third install for me. Only drawback is the leads on the breakaway switch are too short.
by:
Installed the Air Force One (AF1) in a 2017 Wrangler Rubicon. This replaced a RoadMaster Even Brake system. Love that the AF1 is so small and completely out of the way. Love that we don't have to cart the brake controller in and out every time we hook up and disconnect. It's so much easier just attaching one air hose and away you go.

I created a mounting plate from 3/16" aluminum plate and mounted it under the hood. (See pictures). Installation was pretty simple. Just make sure you take your time to align the cable correctly from the pneumatic control. I would also recommend using a through bolt through the Jeep firewall with fender washers as the firewall is pretty flimsy and I was worried the provided sheet metal screw wouldn't hold. It took a couple of test runs to get the cable adjusted properly but I haven't touched it since then. We've done 50 or more hookups and disconnects since initial installation and everything has been flawless. Would definitely buy this system again.
by:
I installed this in my second flat tow vehicle (dinghy) a 2024 GMC Sierra Denali 1500. I added a small aluminum angle iron bolted to the unit to facilitate mounting inside the front passenger side quarter panel. Easy to remove if needed for servicing but out of the way. I installed the air connection behind the front license plate and drilled a hole through the plastic. This will be covered with a flip-up license plate frame. The safety brake away was mounted to the outside of the driver side tow bracket with a small spacer between the unit and the bracket with a longer bolt. This allowed the routing of the brake away cable through the factory plastic hole. I remove the factory plastic cover when towing. Easy to access but invisible when daily driving. I plan to add a 90 degree fitting to ease the air connection process behind the license plate. My aim was easy to connect with a factory look while daily driving.
by:
Easy to install, works great on my 2023 Jeep Gladiator, pulling it with my 2005 American Tradition 40L Class A motorhome!
by:
Installed easy enough. Used an idea from Demco website to mount the main operation unit on top of the fuse box next to the battery on my 2021 F150. The etrailer videos were very helpful with the rest of the install. The air connection was install thru the license plate hold. The design of the bumper on this truck did not really provide a good option for installation so I attached to the side of the base plate.
by:
We decided to step up and buy the Air Force One braking system from etrailer, they had the best price and all the parts in stock which was great, we received the items a few days later. The instructions and [online] video allowed me to install the system quickly, there was no need to chase parts as everything was included. It was a pleasure to quickly talk with a knowledge customer service agent who verified the system figment.
by:
The installation was a one man afternoon project. Since the installation, we have towed our GMC Sierra to Florida and back as well as several more localized trips. The Air Force One system has greatly improved braking .
by:
The braking system works great applying the brakes with the same force as how hard you press in the RV, I would have given it a 5 star, but the adjustment for the indicator light is sticking, I looks like the bolts they give you are scraping on the cylinder so it does not shut off as it should, I have messed with adjusting for over an hour and it sticks. Prior to hookup with air it looked like it would work perfect , but once I hooked up air it started to stick
by:
Excelant braking system, no fuss no worry. It just works!
Wayne profile picture

Wayne

6/25/2024

Excellent! It does it’s job with no intervention on my part. I’ve towed three cars with BlueOx &amp Airforce1s for a total of about 20,000 miles without an issue of any kind.
by:
Already had the Air Force one hardware on our Tiffin so it made sense and works great. Super easy to hook up and unhook.
by:
easy install
by:
Arrived in a timely manner. All parts labeled and easily identifiable and install wasn’t straight forward. Only recommendation would be to add weatherproof electrical connections
by:
They do a great job of including everything. I know they can't cover everything but the firewall on my 2025 Jeep Grand Cherokee L Summit Reserve is very thin. They give you a plate to mount in this situation, but there is no way to fasten it down as there is no access behind to use nut and bolt, and the self drilling screws are the same as used to mount the cable connection. Ideally, they come up with different fasteners that may work better, like those used on overhead garage doors.
by:
No video installation instructions for my exact vehicle but etrailer was very helpful with determining a mounting location for the controller. The video was very helpful with the installation of the rest of the components. When I completed the installation, the braking system worked as intended.
Greg profile picture

Greg

2/24/2025

The only complaint I have is that the instructions stated to only tighten the nuts on the cylinder mounting to the brake arm finger tight. I tightened a bit more but still found myself struggling under the dash on my second trip with a leatherman re-adjusting and tightening the nuts as they had come loose. I would suggest you tighten those nuts to where youre satisfied they cant back off so you dont end up re-mounting as I did on the road. Otherwise Im very happy with the way the system functions. Very quick and easy to hook the Jeep to the RV. It was worth the installation hassle to have a worry free and easy hook-up every time we travel.

Jameson C. profile picture
Etrailer Expert

Jameson C.

2/24/2025

@Greg Good tip. I wonder if they worded that wrong and meant to say hand tight with an appropriate size wrench.
by:
If your coach has air brakes, the Air Force One system is the only way to go. No fiddling with it, no adjustments to make and absolutely no problems. It just WORKS! Installation is not difficult. Take your time, read ALL the instructions and pay attention to the details. I installed mine at the same time as I installed the Blue Ox tow bar kit on my Yukon. Once the whole front end is accessible, installation is pretty straightforward. It took me about about two half- days to install both. A lot of fiddling around taking all the plastic trim pieces apart and putting them back together again but once it was done the truck looks the same as it did. You cannot even tell the AF1 system is in place.
Steven profile picture

Steven

6/18/2022

What more can I say? It just WORKS! Plug in the air line, connect the lighting cable and breakaway switch tether and you’re done. What could be simpler? There is one installation quirk I will mention: if your toad has adjustable foot pedals, set them where you normally do and then pull the fuse for the actuator. The AF1 air cylinder can only be adjusted for a fixed pedal distance. Moving the pedals in or out after installing the air cylinder will result in either insufficient pull on the brake pedal or too much pull, resulting in a continuous dragging of the toad brakes. We never moved the pedals anyway so it was a non-issue for us, but something to be aware of if your toad has that feature.

by:
First of all, etrailer was very quick t ship our Air Force One braking system.
This is a great system. We also have a Ford Explorer that we have been towing for 6 years with Air Force One. When we added our Chevrolet Silverado to the stable, I considered buying a standalone braking system. But after some further thoughts and especially the fact that all I have to do is hook up the air hose and we are ready to go, it seemed only logical to install another Air Force One. Since our Silverado is gas powered, I tie strapped the Air Force One box to the battery location for a diesel truck since it was an empty spot.
Stu profile picture

Stu

7/5/2024

It is hard to believe that it has been a year since I installed this. I have not done anything to it since installation other than adjusting the brake pedal cable just a bit. I had it a little too tight short initially, causing more brakes than needed out of the Silverado.

by:
I installed this SMI Air Force One braking System on a 2017 Jeep Wrangler Sahara Unlimited. I watched and then followed the etrailer video. It was an easy install and the video was spot on. My coach already had the air tank installed, so I just had to buy the Second Vehicle Kit and the Air Jumper.
F. B. profile picture

F. B.

7/18/2019

Ive put 11,000 miles on this towing set-up in the last year. Still loving it.
by:
I highly recommend this kit. I would highly recommend this kit. Remember that this is only for the towed vehicle and doesn't include the motor home parts. I installed it on a diesel F 250 and it is very tight under the hood, so I installed the control box vertical, with wire ties behind the grill and it works perfect. I could not find any space under the hood that would be out of the way of future engine repairs. The kit is easy to install and the instructions are good. Just read the instructions and do a step at the time.
Vance profile picture

Vance

12/30/2022

This is by far the easiest brake system to use. Having got a new vehicle, this is the second vehicle that I have put this system on. It has been working very well one year later.

by:
Works perfect and the installation was awesome
by:
Simple kit to install except for working under the pedal area.
Much care is needed on how you get and seal penetrations in the firewall.
by:
We bought a Motorhome that had this braking system installed but we did not get the parts from the towed vehicle. This second vehicle kit was perfect for that. Etrailer had the best price and it was delivered fast. I will continue to use Etrailer.
William M. profile picture

William M.

8/18/2021

A year later this product is working perfeckly!
by:
It look like an great system to install.
by:
Have not installed it yet the customer service getting order and follow up has been great
Thank you
25
219
true
Show More Reviews

See what our Experts say about this Demco Accessories and Parts

  • Recommended Flat Tow Setup For 2022 Ford Escape Plug-In Hybrid Using Blue Ox Tow Bar
    Hey Kirt, Congrats on the new car! To get your car safe to flat tow you'll need the following parts: Base-Plate # RM39FR Tow-Bar Adapter # RO64FR Lighting # RM-15267 Chargeline # RM-156-25 Air-Force One Vehicle Side # SM99209 and Hose # SM99666 (if you do not still have the vehicle side of the kit, I didn't see you mention that) OR Air Force One # SM99226 (If you still have the hose and vehicle side of the kit) You may also need a high-low adapter, your tow bar needs to be within 3"...
    view full answer...
  • Air Force One Brake System Causing Brakes To Lock Up On Towed Vehicle
    Hello Michael. This is not a common issue with the Demco Air Force One braking system. I just spoke with my contact at Demco and they are not familiar with this issue either. It is especially perplexing since the Air Force One system does not have a gain setting and the braking pressure should be proportional to the brakes on the coach. My contact at Demco asked that you call them directly so their techs can help you troubleshoot over the phone while you are there with the coach. You can...
    view full answer...
  • Recommended Blue Ox Tow Bar Compatible Baseplate for a 2025 Jeep Wrangler Sahara
    Welcome back Michael and congrats on your new Jeep! To flat tow your 2025 Jeep Wrangler Sahara with a Blue Ox tow bar you'll need the Blue Ox baseplate kit item # BX1139. This baseplate is compatible with the stock Sahara bumper. To transfer over your Second Vehicle Kit for Demco Air Force One Flat Tow Brake System item # SM99209 you bought a couple years back, I recommend the Towed Vehicle Reinstall Kit for Demco Air Force One Flat Tow Brake System item # SM99226. it includes new fittings,...
    view full answer...
  • Recommended Flat Towing Setup for a 2026 Chevrolet Colorado ZR2
    Hey Kevin, congrats on the new truck! You've done your homework extremely well. I've listed those parts you'll need below out of your list. Let me know if you have any additional questions where it says Reply to Jerred H. Here are the parts you need to flat tow your 2026 Chevrolet Colorado ZR2 behind your 2022 Entegra Cornerstone: Tow Bar - Roadmaster Nighthawk All-Terrain Tow Bar w/ LED Lights item # RM-676 Baseplate Kit - Roadmaster Direct-Connect Base Plate Kit item # RM28GR Wiring...
    view full answer...
  • Second Vehicle Kit for Demco Air Force One
    Thanks for reaching out Dan. You will want to get the Second Vehicle Kit # SM99209. This will give you all of the vehicle side components in order to use your existing Demco Air Force One system on your 2025 Chevy Colorado. Do you already have the rest of your flat tow components for the new truck? If you need help selecting these, let us know!
    view full answer...
  • Does Install of Demco Air Force One Require Special Regulator When Installing on Ford Maverick
    Hey Michael, actually the Demco Stay IN Play DUO Inline Air Pressure Regulator # DM88UV is for the install of the DUO Stay In Play on a Ford Maverick like yours and not for the Air Force One as odd as that may sound since the AFO is for air brakes and the DUO is for hydraulic but it is the case. So you do not need to install the regulator since you are installing the part # SM99209. With that said I did attach the instructions for the valve that I took from the DUO's instructions for you...
    view full answer...
  • Parts Needed for Jeep Wrangler Towed by Motorhome that Had Demco Air Force One Installed
    Hey Ed, welcome back! You are definitely on the right track as what you need is Demco Air Force One Second Vehicle Kit part # SM99209. This comes with all of the parts you a missing and would be exactly what you need to get your flat tow setup on the road! A qualified RV air-brake technician can inspect the existing Air Force One plumbing and connect an appropriate pressure gauge/test fitting to the rear air connection. This allows them to verify that the system supplies air when the...
    view full answer...
  • Which Demco Air Force One Fits 2022 Dutchstar Built on Spartan K2 Chassis
    Since your 2022 Dutchstar is built on a K2 Spartan chassis the correct Demco Air Force One is the part # DM54YV. This will work great with your Jeep Wrangler that has the light kit already installed.
    view full answer...
  • Troubleshooting A Demco Air Force One Braking System Indicator Light That's Always On
    Hi Larry, If the indicator light is constantly on then it's likely just the placement of your reed switch on the air cylinder itself. The reed switch detects magnets and closes the circuit, sending power to the indicator light. Try moving it further toward the end of the cylinder (closer towards yourself). When installing the reed switch it's important to be careful because the reed switch can arc to ground, it will either no longer work or cause the LED to stay illuminated at all times....
    view full answer...
  • Demco Air Force One For a Jeep Towed By 2016 Motorhome With Air Supply Already At Back Of RV
    We do have a Second Vehicle Kit # SM99209 for the Demco Air Force One # SM99243. This kit contains everything needed for the vehicle side of the Air Force One. You would also need the Air Jumper # SM99666 and depending on which air connection you already have you may need the Replacement RV-Side Pushlock Connector # SM99625 if yours is not the same as the Demco.
    view full answer...
  • Tow Bar Lighting Kit Recommendation for 2024 Ford Bronco Raptor
    Hey Marc, you are off to a great start with the part numbers # SM99209, # SM99945, and # RM92ZR. For lighting I would recommend the Roadmaster part number # RM-15267 which comes with diodes to wire into your taillight wires to activate the taillights as well as the umbilical cable to go from the rear of the motorhome to the front of the towed vehicle.
    view full answer...
  • Does the Second Vehicle Kit for Air Force One Come w/ the Wireless Coachlink Monitor?
    Hey Christopher! The Second Vehicle Kit item # SM99209 does not come with the coach link transmitter. You'll need to purchase it separately with the Demco Wireless Coachlink Braking Monitor item # SM99945.
    view full answer...
  • Recommended Flat Towing Parts for a 2024 Ford Bronco Wildtrack
    The Second Vehicle Kit item # SM99209 does not come with the coach link transmitter. You'll need to purchase it separately with the Demco Wireless Coachlink Braking Monitor item # SM99945. As far as a high low adapter goes, that's going to require you to take a couple of measurements. In order to be considered level your RV's hitch has to be within 3" up or down to the base plates on your 2024 Bronco Wildtrack. I do not have specific measurements of your vehicle or have any way of knowing...
    view full answer...
  • Will an Air Force One Braking System Fit onto a Different Year/Make/Model of Vehicle?
    I am so sorry to hear about your car! If you were using a compatible Demco Air Force One Supplemental System like the # DM26VR on your 2014 Buick Enclave, that braking system will not necessarily fit a new vehicle. This is because Demco makes certain models of Air Force One systems that are engineered to fit different years/makes/models of vehicles. If you wish to know if your current Air Force One System is compatible with your new vehicle, please respond to this answer with the model...
    view full answer...
  • Parts Needed To Flat Tow 2023 Ford Bronco Raptor With 2018 Newmar Dutch Star 4369
    Hey Mike, thanks for reaching out. You are on the right track here - you really just need parts for the towed vehicle, and I can provide you with a full parts list. Here is the rest of what you'll need to flat tow your 2023 Ford Bronco Raptor: - etrailer Invisible Base Plate Kit - Removable Arms # e57FV (for standard factory plastic bumper) - Roadmaster Universal Hy-Power Diode Wiring Kit # RM-152 (For incandescent lights. Use part # RO94FR for LED taillights) - Pollak Heavy-Duty, 4-Pole,...
    view full answer...
  • Best Flat Tow Setup For 2022 Ford F-150 Towed Behind Motorhome With Roadmaster Tow Bar
    Hey Scott, thanks for reaching out. Yes, we can provide all the parts you need to flat tow your 2022 Ford F-150. It sounds like you already have a Roadmaster tow bar, and we can utilize the air connection on the back of your RV. Here is what I recommend: - Roadmaster Direct-Connect Base Plate Kit - Removable Arms # RM38VR - Roadmaster Smart Diode Kit for Variable Voltage LED Tail Lights - 7-Way to 6-Way Adapter Cord # RM38FR - Roadmaster Battery Charge Line Kit for Towed Vehicles # RM-156-25 -...
    view full answer...
  • Blue Ox Patriot or Air Force One Second Vehicle Kit for 2019 Ram 1500 Getting Flat Towed
    For ease of use and the fact this is a temporary situation a Blue Ox Patriot part BRK2019 I think will be your best choice. The Air Force One install is pretty in-depth and take quite a bit of time. The Patriot is super simple to install and use and when you're done using it you could easily sell it second hand. To give you an idea of what all you'd need to install with the Air Force One you can check out the second vehicle kit part # SM99209 which covers everything you'd need to install...
    view full answer...
  • Does Demco SBS Air Force One Coiled Air Jumper Kit for Spartan Chassis also Fit K2 Chassis
    Yes, the Demco SBS Air Force One Coiled Air Jumper Kit for Spartan Chassis # SM6296 is the correct kit to use with the SMI Second Vehicle Kit for Air Force One Supplemental Braking Systems part # SM99209 and # SM99243 that you referenced for the Spartan K2 chassis.
    view full answer...
  • Parts Needed to Flat Tow 2019 Ram 1500 with Motorhome that Has Air Force One Installed
    I don't have ability to view what's in your cart although I've had idea that we should be able to in this department, could you tell me what you have in there and I'll help?
    view full answer...
  • Wireless Monitor and Towed Vehicle Reinstall Kit for a Demco Air Force One Flat Tow Brake System
    Welcome back Cathy and thanks for the picture. The Demco Wireless Coachlink Braking Monitor item # SM99945 is the correct one for the Second Vehicle Kit for Demco Air Force One item # SM99209 you purchased back in 2023. It'll allow you to monitor the braking system from inside your motorhome. The Towed Vehicle Reinstall Kit for Demco Air Force One Flat Tow Brake System item # SM99226 has all the components you'll need to reinstall your Second Vehicle Kit for Demco Air Force One item #...
    view full answer...
  • Parts Needed to Flat Tow 2025 Ford Bronco Badlands
    Hey Bill, for the 2025 Ford Bronco the bumper type you go with will determine which Roadmaster base plate kit you'll need. If you go with the standard bumper you would need the part # RM79RR or if you go with the Modular bumper you would want the part # RM92ZR. The only issue with Roadmaster setups is there isn't a tow bar that fits your 2-1/2 inch hitch size so if you'd be open to a Blue Ox setup you could use the part # BLU78QV and a Blue Ox base plate kit # BLU23XR which actually fits...
    view full answer...
  • Parts Needed to Flat Tow 2023 Chevy Silverado 1500 With Blue Ox Setup and Demco Air Force One
    Hey Joe! Do you have a base plate already or just the Blue Ox tow bar? If you need a base plate kit you can use the Blue Ox Base Plate Kit # BLU24TR. In addition to the Second Vehicle Kit for Demco Air Force One # SM99209 you will need the following: -Roadmaster 4-Diode Universal Wiring Kit for Towed Vehicles # RM-15267 -Roadmaster Battery Disconnect for Towed Vehicle w/ Flat Tow Brake System - Diesel # RM93MR -Roadmaster Battery Charge Line Kit for Towed Vehicles # RM-156-25 These...
    view full answer...
  • Recommended Flat Towing Set Up for a 2022 Jeep Cherokee Trailhawk
    Hey James! Congrats on your new purchase! To flat tow your 2022 Jeep Cherokee Trailhawk you will need the following parts: Base Plate Kit - Blue Ox Base Plate Kit item # BX1143. This is designed specifically for the Trailhawk models and will work great with your Blue Ox tow bar. Compatibility shouldn't be an issue with the previous owner also towing a Trailhawk but if you would like me to confirm I would just need to know what model tow bar you have. Wiring Harness - Roadmaster Diode...
    view full answer...
  • Second Vehicle Kit Recommendation for Flat Towing with SMI Air Force One Braking Kit
    It does appear you have an air nozzle from a SMI Air Force One Supplemental Braking System # SM99243 which would mean that all you'd need further is the second vehicle kit part # SM99209 to install on the vehicle you plan to flat tow and you'd be set. You should trace the air line socket to make sure it looks like it goes to what I attached a picture of. In the picture is the portion of the Air Force One that mounts on the motorhome.
    view full answer...
    Image 1 for Image 2 for


< Previous
123. . .5


Do you have a question about this Accessories and Part?


Info for this part was:

Employee Mike L
Expert Research:
Mike L
Employee Jameson C
Expert Research:
Jameson C
Employee Adam R
Expert Research:
Adam R
Employee Andrew K
Video by:
Andrew K
Employee Kathleen M
Video by:
Kathleen M
Employee Michael B
Video by:
Michael B
Employee Jacob H
Video by:
Jacob H
Employee Aidan B
Video by:
Aidan B
Employee Thomas T
Video by:
Thomas T
Employee Schuyler H
Video by:
Schuyler H
Employee Rick G
Video by:
Rick G
Employee Daniel D
Video by:
Daniel D
Employee Islye U
Video by:
Islye U
Employee Jeff D
Installed by:
Jeff D
Employee Cole B
Installed by:
Cole B
Employee Joshua S
Video Edited:
Joshua S
Employee Jacob T
Video Edited:
Jacob T
Employee Dustin K
Video Edited:
Dustin K
Employee Chris R
Video Edited:
Chris R
Employee Jonathan Y
Video Edited:
Jonathan Y
Employee John S
Video Edited:
John S
Employee Ethan H
Video Edited:
Ethan H
Employee Laura H
Written by:
Laura H
Employee Randy B
Test Fit:
Randy B
Employee Andrew S
Test Fit:
Andrew S
Employee Shane H
Test Fit:
Shane H
Employee Robert C
Test Fit:
Robert C
Employee David F
Test Fit:
David F
Employee Ryan G
Test Fit:
Ryan G
Employee Clayton O
Test Fit:
Clayton O
Employee Bradley B
Test Fit:
Bradley B
Employee John A
Test Fit:
John A
Employee Jesse B
Test Fit:
Jesse B
Employee Scott A
Test Fit:
Scott A
Employee Daniel M
Test Fit:
Daniel M
Employee Wilson B
Updated by:
Wilson B
Employee Jenny M
Updated by:
Jenny M
Employee Kristina F
Updated by:
Kristina F
Employee Matthew E
Updated by:
Matthew E
Employee Amanda K
Updated by:
Amanda K

At etrailer we provide the best information available about the products we sell. We take the quality of our information seriously so that you can get the right part the first time. Let us know if anything is missing or if you have any questions.