


Thank you! Your comment has been submitted successfully. You should be able to view your question/comment here within a few days.
Error submitting comment. Please try again momentarily.


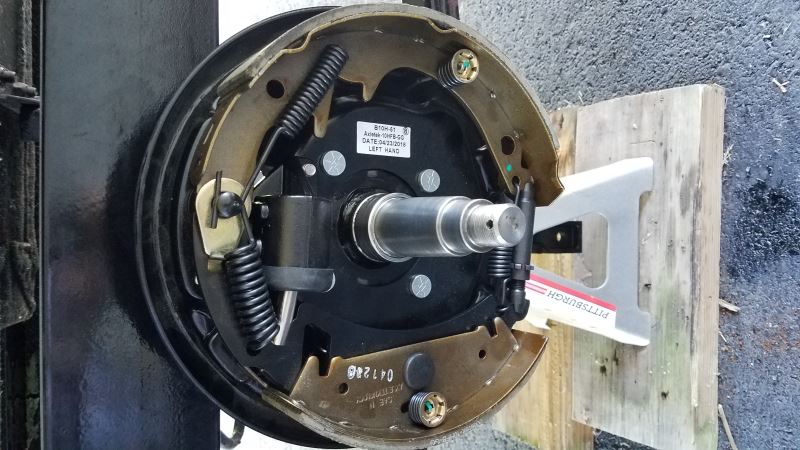
When you’re reversing into a tight space or down a ramp, you don’t want your trailer brakes grabbing. These free-backing hydraulic drum brakes use a fall-away shoe that releases in reverse, so the drums don’t engage even if the surge actuator is activated. You still get full braking power when moving forward, but smooth, drag-free motion when backing up.
Each brake assembly uses a single-plunger, uni-servo design matched to a surge-type hydraulic actuator for precise, predictable braking. The 10" diameter by 2-1/4" wide drums deliver strong stopping performance for 3,500-lb axle ratings and fit standard 4-bolt mounting flanges and 13", 14", or 15" wheels.
The shoes are lined with automotive-grade friction material that’s fully bonded—not riveted—for better torque and longer life. The pads are molded and circular-ground to reduce cracking and crumbling that can cause mechanical lockup. E-coated backing plates fend off wear and corrosion for dependable braking season after season.
These assemblies meet CSA and QAI certification requirements after extensive real-world braking tests. The friction material also carries SAE-N certification, meaning it’s environmentally safe while maintaining consistent braking performance across North America.
Each package includes ten left-hand and ten right-hand assemblies—ideal for building or refurbishing multiple trailers. Mounting bolts are included, and they pair perfectly with the Mounting Hardware for 10" Brake Assemblies – 10 Pairs # BRKH10B10 (sold separately). Fine-tooth adjusters make manual tuning straightforward when it’s time to dial in brake performance.
Videos are provided as a guide only. Refer to manufacturer installation instructions and specs for complete information.
Hey, everybody, Ryan here at etrailer. Today we're gonna be showing you how to install the etrailer.com hydraulic trailer brake kit. But before we get into that why don't we just take a couple of minutes, check this out, and make sure it's gonna work for you What these are gonna do, they're gonna be either a direct replacement for your trailer or even potentially an upgrade. And I say that because these are gonna be what's called free backing which means they're not gonna engage whenever you're in reverse. So really popular, you see these on boat trailers like we have here today. Of course they're on other styles as well, but if your old actuator up front, it pushes the fluid back here to engage your brakes.
If you're sick of having to manually lock that out when you go into reverse, you can get these and not have to worry about that. So these are gonna be designed to work with 3500 pound axles. Also work with those 14 and 15 inch wheel sizes. These are gonna bolt up to the axles that have a four bolt flange which is pretty much a standard. I rarely ever see anything different.
So, in most cases these are gonna work just fine. The pads are gonna be completely bonded, so there's no rivets in it like you'd see in some old school applications. So more or less you just get better performance, longer life, they're less prone to crack and things like that, so they're up to date as far as the standards go. These aren't self-adjusting so you can manually adjust it using the star wheel there which personally I like. You can dial it in how you want and you only have to do it every now and again, to be honest with you.
These are also available in a set that has a Dacromet finish. So it's a special type of coating on there that helps against corrosion and stuff a little bit better. So maybe if you're by the coast or in and out of the water a lot or anything along those lines those will probably hold up just a little bit longer. But it's really just gonna depend on your particular situation. These are gonna be a 10 inch assembly, again, which is super common.
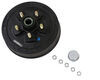
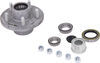
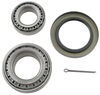
And something that I usually like to recommend, at least usually about 95% of the time it seems like, is when you change this stuff out it's definitely not a bad idea to do your hub and drum assembly as well. We offer some here that are really nice, the bearings are already packed and everything like that so you slap 'em on and and call it a day. But that's for you to decide. If your hub and drum is in really good shape, ours actually was today, you can reuse it, that's fine, by all means. But totally up to you, if you want the parts they are available here. With that said, we see the front side of this. I actually have an extra one of these on hand. I'll grab that and we can see what's going on on the back. Taking a look at the backside of this, just much easier to see. I'm holding it like this, what's going on. Pretty standard stuff here. The backing plate has a coating on it to help keep it in good shape and not rust out and things like that. The sonder where your brake line threads in, that's just completely standard, industry standard stuff. And you have a bunch of brake line kits and everything like that that'll work with this. And of course back here you have your leader screw. So that's how you let the air out of the system once you get this completely installed. And I wanna mention these are not gonna come with the washers and the nuts. You need to actually secure this to your axle. So if you're unsure of the condition of yours or if they're gonna be the same, a lot of times with these I just recommend picking up the kit. That way you have new stuff and you're not gonna have your trailer halfway apart trying to find nuts and bolts and washers and everything like that right in the middle of your install. And then these, there's gonna be some plugs here that'll pop out and once this assembly's on that's gonna give you access to this star wheel here and that's how you're gonna make your adjustments. You can get your screwdriver or your spoon in through there and turn this and make your adjustments in terms of how tight or how loose you wanna run your brakes. These are gonna be available individually as well as a kit and they are side specific. You got your right side and your left side. I always recommend to replace both sides of an axle. It's just the right way to do things. But I understand some people could be in a pinch or whatever the case may be, need to get that going again, so they are available like that. But other than that, at the end of the day, a great way to get your brakes working again and to get you back on the road and and staying safe. As far as the installation goes, really not too bad. Being that it's a whole assembly you just swap out one big part. You're not dealing with springs and trying to change pads and cleaning all this stuff up and everything. So it's about as streamlined as it can get. If you'd like to hang around, though, we'll go ahead and get started on it now. So to begin your installation you're first gonna need to remove your tire, that way we can get all the old parts off. So get your trailer up in the air safely, use jack stands that are appropriate and everything else. Keep in mind too it seems like a lot of trailers are all set up just a little bit different. So yours might not be exactly the same as ours but for the most part you'll be able to use this as some general guidance and everything works the same. So with that said, I'll go ahead and get our tire removed. (tool whirring) Then get the cap off of here. So I just take a small chisel like this, but a flathead screwdriver will work too. Just carefully get in between there, spin it every now and again and work your way around. Doing your best not to damage the cap. And get that popped off. And I usually like to have some cardboard or something set aside where we can set all these greasy parts. So if you wipe some of that grease away it makes it easier to work, but that'll expose a cotter pin, in our case at least. Some of you might just have a press on type retainer. But either way this stuff has to come off so we can get our hub and drum assembly off. I'll straighten that out. Get that popped out. We have this castle nut, get that removed. Then there'll be a nut right there. And usually these are pretty much hand tight, at least they should be, which ours was. So we'll unthread that. It's a little tight, if your hands are slick or whatever, not a big deal, a pair of pliers or a socket or whatever you got on hand. We'll get this removed, this washer. And set that to the side. Then your front bearing. Which I'm trying to take ours out gently 'cause they're brand new so we reuse 'em. Get that out. Set this off to the side where it's clean. And then we can carefully slide our hub and drum assembly off. At this point you'd want to unthread your brake line from your brake shoes here, your backing plate cylinder. So I just have our new part here and a new line just to show you how you would do this 'cause it's a pain to see under there and get everything on film. But yours, the back of it'll be extremely similar to this if not identical, so your brake line will be threaded into this cylinder here and you just need to unthread it, essentially, that way it's free when we go to pull this original piece off. With that said a lot of times these brake lines and stuff are gonna be brass or made from a softer type of material. If you have a line wrench like this that's what I definitely recommend using 'cause it gets much better of a bite on that fitting and you're way less likely to strip it. The majority of the time the size you're gonna need will be either a 3/8, sometimes there'll be a 10 millimeter just depending on the manufacturer and how new everything is. To actually get our assembly off it's gonna be held in place by four pieces of hardware. Usually these are studs and you can just remove the nuts. In our case this is an actual bolt, same difference. And I'm gonna get all these pulled out. And that way we're able to get this off here. (tool whirring) So we get that very last piece of hardware out. Carefully slide this off. We don't want to damage our spindle, jam our assembly on there. So get that removed and get it out of the way. You can grab your assembly and get it in place. Not a bad idea to clean up the surface, wipe it down, just freshen everything up while you're right here. Make sure it's in good shape and everything. And with these being left and right hand specific, make sure you put the right one on the correct side. We have the right hand side and we're over on what most people would consider the passenger side of the vehicle. So if you look at your trailer from the back, the right hand side would would be the right side. This will just slide right over. Line up. And then we can take new hardware. We have those split lock washers and nuts and get 'em started on the back there. We put these on and we'll do the lock washer first and then the nut. And I like to get 'em all as tight as I can by hand. And then when you completely tighten these down I like to do it in a X pattern. I'll give bottom right one couple turns to snug it up and then I'll move to the top left and so on. That way it draws everything in evenly. Once you get everything completely bolted down you can get your brake line reinstalled. So it's gonna go right into the cylinder there. And with these, my advice is just take your time, make sure it's actually lined up because you do not wanna cross thread this. Being that it's pretty soft metals it's pretty easy to do. Just make sure it's started straight. Once you get that started, get it as tight as you can by hand and then come back with that line wrench, preferably, and snug it down. My thought with these, get it snug and then bump it a little bit more. Try not to over tighten it because it can crack pretty easily. My thought is to get it all together and then check for leaks and everything and one is leaking, you can tighten it up a little bit. Not the end of the world. End up cracking the fitting or breaking something from over tightening it then you open up a can of worms. So that's my advice there. And get your hub and drum assembly back on. If you got brand new ones that are already built up and everything, great, nothing really to it. If you decide to reuse your old ones, a couple things you wanna check for, you wanna make sure they're clean, make sure that they measure within spec, make sure that they're not cracked or beat up and the seals and bearings are packed and everything's good. Like I said in our case, I checked everything, we're in pretty good shape. The seals and the bearings were done not long ago at all. So everything's pretty much brand new. So we're able to get away with reusing 'em. With that said, a lot of times when you go to put the drum on, it won't fit, almost like the shoes are out too far. So if it happens to you, which it almost does every time, you can adjust those shoes inward by using the star key here. So I'm turning it towards the center of our trailer and as I'm doing that it's drawing these shoes in And that will allow me to slide our hub and drum into place here. So while that's resting there go ahead and grab our other components here. We got the front bearing. It'll slide on and then that flat washer. And take the nut and get that on. I tighten these nuts down. What I like to do is get it as tight as I can by hand and then come back with some pliers or a socket or something and tighten it down pretty tight. And what that's doing is making sure that this is completely seated on the spindle and that our seal's on, pressed on there, and everything's good. So I got that tightened by hand and then I'm just gonna break it loose. And then so you set the preload. Really you just make sure this is seated. Just tighten it by hand. That's really all there is to it there. Make sure you don't have any play or slop. This should spin fairly easily. If you got a bunch of slop and stuff in there, something's wrong, you need to take it off and try again or tighten this down a little more to correct that. But once that is set then you can take your castle nut there. Now you're able to get your cap back on. So people all have their own way of doing this. Some people like to take a block of wood and tap it like that, which works pretty good. Other people like to take a screwdriver and tap the the edge of it there and rotate it around. Which is all feasible. Just do your best to not try to damage this 'cause they are actually quite easy sometimes. And then there's also tools like this you could use to drive it on as well. So once we do that, you just wanna make sure that it's completely seated and everything's tight. With that all wrapped up, while we still got this in the air what I'm gonna do is just temporarily put our wheel on. I'm just get a few lug nuts on it. And that's because we are gonna have to adjust the brake. And the way I do it is I use the tire spinning to make that adjustment. (tool whirring) So just loosely put this on with a few lug nuts (tool whirring) and that'll do the trick. To adjust the brakes and these little plugs in the backing plate here, you can pop that one out and that'll let us get to that star key that we adjusted to get our hub and drum assembly on. So when you do that, it makes it super loose and the brakes really don't bite at all. So you can take a flathead screwdriver or they make special spoon tools that you can use as well, whatever you got. And you're gonna turn that star key towards the outside of the trailer. So I'm putting it in and lifting up on it. And when you do that you can feel it click. That's gonna set that tension and what you can do, I just put a piece of tape on our tire for a reference. I'm gonna spin it good by hand, spin it pretty hard, and you're looking for about a full revolution before it stops itself. So I have it a little tight probably. So if you're a little tight you'd come in and undo it a click or two. If it's loose you just do the opposite there. So I did it about a click or two looser. And it might be a little too loose now so you gotta fine tune it We'll do half a turn there, see what happens. That's about spot on there, at least for my liking. So you just gotta play with it a little bit until you find that sweet spot and once you do, just go ahead and put your backing plate plugged back in and if you picked up a set of these, you'd simply repeat this same process over on the other side of your trailer. Once you have your brakes adjusted and everything's hooked up and whatnot, since we did open up our system we are gonna have to bleed the brakes, that way we can get all the air out of it. And so what you want to do is where your master cylinder is you'll fill that up full of the appropriate fluid. It's usually DOT 3. Some of the newer ones will take Dot 4, just depends. But you're essentially gonna emulate pumping the brakes in a sense. So what I usually do is just take the breakaway cable and you can pull that. 'Cause when you're pulling this that is actuating our cylinder there and sending fluid back. And so you can do that several times. You usually feel it get tight. You never wanna let this run dry 'cause then it'll suck the air in. But you're gonna need a buddy to give you a hand doing this. And so when you do this, you wanna start with the wheel furthest away from your cylinder. So in our case it would be our right side 'cause our main line runs down the frame this way and then over. And on the back of our brake assembly we have that bleeder screw. And so what's gonna happen, you're gonna have someone hold pressure and while you're holding this pressure you can open up that bleeder screw, just crack it open. And usually you'll see some air, air will come out or fluid will spit out. And while they're still holding to this you wanna close that bleeder screw and tell 'em it's okay, they can let go. Pump it again, pump it again, pump it again, hold it, open it, and just repeat that process until you get a steady stream of brake fluid coming out of that bleeder screw. And once you got that all set, do the other side and so on. And that's how you end up bleeding your brakes. So you have your buddy hold the brake like we talked about and then I put a clear hose on this just to prevent a big mess from happening, but you take your bleeder screw and you just barely crack it open. And like I said you wanna see a steady stream of fluid come out. Usually takes a handful of times, but once you close it, your buddy knows you can let go and pump that pressure again. And once he holds it you just continue to repeat that process. And while you're doing this too, not a bad idea to check for any potential leaks where you made any connections. So here, if you see fluid coming out you know you got an issue, you're never gonna get the brakes bled. You're just constantly pouring. So keep an eye on that as well. Once you have the system bled and you're happy with everything, don't forget to put the rest of your lug nuts, tighten down, get the trailer back on the ground, and torque your lug nuts down. And that will finish up our look at and our installation of the etrailer.com drum brake assembly.
Ratings & Reviews



Garrett T.

3/19/2021
Still working fine.
Jan
10/7/2021
Still working great, no problems!

Albert S.
8/31/2019
The brakes I order were easy to install and work very well. Have ordered other ltems all were received fast and on time thanks etrailer will be ordering again soon

David V.
11/1/2018
My trailer brakes are still working great. Havent had to give this repair a second thought. Thanks
Info for this part was:
At etrailer we provide the best information available about the products we sell. We take the quality of our information seriously so that you can get the right part the first time. Let us know if anything is missing or if you have any questions.



















Charles D.
9/22/2021
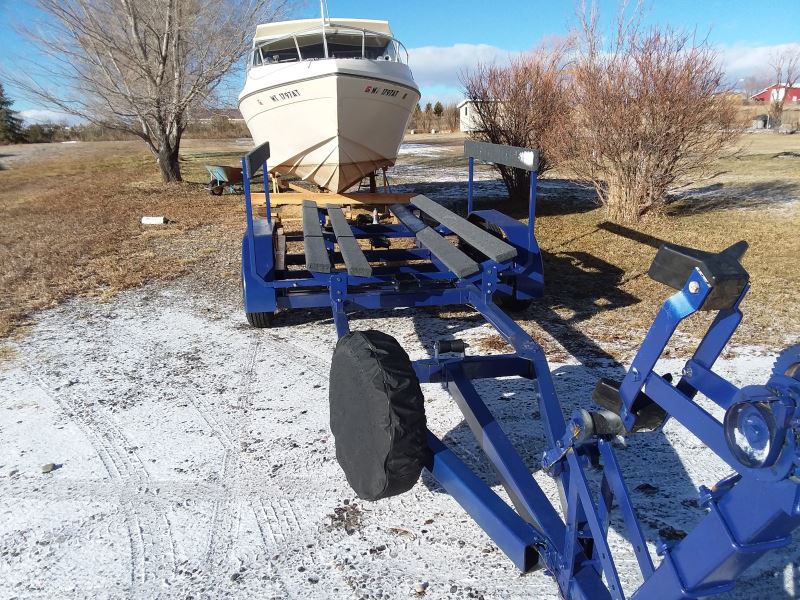
Its been a year now since I have installed the hydraulic trailer brake kit assembly and drums to my boat trailer and they have been working as great as the day I installed them. No issues