bing tracking image
  1. Accessories and Parts
  2. etrailer
  3. Trailer Brakes
  4. Electric Drum Brakes
  5. Brake Magnets
  6. 10 Inch
Replacement Magnet Kit for 10" Electric Trailer Brake Assemblies - 3,500 lbs
etrailer

Replacement Magnet Kit for 10" Electric Trailer Brake Assemblies - 3,500 lbs

Part Number: AKBRKR-M10
In Stock
$30.69
Accessories and Parts
zoom in icon
slider vertical icon
zoom out icon
Comment field cannot be left empty.
Name field cannot be left empty.
By submitting this form, you understand and agree to our Terms of Sale, Website Terms of Use and Privacy Policy.

Thank you! Your comment has been submitted successfully. You should be able to view your question/comment here within a few days.

Error submitting comment. Please try again momentarily.

Product Images

In Use/Installed

Customer Photos

Need help with installation?
Locate installers near me
Replace the worn or damaged magnet on your electric trailer brake assembly. Fits 10" assemblies with a 3,500-lb axle rating. Includes magnet, clip, and spring. 1-800-940-8924 to order etrailer accessories and parts part number AKBRKR-M10 or order online at etrailer.com. Free expert support on all etrailer products. Great prices and Fastest Shipping for Replacement Magnet Kit for 10" Electric Trailer Brake Assemblies - 3,500 lbs. Accessories and Parts reviews from real customers.
  • All Info
  • Reviews (131)
  • Q & A (0)
  • Videos (2)
  • Photos

etrailer Accessories and Parts - AKBRKR-M10

  • Trailer Brakes
  • Electric Drum Brakes
  • Brake Magnets
  • etrailer
  • 10 Inch
  • 3500 lbs

Replace the worn or damaged magnet on your electric trailer brake assembly. Fits 10" assemblies with a 3,500-lb axle rating. Includes magnet, clip, and spring.


Features:

  • Replacement magnet fits 10" trailer brake assemblies designed for 3,500-lb axles
    • Compatible with brake assemblies from most manufacturers, including AxleTek, Dexter, Lippert (LCI), IAC, and AL-KO
  • Oval design
  • Dimensions: 2" long x 3-1/8" wide x 1" tall
  • Magnet, retaining clip, and spring included


13-818 AxleTek Replacement Brake Magnet Kit for 10" Brake Assembly - 3.5K lbs


Video of Replacement Magnet Kit for 10" Electric Trailer Brake Assemblies - 3,500 lbs
Video Thumbnail Video Player Dialog

Videos are provided as a guide only. Refer to manufacturer installation instructions and specs for complete information.


Video Transcript for Feature Review Replacement Magnet Kit for 10" Electric Trailer Brake Assemblies

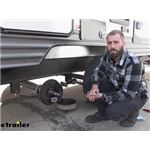
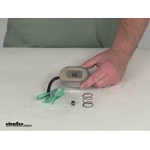
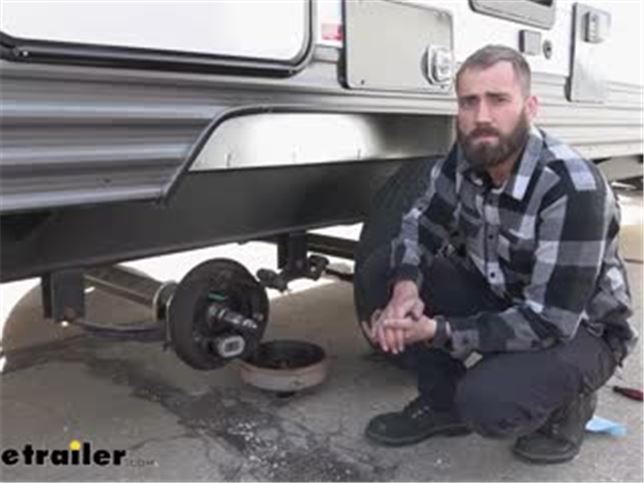
Hey guys, Kevin here with etrailer and today we're gonna be taking a look at etrailer's line of replacement magnet kits for electric trailer brake assemblies. Each of these replacement brake magnets fit a specific brake assembly. So you are gonna wanna know exactly what size brake assembly that you have before you go ahead and purchase that replacement magnet. This specific one is designed for 10 inch brake assemblies, which are typically gonna be on your 3,500 pound axles. So if you don't know exactly what size brake assembly you have, one good bet is to look at the capacity of your axle and that will typically get you in the right direction of what your brake assembly is. Now, typically this isn't a part that you would normally want to replace.

Essentially, if this is kind of worn out then your whole assembly is typically also worn out itself. This would be a good time to take a look at your brake shoes, look at your pads, just see how worn in they are. In our case today, it wasn't an issue with the brake assembly because this is all brand new. It just happened to be just how they ran that wiring for that brake magnet at the factory causing an issue where it was shorting out. To begin our installation we'll have to get to our brake assembly and to do that we will first need to remove our wheel which we've already gone ahead and done.

Then we're gonna pull out our pin and take our castle nut off. Then we can start working out our outer bearing. Usually you can just pull on that, that'll kind of give you enough pressure to pop it right off. Set that down on a nice clean towel. And work the rest of our hub off.

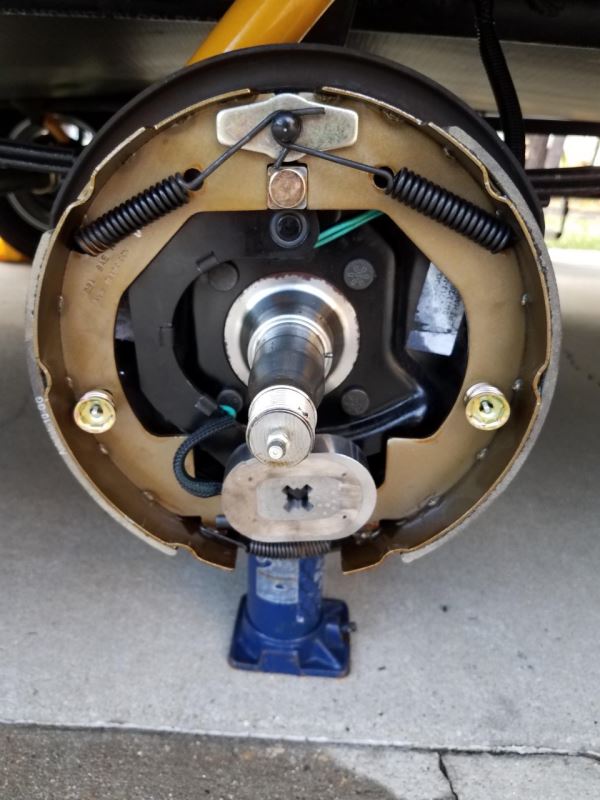
Taking a look at our brake magnet, we can see kind of where it failed. Down here on the actual magnet itself, it's starting to flake off. You can see that it started to heat up and it really started tearing into the magnet. If we look at our wiring though, that's the major cause here. This was sitting here rubbing against our brake shoe and just eating up the wire, then the wire was shorting and overheating.

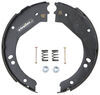
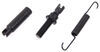
On the back we're gonna have this little clip. We're gonna go ahead and just pop it off. Just kinda sit here and slowly work it out 'cause we're gonna have to reuse it. I'm just using a flathead screwdriver. (metal clanging) And once we have that out, we can pop our wiring through. So I've gone ahead and I cut that wire and worked out our little gasket that we had there. I'm gonna slip that aside for now. And now I'm gonna go ahead and just pop off these three clips and then the one that's inside of our brake right in here. And go ahead and just get that off real easy right there. Make sure these are loose. Start pulling our wiring back. (metal clanging) And we'll also remove this spring. So your new brake magnet is not gonna come with these little clips that go along the brake shoe so we're gonna have to reuse those. And as you can see with this one, they way, way over-tighten that down so it actually cut into the wire itself. So that could be another reason why this magnet failed. So we're gonna just try and work our screwdriver in there and just pry it up a bit and get it off. On your spring, you're going to have a little portion where it's kind of bent down, got that 90 degree angle that's what's gonna clip into this little hole right here and hold this spring in place. So we're gonna try to get that on here. So I'm gonna take that back part, slip it through, popped right in no problem for us. Then we can go ahead and slip on our new brake magnet. Push that in a bit and we'll stick on our center clip. Now they do give you a new one with this kit. This is the only clip that you will get. So like I said, make sure you hold onto those other ones. I'll just push that in place and that's gonna keep our magnet from being able to pop off. From there we'll go ahead and we'll sneak our wiring back and just up around and replace our clips on. And I'm just gonna put 'em in the same spot where we already had our clips and sneak our wiring out the back. Get rid of some of that excess. Go ahead and slip on all of our clips. And this time we're not gonna go nearly as tight as the previous one, just so we don't have any issues. Slightly squeeze that down just until it's kind of touching, we still want this to be able to move just a bit. Go ahead and tuck that in place and put our clip back on. And just keep repeating that process as we work our way back. I'm gonna go ahead and replace my gasket on here. Push that back in place and then I'm gonna strip the casing back on this just a little bit 'cause we're gonna using heat shrink butt connectors to attach to our wires coming from our junction box. Put on some heat shrink butt connectors. Definitely recommend going with heat shrink just because these are gonna be out and exposed to the elements. You don't want a chance of any water getting in there and corroding it and then your brake's not working. And it doesn't matter which wire you hook up to which. So we can go ahead and we'll probably just slip this top one in and crimp it down. And repeat that with our other wires. Shrink down our heat shrink butt connectors. You can use a heat gun like I'm gonna do today or if you just had a lighter, you can go ahead and use that as well. (heat gun whirring) Next I'm gonna go ahead and just kinda zip tie this up just a little bit. I'm gonna leave enough so that when the axle kind of moves, you know, it's not gonna get pinched on anything but I also don't want it hanging too low where it's gonna get caught on anything. Now that our brakes back in place, we can go ahead and reassemble our hub. Just push that on, we'll place on our outer bearing. And we can just use our castle nut to kind of drive in our outer bearing. We're just gonna go until that's tight and then we'll back it off so we can get our pin in place. So got no movement out of the hub. A little tight from just my hands, so we're gonna back that off just a bit. Right about there. Still no play. So now we can stick in our pin. And then we'll just bend that back in place. Now we can go ahead and throw on our wheel. (tire clanging) Replace our lug nuts and then the cap over our spindle. Well, I think about does it for today's look at etrailer's line of replacement magnet kits for electric trailer brake assemblies. My name's Kevin, thanks for watching.

Customer Satisfaction Score:

Ratings & Reviews

4.8

131 reviews
5 Stars
(112)
4 Stars
(14)
3 Stars
(1)
2 Stars
(2)
1 Star
(2)
Review Sort Icon
by:
Great replacement part and installed quickly and easily. Neil was excellent with helping me find the right hub and helping with returns due to AI giving me incorrect information on what part I had. Great company to deal with and great prices. Great products I recommend using them.
by:
Quality product makes sure buy full set for replacing all tires. My drums were shot, so I had to have those re surfaced first as well.
by:
Perfect replacement parts, fit and worked like they should
by:
Great information on your website to help with determining the right part for your trailer. The parts shipped quickly and had them installed on my trailer in no time. The parts are an exact match for my 2017 Grand Design trailer. They work perfectly and I will be using etrailer when I need to replace or upgrade my brakes in the future.
by:
Seem to be a good replacement.
by:
I realized brake on one side of axle was not working. Opened it up to find one of the wires pulled out of the magnet. Ordered this one & problem solved. Good price, exact fit on 3500lb Dexter axle. No problems.
by:
I've purchased lots of small items from etrailer for many years. I always get the parts quicker than I get the opportunity to work on something. The fact that I can find the parts, with good descriptions, and photos, and compare items late in the evening, and order them at my convenience is a giant plus for me. The icing on the cake is their very competitive prices.
Bought parts for electric brakes on an equipment trailer I'm rebuilding this time.
Mr. C. profile picture

Mr. C.

6/9/2018

Replaced the trailer brake magnets on my equipment trailer a year ago. Continue to work good. Now I can move my equipment to job sites as needed.

by:
Replaced original brake magnets last year with these because the original one were causing an overload error code. These have performed perfectly. These were great for the price and working with retailer is always a pleasure.
Allen S. profile picture

Allen S.

3/18/2019

The brake magnets are still working as they should. They seem to be a great product for the price.
by:
The correct magnet at a great price. Nice it comes with a new spring and retainer, and the wires are at a good length to work with. Shipping was very reasonable and fast - thanks etrailer.com!
Linda profile picture

Linda

8/25/2023

The trailer brakes are still doing well and the magnets work as designed. I really am happy with the magnets!

by:
The replacement brake magnet was fine, that just did not turn out to be the problem. A complete brake assembly replacement and drums turned was the fix. Parts also from etrailer, and it works great.
by:
All parts arrived quickly and fit perfect! I bought a used car trailer few months ago and brakes quit working. Pulled drums and needed new magnets, it was missing spring on one side, prior owner must have got some bad service. E-Trialer hooked me up with all the parts, also ordered hub seals and grease and repacked bearings. Thank you !!!
by:
The magnet kit was exactly what I needed (along with a separate order for the brake shoes and a springs kit). I had searched all over my local area, even going to several RV and Trailer parts stores, but they couldn't get me the parts I needed.
With just a little searching on etrailer.com, I got everything I needed, including new cotter pins!
I have already completed one wheel, completely replacing all the brake parts on my 1995 Wilderness Travel Trailer, and all the parts fit perfect - just like new. The parts came with instructions and warnings, and with the springs kits, I had everything I needed to get just-like-new brakes. etrailer.com made it very easy!
But why replace the shoes and parts rather than buy a whole new brake assembly? On some trailers, like mine, the brake assembly is welded to the axle, and would require completely new axles (at $2200) to replace the brake assembly. So the only option, in some cases, is to replace the shoes and other hardware.
One point of warning - the recommendation that comes with the parts is that you replace ALL MAGNETS and ALL SHOES on ALL WHEELS at the same time, otherwise you risk uneven braking. I didn't know this when I made my first order, so I had to order additional parts. But hey, if you are going to all the trouble to replaces the shoes and magnets and re-grease the bearings on one wheel, you might as well do all four right?
by:
Never used them as I ended up needing a complete "Kit". Do you take back opened box parts?
Jenny N. profile picture
Etrailer Expert

Jenny N.

10/2/2023

For these magnets it has been too long from the order was placed that I can offer a return. We have a 60 day return window on unused parts.

by:
Can't speak to the part, the rating is purely etrailer.
Customer service was a joke when this thing didn't show when expected.
"I don't know sir, it could take up to 2 weeks." Really? I ordered a repair part, there was no mention of 2 weeks when it was ordered, otherwise I'd have went a different route. They sell parts here, you'll get it when you get it, if that's good enough for you, you're in the right place. Disappointed.
by:
Needed trailer brake parts and etrailer had the best description of the products and prices. I like the fact that the parts are very well explained with dimensions so that you can order the proper part the first order.

Good shipping, hassle free transaction.
by:
Arrived fast and was an easy fix to get my trailer breaks back in working order. If I would do it again though I would have opted to buy the whole break kit versus just the magnet.
by:
Product was an exact fit. Magnet works in either polarity making install a snap. Trimmed excess wire and connected with heat shrink crimp connectors inside the drum.
by:
Replaced the failed coils on my camper and got functional brakes again. What more can I say but that they do the job. Make sure the wires clear all moving parts when installing.
by:
I ordered the 10" drum trailer brake replacement magnets and they not only fit and worked perfectly, but arrived before I had expected. etrailer has always stocked everything I've needed and at a great price. Their customer service and 'after sale follow-up' is the best I've ever experienced.
A great company to deal with.
Jon B.
by:
It was exactly what I needed to get my brakes back in working order. I was worried because I had 10” hubs -1.5” brakes which are no longer available. Based on info provided by other questions and answers it was an identical replacement.
by:
The hub and magnet developed a deep groove on the original equipment so needed a replacement. Since the brakes were still good all around, I went this route instead of a full brake assembly replacement. Installed ok.
by:
Perfect fit an fast shipping had my trailer repaired and back on the road quickly
by:
Product I ordered was exactly what was needed, and the shipping, even 3 days before Christmas, was fast, and I appreciate the service I received from etrailer.
by:
sales chat was helpful in verifying this was the correct part I needed for an old homemade trailer, shipping was swift, installation fairly straightforward
by:
Braking is weak since replacing hub/drum and magnets. Called tech help but contributed nothing that helped.
Mike L. profile picture
Etrailer Expert

Mike L.

9/26/2018

There are several things to check to ensure your trailer brakes are working at their optimum effectiveness. 1 With the brake controller gain turned all the way up and the manual brake switch on the controller activated, ideally youll want to see 10-1/2 volts at each brake magnet, 10 volts at the absolute minimum. 2 Ensure that the brakes are properly adjusted. If they are adjusted properly, you should feel a very slight lining drag when you spin the wheel by hand. 3 When new brakes and drums are installed, the brakes should be burnished in. This involves accelerating up to about 40 mph, then using the manual brake switch to slow the vehicle/trailer down to 20 mph. Once at 20 mph, release the manual override and travel about a mile to allow enough time for brakes to cool and repeat the process again. You will need to repeat this process 20 to 30 times. This allows the magnet surface and the armature surface of the brake drum to completely conform to each other. This also breaks in the surface of the brake shoes and will prevent them from glazing in the future.

25
131
true
Show More Reviews

See what our Experts say about this etrailer Accessories and Parts

  • Does BK2-100 Bearing Kit Come With A Spindle Sleeve
    Hey Rick, thanks for reaching out. The # BK2-100 bearing kit is correct for your 3,500 lb axle with #84 spindle. Spindle sleeves are not included but we do have them available separately as part # BB60010 (1 pair). For that you'd need a 1-1/2" spindle set tool which is unfortunately not something we carry here. We do have the magnets for Dexter 3,500 lb brake assembly and for that you can use the following: - Replacement Magnet Kit for 10" Electric Trailer Brake Assemblies - 3,500 lbs...
    view full answer...
  • What Ohms Should Trailer Brake Magnets Be?
    Assuming that when you tested the resistance of the brakes you were testing the two wires on each magnet and getting 2.0 and 2.8 ohms the magnets on your trailer are not working correctly and will need to be replaced. For 7" brakes you should get 3.8-4.0 ohms, and for 10-12" brakes you should have 3.0-3.8 ohms. If the brake shoes themselves are good you can replace just the magnet using 7" # AKBRKR-M7, 10" # AKBRKR-M10, or 12" # AKBRKR-M12. If the shoes are needing replacement as well...
    view full answer...
  • Replacement Electric 10" Brake Shoes For a 2000 Scamp 19' Everlands
    I reached out to Scamp for help to find your exact brakes, unfortunately due to the age of your 2000 Scamp 19 Everglades they did not have the exact information or parts available and the only thing that they could tell me is your trailer uses 10" brakes. I recommend pulling apart one of your hubs first to check that the Replacement Shoe and Lining Kit # AKBRKR-S-10 and Magnet Kit # AKBRKR-M10 are the correct. This will also be a good time to also inspect your bearings, drums, grease...
    view full answer...
  • Replacement Magnet for Dexter 3500 Brake Assemblies
    Hey Todd, yes the replacement brake magnet part # AKBRKR-M10 that you referenced is correct replacement for your Dexter 3,500 brake assemblies. Thanks for all of the info you listed on them! Are the brake shoes still in good shape?
    view full answer...
  • Availability of Replacement Round Magnet for Old Hayes 10 x 2-1/4 Brake Assembly
    Given the round magnet, it sounds like you have old Hayes 10 x 2-1/4 brake assemblies that have been obsolete for several years, so replacement parts aren't available any longer. Your best bet would be to replace your existing brake assemblies with modern brake assemblies that use parts that are readily available should they need replacing. Assuming you have 4-bolt brake mounting flanges like what's shown in the provided photo, I'd recommend replacing your existing brake assemblies...
    view full answer...
    Image 1 for
  • Which Trailer Brake Magnets Do I Need to Use
    The difference between these two parts comes down to the size of the brake assembly and hubs that are on your axles. The # AKBRKR-M10 that has green wires are designed for 10" electric brake assemblies, where the # BP01-225 are designed for 12" brake assemblies. You would want to choose which one is best for your trailer brakes based off of the size of the brakes/hubs. Typically if you've got a 3500-lbs axles, you'll need the # AKBRKR-M10. If your trailer has 5200-lbs axles or larger...
    view full answer...
  • Replacement 10 Inch x 1-1/2 Inch Trailer Brakes For 1998 Nash 20N With Welded On Brake Backing Plate
    Based on the images with the measurements you sent the Brake Shoe/Lining # bp04-065, Brake Spring Set # K71-362-00, and Magnet Kit # AKBRKR-M10 are the correct replacement parts for the brakes on your 1998 Nash 20N. We do have the Brake Mounting Flange # 4-35 which you can have welded to your axle. This will allow you to replace the Brake Assemblies # K23-472-473-00 which is typically easier and will help you if your brakes become damaged on the side of the road. Then you will be able...
    view full answer...
    Image 1 for Image 2 for Image 3 for Image 4 for Image 5 for
  • Noise from Newly Installed Electric Brake Magnets and Drums on Travel Trailer
    Thank you for your recent purchase from etrailer of brake magnets and hub/drum assemblies. New components will often result in a different sound than what we are accustomed to but there are a few things you can check. If you are referring to any humming type of sound from the magnets this is normal. If the brakes otherwise operate properly and you are hearing scraping sounds this may simply be due to the new parts needing either some break-in or adjustment. If the brakes are making noise...
    view full answer...
  • How to Test Brake Magnet Amperage on a Trailer with 4 Brakes
    There are a few different tests that can be done to check the brake magnets individually and as a whole on your trailer. I would first recommend checking the magnets for wear before going on to test for proper amperage. If the magnets show abnormal wear or if you can see the windings beginning to show through the friction surface of the magnet then they will need to be replaced. Testing the magnets as a whole will involve using a multimeter, that can read up to 20 amps, to test the amperage...
    view full answer...
  • How to Wire Electric Trailer Brake Magnets to 12 Volt Brake Output and Ground
    No, it does not matter which wire from the magnet is attached to power or ground. Just make sure one wire is properly grounded and the other wire is attached to the electric brake output circuit from the trailer connector. I have linked a video that details replacement and wiring of a trailer brake magnet that should be helpful.
    view full answer...
  • How to Repair Sheared Brake Wires on Magnet of AxleTek 10 Brake Assembly
    As long as there is still a bit of wire still attached to the brake magnet on your # AKEBRK-35-SA, you can use a butt connector like the Deka Heat Shrink Butt Connector # DW05745-5 to connect a jumper wire from the sheared off end to the brake wire on your trailer. Brake wires are typically 12 gauge wire and if you need a jacketed 12 gauge 2 wire you can use the # 12-2-1 which is sold by the foot and has the positive and negative wire jacketed together. If the wire has been completely...
    view full answer...
  • How To Repair An Electric Trailer Brake That Is Missing One Wire
    If one of the brakes on your trailer is missing a wire, you will have two options. First will be to replace the magnet. This will depend on what size brakes you currently have installed, but the Replacement Magnet Kit # AKBRKR-M10, as an example, will come with everything needed to full replace the magnet and wires on a 3,500 pound capacity, 10" electric brake. This will work perfectly, but can be a bit of a pain to do. The easier way, and also the way I recommend, is to just replace the...
    view full answer...
  • Are Electric Drum Brakes Safe to Submerge and Use on Boat Trailer
    It's no secret that water and electricity do not do well together. That being said, improvements in wiring insulation and heat shrink connectors have made it more and more common for boat trailer manufacturers to use electric brake assemblies instead of the traditional disc or drum hydraulic brakes, which are less cost effective. While electric brake assemblies and the components inside of them, like the # AKBRKR-M10 magnets are not waterproof, they can handle being submerged under water...
    view full answer...
  • If One Brake Magnet Goes Bad, Will Other Brakes Still Work?
    If one brake magnet goes out the other 3 on your trailer will still be working, you will just not have the one braking assembly working and it will need to be replaced. As long as the pads on the assembly are in good shape you can just replace the magnet using the Replacement Trailer Brake Magnet for 12" Brake Assemblies # BP01-180 if you have 12" brakes, or # AKBRKR-M10 if you have 10" 3500lb brakes. If you can let me know exactly which size brakes you have I would be happy to confirm...


    view full answer...
  • Can Trailer Brake Assembly Magnets be Grounded to Trailer Frame
    You should be able to ground the brake magnets to the frame of the trailer and have them work fine. Or you can try running a jumper wire back from the ground wire of the magnet back to the main ground of the trailer frame. If you are getting 12 volts into the magnets but they aren't working the problem is that the ground wire isn't properly grounding.
    view full answer...
  • Troubleshooting Malfunctioning Trailer Brake Magnets
    You'll need to do a full troubleshoot. With the trailer unplugged, use a voltmeter on the brake pin on the trailer connector while the manual brake switch is actuated. If you have a time delayed controller, you should also get voltage on that pin with the brake pedal pressed. Next, plug the trailer in, and check the voltage on the output circuit as close to the magnets as you can get. With the gain on the controller turned all the way up, you should get around 12 volts at the magnet when...
    view full answer...
  • Should There Be Power on the Ground Wire for a Brake Magnet
    There should only be power entering the brake magnets, not leaving them through the ground wire. I would first start off by regrounding each brake magnets to a new bare metal surface separately of one another and as close to the brake assembly as possible. Once the above has been completed and the problem still persist then it may be time to replace either the magnets or the entire braking assembly. In order to offer replacement brake magnets I would need to know the brand of brakes you...
    view full answer...
  • Replacement Brake Magnet and Tire/Wheel Combo for a 1964 Shasta Compact Camper
    I am guessing that your axle weight rating is either 2,000 lbs or 3,500 lbs. You should be able to verify this by looking at the tag/sticker near the trailer tongue or by finding the weight rating stamped in the middle of the axle. We do have replacement brake magnets for each. Simply check to see if you have 7" brake assemblies or 10" assemblies and then use part # AKBRKR-M7 or # AKBRKR-M10 respectively. Since the wheel in your picture has a 4 on 4" bolt pattern I am guessing that you...
    view full answer...
    Image 1 for
  • Replacement Brake Magnets for 10 Inch Brakes on 3500 Pound Trailer Axles
    Based more on the testing you have done than the appearance of the magnets I would say that they would need to be replaced if there isn't a wiring issue somewhere. You can use your meter to make sure that the proper voltage is on the wiring. For 1 replacement magnet for a 10 inch brake assembly I recommend # AKBRKR-M10. It comes with a replacement spring and clip also. I have linked a video review of this magnet for you. I have also linked our help article on testing brake magnets.
    view full answer...
    Image 1 for
  • What is Difference Between Trailer Brake Assemblies KB10E-06 and KB12E-06
    The KB10E-06 # AKBRKR-M10 and the KB12E-06 # AKBRKR-M12 are similar magnet designs but they are intended for different applications/sizes of brake assemblies. The # AKBRKR-M12 is for 12 inch assemblies and the # AKBRKR-M10 is for 10. The temptation is to use the bigger magnet on the lower rated assemblies but doing so does not give you more powerful brakes, it actually will just make for harder to adjust brakes as it the magnet will be too sensitive.
    view full answer...
  • Which Wire On the Trailer Brakes is Power And Which One is Ground
    Yes one of the wires will be used for the ground connection. When connecting the wires from the trailer brakes it does not matter which wire you use for the brake feed or ground, the magnet works either way. Just be sure that the wires are clear of any moving parts and that the brake feed is attached to one of the wires and that the other is attached to the trailer frame for a good ground.
    view full answer...
  • Troubleshooting Trailer Brake Magnets With Wires Cut Short and Inside of Brake Assembly
    If the wires are cut to short and are inside the assembly, you can make the connections inside using the Deka Heat Shrink Butt Connector - 12-10 Gauge - Nylon Insulation - Yellow - Qty 5 # DW05745-5 to ensure a good connection. If you don't have enough movement behind the brake magnet spring assembly for the connections, then I recommend replacing the magnets so you will have appropriate function. For 10 inch assemblies use # AKBRKR-M10 or for 12 inch assemblies use # AKBRKR-M12 or #...
    view full answer...
  • Brake Magnets Needed
    Basically every company who makes trailer brakes has their own brake magnets. Dexter is one of the leading manufacturers which is probably why you have found a lot of their stuff. Attached is a link to our selection of brake magnets for you to filter through. Two of our most popular options come from AxleTek (rebranded as etrailer) and are parts # AKBRKR-M12 for 12" brakes and # AKBRKR-M10 for 10" brakes. Each assembly comes with 2 wires connected to it, one for power and one for ground....
    view full answer...
  • Why Does Only One Of My Trailer Brakes Lock Up When Driving But All Will Stop When Adjusting Brakes?
    You may have some bad magnets in your brakes. It seems odd that 3 of the 4 would go bad but I have some tests that you can run to determine if they are bad or if the 1 magnet is bad and drawing more power than it should be. The wiring in series in normal for trailer brakes and does not explain why you are having the issue. The first test you should run is to see what power your brake controller is putting out when your trailer brakes are applied. For this you will need a Multimeter #...
    view full answer...


< Previous


Do you have a question about this Accessories and Part?


Info for this part was:

Employee Mike L
Expert Research:
Mike L
Employee Jameson C
Expert Research:
Jameson C
Employee Adam R
Expert Research:
Adam R
Employee Jeff D
Installed by:
Jeff D
Employee Kevin C
Installed by:
Kevin C
Employee Chris R
Video Edited:
Chris R
Employee Wilson B
Updated by:
Wilson B
Employee Alexander C
Updated by:
Alexander C

At etrailer we provide the best information available about the products we sell. We take the quality of our information seriously so that you can get the right part the first time. Let us know if anything is missing or if you have any questions.