
Summer Starts Here - Save up to 70%
To see if this custom-fit item will work for you please tell us what vehicle you'll use it with.
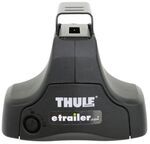
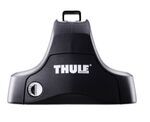
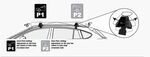
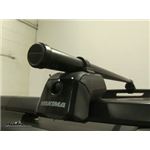
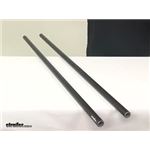
These multipurpose, galvanized steel crossbars supply the backbone for your aftermarket roof rack system. Works with accessories that clamp around the bars. Pair with Yakima towers, fit kit, and RoundBar SL Adapter to create a complete roof rack.
Features:
Yakima 48" RoundBar SM:Videos are provided as a guide only. Refer to manufacturer installation instructions and specs for complete information.
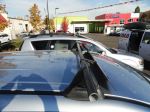
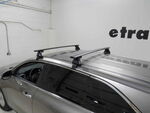
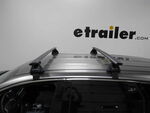
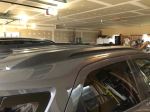
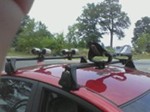
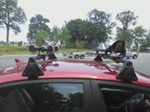
How's it going neighbors This is Ed here with etrailer.com, and we're taking a look at the Yakima CoreBar with baseline towers on our 2022 Kia Sorento. Adding a roof rack system to your Kia Sorento is a great way to take advantage of space that's generally unused to increase your cargo capacity. So it allows you to add things like cargo baskets, rooftop bike carriers, or even kayak carriers. It just helps out 'cause this guy doesn't have the most space, especially if you have the third row option where you have full passengers, it's gonna allow you to get things moving for you. Let's take a look at our crossbar setup a little bit closer. So we're gonna start with the CoreBar.
That's 50 inches long, it is 2 3/4 inches wide, and 1 inch tall. The design of it is similar to a airplane wing, and that is designed to cut through the wind a lot better and reduce wind noise. And it is mounted to our baseline towers using the CoreBar adapter. Your overall height that you're adding to the top of your vehicle, you're right at 4 1/2 inches. So that's gonna work well for any of your rooftop baskets or rooftop boxes that clamp around bars.
It should work with most accessories. Going to the front here, you can see there is a space for a lock core, and we can use the Yakima same key system. So if you have other Yakima things like a bike rack or, again, a cargo box, you can have them all keyed alike using the same keyed lock core. And then you have the fit kit base that's going to fit right into your gutter. These are custom fit, and you have two different numbers, and you're gonna wanna make sure you make note for the front and rear for the fit kits, but they go on in a very similar manner, and it's just rubber that's gonna help protect your finish.
And even the clip that goes into your door jamb is rubberized on the inside to protect your finish. Installation for the CoreBar and baseline towers is pretty easy to catch on. If you do have questions with it, you can check out this video here, and I'll walk you through the steps of your install. It's just a lot of small steps, and it may require some backtracking, but I'll get you there. Let's check it out.
We're gonna start our installation with setting up our baseline towers for our CoreBar adapter and cradle. So we're gonna use our Yakima tool and start by removing the cover. All right, and we're gonna remove the cover by squeezing on the sides and open up the security access to reveal the bolt on the inside. And we're just gonna screw that loose. We're gonna use a flat head just to get on the side of it, just to pop it right out of the cradle. Then we're gonna switch it over for the CoreBar. And you wanna make sure you're keeping in mind of your orientation. You're gonna want it where your bigger part of the oval faces the front. So you're gonna slide that in and then use that same bolt to just secure the adapter but not go all the way in 'cause if you go too far, this is what holds the bar in place. So you don't wanna go too far so you can still slide it across. Now insert our base on the bottom of our baseline tower. It just aligns at the bottom, and you just click it into place. You wanna make sure that the cutout is facing outward 'cause that is where your fit kit bracket is gonna slide and go and fill into that space between the door jamb and the roof. So now let's get an idea of the positioning. All right, and I already have this one assembled, so I'm gonna remove my end cap. I'm just gonna slide it across. I'm gonna take this side and do the same. And now I can replace the end cap. Once you have your baseline towers with adapters on your CoreBar, you can get your pitch and tow settings set with your screw. It wouldn't be a bad idea to get the measurements of where your positioning is on the bar. So you can just tighten this for the final time. And in this case, you're gonna use the center bar out of these three on both, 'cause when you're tightening down, that's actually biting into the bar and gripping it. So this is gonna secure it. I'm gonna do the same on the other side. Now we're gonna take our bar and extend it across our roof, aligning it with the gutter, the pad with the gutter. Initially, when I placed the towers onto the gutters, it was a little bit off from my measurement. So a way I found to help with that is to actually, while on top of the vehicle, you can just carefully lay it forward and use your Yakima tool, and you can make those light adjustments and unloosen that bolt that's underneath. And then make sure you tighten it back. And then everything will be nice and aligned. And now I'm gonna come over here to the passenger side and adjust my pad so it's sitting flush along the gutter line here. Now we're gonna take our tape measure and measure for our crossbar spread. On center, you should be right at 32 inches. So this guy needs to come back a little bit. So we're gonna easily walk him back. We're gonna still have to go back to the driver's side to adjust, but lets get our measurement. Little bit more. And that puts us right at 32. The positioning of your front bar is gonna be in relation to the measurement you get for your rear bar. In the manual, it says that you're gonna go with your furthest corner here and go out 37 inches. And then from here, it's 32 inches on center for the crossbar spread. So now we're gonna complete our fit kit installation. We're gonna grab our clamp, open our access panel, and we're gonna insert our clamp in. I'll use my Yakima tool to lift up on this tab. And then we're gonna drop it right in. And now we're gonna fasten it down until we hear the click on our torque wrench. Now we're gonna close the access door, close the tab door, and we're gonna put our cover on the bottom by hooking the two plastic hooks and just letting it click into place. And now after completing this step, you do the same on the driver's side, and then you have your roof rack installed. So again, this is Ed here with etrailer.com, and we're taking a look at the baseline towers and CoreBar roof rack system on our 2022 Kia Sorento. You have a great day.
Average Customer Rating: 4.7 out of 5 stars (278 Customer Reviews)
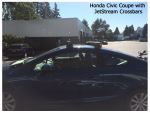
These multipurpose, galvanized steel crossbars supply the backbone for your aftermarket roof rack system. Works with accessories that clamp around the bars. Pair with Yakima towers, fit kit, and RoundBar SL Adapter to create a complete roof rack.Works perfectly. I am always impressed that Yakima continues to make parts for the "old roundbars" since they have since moved on to the superior JetStream bars.
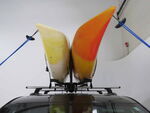
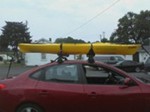
I ordered the Yakima roof rack, with the Hullyrollers for the back crossbar and the Mako saddles for the front crossbar to use with my kayak. It arrived just like they told me and I put them on my car the eveningit arrived. Got to finlly use the roof rack on June 22 to go out kayaking and it worked great. Only thing is I did not know about the air reflector piece for the front crossbar. Now I will be ordering it to help with the wind noise.
Great rack, go on fast, easy to install and work well on my VW TDI wagon. Care has to be given and follow the instructions for the install to what type of rails you have. Works great carrying the VW luggage carrier and plan on using it to carry kayaks as well. Just have not decided what kayak rack type to get yet.
I've attachec a few pictures of the Yakima rack on my Audi Q7. It took a few attempts to find the right combination of attachments, but in the end, the pin attachments work best with the access points on the factory flush-mount rails. Great product!!!!!
roof racks showed up in great condition, and showed up as one package.... I should have ordered the J racks from here but I found them cheaper locally so Thule J racks compliment the whole setup and i am just about ready to hit the water :)
Kimberly has shown that great customer service is not dead! etrailer and Kimberly are great to work with and have earned my business and will always be the 1st and last place I look for my rack+ needs!
As for the application, I needed more space to fit my cargo box on top of my 4Runner TRD Pro’s rack. I came up this this… Thank you!

Everything from etrailer is timely and of good quality! The Yakima crossbars are no exception - they are indestructible.
The installation of this rack system went very well, all of the instructions were easy to read and use. I have attached some pictures of our installation. The vehicle is a 1994 Honda Accord EX four door sedan
Roof Rack 2008 Saturn Astra The roof rack arrived one day early...The packaging was excellent and the quality of the product more than met my expectations. The instructions made the insulation very easy. It took less than 45 minutes to install the unit complete.
Excellent selection of rack parts. Very useful installation videos help when choosing between products. Easy ordering process. Quick delivery.
Really easy to install & work as specified. So happy with the customer support/service at etrailer.
One quick phone call and Gwendolyn figured out exactly what I needed for our new car to use my old Yakima rack.
necessary for using the widest cross bar option (78"). East to install
Love my Yakima roof rack!! It exceeds my expectations.great product. Also thank etrailer for the tec support! great staff always there to help thanks again!!
Everything arrived as promised and earlier than expected just installed. Looks like it will do everything I need it to which is haul around paddleboards. So far so good!
Ackage came 2 days early the install was somewhat easy (did it by myself)
Did not get to mount anything to it but seems really sturdy. One thing I can say is mark out your mounting points with provided stickers then put up and make adjustments to the roof rack.
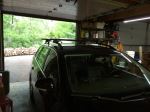
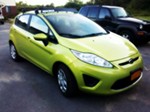
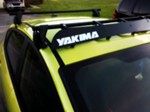
We got a Yakima Roof Rack system with locks and fairing for a "lime squeeze metallic" (Green...) 2011 Ford Fiesta 5dr Hatchback. Received the package yesterday and set it up within about an hour.
I have been using Yakima racks for around 40 years and have never had any problems. However, I am amazed at the price increases over the years. Etrailer prices were by far lower than most. Overall, a very excellent purchase.
Great products though, again, written instructions would have been nice.
Have been rocking my Yakima rack from etrailer.com for a year now. I am using rack in conjunction with a Tepui tent. Once I added the air deflector, I would say it's the perfect setup. The Yakima gives more clearance over the factory rack, so I was able to get my hands under it to secure the tent hardware. If you're thinking of upgrading your factory rack, I would not hesitate to use etrailer.com
The Yakima roof rack system is an Outstanding product. I purchased the product to replace the OEM roof rack because it was too flimsy to carry the tandem bike mount and my bike. The Yakima roof rack is solid and provides me the peace of mind while hauling my bike on the roof of my car. etrailer provided the product for the best price as always.
The rack has been so useful since I purchased it. Staff at etrailer.com were exceptionally helpful in getting the best option for my car and answering questions. I recommend this company, for its 110% customer service, excellent prices and timely delivery.
Haven’t used them yet but they should work as expected
We are so happy with etrailer. The product is high quality and it arrived one day before the expected day of delivery! Their customer services is exceptional - real people who know their stuff first hand. The installation was easy and is a prefect match for our Yakima Sky Box. We took the car to Zion National Park as shown on the photo taken at the Watchman Campground!
Roof rack on my 2005 Chevy Uplander. Also ordered the Q towers and fairing.


Do you have a question about this Roof Rack?
Info for this part was:
At etrailer.com we provide the best information available about the products we sell. We take the quality of our information seriously so that you can get the right part the first time. Let us know if anything is missing or if you have any questions.


Thank you! Your comment has been submitted successfully. You should be able to view your question/comment here within a few days.
Error submitting comment. Please try again momentarily.