

Brake Controller Installation on 1998 Ford E350 Van
Updated 10/21/2009 | Published 10/18/2009
Products Featured in This Question


Question:
I cant seem to find a diagram for wiring my brake controler in my 1998 Ford #-350
asked by: Andy D
Expert Reply:
The procedure for installing a brake controller in your van will depend on what (if any) trailer connector is on the vehicle.
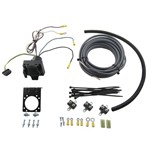
If the van has the factory installed 7-way or 4-way connector, there will be a port under the dash for installing a brake controller. You will need the brake controller wiring adapter, part # 3035-S. The adapter would wire color for color to the brake controller, and would then plug into the port under the dash.
If the van has the 4-way connector, the port under the dash would still be there, but instead of connecting the blue wire from the controller to the adapter, you will need to extend the wire with a length of 12 gauge wire to run to the trailer connector at the rear of the vehicle. You will also need a 4-Way to 7-Way Adapter, part # 37185. If you need a 12 Volt circuit for any trailer accessories, you will also have to run a 12 gauge wire from the trailer connector to the positive battery terminal using a 40 amp inline circuit breaker, part # 9510.
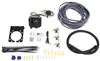
If the van does not have a trailer connector, you will have to hardwire the controller using our Brake Controller Installation Kit, part # ETBC7. The installation kits include all necessary installation hardware. You will also need a T-1 Vehicle Wiring Harness, part # 118344 to tap into the vehicle lighting circuits.
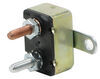
The controller would install under the dash usually to the right of the steering wheel, within reach of the driver. The controller has four wires, the red wire would attach to the cold side of the brake stoplight switch located at the top of the brake pedal. To locate which wire to tap into, use a circuit tester to find the circuit that goes hot only when the brake pedal is pressed. Once found, tap the red wire into this circuit. The blue wire would extend to the rear of the vehicle to attach to the trailer connector. The black wire attaches to the positive battery terminal via a 20 amp (part # 9506P) or 30 amp (part # 38630) circuit breaker, depending on which the brake controller instructions require. The white wire connects to the negative battery terminal.


Featured Help Information
Miscellaneous Media


Continue Researching
- Shop: Trailer Hitch
- Search Results: trailer brake controller
- Shop: Trailer Wiring
- Video: Set up: T-One Vehicle Wiring Harness with 4-Pole Flat Trailer Connector on a 2004 Toyota RAV4
- Shop: Brake Controller
- Shop: Curt Trailer Hitch Receiver - Custom Fit - Class IV - 2"
- Article: Brake Controller Installation on a Ford Full-Size Van
- Video: Beginner’s Guide to Installing the Curt Trailer Hitch Receiver on a 2003 Ford Van
- Shop: Redarc Tow-Pro Liberty Brake Controller w/ Universal Wiring Harness - Dash Knob - Proportional
- Shop: Universal Installation Kit for Trailer Brake Controller - 7-Way RV and 4-Way Flat - 10 Gauge Wires
- Video: 2014 Ford Van Universal Installation Kit for Trailer Brake Controller: Complete Installation
- Video: Curt Custom Fit Vehicle Wiring - Trailer Hitch Wiring - C55344 Review
- Video: Redarc Tow-Pro Liberty Brake Controller Installation - 2022 Chevrolet Express Van
- Video: Feature Breakdown: Universal Installation Kit for Trailer Brake Controller
- Shop: B&W Heavy-Duty Trailer Hitch Receiver - Custom Fit - Class V - 2"
- Shop: Curt Trailer Hitch Receiver - Custom Fit - Class V Commercial Duty - 2-1/2"