


Thank you! Your comment has been submitted successfully. You should be able to view your question/comment here within a few days.
Error submitting comment. Please try again momentarily.


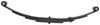
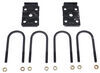
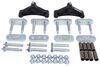
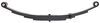
Moves your trailer's leaf springs to the top of your axle with this kit. For 2-3/8" diameter axles and works with double-eye leaf springs only.
Features:

Videos are provided as a guide only. Refer to manufacturer installation instructions and specs for complete information.
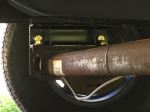
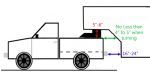
Hey, guys, Kevin here at trailer and today I'm gonna be showing you how to install the Dexter Over-Under Axle Conversion Kit here on our enclosed trailer build. So we get this question all the time: How can I boost the height of my trailer so that I can get it level with my tow vehicle, especially with newer trucks Seems like Ram keeps making their trucks taller and taller so that they can't, you know, no one can't get their fifth wheel in there without actually hitting the bed rails. So let me show you this conversion kit that we have, on our enclosed trail. So with our tire off now, I can show you what our assembly looks like here. As you can see, the U-bolts are facing up. When we put this conversion kit on, it's going to have our U-bolts facing down.
And then we're gonna be dropping our axle down here, increasing our ride height. But the first thing we need to do is measure our axle. So we're gonna try and find the diameter of the axle so that we can get the correct kit. So looking at it. It looks like we're at two and three eighths inch.
Now, this kit does come with two and three eighths inch and a three-inch diameter kit. That really is gonna go with the size of the U-bolts and then the spring seats. All right, I want to give you some measurements here. Let's see where factory ride height is. So from the ground to the wheel well, we're sitting at 29 and 1/4.
And the ground to the body, we're sitting right at 12 and 3/4. Okay, so now we got our kit installed and the axle flipped under our leaf spring. Let me give you a ride height. So now from the ground to the wheel well, we're sitting at right about 34 and 1/4 inches. And then let me also give you one for, ground to the body.
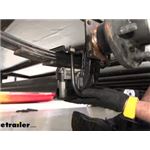
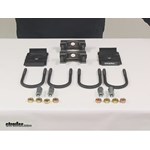
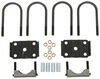
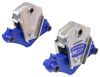
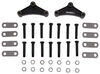
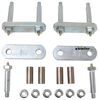
Sitting right at 17 inches. So it's gonna give us some extra space, handle all those clearance issues that we've been having. So the installation difficulty of this kit is going to vary trailer to trailer. Obviously, with our small enclosed trailer here, it really wasn't that difficult. But if you have a giant fifth wheel, maybe you have a 40-foot fifth wheel with all kinds of weight. Whole lot of axle trying to jack it up, it's gonna give you a little bit more of a challenge. So you're gonna wanna take that in mind while you're doing this. Other than that, just bolting on the parts, really isn't that difficult. It's really just a lot of set up for a couple of changes. So your Dexter Over-Under Conversion Kit is going to come with, two spring seats, your nut adjusters, your nuts, your U-bolts, and your U-bolt plates. So first step of this installation is gonna be removing your tires. So you wanna do that while the trailer is still on the ground. So now I got the nuts off, and take up my wheel. I'll set it to the side. I did jack up this trailer, now that I have the nuts off, and then I added four jack stands. You're gonna make sure the new place, and even amount of jack stands along your trailer just so that you can support it without having a worry about it coming down on top here. Obviously, if you have a bigger trailer, go ahead and use more. Do whatever you feel comfortable with. As you can see, our U-bolts in our U-bolt plate is pretty rusted up here. So I'm gonna spray some penetrating oil on here just so that we can get our bolts off. I'll let that set in just a little bit, and then we're gonna take these nuts off. All right, we got our first U-bolt out. I try to go back and forth on each of these just so that the U-bolt doesn't try to tension one way or the other. All right, now that we got our second U-bolt off and our U-bolt plate down. We can go to the other side, do the same thing. So the next step we're gonna do is we're going to, support our axle here cause right now it is free-hanging since we don't have the bolts holding it to our springs. So what I'm gonna do, is I'm gonna stick a jack right in the center, to just support that weight. So, as you can see, if I lift it up this is just free. You don't want that falling down on you while you're working. There we go. And then we're gonna take this bolt off right here. So we're gonna be dropping off the bolt from the front of our leaf spring. So that's gonna be going towards the nose of your trailer. All right, now that we got that out, we're going to pull out our bolt. This can be a little stiff here just because it's got some weight pressing down on it. Our bolt's actually on here pretty good. We are going to actually just thread our nut back on just a little bit. So that we can hammer on our nut, not damage our bolt here. And then we're gonna pop it out that way. Alright, so next, I'm gonna take a punch, and we're just gonna hammer this, bolt out a little bit. So we're gonna get to a point where the punching hammer isn't really gonna be effective here. And we're just gonna get under and socket it ,the rest off the way out. All right, so now that we got our bolt out. I'm just gonna pop the, spring down out of the hanger. May have to loosen this bolt just a little bit. So that it will hang freely. Just like that. So now we can remove our axle, and move, hang our springs back up and redo our whole setup with the conversion kit. So now we have our axle loose and our leaf springs loose. We're going to pull our axle out. We can get our leaf springs back in place, and then work on bolting our axle. So now we have the axle off, we can put this back in place. I do wanna mention that I did loosen up these bolts just to kinda move this in a little bit. Just so that we can get lined up right. Now we can sled our bolt through. And you are gonna have to kinda hammer it back into place cause it is sticking up just a bit. And then we can thread on our nut. So the next thing we're gonna do, is sled our axle back over into place. And we're gonna take our spring seat, and our adjustment nuts here. I'm gonna slide these on. They don't need to go all the way down. We're just getting them on about halfway just so that we can see exactly where we need to be. So the spring seat is actually gonna sit right here. And then we're going to tighten it down, put up a little bit more. So we'd set this on here. We'll get this level. And then tighten these down using a wrench so they put pressure on here, the bracket on our axle. Alright, so we're gonna just tighten these just so that the spring seat is level. We don't want this actually pushing up off. We want the spring seat actually making contact with the axle. And one other thing I do, want to note is that Dexter highly recommends coming in afterwards and tacking this on both sides so that you don't have any chance of the axle moving it all and getting off level. I already went ahead and put the other side up just so that it was a little bit easier on video to show you me putting this side on. But what you can do also, just stick your chunk of wood, some kind of black, anything that you got. Just to kinda get it up level. And now we're going to, set this on here. So there's gonna be a little, my nipple thing right here and the other side that you're gonna poke onto. It's gonna line that up, there you go. And then you can ,use something to hold it up in place. We're gonna set our plate on here, Just like this. If you set it this way, your bolts aren't gonna line up and you're gonna be hitting, your brake from, or your flange for your axle here. So now we will take our U-bolts. We're going to put them through the axle like that. And then up through our plate. All right, before our U- bolts, we're going like this. Now we're gonna be flipping them upside down this way. So we're gonna get under the axle. And then open into our plate. And then we will put our nuts on. It's gonna get inside through both sides going, then we can tighten it down. Alright, now we can go ahead and tighten these down. So right now I'm just doing this with our regular circle wrench. Just to get it, kind of hand tight. But then we are going to do this, to check what you can find in your instructions. And you do wanna do these evenly. So that you're not pulling on one side too much and throwing it off. So here's our completed conversion kit. Basically, if you look at, our side by side of our axle to start with. From now, we basically completely flipped our system here. The bend of the U-bolt used to be up here and now it's down here. So you're going to gain the diameter of your axle as well as your leaf Springs. So that you can get your trailer sitting a little bit higher so that you can handle all those clearance issues that you might be facing. All right, now that we got our system in place. We can put our wheel back on. So as you can see, now that we have the trailer lowered back down. It's sitting on the wheels. We have clearly a bigger difference here. So we have a way higher ride height, But really that's it for this installation. My name's Kevin. Thanks for watching guys..
Customer Satisfaction Score:
94% were satisfied with this product
6% of customers were not satisfied
Ratings & Reviews

This kit worked great. I gained about 5 inches clearance. The camper seems to tow alot better with the trailer frame inline with the truck frame. I would recommend this kit if your in need of more clearance.
Quick shipping. Great kit, was done in about 4.5 hours including welding the brackets and the leveling nuts. I have flipped axels before without this kit, and thought I would try it. Love it. Added about 5.5 inches which was needed since i dont camp in parks. This was installed on a Mallard 24C. Didnt have to cut brake wires as i got a model that they had spare inches of wire. Do yourself a favor and get new bushing sleeves for the springs and drop them. Makes it so much easier.
Our camper (Coleman 17bh) sat so low every driveway, speed bump, or uneven campsite was sketchy at best due to how low the stabilizers and dump valve hung. This kit gave the camper just enough lift to mitigate that issue without going too high. Kit only took ~3 hours to install in the driveway and ended up lifting the trailer ~4”.
I needed to make an already well built Iron Eagle trailer into an off-road, wood hauling, camping gear carrying trailer that can go wherever my rig can. With a pair of General Grabber ATs and the lift it was a success.
The kit wouldn't work for my trailer, but it was well made. Unfortunately, I had to return it. There was no problem returning it and their tech support was great to work with.
This kit does exactly what it advertises. Gave me 4 1/2 in of lift. It is very straightforward to install. The only difficult part was getting the trailer up on jack stands. Make sure you do it on level ground, it makes jacking it much easier. I also had an issue with not having enough spacer nuts. I actually bought two kits and both only had 2 nuts and 4 are needed. There is no packing list so use the picture in the etrailer ad. etrailer was great about making it right.
We modified a client's newly acquired Flagstaff pop-up to better handle off-road camping. This kit made the process simple, reliable and inexpensive. We opted to remove the original spring perches and weld on new (and shock mounts) but the kit allowed for simple bolt on.
The customer had us winterize the camper, as part of the service we checked tires, bearings and axles....the U-bolts and mounts all looked fantastic.
High quality product. Straight toward install and has held up very well. Installed in a driveway in a few hours. I installed this kit on my 1974 komfort camper last year and have put highway and dirt road miles on it since. I take it elk hunting and get into some tight rough situations and haven't had any issues. It gave the camper just the right amount of clearance and it pulls level behind my Tundra with a curt anti sway stabilizer hitch. Before this kit my campers ground clearance was awful and I was always worried about puncturing my holding tank. This product fixed that problem.
Needed to lift my 2015 Pacific Coachworks trailer as it dragged the hitch and bumper . Easy install DIY for me as I am Handy. Took the entire day, taking my time for measurements. Had to jack up the trailer quite high, 2 feet lots of cribbing. I had a wire feed welder and tacked the brackets to the axle. Gained over 4+ inches. Never drags anywhere now even offroad. Tows no different, with my Fastway e-2 10k hitch. Before and after pics.
I have bought this same item from trailer. It's really nice because I can install larger tires which don't wear out near so fast pull much easier and the trailer doesn't bounce all around behind you! Great mod works very well!
Worked out great easy to install I now have the ground clearance to go camping very satisfied thank you
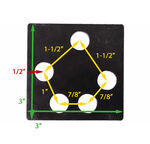
The kit got here before the date listed that was good. All the parts were there. The instructions could use some pics or diagrams of how the parts should be arranged. The bad the plate sent with the kit was way to narrow for the springs so had to use the plate for the old setup which is fine I guess it was heavier duty anyway. But if I am buying new parts I would like to use the parts I paid for. Over all it did the job. The holes in the new plate was at least 1/4" off for the u bolts to go through. Again no way would it work. Have not towed the camper yet but looks solid. One thing more I read that you could weld the one part onto your axle. Would not recommend that if your wires are like mine they run through the axle to the other side which is kind cool but if you heat that metal up you could melt the wires and cause problems with your brakes. I would be careful. I did not weld it looks stable as is and I plan to take this camper off road.
Jenny N.
4/25/2022
You mentioned that the plate bolt holes did not match up to the u bolts and I wanted to see if you would be able to send a picture?
Jim
4/25/2022
Hello Jenny, I will attach a pic of the parts I could not use. As you will see the space between the holes are call it 1.75 inches it is even different a little between top and bottom holes but just a 0.0625 or so. I did not get the calipers out and both plates are the same and my spring is 2 inches wide defiantly not going to fit. I really did not want to take the tire off and take pics of the trailer axle as the bottom view did not show much. Hope this helps and if you really need it I will take the tire off so I could show you the old plate.
Jenny N.
4/25/2022
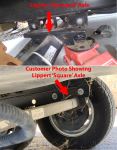
I believe I have figured out what happened. This conversion kit is meant to be used with double eye springs which are 1.75 inches wide and if you have 2-inch-wide springs then you have slipper springs. This would account for why the plates did not line up the way they normally would.
Great conversion kit, easy to get the plates lined up perfectly. I welded the new saddles onto the axle and welded the nuts to the bolts so there is zero chance of anything moving. Having the plates held in perfect position while welding made it simple. Solved the "dragging wheels problem" without having to cut off and reweld the fenders (which had been welded without enough clearance to the tires at the factory.)
Soggy

6/22/2021
1 year later and the axle flip is working great, zero problems. Glad I did it!
Super easy kit and inexpensive way to flip my axle underneath the leaf springs instead of being on top. Makes upgrading to taller wheel and tire setup in the future easy. I now have the fender clearance I didn’t have before
The kit was pretty easy to install - I had a friend help and he did the welding. The camper now sits level when hooked to my truck, exactly as I wanted. We've taken it on a 3000 mile trip to WY with no problems. It's been great!
You just can't beat Etrailer for expertise! This kit was the exact fit to raise my tent trailer after installing larger wheels and tires.
The included instructions made it easy. And the the on line video how-to was excellent. These folks know what they're doing and are thorough.
Just took a couple hours with some help from friends, but the lift is amazing. The trailer rides smooth and I cannot wait to take it off road with our camping. We also don’t have curb restrictions when pulling into gas stations or other locations.
Fit just like it should and worked great on our 5th wheel
Outstanding product. I am so grateful the install video was added to the page. I am a hands on individual and struggle reading directions with numerous steps at times and it made it so much easier to install this. The explanation of how the mount has to sit flush with the axle seat once you tighten down the spacers was very helpful during the alignment stage. I still have to weld the brackets to the axle for extra support as recommended but I did notice that I will be gaining roughly 4” of clearance height to my trailer. This will allow me to sit more evenly with my lifted truck and get my trailer in my driveway easier since I have a water drainage built in to the entrance way with a big dip.
Victoria H.
2/20/2025
Hi David, thank you for the feedback and I'm so glad to hear the install video was so valuable to you! These over-under kits are a great way to add a few inches of clearance height to your trailer. What are you hauling?

Worked well on utility trailer w/3500# dexter axel.
This product did exactly what we needed it to. Bought a replacement axle from Dexter but it created clearance issues in the wheel wells. After installing this kit we have much more clearance and the trailer rides like a dream.


Brooke M.
4/2/2025
Wow that is a night and day difference! So glad these were the ticket :)
I bought this kit to raise the deck height of my car trailer. It was very simple to install and did the job! I’m very happy with the height of the trailer now. I highly recommend the product.
There is a before and after pic. Not great pics but give you the idea.
Nick S.
11/3/2025
You can definitely see a difference! I am glad it was easy to install for you and got the trailer how you want it. What kind of cars are you hauling around??
It is not difficult to install once you lift the trailer, which that part is the hardest aspect to do. Anyhow, a simple solution to raise trailer's clearance, which I wanted to do so my back end wouldn't bottom out when going through some rough terrain. On a similar note, I would also recommend updating the suspension at the same time if you are considering it, and borrowing a 1/2 impact wrench (to loosen existing bolts - 3/8 was too weak and breaker bar too hard to use in some locations).

Gwendolyn Y.
7/23/2025
Install looks great, Ivan! Also, couldn't agree more with you, if you're going to be down there you might as well do any updates or replacement of the suspension at the same time. How camping been going now that it's lifted?
Installed easy. Total lift was about 5”.
Thank you
Brooke M.
3/27/2025
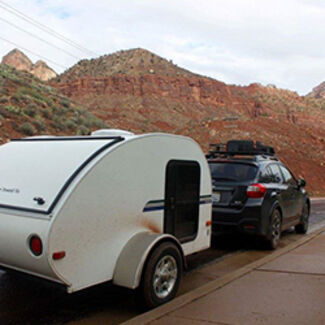
Looks great, Rollie! Those photos are super clear and really show the conversion kit well. Thank you for sending them in!
Rollie
3/29/2026
It’s been a year and we are still very pleased. In addition to the lift we also added oversized tires so we could travel off-road over tough terrain, which was our main purpose for adding the lift. I can also honestly say we can’t tell the difference in the stability on the road compared to the factory height. Still feels very safe. During installation I did go ahead and weld the new saddles to the axle as the instructions suggested.



Do you have a question about this Trailer Suspension Part?
Condition: Missing Parts
Notes: Item has been previously test fitted and has cosmetic install marks and is missing 1 spring seat.
Info for this part was:
At etrailer we provide the best information available about the products we sell. We take the quality of our information seriously so that you can get the right part the first time. Let us know if anything is missing or if you have any questions.































Heather A.
4/3/2025
Looks great George! Now what are you going to put in it?