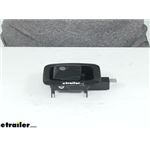
Swap out worn hardware fast with screen door latches in RV door parts suited to straightforward replacements. Choose right-hand or left-hand by viewing the closed door from inside, or go with a bi-directional style to avoid the guesswork. For fit, check hole and striker alignment—some options include a striker, and you can reuse an existing strike plate or redrill if needed.
Yes—installation is straightforward, but a second set of hands helps. Aligning the spring, push rod, and button can be tricky; laying the door flat can make it easier. On aluminum doors, machine screws with nuts can work better than wood screws. Verify all hardware is included. After install, adjust latch or striker height so it engages smoothly.
View the closed screen door from inside your RV. If the latch mounts on the right side, choose a right-hand; if it mounts on the left, choose a left-hand. Some latches are compatible with either side and can reduce the confusion. If the outside swing is throwing you off, stick with the inside view when deciding.
Measure the mounting hole spacing and the latch body size, then compare to your door and striker. If the holes are slightly different, you may need to elongate or drill new holes. Some doors let you reuse the existing strike plate to keep the same screw holes. After mounting, confirm the latch meets the striker without sitting too low or high.
Often yes, but confirm a few details. Universal replacements commonly work with a range of RV screen doors and can include a striker to swap if alignment is off. Check your current striker and hole layout; some installs line up perfectly while others need holes elongated or redrilled. Test fit before final tightening to verify smooth latching.


 Black
Black
 Brown
Brown
 Gold
Gold
 Silver
 RV Door Parts Parts or Accessories
 Filters