bing tracking image
  1. Wiring
  2. Deka
  3. Wire Connectors
  4. Butt Connectors
  5. 18 Gauge
  6. 20 Gauge
  7. 22 Gauge
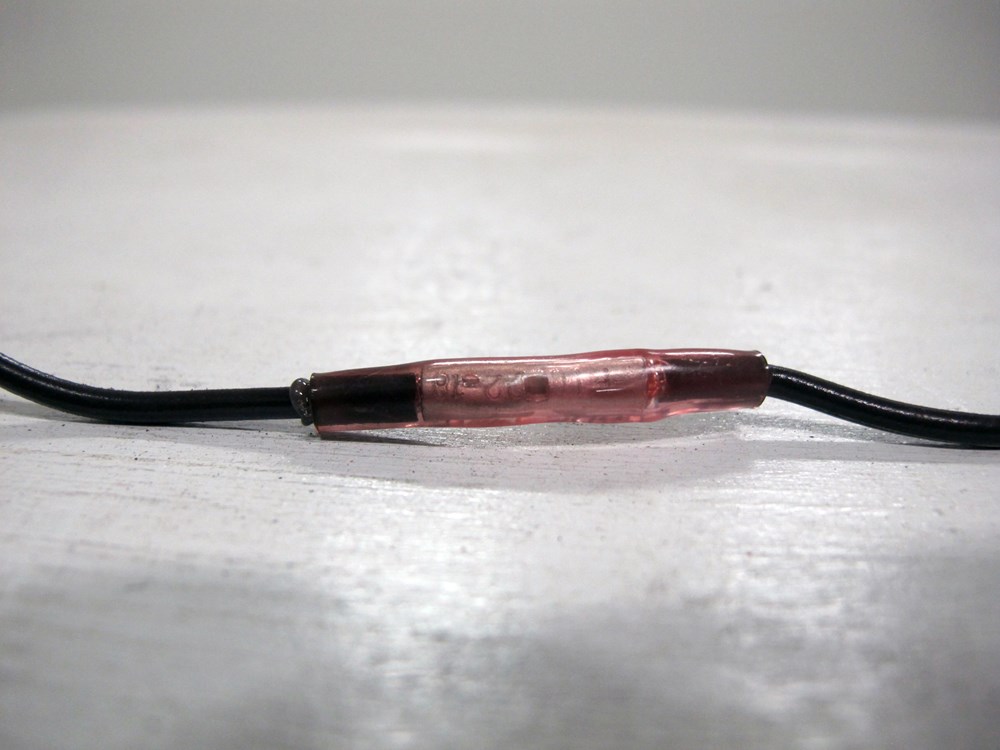
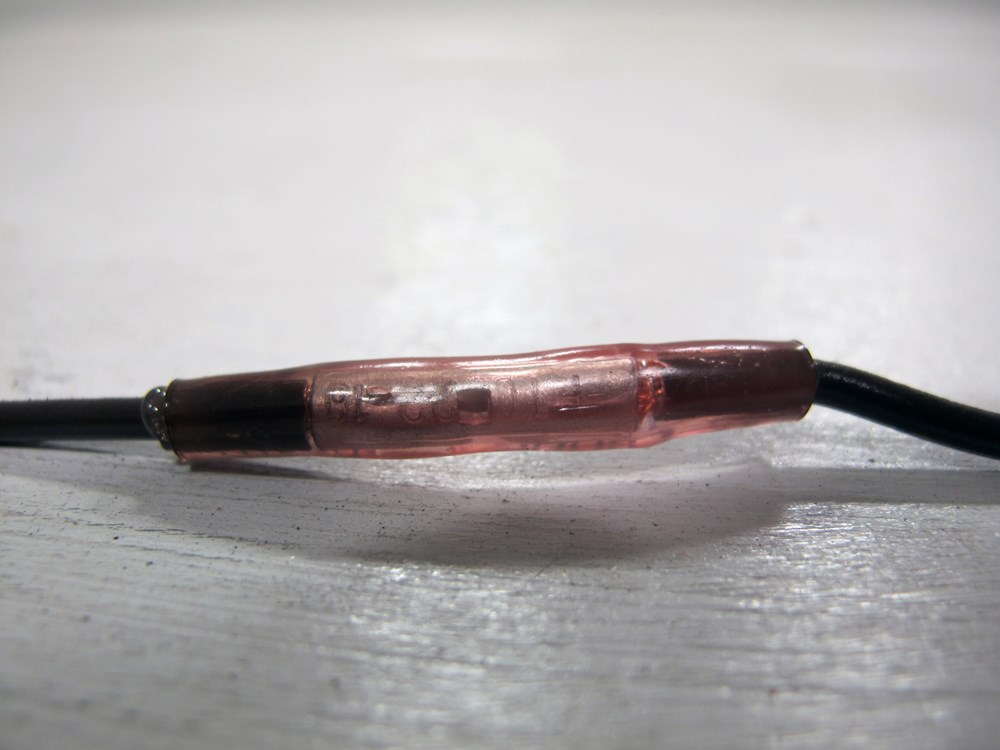
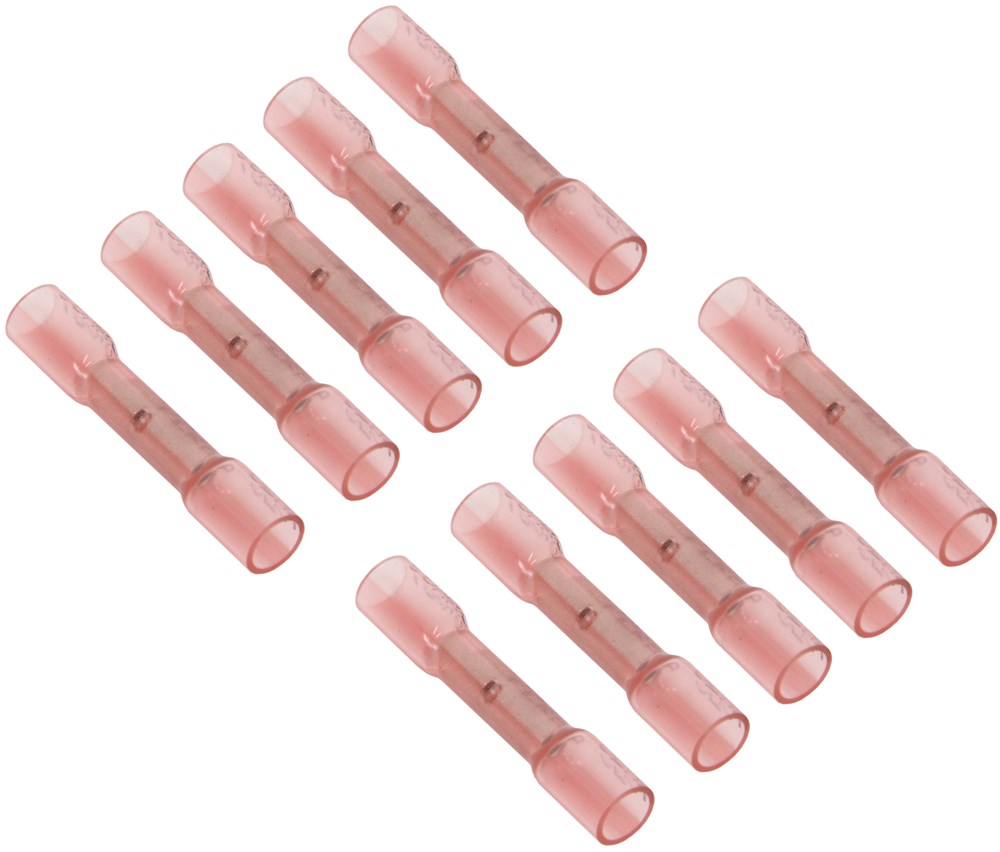
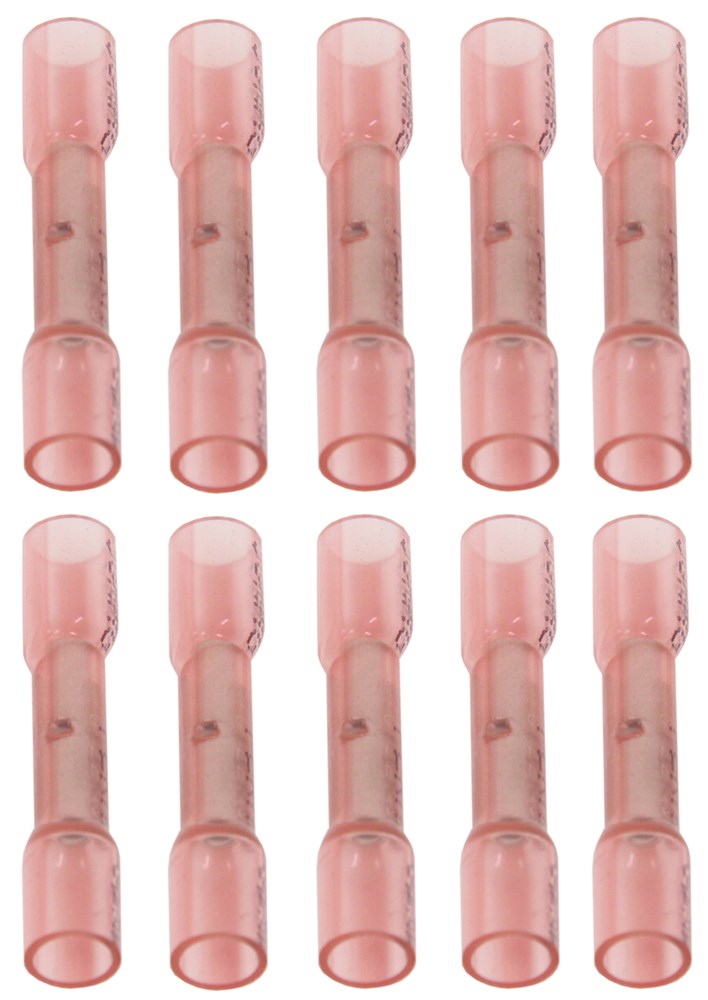
Deka Heat Shrink Butt Connector - 22-18 Gauge - Nylon Insulation - Red - Qty 10
Deka

Deka Heat Shrink Butt Connector - 22-18 Gauge - Nylon Insulation - Red - Qty 10

Part Number: DW05743-10
In Stock
$15.49
Wiring
zoom in icon
slider vertical icon
zoom out icon
Comment field cannot be left empty.
Name field cannot be left empty.
By submitting this form, you understand and agree to our Terms of Sale, Website Terms of Use and Privacy Policy.

Thank you! Your comment has been submitted successfully. You should be able to view your question/comment here within a few days.

Error submitting comment. Please try again momentarily.

Product Images

In Use/Installed

Videos

Need help with installation?
Locate installers near me
This red butt connector joins two lengths of 22-18 gauge wire. Insulated with heat-shrinkable nylon for adjustability and durability. Great Prices for the best wiring from Deka. Deka Heat Shrink Butt Connector - 22-18 Gauge - Nylon Insulation - Red - Qty 10 part number DW05743-10 can be ordered online at etrailer.com or call 1-800-940-8924 for expert service.
  • All Info
  • Reviews (1182)
  • Q & A (0)
  • Videos (1)
  • Photos

Deka Wiring - DW05743-10

  • Wire Connectors
  • Butt Connectors
  • 18 Gauge
  • 20 Gauge
  • 22 Gauge
  • Deka

This red butt connector joins two lengths of 22-18 gauge wire. Insulated with heat-shrinkable nylon for adjustability and durability.


Features:

  • Fits 22-18 gauge wire
  • Heat-shrinkable nylon insulation allows for adjustability and provides durability
  • Red
  • Quantity: 10


05743 Deka Butt Connector - 22-18 Gauge - Nylon Insulation - Red - Qty 10


Video of Deka Heat Shrink Butt Connector - 22-18 Gauge - Nylon Insulation - Red - Qty 10
Video Thumbnail Video Player Dialog

Videos are provided as a guide only. Refer to manufacturer installation instructions and specs for complete information.


Video Transcript for Deka Butt Connectors Detailed Breakdown

Hey, everyone, Ryan here at etrailer. Today we're gonna be checking out the line of Deka heat shrink style electrical butt connectors. Now these are available in a variety of different sizes. So you have the red, the blue and yellow, so small, medium, large if you will. And you can also pick these up in different amounts. You can get 'em individually, as a five pack, or even a 10 pack.

With these heat shrink connectors, what they're gonna allow you to do is pair two wires together, right, and make a a complete circuit. And we'll show you how to do that a little bit later on with these. But these are my go-to whenever I need to make a connection like that. These are what I always grab, especially if the wiring is gonna be outside or in harsher elements. And I say that because the ends of these heat shrinks will seal up, and actually kind of wrap around the wire, and help prevent moisture and stuff like that from getting inside of that connection and causing corrosion.

So if you're looking for, you know, the ultimate protection, so to speak, and help keep your wiring connections in good shape, then something like this is what I'd recommend. Now with that said, there are more standard type butt connectors like these ones here, all right And these, when you crimp 'em down, they don't have that heat shrink on it, right So the ends don't seal, and that'll leave little portions of the inside of the connector exposed, and that's what can happen. Corrosion and moisture and stuff can get in there and start to break it down and deteriorate. Now that's not to say these don't have time and a place because they do. If I'm ever doing stuff on the inside of a vehicle, or where I'm not really too concerned about, moisture and things like that, then by all means, these will do the job just fine.

Now, what size butt connector you're gonna need is this really gonna depend on your application, right So I talked about there being three different sizes. The yellow one's gonna be the largest, that's gonna be for 10 to 12, all wire gauge type wiring. So relatively thick stuff. Something like this is where you would use the yellow connector there. So pretty thick wire.

For the blue one, that's going to work with 14 to 16 gauge wiring, something like this, right More on the medium thickness side of things. And for the red one, it's gonna be the smallest, it's gonna be from 22 to 18, all wire gauge. And when you're dealing with wire, the higher the number, the thinner the wire is, right So for example, 18 gauge would be thicker than 22. Just figured I'd share that. So with these, you know, pretty thin wire, that's what you're dealing with there. And sometimes if you're unsure what you got, a lot of times if you look closely on the wire, they'll be labeled what it is. So this one says 20 AWG, so we know that's 2020 gauge wire, and we need to use the red connectors to complete connections with this type. Now that you know how to determine what size connector that you're gonna need, how many are you gonna need, right Now good rule thumb that we always talk about is always get more than enough, right Because you know, no matter how many times you count what connections you got and stuff, it never fails, right You always need an extra one or something happens. And honestly stuff like this anyway, if you do happen to have a few leftover, they're not bad to have laying around, you'll probably find yourself needing 'em in the future for one reason or another. That's really about it with these. You know, ultimately if you're doing wiring that's going to be exposed to the elements, no brainer, use heat shrink style connectors, will keep it protected and make the connection last longer. Now everyone's gonna use these for a variety of different reasons, right They're super universal, cars, trailers, all kinds of stuff, right Today we're using these to do some wiring on the trailer, make a repair, put a new end on it. And so why don't we go ahead, show you how we set ours up and give you a good idea on how to use these on your particular application. Very first thing that we need to do is take the wires that we're gonna be working with and making our connections to, and strip the ends of the installation back. So about like that is what you're looking for, maybe even a little bit shorter. But you then want to twist the wire nice and tight. That'll give us a good connection, and I'm just gonna make that a little bit shorter there. And then you take your butt connector, in this case we're gonna be using a blue one for this size wiring. Slide that over the bare end of the wire. And what I try to do is make it to where when you put the connector on that bare end of that wire, that's where it stops. You know, that way all the wiring is inside of the metal connector there. We'll take a pair of crimps, get this in, crimp down. You can lightly pull on it if you want to, to make sure it's not just gonna fall outta there, which it's good. Then we'll complete our connection here. All right, taking the other end of the wire that we're hooking this up to, putting it in there, and crimping it down. Going to do that same thing for our yellow wire here. Get that attached. And then for these brown wires, so in our case, we have one brown wire for our new trailer connector, right But we have two brown wires for our trailer and these are both taillight signals and this is too. So what we're gonna do, this is perfectly fine to do so, is just twist these two ends together, get 'em nice and tight. And then we're gonna step up one size to a little bit larger butt connector, put that over both ends of the wire, crimp it down. And then for, since we're gonna be putting one end, one wire end on the other side, what I like to do when this happens, is strip the wire back a little long and then double it over. That'll help the butt connector get a little bit better of a bite onto it. Got that connection made. And now we're ready to shrink the ends down. And so in order to do that, I recommend using a heat gun. And you apply heat to these, you know, kind of just consistently move it around. Try not to keep it in one single spot for too long. (heat gun humming) So that's about as long as you need to keep that heat onto it right there. Once it shrinks down and stop shrinking, that's really all the heat that you need to apply to it. You don't just want to keep it on there and continue to warm it up if we don't have to. So hit these other two and should be good. (heat gun humming) Once you have all of your connections made, it's not a bad idea to actually test everything out to make sure that the connections are indeed good. So being that we're dealing with trailer wiring today, in our case, I just hooked up to a little test box, which is simulating a vehicle, turn our lights on, and make sure power to the back where they're mounted up. We'll track our taillights, our left turn, our right turn and our brake lights. With everything working, you know the connection's good. And then if you want to, you can always come back with electrical tape too and tape these up for an additional layer protection. But with that said, I think that'll about do it for our look at of the line of Deka heat shrink style butt connectors.

Ratings & Reviews

4.8

1182 reviews
Review sort icon
This red butt connector joins two lengths of 22-18 gauge wire. Insulated with heat-shrinkable nylon for adjustability and durability.

by:

Item was exactly as ordered and of high quality. I had a question as to which of two wiring connections I needed for the lights I purchased. My questioning email was answered immediately and correctly. Good customer service.


by:

Held up well through winter #1 on my snowmobile trailer!


by:

I have bought several items from this company and have been very happy with the pricing, shipping and quality of the items .


by:

Great product. Fit my trailer tail lights perfectly.


by:

Products very good. Installed easily. Look good and work well. Only problem was shrink tubing way too small to fit over connectors. Otherwise everything fine. No biggie. !!


by:

These butt connectors work like you expect them to and at a great price!


by:

Good product but, too small for brake wiring. You did not have the right size.

Heather A. profile picture
Etrailer Expert

Heather A.

2/10/2021

We recommend 10 or 12 gauge wiring for trailer brakes. The Deka Heat Shrink Butt Connector - 12-10 Gauge - Nylon Insulation part DW05745-5 will work well for you.


by:

I was very pleased with my brake shoes. The installation went smoothly. The packaging could have been better. The box arrived in a beat up condition, but the contents were okay.


by:

etrailer did an exceptional job in processing and shipping my order out complete - ahead of projected delivery - hats off to everyone at etrailer - it is a team effort. Thank you for the great experience and I'll check with etrialer on any future needs...…


by:

Haven't rewired the trailer yet, but the items ordered arrived quickly and the order was accurate. Great prices and service!

Jim S. profile picture

Jim S.

12/4/2017

Great! I dont use the bot very much, but all the lights still work!!!!


by:

Great selection and quality products. My order arrived on schedule. No complaints

Arby profile picture

Arby

5/12/2016

Ive had the boat trailer in and out of the water several times and traveled over a thousand miles, including hundreds of miles down Canadian logging roads. No problems at all with the connectors coming loose or corroding.


by:

Being a new boat owner I was quickly overwhelmed by what I didn't know. Re-wiring, re-lighting my trailer was my first project. etrailer has a wide range of products, but most important to me, was their added product information and instructional information which helped me make the right selections to get this done. Add to that is their very competitive prices. etrailer will be my go to source for my future trailer needs.


by:

I really like the idea of any outdoor wiring connector that has self-sealing heat shrink. I don’t agree with the suggestion of using a lighter to activate the heat shrink—use a proper heat gun designed for this.


by:

Just received my order of new backing plate assemblies and some misc small parts. Ordered on line late Sunday night, confirmed I had ordered the right parts Monday morning before shipment went out. Customer service by phone was superb and the gal I talked with was perfect. Shipment was on my porch Friday afternoon. I did open box and inspect shipment that arrived completely intact/good shape and all looked good at this point. Not sure when will get to the brakes on the trailer but will post again when the job is done. So far nothing but good to say about Etrailer.com. Regards, John.


by:

Order was complete and delivered in a timely manner. Only problem (minor) was the 7way pigtail was not wired to color code. Had to use test light to get 3 of the wires in correct location. Could be a problem if someone wasn't comfortable with ringing out wires.


by:

I would like to really thank the team at etrailer for making my order correct. George, Amy and Carol all worked well with communication with me when there was a small issue with the amount of connectors I ordered. They made things right and I have nothing but appreciation for their work and attention to detail to help me out. Thank you again and I will be doing business again!! A+


by:

couldn't use the wire connectors, to small for the wires on truck and trailer wiring harness. The trailer hitch fit good and the wiring harness was as advertised. No problem installing either of them


by:

I had trailer light problems (who hasn't?) and found etrailer on the web. The site was extremely well organized and made it easy to find what I was looking for.
I had a question regarding the kind of wire connector needed. It was answered promptly by E-mail.
The lights and connectors arrived as promised and the installation was straightforward thanks to the videos on the site.


by:

Because my boat trailer is wider 20 Ft, I'm trying to replace my rear lightbar with a Optronics lightbar MCL97RB but my trailer is aluminum and I need a ground wire for that lightbar. That lightbar would ground by connecting the lightbar frame to the aluminum part of my trailer which is not a proper ground. I need Optronics lightbar MCL 97RG which I'm told you don't carry.

Lazer S. profile picture
Etrailer Expert

Lazer S.

2/10/2026

Sorry we didn't have what you were looking for, Richard. You could use a wire going from the hardware to the axle or a better grounding source if you are unable to find that specific light though. I looked around and couldn't find one that matched the MCL97RG part number, but you may have better luck. Out of curiosity, what kind of boat and trailer do you have?


by:

Just upgraded to a 2016 Odyssey and need to tow my camper.
Purchased the OEM hitch and OEM custom harness (from car to 4 pin on hitch. OEM Hitch comes with nice beefy flange where the 4 pin connector mounts. But I needed a 7 pin for electric brakes and bought this ETBC7 kit to do the job.

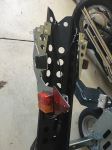
I ended up cutting a custom hole in the bumper cover and figuring a way to mount the bracket in this kit directly to the OEM hitch. Wanted to share photos of the install for anyone else in the same boat. Advantage of my install is that the 7 pin is mounted above the bracket, protecting it from injury from low clearance obstacles on the road. One Con, is I had to mount it upside down so it didn't interfere with the metal bumper under the bumper cover.

One issue I remember is that the Ground wire on the 7 pin harness didn't come close to reaching an available frame member, at the side of the car. I had to cut off the ring lug and extend it out to the edge of the car to complete the install. But it is done now!


by:

Exactly what I needed to rewire a 20-year-old trailer that was starting to show it's age with inconsistent lighting performance and continuity issues. In addition to purchasing this lighting harness, I upgraded all my incandescent bulb side markers and taillights with LED units and complete rewired the trailer. etrailer had everything I needed in one place with excellent pricing and superb service. Everything is working great and I love the brightness and visibility of the LED lights.


by:

Perfect finish to installing a water tight LED light kit on my PWC trailer. These are of good quality and I had plenty to spare.

Carlos profile picture

Carlos

5/16/2019

Still water tight and working, would buy again.



by:

I ONLY USE THESE TYPE OF BUTT CONNECTORS FOR TRAILER BRAKE AND LIGHTING WIRING.

Munster profile picture

Munster

7/13/2016

STILL WORKING GREAT NO ISSUES


by:

I used these when I rewired my boat trailer, and so far they have worked flawlessly. I like that they are much more water resistant than those that were originally on the trailer from 32 years ago. They shrink up nice and tight on the wire thus minimizing any water incursion into the electrical system. Well worth it.


by:

Worked as intended. Time to get the trailer back on the road.


25
25

See what our Experts say about this Deka Wiring

  • How to Replace a 4-Way Trailer Connector with 8 Wires
    A 4-way trailer connector will have four functions which means it will also have four wires for the exception of wishbone harnesses. These four functions are ground, tail light, right turn, and left turn. The ground function will usually be represented with a white wire, the tail light function will usually be represented with a brown wire, the right turn signal will usually be represented with a green wire, and the left turn signal will usually be represented with a yellow wire. From...
    view full answer...
    Image 1 for
  • How Do I Wire LED Flood Lights on My Camper to Use When Backing Up?
    Another option than running the LED light to the battery is by running the wiring to the running lights. Although, this can be just as difficult as running it to the battery. The best route is to run the wiring to the reverse lights. However, if you go this route, you must go without a switch option. The only way to use a switch is to go directly to the battery. If you need extra wiring for the application, I recommend using the 18-Gauge 2-Wire Bonded Parallel Conductor Wire - per Foot...
    view full answer...
  • Connectors Needed To Tie Into A Turn Signal Circuit
    Hi Matt, If you're saying that you need connectors to splice into the tail light wiring then we simply use heat shrink butt connectors. You'd cut the tail light wire and place one side in the butt connector, twisted together with your wire running to the 7-way and then place the other side of the tail light wire into the other side of the butt connector to complete the connection. These come in different sizes to fit various wire gauges: 22-18 Gauge # DW05743-10 16-14 Gauge # DW05744-10 12-10...
    view full answer...
  • Can Euro 7-Pin be Replaced by American 4-Way?
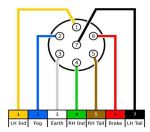
    Sure, you can cut off the Euro 7-pin and add an American-style 4-way. I recommend using the Wishbone Wiring Harness # A20WB, which actually has five wires; it splits the running light wires so you do not have to run a jumper wire from tail light to tail light. You will need to do some splicing and you can use the accompanying diagram of a Euro 7-pin to see how they are typically wired. I recommend using butt connectors # DW05743-10 to connect the 20 gauge wires of the harness.
    view full answer...
    Image 1 for Image 2 for
  • Identification Light Bar for Trailers over 80" Wide that Grounds Through the Mounting Hardware
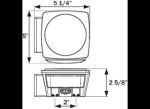
    Hey Richard. I have the Optronics item # MCL97RPG, which is the Identification Light Bar. This is a 3-light LED assembly designed for trailers over 80" wide. It has submersible lights, a stainless steel base, and grounds through the mounting hardware. I looked at our inventory and checked online, I could not find a MCL97RG in Optronics MCL97 line. i attached a diagram below so you could see the dimensions of the Optronics item # MCL97RPG. What kind of boat do you have? You can add...
    view full answer...
  • Best Replacement For Jensen MP5000 RV Radio
    We do have a good replacement that will be about the same size as your Jensen MP5000 but there are no plug and play replacement options. That being said, the Jensen # JWM60A radio is going to be the best replacement you can find for your current radio. Just match up the functions of the wires using these heat shrink connectors # DW05743-10 if your current plug will not hook into the # JWM60A radio.
    view full answer...
  • Can a 4-Way Flat Harness With Full Length Ground Wires Be Used In Place Of Grounding To Frame?
    Yes, you can use a 25 Ft 4-Way Trailer Wiring Harness # A25W2GWB with a full length ground wire to ground your Tail Lights. You will not have to ground either the harness or the lights to the frame on your aluminum trailer. I recommend using Heat Shrink Butt Connectors # DW05743-10 for your wire splices. This will help to protect the wiring from corrosion issues at the connections.
    view full answer...
  • Best Way To Connect Multi Wires and Lights on a Boat Trailer
    The best way to make water tight wire connections on a trailer are with heat shrink butt connectors; the Deka Heat Shrink Butt Connectors part # DW05743-10 for 22-18 gauge, part # DW05744-10 for 16-14 gauge, and part # DW05745-10 for 12-10 gauge. If you need to combine multiple wires, choose the smallest size that both wires will fit inside so you can get a tighter seal on the heat shrink tubing.
    view full answer...
  • Replacing 4-Way Connector on Trailer with 8 Wires
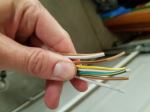
    For just the needed 4-Way by itself I recommend the Hopkins Quick Fix # HMC20031 that features a removable cap that makes it easier to insert the wiring from your trailer. From the looks of the picture you attached you probably have three ground wires (white) and three running light wires (brown), the remaining green wire being for right side turn/brake and the yellow for left side turn/brake. With that being said I highly recommend still testing them each for function for verification...
    view full answer...
    Image 1 for
  • Replacement Tail Lights for an EZ Loader Boat Trailer
    I do not know exactly what lights your boat trailer came with nor would we have an exact OEM replacement but we do have the Miro-Flex LED Trailer Tail Lights part # STL28RB & # STL29RB which are a submersible LED tail light that should work well for you. The lights mount via two bolts placed 2" apart on center. The circuit boards are sealed, which means that water will not damage the diodes or circuit boards. The lights do not come with sealed wiring connectors but you can add them using...
    view full answer...
    Image 1 for
  • Best Connector for Installing the 18-Gauge 2-Wire Bonded Wire
    The best connector type to use with the 40' 18-Gauge 2-Wire Bonded Wire # SWC77FR are the Deka Heat Shrink Butt Connectors # DW05743-10. You'll insert the ends of the wires into the butt connector, crimp it down, and then use a heat gun or a small flame to shrink the casing around the wires. This gives you a solid connection that is safe from being exposed to the elements.
    view full answer...
  • Wire Gauge Of Optronics LED Combination Trailer Tail Lights TLL16RK
    The wire gauge used in the LED Combination Trailer Tail Lights - Submersible part # TLL16RK is 20 gauge according to Optronics. This may seem light but the lights are LED and draw very little power. You can use Deka Heat Shrink Butt Connector - 22-18 Gauge - Nylon Insulation part # DW05743-10 to install the lights if you need them.
    view full answer...
  • What Gauge Wire Is Used On the Hopkins Endurance 4-Way Flat Trailer Wiring Harness?
    The Hopkins Endurance 4-Way Flat Trailer Wiring Harness - 20' Long # HM48240 uses 18 gauge wire for the 3 lighting functions and 16 gauge for the ground wire. This is standard size wire for a 4-way flat harness, but the ergonomic grip on the connector for the easy pull disconnection is what sets this harness apart from others. I recommend using the Deka Heat Shrink Butt Connector - 22-18 Gauge - Nylon Insulation - Red - Qty 10 # DW05743-10 for your light connections.
    view full answer...
  • How To Install Alpena LED Fog Lights With A Toggle Switch On Boat
    The Alpena LED Fog Litz 4 # ALP77160 are fairly simple to install with a toggle switch, just make sure you are connecting them to a 12V battery of some sort. I recommend wiring it to the Pollak Light-Duty Toggle Switch - On-Off - 12 Volt - 10 Amp - 6" Wire Leads # PK34513 and using Deka Heat Shrink Butt Connectors (10 pack) # DW05743-10 for your connections. Attach the negative wire on the fog lights to the negative terminal on the battery (or bare metal for ground connection). Then connect...
    view full answer...
  • How to Install the Alpena LED Fog Litz 4 Part # ALP77160 with a Toggle Switch
    I do have a way for you to install the Alpena LED Fog Litz 4 part # ALP77160 on your 2010 Mazda CX-7 but unfortunately I cannot recommend you use them inline with your low-beam headlights as you would likely exceed the maximum amp draw allowed for that circuit. In order to install the fog lights on your CX-7, I recommend using them with a toggle switch such as the LED Micro Bug Push Button Toggle Switch part # PL-SW28B. In order to install the fog lights with a toggle switch you will need...
    view full answer...
  • Can Hair Dryer Be Used For Deka Heat Shrink Butt Connectors
    A hair dryer is exactly what works great when using the Deka Heat Shrink Butt Connector, part # DW05743-10. Using these butt connectors will help keep any moisture and dirt out of the connection for you.
    view full answer...
  • Recommended Wire Connector Used To Attach Lights On Boat Trailer
    In order to join lights together on a boat trailer you'll want to use heat shrink butt connectors like part # DW05743-10, part # DW05744-10, and part # DW05745-10 as they keep out moisture which reduces the chance for corrosion that cause lighting issues. If you need to tie multiple wires together, you can do so using one of the larger butt connectors. In order to seal these connections you also need a heat gun, the Trades Pro Dual Range Heat Gun w/ Nozzles part # ALL836717. I have attached...
    view full answer...
  • Trailer Wiring Harness Installation Location at the Back of a 2008 Nissan Pathfinder
    Some Nissan vehicles came with that 8-pin connector rather than a 6-pin like most others. There isn't a plug-in harness or adapter for Nissan vehicles with the 8-pin connector, such as your 2008 Pathfinder, but there is an option for you. First, and what I recommend, is to use the harness you have, # 118267, but cut off the vehicle and harness side connectors and hardwire them together based on function. Use a circuit tester such as # PTW2993 or a meter such as # PT89ZR to test the wires...
    view full answer...
    Image 1 for
  • Installation of Optronics TLL12RK LED Trailer Taillights
    Although there isn't a plug and play harness available, wiring up the # TLL12RK taillights to a trailer harness like # A10-4225VP would be extremely easy, as you can see in the provided video where my buddy Jake shows how the harness is installed. The wiring pigtails included with the # TLL12RK would connect as follows: • Red wire on pigtail connects to green wire on right side, yellow wire on left side • Black wire on pigtail connects to brown wire on both sides • White wire grounds...
    view full answer...
  • Trailer Wiring Harness Compatible with Peterson 435800 Trailer Stop/Turn/Taillight
    We don't offer a plug and play trailer harness that would plug directly into the Peterson # 435800 trailer taillight. The lamp includes a 3 pin pigtail that would plug into the rear of the lamp which would wire directly into the trailer wiring. If you need a 4 pole harness for your trailer, we offer them in varying lengths. • For a 20 foot harness, use part # A20WB • For a 25 foot harness, use # A25W2GWB • For a 30 foot harness, use # HM48265 • For a 35 foot harness, use # A35W42B To...
    view full answer...
  • What Gauge Wiring Is Used On Malone EcoLight Sport Trailer MAL53FR?
    I reached out to my contact at Malone and the Malone EcoLight Sport Trailer - 58" Crossbars - 400 lbs # MAL53FR uses 18 gauge wiring. I recommend picking up the Heat Shrink Butt Connectors # DW05743-10 to use for connection the wiring functions on the trailer as this will give you a weather tight connection compared to the included quick splices. I included videos of each of the products mentioned for you to take a look at.
    view full answer...
  • Wire Connector Recommendation for 20 Gauge Wire on Trailer
    For a 20 gauge wire I would not recommend the use of a quick splice connector. The core of the wire would be too thin for it to work well. You would most likely end up cutting the core of the wire when tightening it. I would recommend soldering as the best solution and then beyond that butt connectors like the part # DW05743-10 would be the next best solution.
    view full answer...
  • Should The Plug-In Connector On The Furrion Camera Fully Plug Into The Wiring Harness Connector
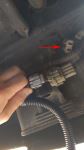
    In my experience the Furrion Vision S Wireless RV Backup Camera System # FOS43TASF has always fully plugged into the connector so you may have have debris inside of it preventing it from fully connecting. If you can't get it out then you can replace the connector with the one from part # FRCBRKT-BL. Simply remove the mount and pull the wiring out from the trailer and cut it and splice in the new connector with some heat shrink butt connectors # DW05743-10. One other thing I want to...
    view full answer...
  • Installation Process for Optronics Light Guide LED Backup Light for Truck/Trailer
    In order to connect the Light Guide LED Backup Light # BUL602CB to your truck bed light you will want a 2-wire pigtail. You can use the 2-Wire Pigtail for Optronics Backup and Utility Trailer Lights # A45CB or the Right Angle 2-Wire Pigtail for Optronics Backup and Utility Trailer Lights # A49PB. These will plug into the back of the light. Once you have these, you will need to connect the wires to your truck. The white ground wire needs to be secured to a clean, bare-metal surface. The...
    view full answer...


< Previous
12


Do you have a question about this Wiring?


Info for this part was:

Employee Jameson C
Expert Research:
Jameson C
Employee Adam R
Expert Research:
Adam R
Employee Jeffrey L
Expert Research:
Jeffrey L
Employee Laura H
Written by:
Laura H
Employee Wilson B
Updated by:
Wilson B
Employee Jonathan Y
Video Edited:
Jonathan Y
Employee Ryan G
Installed by:
Ryan G
Employee Thomas T
Video by:
Thomas T

At etrailer we provide the best information available about the products we sell. We take the quality of our information seriously so that you can get the right part the first time. Let us know if anything is missing or if you have any questions.

Product Experts Available Now!
Call 1-800-940-8924