
 Product Experts Available Now!
Call 1-800-940-8924


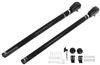
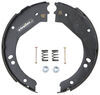
If your trailer’s old brakes are dragging or uneven, these 10" x 2-1/4" electric brake assemblies bring back smooth, consistent stopping. Each kit includes left-hand and right-hand assemblies with fully bonded automotive-grade friction material that provides strong braking torque and long life. Designed for 13", 14", and 15" wheels with a 4-bolt mounting flange, they fit most standard hub-and-drum setups rated at 3,500 lbs.
The friction lining on these brakes is molded and bonded directly to the shoes—not riveted—so there’s less chance of cracking or crumbling under heavy use. The tapered edges and circular grinding deliver stable contact with the drum for smooth braking and more control. Each lining meets SAE-N certification standards, meaning it’s environmentally safe and built for dependable, real-world performance.
Whether you tow occasionally or often, corrosion protection matters. The e-coated backing plates on these assemblies fight rust and surface wear over time. Adjuster plugs keep dirt and grime out of the housing so the internal components stay clean and responsive. It’s a simple detail that helps extend brake life and preserve consistent performance.
These manual-adjust brakes let you fine-tune alignment as the shoes wear. The precise adjustment gears make it easy to dial in the correct drag on the drum—tight enough for solid stopping but smooth enough for free rotation. Routine adjustment keeps braking power steady trip after trip.
Each assembly meets Canadian Standards Association requirements for safety and quality, with additional testing by the Quality Auditing Institute to confirm braking performance under real-world conditions. That means these brakes were built and verified to stop reliably when it counts most.
Videos are provided as a guide only. Refer to manufacturer installation instructions and specs for complete information.
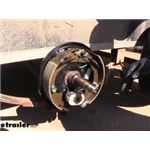
Randy: Hey, guys, Randy here at etrailer.com. Today we're taking a look at the left and the right brake assembly. These electric assemblies allows you to completely replace all of the components in your braking system. So new springs, new keepers, new adjuster, new magnet. Everything's brand new and fresh. This is an excellent alternative to replacing these things piece by piece.
Once you start doing that, you got to take it apart, put it together, take it apart when you have a failure. In this case, we're getting everything on fresh, everything on new. It's going to eliminate a lot of problems and we're also going to get the same braking power out of both sides. Our left side is going to do the same amount of braking as our right side. It's going to make everything a lot safer for us.
Everything's coated with a good corrosion-resistant finish for us as well. This brake dust can be pretty corrosive and having this finish on here is just going to help eliminate a lot of the issues we have with corrosion.We're also going to use an automotive grade pad really nice, wide pad and you can see we've got beveled edges here on the front and on the back. So it's going to reduce a lot of that chattering or a lot of that skipping we get and noise that we often get out of some other type brake assemblies. Now these are what's considered a 10 inch diameter brake assembly and they have the two and a quarter inch wide brake shoes, has the four bolt mounting flange like you've seen. And they're rated for axles up to 35 hundred pounds.
Generally, you're going to see these on trailers that have 13, 14, or 15 inch wheels. Now taking a minute to compare this to other products that we have available, there's really no big difference in them. Even comparing them to more expensive type brands, they're right in line and offer the same quality. Now the only thing you may want to consider is a self-adjusting set of brakes. Those require slightly less maintenance because you don't have to get underneath and tune them in every six or eight months.Now in getting to the assemblies, we need to remove our drum here or if you're going to be doing the drum as well kind of like we are, we need to get this off.
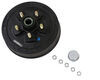
In order to do that, this cap's going to have to come off. We're just going to use a dead blow hammer and if we kind of tap out on it as we rotate, you can see it's going to come off. That one came off pretty quick. It takes, sometimes, a little bit longer than that. But once you get that off, we're going to clean this grease off. That's going to allow us to get to the keeper. Let me see, with that grease off you can see this one has a cotter pin. It's going to be right here. Some of them are going to have different styles. Some of them will have like a keeper that slides over. It doesn't really matter which one you've got, just hang on to it because we will be reusing it.So here are the cotter pin, we need to straighten that guy out, then begin to push it downward and we can get a hold of it on its bottom side. Now we just want to back off this large nut. We're going to hang on to this, we'll be reusing it just like our keeper there. These aren't very tight, generally, so just a pair of pliers those will come off. And then we're going to wiggle our drum just a little bit here, then right here on the end we're going to have this thrush flusher. We're going to get that off. Now if you're getting a new hub, like what we're going to be doing, we're going with a galvanized hub just to eliminate a lot of this rusting issue then you won't need to keep your bearings. You won't need to keep your hub or the seal. If you're not replacing this, if you're just going to be replacing the brake assembly, hang on to these things so you can put them back together.And once that's off, we're going to clean everything up really well. We need to inspect our spindle here. We're going to be looking for any type of damage to it. We're going to be looking for any signs of like major heat, if we see any discoloration on it. Our seal rides right on this lip so we want to make sure that's nice and clean and free of defect. We've got our inner bearing that's going to go here, outer bearing's going to go here. So you just want to make sure everything's nice and smooth. We don't see any cracking, no discoloration. This one looks really good. Now you'll see for a brake assembly, we've gut a stud here, here, here, and down here. Generally, you're going to have four or five. Let's see, it looks like this one is a four. So we're going to back those nuts off that are on the backside here and we want to hang on to those so we can use them with our new brake assembly.You can see here's what our hardware looks like, just the flange nut. Now ours uses an 18 millimeter. A lot of times though, a nine-sixteenths is probably going to be what you need. So just check it out and see what size you've got there. Before you pull your last bolt out, we need to get our wires separated here. These are going to be the two that come in from our plug and then you can see they used quick connectors there, which we don't recommend. They use those to go across to the other axle so we'll have to splice all these together. We'll show you that in just a minute. For our wires here we need to strip them back. The white wire, generally that's going to be a ground, but since it is a magnet we just need to put power through it. So we can connect our wires either way we want.So I'm going to twist the two of those together and to give us great corrosion resistance, we're going to use DW05745. This will be a heat shrink butt connector here on both of them. So we get our wires twisted, get them pushed in there, and then crimp it down really well. Make sure we got a good contact there and do the same thing with these. All right. Now that's going to give us our spot to connect. I'm just going to strip back a little bit more here on these wires. I like to double these over since we're going into a little bit bigger butt connector. Flex it in the middle. Same thing here. All right. Now your assemblies, since you've got left and right, you're going to use the left-hand on the driver side of the trailer. It goes right into that original flange. And for now, I'm just going to throw one nut on it to hold it in place while we make our connections there.So we go in, crimp it down, and then we use a heat source to shrink them. We can use a lighter, we can use a heat gun, we can use a mini torch. We just want to be sure we don't overheat them. You don't want them to melt. The actual butt connector, you just want it to shrink down. You can see as you start to shrink it, it's going to turn kind of clear and the wires are going to look like they get a little bit larger, almost like they're magnified. See that little bit of clear gel that comes out of the end there, just gives you a really nice water-tight connection so you don't have to worry about corrosion issues. Now you want to got through them, we're going to tighten down our nuts here. Now there are three-eighths studs that come out of the back so general torque applications for that are somewhere around 35 foot pounds.Now once we've got everything put back together, you want to check your brakes. You want to rotate it and you want to hear a slight, constant drag like what we've got there. You can just barely hear those brakes dragging a little bit. If need be, if you don't have that, if your tire spins real freely you need to expand those brakes out just a little bit. So you go in the backside with a screwdriver, take that oval-shaped cap out, and that will allow you to adjust the brake tension. If you've got it on there and you can't move it at all, you need to loosen it up a little bit. And this is something you want to do periodically just to check it and inspect it to make sure you're going to have proper braking performance out of your setup.Now to test everything out, of course, we want to make sure our connections are right so we'll hook up our truck or you can hook up a trailer tester, get the wheel spinning, have them apply the brakes and make sure it stops. That's the idea. As you can see, nice and solid there. Go ahead and release. Should release cleanly and we'll be heading down the road again.
Ratings & Reviews

Info for this part was:
At etrailer we provide the best information available about the products we sell. We take the quality of our information seriously so that you can get the right part the first time. Let us know if anything is missing or if you have any questions.












Thank you! Your comment has been submitted successfully. You should be able to view your question/comment here within a few days.
Error submitting comment. Please try again momentarily.