If that’s happening to you, take a breath.Most trailer brake problems are not catastrophic failures. They’re usually electrical connection issues, adjustment problems, or surface rust after the trailer has been sitting.Electric trailer brakes are actually a simple system. Power leaves the brake controller in your vehicle, travels through the 7-way connector, runs down the blue brake wire to the brake magnets inside each hub, and then grounds back through the trailer frame.If anything interrupts that path, whether it’s corrosion, a loose ground, or a shorted wire, braking performance will change. The key is diagnosing in the right order so you don’t replace parts you don’t need.Here’s exactly how we walk neighbors through it.
If your trailer uses a 7-way connector (the round plug with seven pins), you almost certainly have electric drum brakes.
That system includes:
A brake controller inside your vehicle
A dedicated brake output wire (usually blue)
A breakaway switch with a small onboard battery
Brake magnets inside each drum
If you’re not sure how those components work together, we break it down step-by-step in our guide to Electric Trailer Brakes: How They Work & What to Buy. When you press the brake pedal (or use the manual override) the controller sends voltage through that blue wire to the magnets. The magnets grab the inside of the drum, which applies the brake shoes.
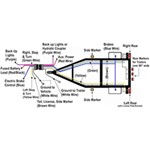
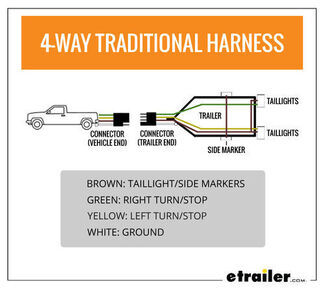
7-Pole Trailer Connector
If that voltage doesn’t reach the magnets cleanly, the brakes won’t behave the way they should.That’s why we always start at the beginning of the power path: at the tow vehicle.
Start at the Source: Confirm Power and Connection
When trailer brakes aren’t working, always begin at the front of the system: the tow vehicle and the main connection point. If power never leaves the truck or can’t complete a circuit, nothing happening at the axles will fix it.Is the Truck Sending Brake Power?Before crawling under the trailer, confirm the vehicle is doing its job.With the trailer plugged in:
Turn the vehicle on.
Use the manual override on your brake controller.
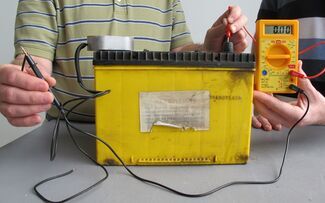
Test the brake output pin on the 7-way connector with a circuit tester or multimeter.
You should see voltage when the manual override is activated. If you don’t, the issue is on the truck side, not the trailer.Check:
Trailer brake fuses - Look in your vehicle’s fuse panel for any fuses labeled “Trailer Brake,” “Tow Package,” or similar. A blown fuse will prevent power from reaching the 7-way entirely. Replace any blown fuse with the correct amperage.
Brake controller wiring and ground - Make sure the controller has a solid power and ground connection under the dash. A loose ground wire or poor crimp connection can prevent the controller from outputting voltage. If the controller doesn’t power on consistently, this is often the reason.
The blue brake output wire connection - This is the wire that carries brake power from the controller to the 7-way. Confirm it’s securely connected and hasn’t pulled loose, especially near the back of the vehicle where it ties into the trailer connector harness.
If power never leaves the truck, the trailer can’t brake. Verifying these three points prevents a lot of unnecessary trailer disassembly.If Your Brake Controller Says “No Trailer Connected”When a brake controller displays “no trailer connected,” it usually means the controller can’t detect a complete electrical circuit.Most of the time, that comes down to one of three things:
A weak or corroded trailer frame ground
Corrosion inside the 7-way connector
A broken brake output wire
Start with the ground.Your trailer frame serves as the electrical return path. If the ground connection is rusty or loose where it bolts to the frame, power can’t complete the circuit, and the controller won’t recognize the trailer.If you haven’t checked your ground connections yet, start here: How to Fix a Bad Trailer Ground We see far more brake detection problems caused by poor grounds than by failed brake magnets.
If Trailer Brakes Feel Weak
If the controller detects the trailer but braking feels soft or inconsistent, the system is getting power, but something is reducing braking force.
Work through this in order.1. Surface Rust on Brake Drums
When a trailer sits, moisture can create a light layer of rust inside the brake drum. That rust reduces friction between the brake shoes and the drum.Often, 10–20 controlled low-speed stops will clean that surface.If braking improves after that, rust was the issue, not worn parts.2. Brake Adjustment
Electric drum brakes require periodic adjustment unless they’re self-adjusting.If the brake shoes sit too far away from the drum, the magnets may engage but the shoes won’t press firmly enough to create strong stopping power.Adjustment alone fixes more weak brake complaints than most neighbors expect. If you’re unsure how to adjust them correctly, follow our step-by-step guide: How to Adjust Your Trailer Brakes | The Ultimate Guide. 3. Bedding (Break-In) After ReplacementIf brake assemblies were recently replaced, they must be properly bedded.That means:
20–30 moderate stops from 20–25 mph
Allow cooling time between stops
Avoid aggressive or panic braking during this process
This gradual heat cycle helps the brake shoes conform to the drum surface.Until that happens, braking can feel softer than expected, even when everything is installed correctly.If the controller detects the trailer but braking feels soft or inconsistent, the system is getting power, but something is reducing braking force.
Work through this in order.1. Surface Rust on Brake Drums
When a trailer sits, moisture can create a light layer of rust inside the brake drum. That rust reduces friction between the brake shoes and the drum.Often, 10–20 controlled low-speed stops will clean that surface.If braking improves after that, rust was the issue, not worn parts.2. Brake Adjustment
Electric drum brakes require periodic adjustment unless they’re self-adjusting.If the brake shoes sit too far away from the drum, the magnets may engage but the shoes won’t press firmly enough to create strong stopping power.Adjustment alone fixes more weak brake complaints than most neighbors expect. If you’re unsure how to adjust them correctly, follow our step-by-step guide: How to Adjust Your Trailer Brakes | The Ultimate Guide. 3. Bedding (Break-In) After ReplacementIf brake assemblies were recently replaced, they must be properly bedded.That means:
20–30 moderate stops from 20–25 mph
Allow cooling time between stops
Avoid aggressive or panic braking during this process
This gradual heat cycle helps the brake shoes conform to the drum surface.Until that happens, braking can feel softer than expected, even when everything is installed correctly.
Rusted trailer brakes
Manual adjust electric brakes
If Trailer Brakes Are Locking Up
If the trailer wheels lock with very little controller input, the brakes are either getting too much power or receiving power when they shouldn’t.Start with the brake controller gain. Gain controls how aggressively the trailer brakes apply. If it’s set too high, the brakes can lock with very light pedal pressure. Lower it slightly and test again.If the gain looks correct, shift your attention to the wiring.
Check the blue brake wire for damage. If the insulation is worn and the wire is contacting metal, it can send unintended power to the brakes.
Then look inside the 7-way connector. Corrosion or loose wires can cause circuits to interfere with each other.
Finally, make sure the brake circuit isn’t tied into the auxiliary 12V circuit. That auxiliary pin carries constant battery power. If it’s connected to the brake wire, the trailer can receive full braking power without proper controller input.
Brake power should only come from the controller. If braking behavior changes when you turn on your headlights, that’s a strong sign wiring inside the connector is crossed.In that case, start with full wiring isolation here: Trailer Lights Not Working? Start Here
Check the Breakaway System
Every electric brake trailer has a breakaway switch and a small onboard battery.
If the breakaway pin is partially pulled, it sends constant power to the brakes, as if the trailer has detached from the vehicle.That can cause:
Brakes dragging
Brakes locking unexpectedly
Controller error messages
Make sure:
The pin is fully seated
The battery is charged
The wiring is secure and corrosion-free
This is an easy thing to overlook and more common than most neighbors realize.
Important:
Never pull the breakaway pin to “test” it while the 7-way is plugged into the vehicle.
That can backfeed power into the brake controller and damage it.If you need to test the breakaway system, unplug the trailer from the truck first.
Trailer breakway system
Inspect Wiring and Brake Components Under the Trailer
If the truck is sending power and the 7-way connection looks good, move down the trailer.
Start by following the blue brake wire from the tongue to each axle. That wire carries braking power to the magnets, so any damage along the way can affect performance.Look for:
Damaged insulation
Corroded butt connectors
Loose wires at brake magnets
Rodent damage
Wiring pulled tight near moving suspension parts
Road debris, moisture, and suspension movement are hard on exposed trailer wiring. Small breaks or loose connections can cause weak braking, intermittent braking, or lock-up.If you suspect a magnet issue, resistance testing with a multimeter can confirm whether the magnet is functioning properly. We walk through that process step-by-step in Testing Trailer Brake Magnets for Proper Function.If the wiring checks out and power is reaching the brakes, but stopping still feels off, it’s time to inspect the hardware.Make sure:
Brake shoes aren’t excessively worn
Magnets aren’t weak or damaged
There’s no grease contamination from a failed hub seal
If everything worked the last time you towed and now your trailer brakes aren’t working correctly, the cause is usually predictable.Moisture causes corrosion inside connectors. Grounds rust underneath mounting points. Drums develop surface rust. Adjustment can shift slightly. Breakaway batteries slowly drain.Most of the time, it’s not a major failure. It’s small issues adding up.
When to Pause Before Towing
If your trailer brakes are:
Not engaging at all
Locking unpredictably
Causing sway under braking
Pause before highway travel.Trailer brakes are what keep the trailer tracking straight and stopping in control. If braking is inconsistent, the trailer can push the tow vehicle or react unpredictably in traffic.
A broken light is inconvenient.Brakes are safety-critical.If something feels wrong, isolate the issue before towing at speed.
Stable braking keeps the trailer in line behind the truck.
Not Sure What You’re Seeing?
Tell us what your brake controller display says, what happens when you use the manual override, and what you’ve already tested.We troubleshoot trailer brake wiring and adjustment issues with neighbors every day.Most of the time, the fix isn’t a full brake replacement. It’s a ground connection, a wiring issue, or an adjustment that drifted. Work through the system in order and you’ll usually find the cause.Trailer braking should feel predictable and controlled.If it doesn’t, it’s worth sorting out before you tow.
About Nicki B.I’ve always loved learning and teaching. Every day I get the chance to help a neighbor pick up something new, whether it’s understanding how to tow with more confidence, setting up camp a little easier, or just finding the right gear for their next trip. For me, the real joy comes from turning those little “aha” moments into solutions that make life safer, smoother, and more fun.Outside of work, you’ll usually find me outdoors. I love fishing, camping, and hiking the trails with my family and our golden retriever (who insists on carrying the biggest stick he can find). I spent years as a Cubmaster and scout leader, and now I get to put those skills to good use running our team campouts. My favorite part is making up fun games and activities that get everyone laughing.When I’m not outside, I’m probably curled up with a book or unwinding with some old Top Gear reruns. At the end of the day, I just like finding ways to make things a little easier and more enjoyable, on the road, at camp, or at home.
Hello Gray, Thanks for writing in! The TorkLift GlowStep Revolution Uprising #TLA9005 is a great option to consider for the door interference you're having with your MORryde StepAbove steps. The two systems mount differently, and there is…
The Demco Hydraulic Trailer Brake Actuator part #DM72VR should be a direct replacement for the Atwood 61101 Brake Actuator that you have now. This newest updated it rated at 7K instead of 6K. This is a bolt on option that mounts on 3" centers.…
Yes, the Replacement Plug and Play Electric-Over-Hydraulic Actuator #DX36XR is the correct part for your Dexter BrakeRite II SD. To replace the wiring harness you also need part #T4834300. This is the harness with the 7-Way connectors and the…
Based on what we could find, the AL-KO 8490 is a 3,500 lb axle, and your info stating the 5 on 4-1/2" bolt pattern and 10" x 2-1/4" drum size supports that as well. I do recommend verifying what you need by taking apart your current…
According to my research, AL-KO 8490 references an AL-KO hub for 3,500 lb axles with a 10 x 2-1/4" drum and a 5 on 4-1/2" bolt pattern. For a drum assembly that will work with these hubs I recommend taking a look at the Electric Trailer…
Based on what information I could find about AL-KO 8490 hub and drums, it is rated for 3,500 pound axles, has a 5 on 4-1/2 bolt pattern, and is a 10 by 2-1/4 inch drum. If this is the case, we have several options for you. I have attached a link to…
There are a few different diagrams for the Titan BrakeRite EHB Electric-Hydraulic Actuator depending on which model you have. For example, if you have the RF model then you will use the diagram (see photo 1) with a 4-way as that is all that is…
Hey Gregg, yes you can use the Dexter BrakeRite Electric Over Hydraulic Actuator for Disc Brakes #DX82KR to replace your Replacement Dexter BrakeRite II SD Electric Over Hydraulic Actuator #DX36XR. The only difference is like you already stated, the…
Hello Stephen, thanks for reaching out. I am sorry to say that Dexter does not offer a replacement control board for the BrakeRite unit. The entire unit will need to be replaced. Which BrakeRite unit is it exactly? Is it the plug-in version or is it…
We have a replacement for a Dico model 60 actuator. Dexter bought out Titan and upgraded that actuator replacing it with part #099-175-00 which will be a great choice if your trailer has drum brakes. For disc brakes you'd want the part…
Yes, the 5,200 lb and 7,000 lb trailer axles will have the same five bolt brake mounting flange so you can swap braking assemblies out between the two. That said, the Dexter Nev-R-Adjust Electric Trailer Brake Kit part #23-464-465 which is for 7,000…
The Electric Trailer Brake Kit - 10 inch - Left and Right Hand Assemblies - 3,500 pounds #AKEBRK-35 is the correct brake set up for your Kelsey Hayes 602027 and 602028 and even though your trailer is rated for 2,750 pounds the 3,500 pound brakes will…