bing tracking image

Banner Image
Updated By: Izzy B.
Last Updated: 8/12/2024
Time To Read: 9 minutes
How to Measure and Replace Everything in Your hub Assembly
Servicing and maintaining your trailer is arguably the least exciting part of trailer ownership. In this writer’s opinion, there’s only one thing that could possibly make trailer maintenance more frustrating: realizing that you need replacement parts, but you don’t know which parts to pick. How do you know you’re not just throwing money away on parts that won't even fit? We’ve been there too, and that’s why we’ve put together this handy guide to figuring out your own hub assembly measurements the EASY way. In our years of pulling apart our own trailer brake assemblies, we’ve learned firsthand which measurements you need, how to take them correctly, and what to do with those numbers once you’ve got them. In short, we’ve suffered so that you don’t have to. Now, just find yourself a decent digital caliper, and you’ll be able to pick your own hub assembly replacement parts like a pro.Looking for a specific measurement? Skip right to that section below:
Hub Bore Diameter
Dust Cap
We’ll be working from the front of the assembly to the back, starting with the dust cap. You’ll know it’s time to replace your dust caps when they’re looking dented/misshapen, showing signs of corrosion, or if they’ve just fallen off on the road. You can also replace them whenever you clean and repack your bearings, if you feel like being proactive. It’s important that your dust caps are fitted properly so that they keep dust and water outside the hub, while keeping the grease inside. Luckily, a dust cap is one of the easier parts on your hub assembly to replace.To replace your dust cap, you only need to know one measurement: the diameter of your hub bore in inches (this is a pretty simple measurement to take too).
Hub bore diameter
Once you remove the old dust cap and any other components that might be in the way, grab your handy dandy digital caliper. With the caliper, measure the inside of your hub bore at its widest point -that’ll be the diameter. Accuracy is really important here, so you should make sure you’re taking this measurement to the nearest 3 decimal places. Based on that number, look for a dust cap with an outer diameter that’s the same or ever so slightly larger (we’re talking decimal places here). You want your dust cap to fit really snugly inside the hub bore so that it doesn’t come loose and pop off. It’s also important to make sure your new dust cap is seated properly when you seat it in the hub, otherwise it may pop out later on.
Our front hub bore
Our hub bore was pretty greasy and had to be cleaned before we could take measurements
Measuring our hub bore
Measuring our front hub bore with a digital caliper
You can also add bearing protectors-especially those with zerk fittings-instead of dust caps. These are an excellent option if you’re interested in giving your hub assembly extra protection, with the added benefit of being able to pump in supplemental grease to the hub without disassembling everything first. Check out our selection of bearing protectors here!
Bearing Protector
Dust Cap:
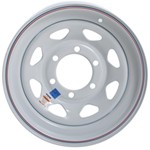
  • Protects the hub by keeping out the water, dust, and debris
  • Replace dust caps when they're visibly dented, misshapen, corroded, or just missing
  • To measure for replacement dust caps, find the diameter of your hub's front bore hole (in inches) to 3 decimal places
Spindle Nut
Behind the dust cap is the spindle nut (also called the axle nut or castle nut). Spindle nuts can vary in shape, size and features, but they're all meant to keep the components of your hub assembly snugged safely inside. You may want to replace your old spindle nut if the threads are getting worn down, or if the nut is visibly damaged or corroded. To choose the right replacement part, you'll need a couple of measurements.First off, you’ll need to look for a spindle nut that matches your spindle’s diameter. For example, if you've got a 1" diameter spindle, you'll need a 1" diameter spindle nut. To find your spindle’s diameter, just use your caliper to measure the widest part of your spindle’s thread.
Spindle Nut Assortment
Castle nuts look like castle turrets. Jam nuts and plain spindle nuts are typically flat and narrow, but can vary slightly in appearance.
TPI Calculations
It’s also important that your spindle nut has the same number of threads per inch (TPI) as your spindle so they can interlock together. Spindle nuts for trailers usually have 14 threads per inch, or TPI. However, they can also come in 12 or 16 TPI options (coarse threads), or 18, 20, or 24 TPI (fine threads). If you need to calculate your spindle’s TPI, count out the number of thread peaks on 1 inch of your threaded spindle. You can also find this value by counting the total number of threads on the spindle, and dividing that number by the total length of the spindle. To the left, you'll see an example of this formula in action.
Again, accuracy is really important when looking for TPI. If you calculate your TPI incorrectly your spindle and castle nut won’t mate properly, and you’ll have to buy a new castle nut. If you run your calculations and get a TPI that isn’t a whole number, your safest bet is to round up or down to the nearest whole number, and try a castle nut with that TPI. Again though, in all likelihood, you’ll probably end up needing a 14 TPI castle nut.
Measuring spindle diameter
Measuring the diameter of our spindle at the front of the hub assembly
Counting Spindle Nut Threads
Spindle Nut:
  • Helps keep the components of your hub assembly fixed in place inside the hub
  • Replace a spindle nut when it's visibly damaged or corroded, or the threads are worn down
  • If you need to replace a spindle nut, find the diameter and thread pitch of your threaded spindle
  • The inner diameter of your spindle nut should match your spindle's diameter
Spindle Washer
After the spindle nut comes the spindle washer. Again, you’ll want to replace this part if it’s looking visibly damaged or mangled.Like with spindle nuts, you want to choose a spindle washer with the same diameter as your spindle, so a 1” diameter spindle would get a 1” diameter washer.
greasy washer in hand
Our old spindle washer was pretty scratched up
Washer Assortment
It’s important to remember the washer type you need depends on your spindle style. Here's a quick breakdown of the different kinds of spindle washers you'll see, and what kind of setup they can be used with:
  • Round Washers - Used on round spindles, typically with castle nuts and cotter pins
  • D Washers - Used on spindles with a flat side. Can be used with either a castle nut and cotter pin, or a jam nut and nut retainer
  • Tongue Washers - Used on spindles with a groove notched through the thread. Typically used with a castle nut and cotter pin
  • Tang Washers - Come in several varieties (they either have a "tang" that sticks up, or one that sticks in). Can be used on spindles that have a flat side or a groove in the thread. Do not need cotter pins, since the tang keeps the spindle nut from moving
Spindle Washer:
  • Can protect bearings from being scratched by the spindle nut, and can prevent spindle nuts from turning
  • Change out spindle washers when they're corroded, scratched up, or mangled
  • Look for a washer with the same diameter as your spindle, that suits your spindle style
Bearings & RacesNext, you’ll need to figure out the right sizes for your new bearings and races. Since your bearings and races touch inside the hub, they wear at the same rate. Because of this, it’s likely that if one’s in bad shape, the other probably is too. You can tell if bearings and races need to be replaced by looking for scrapes, pitting, or discoloration on the surface of the metal, or by checking for little flecks of metal in the residual grease on each of these components.
Bearing in hand
One of our old bearings; all the numbers had worn off
The easiest way to find the right replacement bearings and races is to check the tops of these parts for imprinted numbers. These numbers will tell you just what kind of bearings and/ or races you’ll need to look for. If the numbers have worn off, you can figure out the right sizes on your own by looking for your old bearing’s inner and outer diameters. Before you take any measurements though, you can shorten your list of potential bearings by checking your axle’s capacity. Since bearing sizes are based on axle sizes, knowing your axle’s capacity will really help narrow down your search. For more on this subject, check out our guide to the most popular bearings by axle size here.
Bearing with numbers intact
A bearing with identifying numbers intact
Measuring inner diameter bearing
Measuring the inner diameter of a bearing
To find the inner diameter of your old bearing, use your caliper to measure the inside of your old bearing at its widest point, or the outside of the spindle where it sits. Then to get the outer diameter, measure the outer dimensions of your old bearing, or the inner dimensions of its associated race.Now if your numbers seem a little off, don’t worry. It’s very normal for these measurements to be a little imperfect when you’re measuring old bearings, even if you’re using calipers. Normal wear and tear can warp bearings over time and change their diameters a bit. You should just look for a replacement bearing with the closest possible measurements to your old one, if not a little on the larger side. Once you have these measurements, check out a bearing size chart to figure out the kind of bearing you need to look for. You can also search for bearings on our site by inner diameter.
Once you know what size bearings you’re working with, it’s pretty easy to find the right races. You can usually just look up “race for bearing no____” and you’ll find the race you need. Replacement races are also sometimes sold along with the bearings, so you may be able to buy both parts at once. It’s worth mentioning that races can be pretty difficult to remove because they’re meant to fit very tightly inside the hub. You can buy special tools to help you remove races, but they can run a little expensive. Depending on your situation, it might be easier to replace the whole hub and drum instead of just the races. *Replacement hubs can vary greatly in price, but the majority fall in the $50-$100 range. The cost to replace a hub will depend on your specific brake.*
Bearings/Races:
  • Bearings rotate inside the hub, within their associated races
  • Select new bearings/ races when the old ones are scratched, pitted, discolored, corroded, and/or misshapen
  • Look for identifying numbers, check your axle's capacity, and measure the inner and outer diameters of your old bearings
Grease Seal
At the very back of your hub assembly is the grease seal. It’s VERY important to check and replace this part regularly. If it’s damaged or dented, your hub’s gonna start to lose a lot of grease, and you definitely don’t want that. Like bearings and races, a lot of grease seals will have part numbers printed on their sides. But if those numbers are worn off, you can always find a replacement by calculating the inner and outer diameters for an appropriately sized grease seal. If your old grease seal is warped, the diameters of your back hub bore and spindle will work just fine.
New grease seal with numbers
A new grease seal with the numbers intact
Old grease seal
Our old grease seal was dented and bent out of shape
Greasy Brake
What happened when we tried to re-grease a brake with a busted grease seal
To measure your back hub bore (which will be the same as your new grease seal’s outer diameter), use the same process that you used to measure the front hub bore. With the digital caliper, find the bore width in inches at its widest point, to three decimal places. To find the right inner diameter for your new grease seal, measure the diameter of your spindle where the grease seal would usually sit. Once you have those measurements, you’ll be able to look up which size of grease seal will best fit your setup. You want to look for an exact fit, so that the seal sits snug in the hub bore and keeps all the grease inside.
Measuring rear bore
Measuring the rear bore for the grease seal
Measuring the spindle
Measure the back of the spindle, where the grease seal will sit
Grease Seal:
  • They keep the grease securely inside the hub assembly
  • Replace grease seals when they are dented, misshapen, corroded, or no longer hold grease
  • Look for identifying numbers, or measure the diameters of the back hub bore and the spindle
Having to replace different components of your hub assembly can be difficult on your own, but with this guide in hand, it doesn’t have to be! Next time you find yourself in need of some new replacement parts, you’ll be able to choose them confidently, and without having to agonize over researching all the steps on your own. But if you still need a little support here and there, don’t hesitate to reach out to one of our experts. Rain or shine, we’re always here to help you find the solutions you need.
Izzy B
About Izzy B.My journey with etrailer has had a number of twists and turns. I first started here in 2019 as a Summer Intern with our Content Department. I ended up enjoying the experience so much, that I came back to work at etrailer during several academic breaks throughout my college years. After some time away, I returned last Spring to work at our main warehouse, first as a Picker, and eventually on our Audit Team. Then, at the start of 2024, I was offered the chance to come aboard etrailer's Marketing Department, as a Writer for the Shopping Guide Team. Now, I help our neighbors by creating informational content to aid their shopping experience, ensuring they find the info, products, and solutions they need to get their own journeys underway!
Written by: Izzy BLast updated: 8/2/2024