There’s a very good chance you’re dealing with a bad ground.I say that confidently because this is the most common trailer wiring problem we see, especially after winter.Before you replace lights. Before you cut into wiring. Before you assume the plug is bad, check the ground first.
Most trailer grounds connect directly to the frame. It’s simple and it works until corrosion gets involved.
Over time:
Rust forms under the ring terminal
Road salt accelerates it
Paint separates metal contact
Moisture works under the mounting bolt
From the outside, the connection can look perfectly fine.Underneath? It may barely be conducting.That weak connection creates voltage drop. And voltage drop is what causes all the strange light behavior neighbors describe this time of year.The good news is this usually isn’t complicated. It just requires clean contact.
What the Ground Is Actually Doing
Every trailer light has a power wire delivering electricity to it. But electricity has to return to the source. That return path is the ground.If that path is weak, power starts trying to return through other circuits. That’s when things get weird.You’ll see things like:
Turn signals flashing both sides
Brake lights dimming running lights
One function working while another doesn’t
Lights glowing faint instead of bright
It feels like a wiring nightmare. Most of the time, it’s just a bad ground connection.
Step 1: Start at the Main Ground Near the Tongue
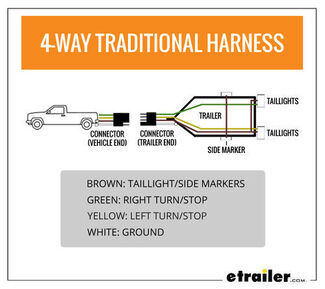
This is always where you start. Find the white wire coming from your 4-way or 7-way plug. It should be bolted to the trailer frame near the tongue.Now look closely.Is the bolt tight?Is there rust under the ring terminal?Is the frame actually bare metal or painted and corroded?If there’s rust or paint, remove the bolt. Sand the frame down to clean steel. Clean or replace the ring terminal. Then reattach it tightly.One thing we recommend often: add a star washer between the terminal and the frame. It bites into the metal and creates a more reliable long-term connection.A lot of the time, this is the whole problem.This is always where you start. Find the white wire coming from your 4-way or 7-way plug. It should be bolted to the trailer frame near the tongue.Now look closely.Is the bolt tight?Is there rust under the ring terminal?Is the frame actually bare metal or painted and corroded?If there’s rust or paint, remove the bolt. Sand the frame down to clean steel. Clean or replace the ring terminal. Then reattach it tightly.One thing we recommend often: add a star washer between the terminal and the frame. It bites into the metal and creates a more reliable long-term connection.A lot of the time, this is the whole problem.
Step 2: Check the Ground at Each Light
Many trailers ground each light individually through the frame. That means every mounting point is a potential failure spot.Remove the light and inspect:
The ground wire connection
The mounting studs (if it grounds through hardware)
The metal surface behind the bracket
If the light grounds through its mounting bolts, take it off and clean the contact area. Even a thin layer of paint can interrupt the return path.This is especially common on older utility trailers and boat trailers. The hardware looks tight but electrically, it’s not making good contact.The goal is simple: clean metal touching clean metal.
Step 3: When It Makes Sense to Run a Dedicated Ground Wire
If you’ve fixed this once and it keeps coming back or the trailer frame is heavily painted, powder-coated, or deeply corroded, it may be time for a more permanent solution.Run a dedicated ground wire from each light back to a central ground point near the tongue. Tie everything into the main plug ground.Instead of relying on the frame to carry return current, you’re creating a complete wired circuit.We’ve recommended this to a lot of neighbors who were tired of chasing intermittent light problems. It takes more effort upfront, but it eliminates repeat issues.
Step 4: Protect It So You Don’t Do This Again Next Year
After cleaning and tightening everything:
Apply dielectric grease to slow moisture intrusion
Secure the wiring so it isn’t pulling on the terminal
Avoid mounting points where water collects
A solid ground can last for years, but only if it’s protected.
How You’ll Know You Fixed It
When the ground is solid, the difference is immediate.
Lights are brighter
Flickering stops
Turn signals flash normally
Brake lights stop affecting other circuits
It’s one of those repairs where you flip the switch and just know it’s right.
When It’s Not the Ground
If you’ve cleaned every ground, verified tight connections, and the lights are still acting strangely, the issue may be somewhere else.It could be:
Corrosion inside the trailer connector
A damaged wire between circuits
A failing converter on the vehicle side
At that point, it helps to isolate whether the problem is on the trailer or the tow vehicle. If you haven’t already, start with: Trailer Lights Not Working After Winter? How to Test and Find the ProblemTell us what the lights are doing. Let us know if you’re running a 4-way or 7-way setup. A photo of the ground connection helps too.We help neighbors troubleshoot this every season. Sometimes it’s a quick fix. Sometimes it needs a cleaner long-term solution. Either way, we’ll help you sort it out.The good news is most ground issues are straightforward. It just needs the right path back to ground.
About Nicki B.I’ve always loved learning and teaching. Every day I get the chance to help a neighbor pick up something new, whether it’s understanding how to tow with more confidence, setting up camp a little easier, or just finding the right gear for their next trip. For me, the real joy comes from turning those little “aha” moments into solutions that make life safer, smoother, and more fun.Outside of work, you’ll usually find me outdoors. I love fishing, camping, and hiking the trails with my family and our golden retriever (who insists on carrying the biggest stick he can find). I spent years as a Cubmaster and scout leader, and now I get to put those skills to good use running our team campouts. My favorite part is making up fun games and activities that get everyone laughing.When I’m not outside, I’m probably curled up with a book or unwinding with some old Top Gear reruns. At the end of the day, I just like finding ways to make things a little easier and more enjoyable, on the road, at camp, or at home.
There is no exact way to determine the leaf spring length. The best way to determine the length for a replacement is by measuring the existing leaf springs. The hanger distance and shackle length can help you get a good idea, but you're looking…
Based on what we could find, the AL-KO 8490 is a 3,500 lb axle, and your info stating the 5 on 4-1/2" bolt pattern and 10" x 2-1/4" drum size supports that as well. I do recommend verifying what you need by taking apart your current…
According to my research, AL-KO 8490 references an AL-KO hub for 3,500 lb axles with a 10 x 2-1/4" drum and a 5 on 4-1/2" bolt pattern. For a drum assembly that will work with these hubs I recommend taking a look at the Electric Trailer…
Based on what information I could find about AL-KO 8490 hub and drums, it is rated for 3,500 pound axles, has a 5 on 4-1/2 bolt pattern, and is a 10 by 2-1/4 inch drum. If this is the case, we have several options for you. I have attached a link to…
The brake pads on the Dexter Electric Trailer Brakes item #K23-086-087-00 are 3/16" thick. Dexter Axle recommends replacing them once they get down to 1/16" thick.
On Dexter 12" Nev-R-Adjust Electric Brake Assembly #23-458 the shoe pad thickness is 3/16 of an inch. Dexter says that you should replace the shoes if the material gets down to 1/16 of an inch thick or less.
The Bearing Buddy Grease Seal Kit you referenced, part #BB60002 would be the appropriate replacement seal for your hub. It is compatible with your L68149 inner bearing and is the proper replacement for your existing 10-19 seal. The two most common…
The inner stainless steel ring included with the Spindle Grease Seal Set #BB60005 has an inside diameter of 1.0645 inches (and an outside diameter of 1.375 inches). This ring is designed to install on the spindle for the grease seal to ride on once…
There are a host of potential issues and you will need to do some troubleshooting, which I can help you with. The first, and most important, thing to do is check all of your ground connections as they may be weak or loose; weak grounds can cause low…
The smallest diameter 13 inch trailer wheel and tire will have a diameter of 24.1 inches (ST175/80-13). There are 3 common 12 inch trailer tire sizes: 4.80-12 has a diameter of 20.5 inches, 5.30-12 has a diameter of 21.9 inches, and 145/80-12 has a…
I looked up the Sunset Park RV Sun-Lite 16BH and the official length is listed at 16' 6" therefore in order to find the correct cover we'll need to subtract 3' for the tongue and round up which means we're looking at a cover for…


.png "Nicki B")