


To see if this custom-fit item will work for you please tell us what vehicle you'll use it with.


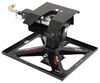
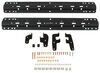
You tow a 5th wheel but still use your truck bed for lumber or pallets. This system gives you a complete 5th wheel hitch with a B&W underbed mounting kit, then breaks into three pieces when you're not towing so it takes up less space.
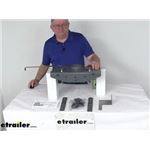
This Demco Recon Stealth separates into three sections when you need to remove it from the truck bed. That changes the job from pulling one large hitch to lifting smaller sections one at a time. The base also folds down when the hitch is not assembled, so it does not leave the same upright profile in the bed. The included MOLLE panel mounts at the front of the bed so you can strap the components in place instead of finding space for them in your garage.
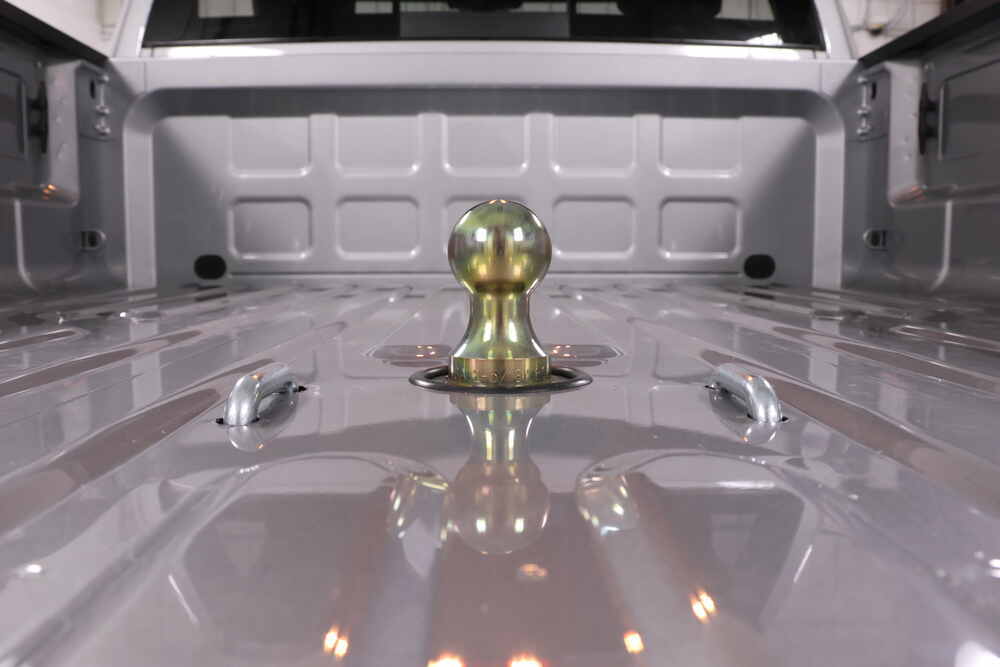
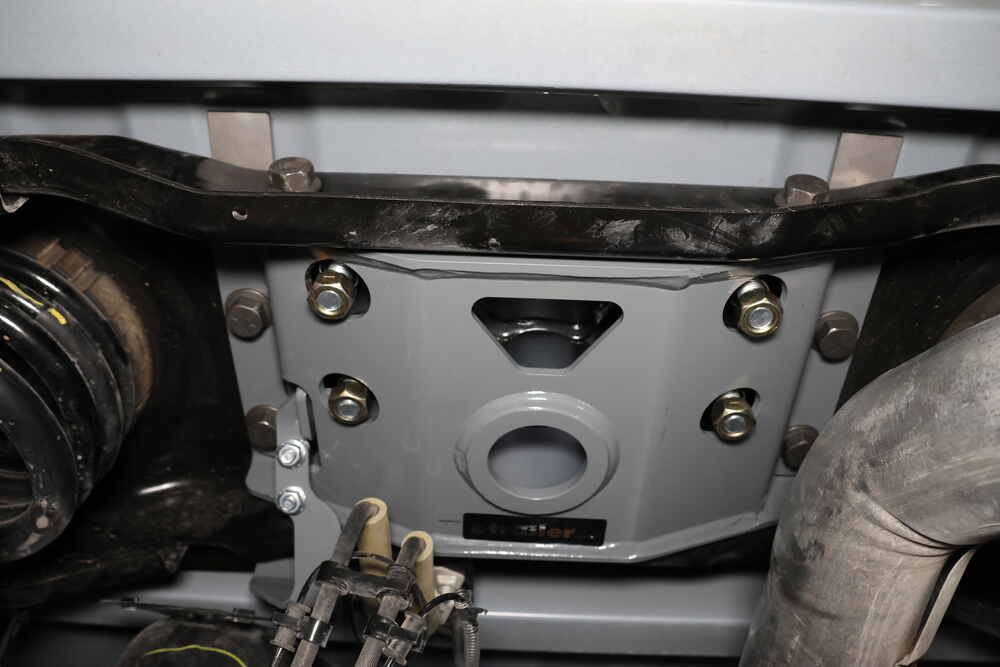
The included B&W underbed kit installs beneath your truck bed and gives you a solid mounting point for the Recon hitch without adding above-bed rails. This is the Turnoverball system, one of the most widely used gooseneck setups, and it doubles as a complete gooseneck hitch when the fifth wheel is removed. A single hole in the bed serves as the connection point, keeping the surface clear when you're not towing.
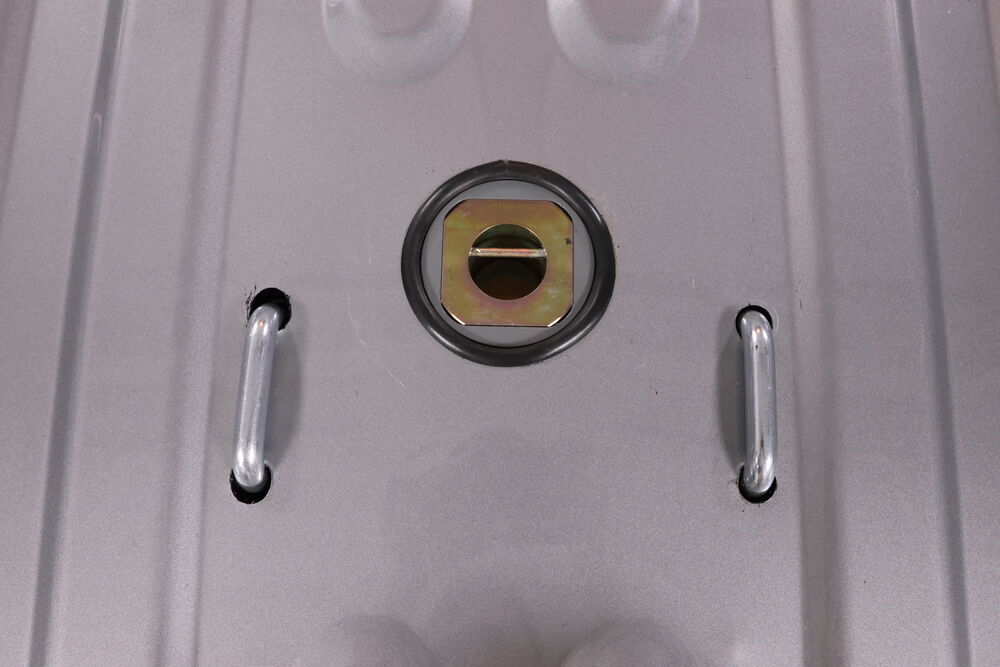
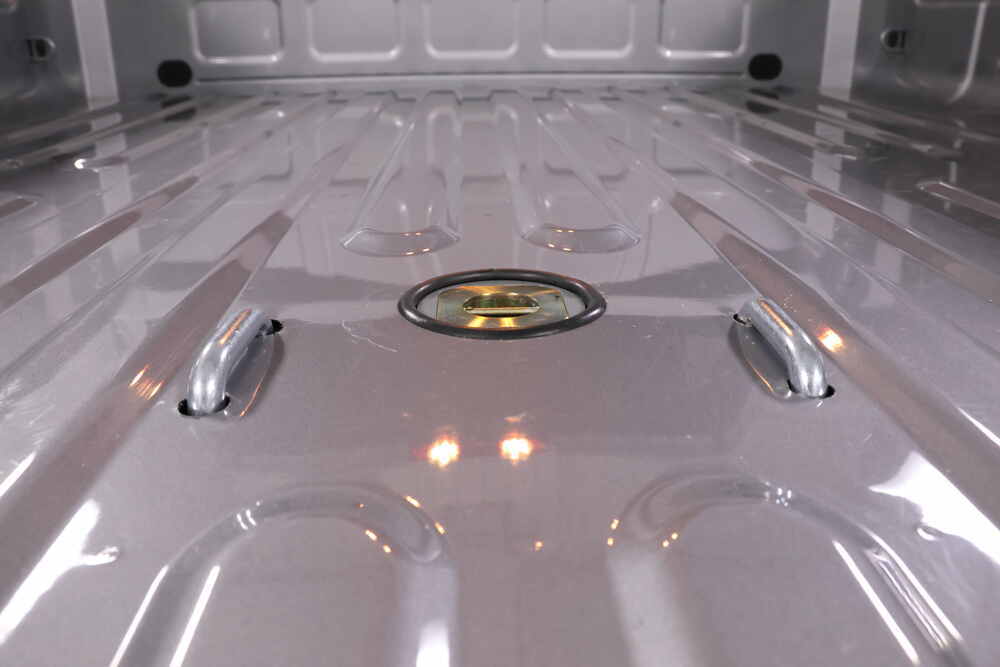
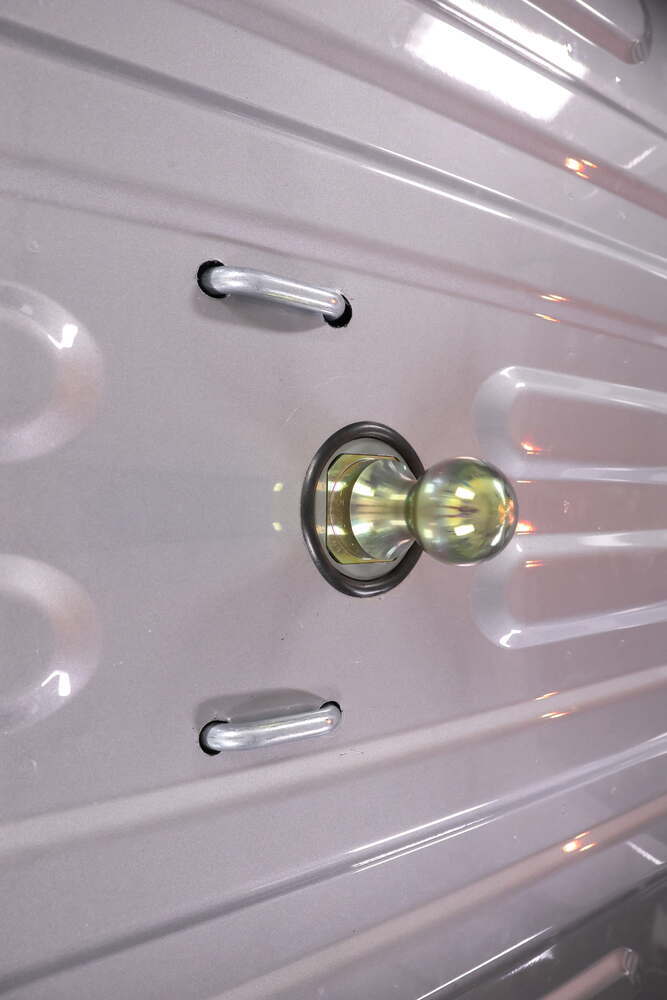
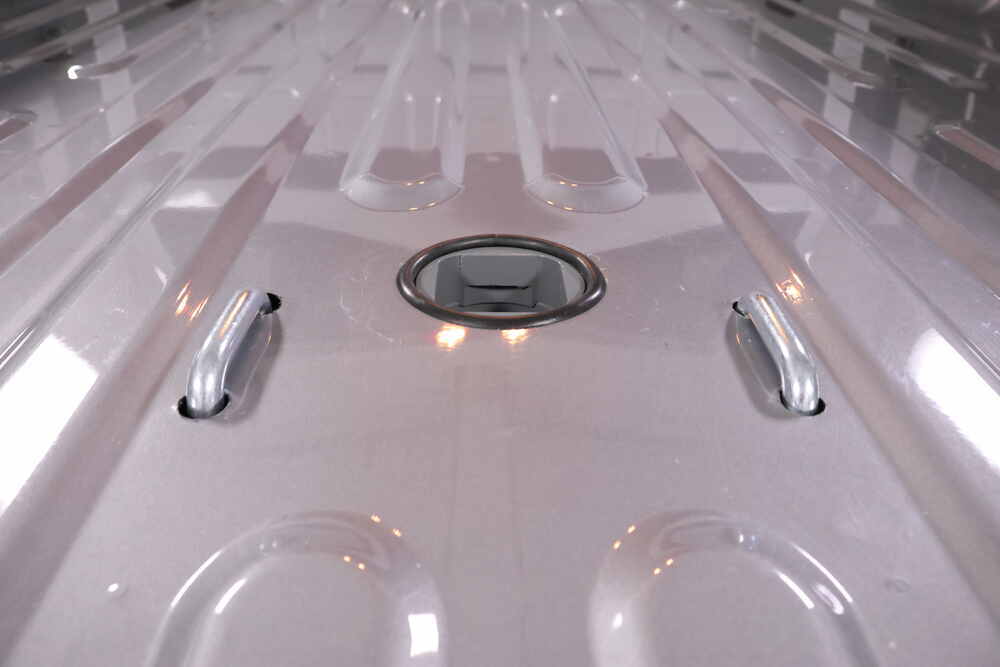
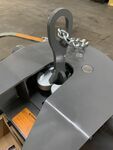
Once the fifth wheel hitch is removed, the bed is open for hauling materials or equipment. The gooseneck ball can be flipped upside down and stored in the hitch, leaving a flat surface for cargo. Safety chain loops sit flush in the bed, so nothing sticks up or gets in the way when you're using the truck for other jobs.
The hitch head uses a wraparound jaw and locking bar that fully enclose the kingpin. That tighter fit cuts down on the movement you can get from looser coupler styles at the hitch. The head pivots front-to-back and side-to-side, which helps it stay aligned as the truck and trailer move through turns, dips, and uneven ground.
This hitch is not compatible with rotating pin boxes, since it is designed for a standard fixed kingpin connection.
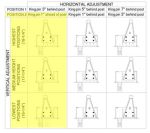
The upright uses stacked pin holes so the hitch head can be set at different heights. That lets you match the trailer to the truck more closely instead of towing nose high or nose low. The hitch connects directly to the underbed mounting point, so the adjustment happens at the hitch without changing the setup underneath.
Note: Not compatible with rotating pin boxes.
Videos are provided as a guide only. Refer to manufacturer installation instructions and specs for complete information.
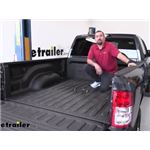
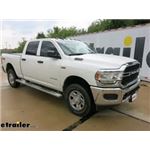
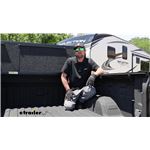
Hello neighbors, it's Brad here at etrailer. And today, we're taking a look and installing the B&W underbed gooseneck kit for a fifth wheel companion on a 2022 Ram 2500 with the OEM prep package. And the great part about this kit is the fact that it does come with the ball, so when you need it to be a gooseneck, no problem, the ball goes into place. And when you're not using that or the fifth wheel, no problem, store it upside down and it's gonna stay there completely flush and you'll have it ready for next time. But if you plan on using a fifth wheel, you can actually plug in the Companion fifth wheel from B&W in here and you'll have a fifth wheel. So, you have a lot of versatility.
And overall, it's just a really nice system. The Companion itself is really great too, because it does break down into two pieces, so loading and unloading that fifth wheel into your bed becomes a lot lighter by being able to break it down into those two separate systems. Now, this is what it's gonna look like when it's installed. And when you're ready to hook up to your gooseneck, you'll have your ball right here and you can use the latch on the side to lock that in. But the great part about this kit is the fact that when you're not using this, you can actually stow this upside down and it's gonna fit in there with no problems.
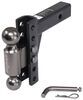
It's also gonna make sure that you have full access of your bed. Even your safety chain loops sit pretty good in between the corrugations here to maximize the flatness of your bed, so it's not gonna be in the way when you need your truck to be a truck. But as soon as you're ready to actually get that gooseneck towing, pretty easy. You're gonna pull this out, swap it over, lock it in place. Now, this is gonna be a 2 5/16 ball and you're gonna get a 30,000-pound towing capacity.
So, overall, that's pretty heavy-duty. I really don't worry too much about the gooseneck being the weak link. You do wanna make sure what the truck is capable of towing before hooking up. But definitely, the 30,000 pounds, that's really gonna open it up to what you can tow with this. A neat design that this ball has is the fact that it's got holes on all four sides, so it doesn't actually have to be in any direction.
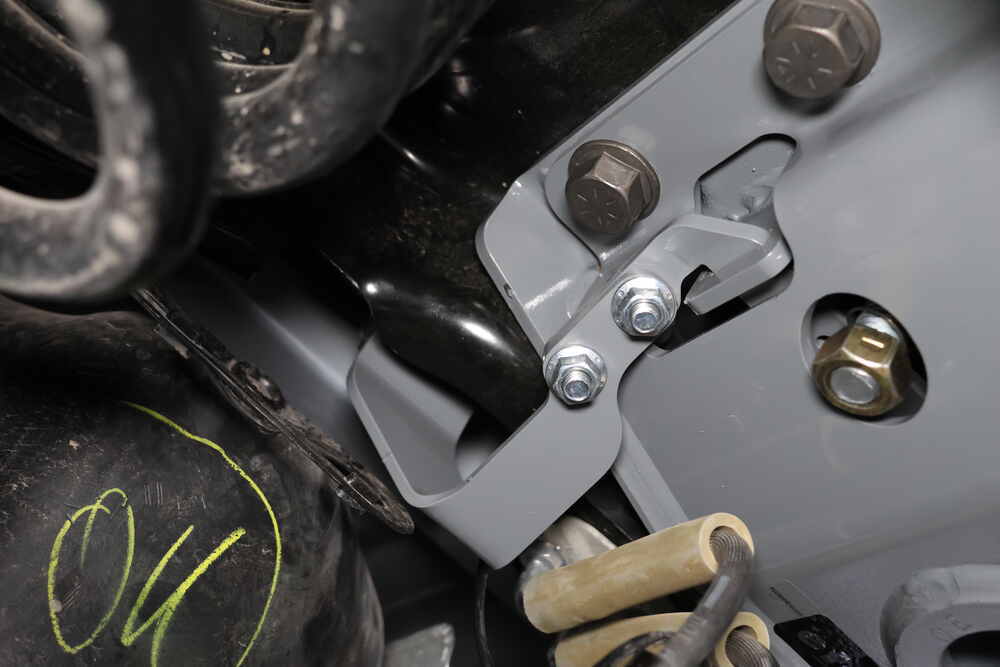
You can drop it in, it's gonna slide in nice and tight. And the great part too is, when it's upside down, it fits really well in here. But there's also these small little channels that's gonna make sure that if there is any water pooling up, that's able to actually drain down. So, that way, you don't have water building up with corrosion or anything like that. It's also powder-coated and this is also coated as well, so you really don't have to worry about that rust and corrosion over time. So, really heavy-duty, solid product. And throughout the whole install process, they do a really good job of making sure that this fits perfectly. Now, the great part about this underbed kit with the prep kit is it's really simple actually. You can see the powder-coated gray center section and really that's all there is. It just bolts up. And it's going to bolt in through factory holes and it's very simple overall compared to a lot of some of your other underbed gooseneck kits. And this one, it fits really well. The instructions are really well laid out and it's really easy to drill the hole to have it aligned. They have templates for it. So, throughout, all, if this is your first underbed kit, this is gonna be a relatively easy one. Now, with that, during the install, there are a few spots, just kinda get into some of this hardware, I will admit, it is kind of tricky, so you might need some crow's foot, you might just kinda have to swap through a few different tools to get to them. And sometimes, torquing them down is difficult. And that is kinda, by nature, the hardest part of some of these underbed kits, but this is one of the easier ones to do. Now, speaking of that installation, I'm gonna walk you through all the steps, so you can get yours installed on your truck. Now, to begin our installation, I recommend dropping the spare tire as well as the heat shield down. It's just gonna really open everything up and you're gonna have a little bit more room to work with. It's already kinda tight, especially trying to get to some of the hardware. So, the instruction manual says it's optional. I highly recommend it. Just having more space is gonna make it easier. So, we'll go ahead, we're gonna lower down our spare tire and get this out of the way. And with the spare tire out of the way, we can go ahead. There's gonna be some 10-millimeter bolts here that hold the heat shield in. You'll be able to see these pretty quickly. There's also gonna be some up here that we'll need to remove as well. So, during this whole process, I highly recommend keeping all your hardware in a safe, organized spot. It's gonna make reinstallation a lot easier. Now, something else that's gonna make our installation a little bit easier is popping off our exhaust isolator here. It's gonna allow us just to have a little bit of movement of this exhaust. Sometimes, when getting it in place, just to have a little bit of wiggle room will make it a lot easier. So, I'm gonna go ahead and pop this off. And sometimes, if it's covered up in dirt and debris, it's easy to just put a little bit of silicone spray or even a penetrating oil to just kinda load this up. And then I'm gonna take a pry bar here and we'll get this popped off. So, this is supported further down. But again, this just gives us just a little bit more for it to drop down. And later on we may need to use a ratchet strap or something along those lines to kinda get more clearance, but this is gonna help. So, now you're gonna wanna grab your alignment plate. And this is kind of a testament to B&W's quality. This is really, really nice 'cause it makes it a lot easier to find our perfect spot to drill our pilot hole to get that hole mounted through the bed. Now, you're gonna see this hole here, we're gonna align it with this hole that's on this center section here. So, I'm on the front of the crossmember here. So, I'm gonna just slide this over. And then make sure that these are aligned. And then from there, I'm gonna just push straight up. And again, just make sure that these are aligned properly. Now, the instructions say you can use a C-clamp to kinda hold this in place. But as long as you're putting this directly straight up, holding it against it, everything should be nice and square. Just make sure it's nice and tight. Now, we're gonna be using the center hole here. So, I'm just gonna take a paint marker and mark that hole and that's gonna allow us to get our pilot hole drilled there. Now, with that pilot hole marked, we're gonna go ahead and just go ahead and drill this out. And I'm just kinda using a small drill bit here 'cause we'll be going up with a hole saw later to get this perfect. But really, make sure that this is lined properly and then we'll just drill until we can make it all the way through the bed. And with that pilot hole made, it's gonna be easy to make sure that we're properly aligned to when we put our center section up. And we're gonna be using a 3 1/2-inch hole saw. So, using that pilot hole here, we're just gonna drill through, so take your time. Now, if you have a spray-on bed liner, sometimes, you're gonna be working at it a little bit longer, but I highly suggest putting this up to a pretty high setting and using your feet to kinda keep this in place, so it don't throw your wrist around here. So, go ahead and start making our hole. Now, there might be some burrs here, just from cutting it out, so I'm gonna just take a file and kinda run that around so all the edges are nice and clean. And once you have that smoothed out, I'm gonna go ahead and just vacuum this up 'cause we're gonna be putting a little bit of paint here on the raw edge. That way, it doesn't turn into rust over time, but we wanna make sure it's nice and clean before putting paint down. Now, as far as putting paint down on here, I'm gonna be using just a white paint marker, just to kinda get these edges to keep them clean. If you don't have a paint marker, no big deal, you can use spray paint. If you have white, which matches our truck, great. If your truck's a different color, using clear or black, whatever kinda looks best for you. Now, if you are gonna spray paint, something I recommend is, in the kit, they're gonna have this, it's kinda nice to just lay it directly over here. That way, you can kinda spray it, it's gonna coat it up, but it's not gonna have overspray everywhere, so just a little helpful tip. So, I'm gonna go ahead and kinda mark our edges with this to make it nice and clean. So, now that we got this all painted up, it looks really good, we'll be able to start working and putting the bottom part, actually, installing it here. You can leave your paint, your file and your vacuum, we're gonna need that later on when we do our safety chain loops here. So, you can leave those and we'll head underneath the vehicle. Now, at this point, we're gonna check and make sure we don't have any electrical connections. A lot of times, they have plastic push pins that hold them in. If you do have that, you're gonna wanna pop those out. And that way, we have clearance. We'll reinstall them later. Ours does not have that. And since we are gonna be sliding it up here, you're gonna notice that we do have some lines and cables. Now, there's a bracket up there and there's gonna be hard lines, so I'm gonna try my best to kinda get this up without having to drop this down. Just be very careful. You obviously don't wanna damage any of these during installation. So, now we're gonna take our fastener blocks here and we want this flange facing down towards our crossmember here. Now, sometimes, it can be pretty tight. There's a slot here in the corrugation of the bed. We're gonna try to get that in place. You may have to kinda move it around a little bit. So, it is pretty tight here. So, our first one, we'll try to get this in place. What we're gonna do is just slide this flange portion in and up, and then we'll kinda slowly work its way down. And that's gonna allow us to get our other one in place. Again, this is rather tight. You can do this from the front or the back, so whatever works best for you to kind of line these up. But you can slowly move your way over. And what we're gonna do is try to get these to align with these holes here. Now, if your bed had seen some wear and it's dented up, this is gonna get a little bit tricky. What I've found in the past, this bed is perfectly new and we don't have to worry too much, but what I've found is putting a pry bar here and just kinda slowly lifting to give you a little bit more space. So, if that bed is dented in, you'll have a little bit more room to work with. Now, what kinda helps, by just kinda lifting up here, that's gonna take just a smidge of tension off to allow us to kinda get this in place. And then once you kinda are able to shift this around, you should be able to get these to line up. You can kinda push on this inside too. There's enough of the gap. But again, just kinda work this until we get these aligned. There we go. So, we got this one in place. I'm gonna go ahead and do the same for the other side. Now, at this point, you might wanna grab an extra set of hands. This is fairly heavy, at least, while holding it up there and trying to get it to fit, but also have some hardware ready. Now, these do have thread lock, but we're gonna be just hand tighten these in, just to kinda keep it in place. And you're gonna see these threaded portions here on each corner, I'm gonna try to get those in place. And then once we have it up, we can also try to align our blocks that we put up there. Now, to get this in place, my best bet, we're gonna be lifting over the exhaust side. And those lines that I mentioned earlier, just be very careful here, we're gonna try to route it over those. So, just kinda slide this up. And you can kinda let the exhaust slightly hold it. I'm gonna take our bracket here and make sure that we're clearing that. And then just kinda go it in an angle and then we should be able to push this up. And this is where we can go ahead and get our hardware threaded in for now. And the good part is once we kinda get these two in place, it's at least gonna hold this up for us. Now, I'm also gonna do the front. That way, it's not resting on these lines. So, now we're also gonna take those same hardware here and we're just gonna get these started. That way, they're not moving around on us. We'll do the same on the other side as well. So, now at this point, we're gonna wanna check to make sure that we're lined up properly and it's looking really good. But before we tighten things down, using a lifting device to kinda really get it set exactly where we want it is gonna be key. It's gonna make a lot easier and know that we're gonna have it right where we want it to go. Now, as far as making a lifting device, there's a few different ways you can do this. If you get it some two-by-sixes, it's gonna work fine. I use jack stands and I just have a pry bar, you can use it jack handle or whatever. And basically, just with the ratchet strap, you're gonna hook this through the lock here on the gooseneck and then we're just gonna ratchet this down. It's gonna cinch this up and pull it exactly where we want it to be. It's also a good time, you can slightly put a little bit of different pressure on it. If it's slightly off, you can kinda get some of that ironed out. But overall, ours looks really, really good. It's kind of the glory of that alignment pin as it really does make sure that it's right where it needs to be. So, we're gonna go ahead, tighten this down and we're gonna see this kinda pull up and go exactly right where we need it. So, now we can see that's nice and flush with this exactly where we want it, so we can actually keep this lifting device in place. And as I mentioned before, sometimes, you can kinda move these around to get a little bit more perfection where you want it. But overall, I'm very happy with the fitment. So, now we can go back down and start tighten down our hardware. So, now that we're happy with it up top, we're gonna go ahead and tighten these down. Now, this is gonna be the tricky part. Really, the hardest part of the installation is getting to a lot of this hardware. Our goal, we're gonna wanna tighten these four that go into that plate that we fed up first. So, I'm gonna go ahead and use a socket and an impact. But you're gonna see, there's gonna be some clearance issues for these side ones. So, using a ratcheting wrench to get these started or get them at least tightened down is gonna help. They're all gonna be a 15/16, so go ahead and get these ones tightened down first and then you're gonna make your way to these outside ones. Now, just make sure they're nice and snug and then we'll come back with a torque wrench to get them perfect. Now, these ones are gonna be a little bit tricky, so I'm gonna be using an extension. And the fact that we have our exhaust loose is gonna allow me just enough room, I think, to get that extension socket. Now, you may end up needing a swivel here as well. So, with my extension, I might be able to get here. Now, another thing that you can do is take ratchet strap and take this exhaust and ratchet it over really, to give you a little more space here. But I think with my swivel, I should be able to get this at least tightened down. So, now with those ones tightened in on our brackets, I'm gonna go ahead, again, with just a ratcheting wrench to at least get these started a little bit more. And then hopefully, I can get a short-well socket here with a ratchet and that way, we can really get these cinched up. Now, on the forward bolt here, towards the cab on the passenger's side, you can absolutely get a socket on it. That's probably gonna be the best option for this one. Now, over here, this one, as you probably noticed, when you're threading in, it's kinda tucked away, so we're gonna have to get a little creative. And I think we may end up having to use, again, our ratcheting wrench and then potentially get an extension to shoot across here. So, we'll get to that here shortly. Now, I am able to get a socket as well as a ratchet in here. It is tight. You're not gonna be able to get too much movement. If you have one that swivels or bends here, that's gonna make it a little bit easier. But I am able to get some rotations, so I'm gonna continue on doing this. That way, we can get it nice and tight. So, now we're gonna come back with our torque wrench and we're gonna tighten down in the same order that we did, the normal tightening. Now, the torque settings are in the instruction manual. And if you need a torque wrench, we have them available here at etrailer. Generally, you can rent them at an auto parts store. So, these ones, not too hard to get to with a swivel and an extension. These ones, we're gonna be using a crow's foot, so I'll show you that when we get to torquing those. So, now for our crow's foot extension, that's gonna be the ticket for getting a torque wrench in here. So, it just attaches to here and allows us to get in this tight spot. It's still gonna be pretty tight here, so just be careful. That way, it doesn't slip off and you bust your knuckles. And you may need to rotate it a few times in order to get that fully torqued, but just take your time here. Now, these ones here, since they're tightened down, you can actually get a deep well socket. And again, you don't have a whole lot of room to work here, so hopefully, you got it tightened down pretty good before, 'cause we're not getting a whole lot of turns here, but as you can see, we can still get this properly torqued. I'm gonna attempt to do the same thing on this one as well. Now, if you had to move any of those plastic fasteners for those wiring here, you can go ahead and put those back in. Now, we're getting ready to put our handle in on the driver's side here and it's gonna slide right in this area. The thing is is we're gonna need to be moving that handle to engage and disengage the lock. So, this little wiring here, you can see the plastic plug, I'm gonna pry this out. And what we're gonna do is we're gonna just try to move this wiring up and out of the way. And I think the best way to do this is we'll feed the handle in. And once we kinda get it attached, we can start to see where this is gonna end up. We just want this to be clear so it's not rubbing against it and we'll just throw a zip tie around it to keep it out of the way. Now, the 2500s, the handle's gonna face up. So, I'm gonna just take this and we're gonna just slide it in. And then we're gonna grab our bracket and hardware and head underneath the truck to make that attachment. So, we can see our handle here and it has square holes. The further ones are gonna be the ones for the 2500 and our carriage bolts are gonna sit through that and then we're gonna bolt our bracket up using the flange nuts. So, let me kinda just put this in place here. So, I'm gonna just take our carriage bolts here and we'll drop those down in. Make sure that they're seated flat. And then we can go ahead and take our bracket. And this is gonna align with those pretty easily. And we'll just feed those carriage bolts through the two holes on the bracket. And then we're gonna finish these up with the flange nuts that are included. So, I'm gonna just get these hand tightened. Now, there is a torque setting. So, as long as we get these hand tightened in and then we can snug them up, we'll come back with a torque wrench and get these all properly installed. Now, I'm gonna go back and torque these down on the back end with my torque wrench. But in order to attach this, we're gonna wanna get this hardware secure but we also want to make sure we can pass our carriage bolts through these. So, what we're gonna do is disengage this. So, I've taken our lifting device out. That way, I mean, this is already bolted up and torque down, so it's not gonna move anywhere. Now, during this process, you wanna make sure that it doesn't disengage. You can wedge something up here. Just the main thing is, if you bump this back, obviously, it's going to engage again, so you don't want your hands getting pinched. So, what I'm gonna do here, grab our carriage bolt and pass that through and I'll grab the other one and do the same. So, now I'm just gonna kind of align these up. We may need to kinda move that handle a little bit. But once we kinda get these pass through, we can take our flange nuts and we can get these hand tightened in, just to kinda get them started. And it might be easier to reengage it, since we have our carriage bolts in, so I'm gonna just slowly let this go back in. And you can see, it's gonna seat a little bit more properly here. So, just make sure you have the head of the carriage bolt in that square and then we'll go through and tighten these down. And then I'm gonna go back with a torque wrench and get these two as well as the ones that went on the handle. So, now that we have our handle attached, what we're gonna wanna do is actually go through and make sure that it's engaging, it's locking in place and it's doing what it needs to do. Now, I recommend doing this a few times and looking for any clearance issues. So, we mentioned earlier that we had that wire loom that's kinda in the way and that plastic plug I pried out, but it is kinda rubbing against it. So, what I'm gonna do is engage this and move it around and zip tie that out of the way. And there may be a few other cables here and there, some of those break lines that are flexible that we're gonna wanna zip tie and we want a nice clean path. That way, it's not rubbing against our handle here and chafing it over time. So, just go through and make sure that it actuates nice and easy, nice and smooth, it's not catching on anything. And if there is anything that is catching on, just go ahead, zip those up and make it nice and open for that path. Now, I do feel some rubbing and you can see the handle here, this is that same wire loom that we took the plastic plug off. There's another one that's right here. So, I'm gonna go ahead and pry this off. And the kit does not include zip ties. So, if you need to pick some up, we have some available here at etrailer. But once we have these plugs out, we can kinda move that wire. It's pretty solid but there should be enough play for us to be able to zip it out of the way. There's another plastic fastener that was right here and I loosen that up and that does give you a little bit of room here. And what I did is I just raised this wire loom up and zip tied it to these clips here. You don't wanna use any hard lines 'cause that can chafe it, but using the plastic clips, I was able to create a nice little pocket for that handle to slide. So, again, just actuate it until you, for sure, have everything up out of the way and just make sure it's zipped up nice and that's just gonna prolong the life of all your lines. Now, we're getting ready to put our safety chain loops in. And again, another testament to B&W in really thinking ahead is they have this template here, so it's gonna make it easy to align those holes perfectly. So, what we're gonna do is take our ball and make sure that it is engaged so that way, the ball doesn't drop all the way down, and that's gonna create a nice little spot to hold this template in place. So, we'll just slide this over top. And you can see, this is gonna align the four holes here. So, just make sure that it's nice and even exactly where you want it. And then you can see the indents, that's where we're gonna drill our pilot holes. So, I'll go ahead with my pilot bit and I'm gonna go ahead and make those holes now. And make sure you drill all the way through. So, now I'm gonna go ahead and repeat the same process for the other three holes. So, now we're gonna enlarge our pilot holes and you're gonna wanna use an 11/16 drill bit. Now, these ones went straight through. The back ones, you are drilling through the brace, so, again, you're gonna be kinda working at it for a little bit. I suggest having your safety chain U-bolts here. That way, you can kinda test fit to make sure that you're not over drilling. But really, you just wanna allow this to be able to pass through. Sometimes, it'll catch here on the threads, but if you can kinda work it in to where this drops in place, that's what we're looking for. So, we'll go through, enlarge all of these and make sure our U-bolts pass in. Now, I do recommend putting a little bit of cutting lube on here, not only to make it a little bit easier to pass through, but also, it's gonna get really hot if not, and it can leave burn marks on the paint. So, just take your time here, use some cutting lube and we'll make our way through these. Now, with our holes drilled out, again, I'm gonna go ahead, just test to make sure that these fit in. And again, sometimes, these threads will catch, but if you can get those to pass through, this is kinda what you're looking for because the springs are gonna go underneath. So, as long as you can kinda raise this up, that's what we're looking for. So, just make sure they both fit. And then just as before, vacuum it up. I'm gonna go ahead and file some of these edges and touch it up with some paint. We can then go ahead, drop the U-bolts in and then we'll go under. That way, we can get the springs on them. Now, with those U-bolts passed down, we can go ahead and take the springs, separate those and we're gonna have this cone shape. That larger end is gonna go towards the top here and we're gonna wanna push this up. And the reason being is, sometimes, when you tighten the nut, it can actually kind of start to go in the threads, so just make sure that it's pushed up as you're doing this. And then we're gonna follow it up with the nut and we're gonna tighten this down to where it's flush with the bottom here. So, again, I'm gonna just hand tighten it here and then I'm gonna try my best to push up our spring, so it doesn't get caught in those threads. And then with the 15/16, I'm gonna go ahead and tighten this down. Again, just looking for it to be flush on the bottom. So, now we'll go through and we'll repeat the same for the other three. So, all that's left to do now is get our exhaust hanger back on. We're gonna get our heat shield up as well as our spare tire, and then we're ready to start using our gooseneck. And that was a look and installation of the B&W underbed gooseneck kit for a fifth wheel companion on a 2022 Ram 2500 with the OEM prep package..
Do you have a question about this 5th Wheel Hitch?
Info for this part was:
At etrailer we provide the best information available about the products we sell. We take the quality of our information seriously so that you can get the right part the first time. Let us know if anything is missing or if you have any questions.















Thank you! Your comment has been submitted successfully. You should be able to view your question/comment here within a few days.
Error submitting comment. Please try again momentarily.