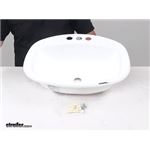
Hello Geoff, thanks for reaching out. The closest thing we have to that would be the Better Bath RV Kitchen Sink #LC421572. This is 25" long x 15" wide overall. The interior of the sink is 22-7/8" x 12-7/8". Do you have any…
Hey Michael! Since you were looking at the SoftStartRV Soft Start #SSR54FR are you wanting that built in as well? The Active Controls ActiveStart Plug-In Soft Start for RVs #AS94FR is a soft start and surge protector all in one. If you aren't…
Hey Nancy, yes the WFCO Auto Detect RV Converter and AC/DC Distribution Panel #WF96FR that you referenced is the correct replacement for your WF8735P that you have now and is compatible with lithium batteries like you need as well. This is same shape…
The overall dimensions of the Better Bath RV Kitchen Sink part #LC421572 including the lip are 25" long x 15" wide x 7" tall. The lip is 1" so if you wanted the bowl dimensions that would be 23" long x 13" wide x 7"…
Hey Matthew! The Better Bath RV Kitchen Sink #LC421572 is the best replacement option for your Forest River Salem 27RK. This measures 25" long x 15" wide x 6-1/8" deep. Depending on your existing cutout you may have to enlarge the hole…
Hey Gwen! The distance from the center of the mounting hole to the bottom of the Trailer Valet JX Trailer Jack #TV35FR when fully retracted is 13.44". If you’re measuring from the bottom of the pipe mount instead of the center of the hole, that…
Hey Roy, thanks for the pictures. The 72" measurement on the Thomas Payne RV Jackknife Sofa item #TP88KR is the distance from the outside edge of the brackets. The actual sofa portion is 69" wide. How wide of space are you working with on…
Hey Cameron, thanks for reaching out. Sadly, we do not offer any kind of kitchen sink or counter trim. All of the trimming we offer is like exterior trim for a camper or RV. We don't have anything meant for a countertop.
Hey Ron! You do not want to use plumbers putty on the Better Bath RV Kitchen Sink #LC29FR. 100% silicone sealant is what is recommended for this application. Any big trips coming up once you get the sink replaced?
Hey Anthony! The outer diameter of the weld-on pipe coupling on the Trailer Valet JX Trailer Jack #TV35FR is 2.01". I went ahead and attached some dimensional drawings below for your reference. What kind of trailer do you have?
Hey Richard. The EcoHitch Hidden Front Hitch item #EH79CR will definitely support a 542 lbs motorcycle. It has a 1,000 lbs total capacity no matter how you use it. Unless you have the lightest motorcycle carrier ever, it's not going to work with…
For a 25-3/4" x 14-3/4" cutout we have the following single bowl and double bowl options: Single Bowl: Better Bath RV Kitchen Sink #LC385313 Double Bowl: Better Bath RV Kitchen Sink #LC388412 Better Bath RV Kitchen Sink #LC385314 LaSalle…
Wow! I placed my order late on a Friday afternoon and when I get to work this AM my I have confirmation that my order has already shipped. Thanks for the great service.


 Filters