Hey Michael, yes a 7k Roadmaster Comfort Ride kit part #RM-2460-2570 would work on a 6k axle setup as they both have the same diameter axle of 3 inches. We do also have a 6k version with the part #RRM49NQ or are you wanting to increase the suspension…
Hey Wyatt, That ARC13AACWL2 unit you have looks like it uses the old R410a refrigerant. Unfortunately this past year all the RV Ac manufacturers switched to an R32 refrigerant which is no longer compatible with the old R410a. With that said we do not…
I have the perfect solution for you with the RockyMounts AfterParty Swing Away Bike Rack for 2 Bikes #RKY37ZR. This platform rack matches perfectly with what you're looking for, includes locks, and also uses a newer style upright arms that secure…
The globrite 122 in red or yellow/amber are 3.75 inches by 1.70 inches from what I can find online. We do not have a direct replacement, however the closest dimension we have to replace them is 3-1/2 by 1 inch. I recommend the #MC68RB and #MC68AB. If…
The part number you listed is a Coleman Mach AC unit so that means that the replacement shroud part #MA00-325001 would be the correct shroud replacement.
Good morning Jay, I got that part added for you here Cummins Onan EC-AGS+ Auto Generator Start System - Bluetooth - Gas RVs #CM96MR. This will allow some select models (including your LP 5500) of Onan generators to be remote-started from an app based…
Congrats on the new motorhome Edward! SnapPad doesn't have the 2026 Allego Red 38 KA in their system so I don't know what size your jack feet are. However, we have a few options that will work with the HWH leveling systems. What you'll…
To replace your Lippert Turning Point with a Gen-Y gooseneck pin box you'll need to match the bolt pattern and pin weight of your 5th wheel trailer. The Gen-Y Hitch Shock Absorbing 5th Wheel to Gooseneck Pin Box - Lippert Turning Point - 21K -…
Hello Kevin, Thanks for writing in. The main difference between the Power Watchdog Surge Protectors #HU67FR and #HU42VR comes down to the monitoring capability, housing design, and surge protection rating. The #HU67FR is the newer Generation 2 model.…
Hey Robin! Are you looking for a complete flat tow setup, or do you already have some parts of the system? For baseplates and tow bar, I'd go with Roadmaster Direct-Connect Base Plate Kit - Removable Arms #RM-522203-5 and the Roadmaster Nighthawk…
Hello Richard, Congratulations on the KZ Confluence 18RB! That is a really nice camper, and I like that KZ packed quite a bit into an 18-foot floorplan while still giving you a slide for some extra room inside. Yes, installing the etrailer RV…
As the Curt C17342 weight distribution system was discontinued at the end of 2016, there will be no more direct replacement parts available for it, unfortunately. However, The bars that fit the Curt replacement head #C17507 will be a 1-5/16"…
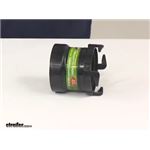
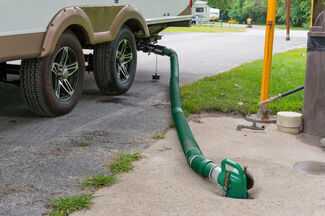
Built to handle size changes in your RV plumbing, reducer couplers let you step between common 3" and 1-1/2" lines for gray or black water hookups. Installation typically uses ABS solvent cement for a solid seal; if you're replacing a cemented fitting, removal usually means cutting the pipe after loosening any clamps.
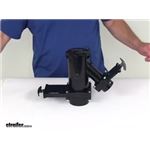
Yes, reducer couplers are available to go from 3" to 1-1/2". Confirm whether you need an inline coupler or a tank reducer that fits a 3" opening and steps down to 1-1/2". Check if your connection is hub or spigot and verify the pipe OD. This setup is commonly used at a 3" Y to tie in a 1-1/2" line.
Use ABS solvent cement on rigid pipe joints. If the reducer fits inside the tank neck, some setups use gasket maker and a band clamp to secure and seal the connection. Inspect your tank for a gasketed union or existing clamp to match the original style before installing.
You won't be able to break down the cement, so plan to cut the pipes after loosening any hose clamps. Avoid prying on the tank neck to prevent damage. Once removed, install the new reducer and reassemble with fresh ABS solvent cement.
Use ABS solvent cement to secure reducer couplers. Dry-fit first to confirm hub, spigot, and pipe sizes line up. Clean the mating surfaces and apply the cement per directions to help prevent leaks. Relying only on clamps can allow movement; adhesive helps lock rigid RV sewer pipe connections.


 Filters