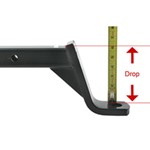
Hello Douglas, Thanks for writing in, and thank you for your order! I am sorry to report that the manufacturer does not have a weld pattern or installation instructions available for the Sleeve-Lock A-Frame Trailer Coupler #CA-5296-B. I know that…
Hey Mike, thanks for reaching out. Your roof thickness is going to make this tricky. That Advent system is really built around a standard roof thickness of 2-1/2" to 5", and at roughly 6-1/4" you’re outside that range. Advent doesn’t…
Hey Jonathan, We haven't heard of any issues with the P3 #90195 and plug-in harness #3070-P with a 2024 Honda Ridgeline. How are you sure that the brakes are being applied on your Honda when applying the manual override on the P3? What are you…
Hi Bill! You will need to completely replace the system since you have old Dometic R410a units on your Monaco. Everything switched to R32 refrigerant following new EPA regulations in 2025, and the new systems are not backwards compatible. For a…
Hi Collin, welcome back! The most economical replacement is going to be from Advent Air. You will need a complete system since everything moved to R32 refrigerant. If your upgraded thermostat is R32 compatible, or a smart thermostat that got a…
Hey Keith! I can definitely help you find a replacement for your Dometic Duo Therm. However, you're going to have to replace the thermostat and air distribution box as well. Your current setup is for R410A and everything switched to R32 last year…
Hey Matthew, thanks for reaching out. We do have a heat strip kit that will work with the Advent Air RV Air Conditioner System #ADV99QR. For that you'll need the following: - Electric Heat Strip for Advent Air RV Air Conditioners - 5,500 BTU -…
Hey Ray, thanks for reaching out. Yes we do have a good option for replacing your Dometic Duo-Therm 57915.531. With yours being an older unit, there is not a direct rooftop swap that keeps your existing controls. The correct path is replacing the…
Hey Alan, while the Air Distribution Box w/ Wall-Mounted Thermostat for Advent Air RV Air Conditioners #ADV98SR does have ability to control a furnace it can't be used with a Duo Therm setup like you have. It can only work with Advent Air AC…
Hey Rob! Thanks for reaching out. The Fogatti InstaShower 9 Pro RV Tankless Water Heater #FG33FR is compatible with a standard 15" x 15" door. Based on knowing what size your existing hot water heater door is, you should have no issues…
Yes, there is Mike. The Global Link RV Lock with Bluetooth Connectivity item #GL62VR does indeed have a deadbolt function. The top left key controls the deadbolt and the key built into the handle secures the door latch. I've attached a picture…
In these days of customer "no service" I am usually disapointed when doing business with people I don't know. It was refreshing doing business with you. I'm impressed!
Randy
Watkinsville, GA
RV Access Doors with Rectangle Multi-Purpose Hatch
Dial in a clean, functional opening with rectangle multi-purpose hatch RV access doors. Measure your cutout to confirm fit, and note choices like key locks or thumb locks, hidden fasteners, and waterproof options. Some latches and locks protrude into the compartment, so check clearance; seal edges with butyl tape and non-sag sealant for a tight, lasting install.
Yes, a Rectangle Multi-Purpose Hatch can be installed turned 90 degrees. Confirm the hinge and latch orientation you prefer after rotating. Check that the cutout and flange still clear any framing. Make sure the latch has room to operate in the new orientation.
Both options exist for Rectangle Multi-Purpose Hatches. A thumb lock rotates without a key and simply keeps the hatch closed. A key lock provides keyed access. Check for latch strength and how it secures; some light-duty latches can feel flimsy. Also verify back clearance since some locks protrude behind the door.
Match the hatch to your cutout hole, not the outside frame. Measure the height and width of the existing cutout and compare to the hatch's cutout requirement. If your opening is close, you may be able to enlarge it slightly. Verify the door thickness and latch reach so it closes properly on your wall.
Plan on a careful cut, solid fasteners, and proper sealant. Measure and mark, drill pilot holes, and use self-tapping screws for a clean, hidden-fastener look. Use butyl tape on the flange and a non-sag sealant to help prevent leaks. If edges are rough, file and finish them before mounting. Confirm latch tension for a tight seal.


 Filters