Tekonsha POD Trailer Brake Controller w/ Plug-In Harness - Up to 2 Axles - Time Delayed

 Arrives before Christmas

without factory Tow Package
Will this fit?
To see if this custom-fit item will work for you please tell us what vehicle you'll use it with.
- All Info
- Reviews (1322)
- Q & A (0)
- Videos (4)
- Photos
Tekonsha Trailer Brake Controller - TK56ER
- Electric
- Time Delayed Controller
- Up to 2 Axles
- Tekonsha
- Under-Dash
- Plug-In
- Under-Dash Box
- Single Trailer Only
- Indicator Lights
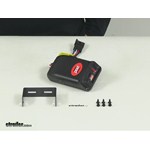
This time-delayed brake controller is designed to mount at any angle, even upside down. The controls are all up front for easy access, including a slide-bar manual override and a thumbwheel for braking output. LED indicator shows your braking status.
Features:
- Brake controller activates trailer brakes with preset intensity
- Adjustable power output lets you select the amount of braking force
- Simple thumbwheel lets you change settings
- LED indicator on front of unit shows you your braking status
- Green light indicates that brakes are connected
- Color changes to orange and then to red as the power output increases
- Slide-bar manual override is within easy reach for controlling trailer sway or stopping in emergencies
- Quick and easy installation with no mounting restrictions - can be installed in any direction
- Designed to be mounted upside down and still have a readable display
- Mounting bracket and hardware included
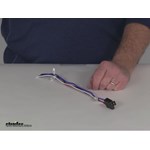
- Pigtail harness wires into your vehicle so you can easily plug in the controller
Specs:
- Application: trailers with up to 2 axles (4 brake assemblies)
- Compatible with electric trailer brakes only
- Dimensions: 5" long x 3" wide x 1-1/4" tall
- Warranty:
- Limited 5-year on brake controller
- Limited 1-year on wiring harness
Easy-to-Access Brake Controller
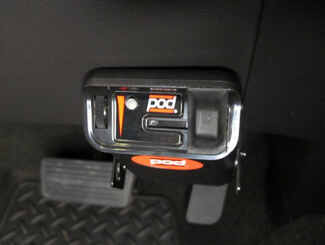
The Tekonsha POD is designed to mount in any direction, and it's especially suited for mounting on near-vertical dashes. All the controls are on the front of the module, so you can still access them with the controller tucked away in a convenient place.
Braking Output
Braking output is the maximum amount of power that will be applied to your trailer's brakes. How much braking output you need is determined by the weight of your trailer; a heavier trailer will need more power to bring it to a stop. You want to set the braking output as high as you can without locking up the brakes. Once you've set up the brake controller the first time, you shouldn't need to adjust the settings until the trailer load changes, you switch trailers, or road conditions change. Use the thumbwheel on the side to change the braking output level. The output setting will appear as a number on the digital display, with a higher number indicating higher braking power.
Manual Override
The Tekonsha POD keeps the manual override within easy reach on the front of the module, great for stopping sway or controlling your trailer's momentum in emergencies. Push the slide-bar lever to activate the trailer's brakes and brake lights without you having to apply the brakes on your tow vehicle, perfect for limiting trailer movement while you're cruising.
Quick, Simple Installation
Because inertia plays no role in the functioning of this controller, you do not have to mount the unit at any particular angle. Your mounting options are limitless, with the controller designed with all of the controls on the front of the module so you can access them even if it's mounted upside down.
The included pigtail harness splices into your vehicle's wiring beneath your dash to provide an easy-to-access plug for the POD. This way installation of the controller isn't permanent. You can unplug and remove it at any time and securely stow it away.
Note: If you don't already have a 7-way plug at the back of your vehicle, take a look at our exclusive 7- and 4-way brake controller installation kit (ETBC7 - sold separately).
Time-Delayed Braking
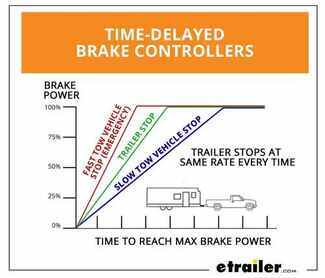
The Tekonsha POD comes equipped with time-delayed braking. Every time you apply the brakes in your vehicle, a signal is sent - via the brake switch - to the POD. The controller then sends power out to your trailer brakes to activate them with an intensity set by you, at a rate determined by you. The amount of braking power (output) can be adjusted to suit your preference, the road conditions, the type of trailer, and the weight of your load. To determine which levels are best for your application, test your towing setup and choose what feels right.
80500 Tekonsha PowerTrac Electric Brake Control - 1 to 2 Axles - Time Actuated
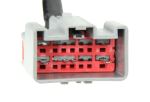
8506920 Replacement Brake Control Plug-In Harness for Tekonsha and Draw-Tite Brake Controller 12" Long
Replaces 20127
Installation DetailsCalifornia residents: click here


Videos are provided as a guide only. Refer to manufacturer installation instructions and specs for complete information.
Video Transcript for How to Set Up Your Tekonsha POD Trailer Brake Controller on a 2017 Dodge Grand Caravan
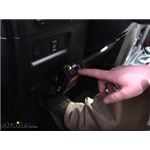
Today on our 2017 Dodge Grand Caravan we'll be installing a Tekonsha PowerTrac Electronic Brake Controller, part number 39523. To ease our installation we'll be installing our brake controller with our 7-Way Adapter Kit, part number ETBC7. Here's what our brake controller looks like installed. As you can see, it's a nice, slimline design, very simple to operate, and easy to use. This will easily allow us to control trailer brakes on trailers that have up to two axles, making our Caravan a more suitable tow vehicle. This LED, when we don't a trailer connected, there is nothing displayed there. It's just off.
When we have a trailer connected, we know we that have a functioning brake system when the green light is displayed. When your brakes are applied, you can see that it changes color to let you know that the brakes are working. Now this is a time delay brake controller versus one that has an inertia switch built inside of it. Because it's time delay this will allow us to mount it at any angle wherever we want inside of our vehicle. Now I want to point out a couple of things here. When we dial down our power of a brakes, when we slide our knob over here for manual override, you can see that our color of the light doesn't change.
This is letting us know how much power is being applied. When it's green there's very little power being applied. When we move the knob up, you can see it goes to a yellow color, then orange, then a red. The darker a color, the more intensity and power is being sent to the brakes in your trailer, giving you more aggressive braking. A good suggestion to start with our brakes in the orange position.
That's right in the middle. That'll give you a good starting point. You can adjust it down or up to suit your needs or driving style. Now what sets this apart from other brake controllers on the market, besides the fact it's a time delay unit, is this is a very simple to operate unit. There's no buttons. All you have is your power adjustment knob, and your manual override, giving you what you need in order to tow a trailer with up to two axles with electric brakes.
Now that we've gone over some of the features of our brake controller, we'll show you how to install it. To begin our installation today we need to find a place to mount our 7-pole. We'll be using one of our long brackets here. It's part number 18136. This will allow us to attach to our hitch using a provided clamp. We'll get that started and we'll tighten down our clamp. Our clamp uses a 5/16 socket and we'll use a 5/16 nut driver. We'll take our 7-pole and our bracket for our 7-pole, slide the wires through the hole, insert it into position, and secure it to the bracket with the provided hardware. With all of our hardware tightened down we'll slide this onto our bracket that we installed, and secure it with the provided hardware. We'll have a flat washer on the bottom, followed by a lock washer, and then a nut. Now where our 4-pole flat connector is on the back of our 7-way, let's cut that off. We'll take our existing 4-pole flat trailer wiring here and measure off about how much we're going to need, and we'll cut off our connector here too. We'll separate all four of our wires. We have our two wires here, our white wire is our ground wire coming from our connector. We'll cut off the excess here. Our purple wire here is for our reverse light input. We're not going to be using this here today so we're just going to cut this back off a little short, and we'll tape up with our wiring bundle, just to protect it, and now we'll tape it all up together with the rest of our wires. We'll feed our wires through this hole in our bracket here now. Pull on up. Now let's strip off some insulation from all our wires that we cut off from our connectors. This white wire here, we'll strip off a little bit more than the rest. This is on the side from our 4-pole flat that was already on our vehicle. We'll start off by putting some heat shrink butt connectors on our end closest to our 7-Way. We'll be using blue ones, which are for 14 to 16 gauge on the smaller diameter wires, and our ground wire, we'll be using one that's yellow. This for 10 to 12 gauge wire. Now we'll start connecting them color for color. Our white wire is our ground on the side from our existing 4-pole flat wiring from when we cut off excess. We'll just twist this together, fold it back in half because this is going to a thicker wire on our 7-way. This will help bite into there easier. Now we'll take our gray duplex wire that comes with our kit, take a utility knife with a sharp blade and we'll go right down the middle from one end of the wire, and you'll find there's two wires inside, a black and a white one. We'll just make sure cut off the covering. Now we'll strip back the insulation from both ends. We'll attach this into our 7-Way. We'll try to match it up as color for color as possible, so black will go to black. This will be for our power wire that will charge our battery in our trailer. Our blue wire is our brake output wire. This will go to the white wire. Okay, now we use a heat gun and heat shrink our butt connectors. You can also use a lighter to do this. Just make sure you don't make direct contact with the flame. Now we'll just hide all the wires with some electrical tape here to help better protect it, and help prevent us from seeing any colored wire from underneath our vehicle. We took our gray duplex wire, which will supply our brake signal, and our power wire to our 7-way, ran into the front of the vehicle, making sure we avoided any moving parts such as the suspension, or any sources of heat such as the exhaust. We went between the hitch and our stow and go seating area here, secured to this bracket for our brake line, secured it here to this bracket for our sub frame, went above our rear suspension here, went over our rear shock mount, and then down, and we went through this hole here for our parking brake cable bracket, and we secure it to our parking brake cable. We don't have to worry about the cable moving. It won't. We just secured it along this, up to the front of the vehicle, down to where our front sub frame is, went over this bracket here where it's at our fire wall now. We'll drop a pull wire from the engine bay and bring this on up into our engine compartment. Here's our pull wire we dropped down. We taped the end of our duplex wiring to that. Take our pull wire and we'll pull it up. Now we'll take our utility knife here and we'll separate our duplex wiring like we did earlier. All the way down the very end of it. With that split all the way down now, we'll just remove the gray outer covering. Now we need to find a place to mount our circuit breakers. Our two circuit breakers in questions, we're using a 40 amp circuit breaker to supply power to our 7-way in the back, and we use a 30 amp to supply power to our brake controller inside the vehicle. We're going to place these right about here on our windshield cowl. They'll be protected and not in the way of our battery or our fuse box should we ever need to gain access. We'll secure them into place with our self-tapping screws. Our black wire, again, this is going to our 40 amp breaker, this is going to connect to the auxiliary side of our breaker. This is the one that's silver. Our gold side is our side that goes to the battery on our vehicle. Let's measure off as much wire as we need. Cut off the excess. We'll strip off the insulation, and we'll attach one of our yellow, small ring terminals. Crimp that down in place. I'll remove our nut here. Slide our terminal over the stud and re-secure the nut. Let's do it finger tight for now. We'll tighten all these back up here once we're done with the install. We poked a pull wire through our fire wall grommet right behind our battery to the side of our brake booster. Now we'll grab our pull wire and pull out a little bit more. We'll tape our wire to it that's going inside the firewall. Here's our pull wire. Our white wire, this is going to our brake controller's blue wire. I'll tape this to this, and pull it through our fire wall. Here's our white wire inside the firewall. Our white wire here, we'll measure off how much you're going to need, and cut off the excess. We'll strip off some of our insulation, and we'll stick on one of our yellow butt connectors, and we'll crimp that one. Now we'll take our brake controller here, and this connector here, we'll just cut it off. Our blue wire is our brake output wire. We'll strip off some of the insulation from it, and we'll stick it in the other end of our white wire here, and we'll crimp it down. Our white wire on the brake controller unit itself is our ground. Let's strip off some of the insulation from it, attach a butt connector to it. Now our excess white wire that we just cut off, we'll strip off one end of the insulation from it, and we'll stick on to the other end of the ground off the brake controller, and we'll crimp that down. We'll pass the remainder of the white wire through the fire wall in the same location that our other white wire went through. Now we'll go underneath the engine compartment and pull that through. Grab our white wire now, pull it through, making sure we leave enough slack on the inside. Now we'll cut off our excess white wire. We'll be attaching this directly to the negative terminal on our battery, which is the side closest to the fire wall. Strip off some of the insulation, and we'll attach one of our larger diameter ring terminals to it. We'll just set it aside for the time being. Now our excess black wire that we had, we'll strip off some insulation, place on a butt connector and we'll crimp it down. This will go the black wire on our brake controller, which has our power supply to it. I'll strip off some insulation from it, and then we'll attach that wire as well. Then we'll feed the end of the black wire through our fire wall like we did the other two, from inside out. There's our black wire. We'll just pull the slack out now making sure we leave enough inside the vehicle. We'll measure off how much wire we're going to need to connect to the silver side of our 30 amp breaker right here. We'll strip off the insulation and attach a small ring terminal to it. Now we can find the cold side of our brake pedal switch. This is the wire that only has power going to it when the brake pedal is depressed. We have our test light hooked up to it. The wire that we're going after here is a green and white wire. It's this one right here, closest to the fire wall. It's green and white. All right, to make this easier to work with, we'll grab our brake pedal switch and pull back, and disconnect it. Now we have some more room to connect our wiring. We'll take our little quick connector here, I'll slide it over the wire. With that slid on all the way now, we need to get an extension wire. Just use some 16 gage wiring we have laying around. You'll need about two feet in order to do this. We'll slide our wiring on in, and take our pliers and we'll cramp our connector closed. With that crimped down all the way, we'll take our connector here, close it up. Now I'll plug our stop light switch back in. All right, once it snaps back in we're good to go. Let's strip off the insulation from the two ends of our red wires now, and we'll connect them together with the butt connector. With all our connections made inside the vehicle we can now wrap it up with some electrical tape to help hide the colored wires. Now we need to find a place to mount our brake controller. Right here to the right side of our dash is a perfect spot. Make sure we have enough slack for our cables to do that. Once we have it in the right position where we want it, we'll slide it down and secure our bracket to the dash with the provided self-tapping screws. They're a 1/4". Now we'll just slide our brake controller into the bracket and secure it with the provided screws. Now we'll take our leftover black wire here and make connections from our circuit breakers here and here to the positive side of our battery. Take a breaker, the gold or copper colored side. Now we're going to make this so we can actually easily remove our battery if we need to, so we'll just wrap around the side of it. I put a large ring terminal on it. Take our left over wire now, strip off one end, place a small ring terminal on, and we'll crimp it down. We'll attach that to the side of our final breaker. Measure off how much wire we'll need and we'll cut off the excess. Place on our large ring terminal and we'll crimp it down. Now that we have all the connections made to our breakers we'll tighten down the nuts fully using a 10mm socket. We'll do our battery connections from our breaker first. A 10mm socket right here, we're going to remove this 10mm nut. We'll place on both of our terminals that go to our breakers, and we'll replace our nut, and we'll snug that down. Now we'll do our negative. Same process. Originally we we're going to attach our ground wire directly to the negative terminal on our battery posts, but I found that there's two factory ground positions right here. We'll use these instead because it's less things going to our battery. Put one on the stud and re-secure the nut. That completes our installation of Tekonsha PowerTrac Electronic Brake Controller, part number 39523 on our 2017 Dodge Grand Caravan.
Customer Satisfaction Score:
96% were satisfied with this product
4% of customers were not satisfied
- Product did not meet expectations
- Wrong item was ordered
- Did not arrive in time
Ratings & Reviews
4.8
1322 reviews

quick delivery
Simple install and fit like a glove! Great product and great company to work with!
Had all wires just plug in. No splicing. Great. Thanks
See what our Experts say about this Tekonsha Trailer Brake Controller
- How to Convert a Trailer with Surge Brakes to Electric Over Hydraulic BrakesYou can convert surge brakes to an electric over hydraulic braking system. To do this, you will need an electric over hydraulic actuator and a brake controller. For an electric over hydraulic actuator, I recommend looking at the Carlisle HydraStar units. If your trailer has drum brakes, you will want part # HBA-10. If your trailer has disc brakes, then you will want part # HBA16. I have also attached a link to all of our electric over hydraulic actuators for you to check out your options. The...
view full answer... - Recommended Wiring for 1998 Ford F-150 to Add 7-Way to Factory 4-Way Trailer ConnectionFor your 1998 Ford F-150 Extended Cab with factory 4-way flat, you need the Tekonsha Ford Replacement OEM Tow Package Wiring Harness, 7-Way # 118242. This will give you the two additional relays needed as well as the wiring harness. Then you will need a brake controller. I recommend the Tekonsha Prodigy P3 # 90195 as well as the wiring adapter # 3035-P. This will give you an easy to use proportional brake controller with easy to use presets as well as a nice LCD screen for diagnostics....
view full answer... - Brake Controller Installation on 2008 Chevy TrailblazerThe orange wire found under the dash that would provide power to the brake controller is already circuit protected, so you would not need an additional circuit breaker like the # 9506P you referred to. The wiring connections would be made as follows: Orange tow pkg wire connects to black wire on controller Dark blue tow pkg wire connects to blue wire on controller Light blue tow pkg wire connects to the red controller wire Black tow pkg wire connects to the white brake controller wire The...
view full answer... - Troubleshooting Red Flashing Light on the Curt Venturer Trailer Brake Controller # C74VVIf you check out the picture that I attached you can see that your Curt Venturer Trailer Brake Controller # C74VV that you installed is detecting an overload or short on the brake circuit of your 2008 GMC Sierra. The wiring adapter # C51515 that you also installed is the correct adapter so now we need to determine if the problem is on your Sierra or your trailer. If you have another trailer with brakes handy then you can simply hook up to that trailer and see if the same thing happens. Whether...
view full answer... - Recommended Fastway e2 Weight Distribution System for Coleman Trailer and Brake ControllerThe Fastway e2 # FA94-00-0800 has a weight capacity of 800 lbs as you mentioned, but weight distribution systems are rated for total tongue weight and have a range. The total tongue weight is the loaded trailer tongue weight plus any cargo weight behind the rear axle of your tow vehicle. If your loaded Coleman trailer is 540 lbs, then this system will work really well as your total tongue weight will be in the middle of its 400-800 lbs capacity. If you want slightly better ground clearance...
view full answer... - Brake Controller Recommendation for 2008 Sterling Bullet (Dodge Ram) TruckWith the # 3020-P, wiring harness, any of the Tekonsha brake controllers will plug right into the factory harness. The Tekonsha # 39523 PowerTrac brake controller would work for you, but I'd urge you to go with a proportional controller like the Tekonsha Primus, part # TK90160. A proportional controller will sense how quickly the tow vehicle is slowing, and will send the appropriate amount of power to the trailer brakes so the trailer and tow vehicle stop at the same rate for safer, more...
view full answer... - What Does the Crescent Wrench Mean on the Dashboard of a 2017 Hyundai Santa FeAccording to the owner's manual for your 2017 Hyundai Santa Fe, if you do not have your vehicle serviced according to the pre-selected service interval, a service required message (crescent wrench on dashboard) is displayed for several seconds each time you set the ignition switch or engine start/stop button to the on position (The mileage and time changes to "---"). To reset the service interval to the mileage and days you inputted before: - Press the select/reset button for more than...
view full answer... - Correct Brake Controller Adapter for 2011 Ford F-150If you have one of the following brake controllers, we offer a complete plug-in application. No wiring needed, just plug one end of the Tow Ready Plug-In Wiring Adapter, # 22292, into your brake controller and the other end will plug into the built-in harness beneath the dash on your 2011 Ford F-150. Brake EVN # TK63VR Tekonsha PowerTrac # 39523 Tekonsha P2 # 90885 Tekonsha P3 # 90195 Tekonsha Primus IQ # TK90160 Tekonsha Voyager # 39510 If you have a different brand of brake controller,...
view full answer... - Tekonsha POD Brake Controller 39523 - Does Trailer Need To Be Connected For Light To Turn On?Hello Miguel, thanks for reaching out. What you are describing sounds normal for the Tekonsha POD Trailer Brake Controller # 39523. The light should only come on when the trailer is plugged in. You should see a green light when you hook up. The light would stay off with the trailer disconnected. This is completely normal and not a cause for concern. You should be able to hit the manual override to test the controller and make sure it is working normally.
view full answer... - Troubleshooting the Pilot 2-6 Brake Electronic Brake Controller Part # 80550Can you send me a photo of the display you are seeing?
view full answer... - Easier to Install Brake Controller Solution for 2018 Subaru Outback WagonYour 2018 Subaru Outback Wagon can have a brake controller installed like the part # 39523 that you referenced but since there isn't factory brake controller wiring on your vehicle you'd have to either hardwire it in with the # ETBC7 or go with something like the Curt Echo part # C51180 which plugs into an active 7-way and once synced to a smart phone is ready to go. This instead needs the # ETBC7L which requires much less wiring than the # ETBC7. Both controllers would work great with...
view full answer... - Least Expensive Trailer Hitch, Wiring Harness, and Brake Controller for 2009 Lexus RX 350I will give you a list of all the most budget-friendly parts for a complete towing set up for your 2009 Lexus RX 350. It sounds like you have a trailer with electric brakes, so you will need a hitch, 7-way, 4-way (which is needed because it plugs into the 7-way), ball mount, 2" hitch ball and brake controller. So here is the list of the most economical parts for you: - Curt Trailer Hitch Receiver # 13530 - Curt T-Connector Vehicle Wiring Harness with 4-Pole Flat Trailer Connector # C55563 -...
view full answer... - Which is Actually Better? a Proportional or Time-Delayed Trailer Brake ControllerProportional brake controllers like the Prodigy P3 part # 90195 are by far the better choice over time delayed. Proportional controllers use internal sensors to determine how hard your trailer brakes should be applied based on how hard they sense you are applying the vehicles brakes. A time-delayed controller applies a set amount of braking force that ramps up over a set amount of time and then stays at that force till the brakes are released. If you think about how often you apply the...
view full answer... - What is the Difference Between a Time Delay Brake Controller and a Proportional Brake ControllerThe Tekonsha PowerTrac brake controller # 39523 is a time delay brake controller. The other type of controller is a proportional controller. A time delay controller is so named because there is a delay between the time that you initially apply the brakes in your tow vehicle and the time that the controller reaches maximum power output. Unlike a proportional brake controller, which activates your trailer's brakes based on the deceleration of your tow vehicle, a time-delayed controller sends...
view full answer... - Is there a Brake Controller that Fits in the Dash Pocket on a 2015 Chevy SilveradoIf you were to use the PowerTrac # 39523 it does have all of its controls at the front where they would be accessible. Since this is a time delay control it doesn't have to be mounted in any specific orientation. This controller is 3 inches wide, 5 inches long, and 1-1/4 inches tall. If you can tell me the amount of space in the pocket on your 2015 Chevy Silverado 1500 I can determine if something else might work better. In addition to the brake controller the only other part you will...
view full answer... - Will Tekonsha 39523 PowerTrac Brake Controller Fire Trailer Brake Lamps With Manual SliderAccording to Tekonsha, who manufactures the # 38523 PowerTrac, if the controller was manufactured after 2013, it will drive the trailer's brake lamps with the manual brake slider.
view full answer... - Does Trailer Need New Hub/Drums When Switching From Hydraulic to Electric BrakesPretty much all hub and drum systems are compatible with both electric and hydraulic brake systems. If you can give me some photos and/or information about the axle weight rating, hub inner diameter, and brake mounting bolt pattern I'd be happy to help you find the correct replacement electric brake kit for your trailer! Attached is a helpful article on adding electric brakes so you can familiarize yourself with the process, and then it's also worth noting that you'll likely want to swap...
view full answer... - Tekonsha PowerTrac Brake Controller # 39523 Seems to Engage Brakes When Lights are Turned OnIf your Tekonsha PowerTrac Brake Controller # 39523 works properly until you turn on your vehicle headlights then my first suspicion is a problem in the wiring at the 7-way or trailer. It could be that the running light circuit (often carried on a brown wire that leads to the blade contact at the 11:00 position - see linked photo) is somehow being bridged to the brake output circuit wire. The brake circuit is often assigned to a blue wire at the 7-way contact that is in the 5:00 position....
view full answer... - Parts Needed to Install Brake Controller in 2009 Toyota RAV4For your 2009 Toyota RAV4 there isn't a plug and play style of brake controller install harness so you'd have to hardwire one in with the # ETBC7 plus a 4-way kit part # 118412 if you do not have a 4-way already. Those two parts would be all you need to install the brake controller part # 39523 that you mentioned in your 2009 Toyota RAV4. I attached an install video for the ETBC7 installed in a Rav4 similar to your 2009 model.
view full answer... - Finding the Wire for the Cold Side of Brake Switch on a 2001 Chevy Express VanTo find the cold side of the brake switch on your 2001 Chevy Express Van you will need to use your circuit tester to test the brake switch wires. The van key might have to be turned on for this test. You will need the wire that shows power only when the brake pedal is pressed. When you release the pedal it should not have power. And it should also not have power with the headlights or turn signals on. On newer models, 2003 and up, the cold side wire is a white wire so test that one first.
view full answer... - Timbren Axle Less Kit with 6 Lug Bolt Pattern for Off-Road UseSince the plan is off-road tires for an off road trailer the best Timbren Axle Less kit system is the part # ASR35HDS02 which has a 4 inch lift built into it for better ground clearance and also is designed to allow for wider off-road tires as well. Then for a hub/drum with the bolt pattern of 6 on 5-1/2 inch that you need you'd also want the part # 8-201-9UC3-EZ. For a set of self adjusting brake assemblies then you'd want the part # 23-458-459 which is a set for both sides. Electric...
view full answer... - Bypassing ITBC of 2014 Silverado 3500 and Installing Aftermarket Brake ControllerWe have heard numerous reports on the factory GM, Dodge and Ford brake controllers working intermittently with certain trailers over the years, which is why Tekonsha has actually put out a tech bulletin showing how to bypass the factory controller and install an aftermarket model. I'm not aware of any adapter, but the ITBC (integrated trailer brake controller) can easily be bypassed using the tech bulletin I've linked for you. I suppose if you wanted to, you could switch back and forth...
view full answer... - Should the Light on the Pod Brake Controller be On All the Time with No Trailer ConnectedWhen no trailer is connected the light on brake controller # 39523 will either be flashing or off. If it is green all the time with no trailer connected that indicates a short to ground. This normally occurs when there is corrosion on the pins or where the wires attach on the trailer connector. I have included a link to the instructions that include a troubleshooting section. I have also included a link to our FAQ article on troubleshooting brake controllers for you.
view full answer... - Recommended Brake Controller and Plug in Adapter for a 2003 Chevy Silverado 1500Congrats on your new purchase Raymond! The best brake controller with a plug in adapter for your 2003 Chevy Silverado 1500 is the Tekonsha Prodigy P2 w/ Custom Harness item # TK33UR. This is a proportional brake controller that automatically adjusts your trailer's braking based on the deceleration of your Silverado. It stops your trailer with the same amount of force you are stopping or slowing your truck. This is not only the safest type of controller but also the easiest on both the tow...
view full answer... - Most Economical Trailer Hitch Receiver and Wiring Harness For a 2023 Honda Pilot TouringOur etrailer Trailer Hitch Receiver # e27KR you found is our most economical custom fit receiver for your 2023 Honda Pilot Touring edition. For the wiring you can select from either the 4-Way # C48ZV or the 7-Way # C35ZV depending on the types of trailers you will be towing. If you have a trailer with a 7-way you are also most likely going to need a Trailer Brake Controller # 39510 along with the Wiring # 20127 to connect it. This is one of our most economical and reliable proportional...
view full answer... - My Vehicle has a 4-Pin Trailer Plug, but Trailer has 7-Pin Trailer PlugIf you just need a 4-pin to 7-pin trailer wiring adapter, then you can use part # C57672. This will plug into the 4-pin trailer connector on your brother's vehicle and give him the 7-pin socket for the trailer. Keep in mind, this will only give you trailer light functions. If your trailer has a 7-pin connector, then it likely has electric trailer brakes and an onboard battery. If you want a fully functioning 7-way trailer socket on his vehicle, then the installation will be a bit more...
view full answer... - Installing a Trailer Brake Controller on a 2012 Dodge Caravan with Tow PackageI spoke with a colleague who worked at Chrysler and he stated that they do not put the trailer hitch and 7-Way wiring on the Grand Caravan at the factory. That is something that the dealer installs. In any event here is what you will need to do. The brake controller will need to be hardwired into the vehicle. The white wire on the brake controller will need to get connected directly to the negative terminal on the vehicle battery. The black wire will need to connect to a 30 amp circuit...
view full answer... - Brake Controller Installation in 2019 Ford RangerWe have not yet (as of April 2019) had a chance to install any wired trailer brake controllers on a 2019 Ford Ranger so for guidance I checked with my most trusted brake controller expert at Tekonsha. Based on what I could learn about the truck if the Ranger has a factory-installed 7-way it should have a standard brake controller connection port above and to the left of your left knee when seated; this will be near the kick panel. You will want to look for a connector that matches the...
view full answer... - Brake Controller For A 2023 Ford Ranger With Factory 4 FlatHey Bill, You can absolutely use your Primus IQ on your 2023 Ford Ranger! The installation will be a bit different, since there is not a plug and play adapter for your vehicle it will need to be spliced in. If you do not have the universal harness it came with originally we do have a replacement, # 20127. This would just plug into the back of the controller and then splice into the vehicle. For your Ford Ranger, the 4 flat plug that is on it would be considered "without a factory tow...
view full answer... - What Are the Brake Controller Wire Colors for on a 1998 Dodge Ram 2500The factory electric trailer brake controller wires on a 1998 Dodge Ram 2500 are as follows: Power - Red/Orange Ground - Black/Orange Stop Light - White/Tan Brake Output - Light Blue For a brake controller, I recommend using the Tekonsha Voyager Trailer Brake Controller part # 39510. It sounds like the previous owner of your truck may have cut off the old brake controller port so you are also going to want to use the Replacement Brake Control Plug-In Harness for Tekonsha and Draw-Tite...
view full answer... - Brake Controller Installation on 2008 Chevy TrailblazerThe orange wire found under the dash that would provide power to the brake controller is already circuit protected, so you would not need an additional circuit breaker like the # 9506P you referred to. The wiring connections would be made as follows: Orange tow pkg wire connects to black wire on controller Dark blue tow pkg wire connects to blue wire on controller Light blue tow pkg wire connects to the red controller wire Black tow pkg wire connects to the white brake controller wire The...
view full answer... - Troubleshooting Red Flashing Light on the Curt Venturer Trailer Brake Controller # C74VVIf you check out the picture that I attached you can see that your Curt Venturer Trailer Brake Controller # C74VV that you installed is detecting an overload or short on the brake circuit of your 2008 GMC Sierra. The wiring adapter # C51515 that you also installed is the correct adapter so now we need to determine if the problem is on your Sierra or your trailer. If you have another trailer with brakes handy then you can simply hook up to that trailer and see if the same thing happens. Whether...
view full answer... - Parts Needed to Install a Brake Controller in a 2021 Ford Explorer w/out the Towing Package Hey Scott! Congrats on the new vehicle! To install a Tekonsha brake controller you'll need the Replacement Brake Control Plug-In Harness for Tekonsha item # 20127. The 2021 Ford Explorer's did not come with a plug in port if you do not have any factory trailer wiring. I have linked an installation video below to show you exactly how to get it set up. Here are the rest of the wiring harnesses you'll need to set your Explorer up to tow a trailer with brakes: 4-Way Connector - Curt T-Connector...
view full answer... - Recommended Fastway e2 Weight Distribution System for Coleman Trailer and Brake ControllerThe Fastway e2 # FA94-00-0800 has a weight capacity of 800 lbs as you mentioned, but weight distribution systems are rated for total tongue weight and have a range. The total tongue weight is the loaded trailer tongue weight plus any cargo weight behind the rear axle of your tow vehicle. If your loaded Coleman trailer is 540 lbs, then this system will work really well as your total tongue weight will be in the middle of its 400-800 lbs capacity. If you want slightly better ground clearance...
view full answer... - Troubleshooting the Pilot 2-6 Brake Electronic Brake Controller Part # 80550Can you send me a photo of the display you are seeing?
view full answer... - Weight Distribution Hitch w/ 7 Rise For 2021 Forest River Flagstaff E-Pro E15TBYour 2021 Forest River Flagstaff E-Pro E15TB has a GVWR of nearly 3,900 lbs, so a good estimate for your loaded tongue weight is going to be in the 450 lb - 500 lb range. For that tongue weight, what you will need for a weight distribution hitch that will give you the rise you need is one from Blue Ox: - Blue Ox TrackPro Weight Distribution w/ Sway Control - 7-Hole Shank # BLU36FR The TrackPro # BLU36FR has a maximum rise of 8 inch, and is for loaded tongue weights between 200 lbs and...
view full answer... - Least Expensive Trailer Hitch, Wiring Harness, and Brake Controller for 2009 Lexus RX 350I will give you a list of all the most budget-friendly parts for a complete towing set up for your 2009 Lexus RX 350. It sounds like you have a trailer with electric brakes, so you will need a hitch, 7-way, 4-way (which is needed because it plugs into the 7-way), ball mount, 2" hitch ball and brake controller. So here is the list of the most economical parts for you: - Curt Trailer Hitch Receiver # 13530 - Curt T-Connector Vehicle Wiring Harness with 4-Pole Flat Trailer Connector # C55563 -...
view full answer... - Parts Needed to Install Prodigy P3 Brake Controller in 2018 Jeep Wrangler UnlimitedSince the 2018 Jeep Wrangler does not come with factory brake controller wiring you'll have to hardwire in your P3 part # 90195. You will need to start with a 4-way (if you do not have one). For that you would want the # C55124. From there you would need to convert the 4-way to a 7-way so that you can install the brake controller. For that you will want the Brake Controller Install Kit and 7-Way Adapter part # ETBC7. I attached installation instructions and an install video for this product...
view full answer... - Is there a Tekonsha Vehicle Specific Pigtail for My 2013 GMC Sierra 1500?Hello Ric, I’m sorry, but I’m not showing that there is a vehicle-specific pigtail available for your 2013 Sierra 1500. You would need to splice in the brake controller. The Tekonsha Primus IQ Trailer Brake Controller - Up to 3 Axles - Proportional # TK90160 would be the correct brake controller for your vehicle, as it comes with a universal wiring pigtail. If you need just the pigtail, you can order # 20127. Is there a connector under your dash for a vehicle-specific pigtail?
view full answer... - Is Tekonsha Prodigy P3 Brake Controller Pigtail Wiring Harness Sold SeparatelyI can understand not wanting to undo the wiring and then re-do it, and the pigtail harness is available separately for the Tekonsha Prodigy P3 # 90195. The correct part is the following: - Replacement Brake Control Plug-In Harness # 20127 One end of this will plug into the P3 and the other end will hardwire to your new vehicle. In case you were interested in a new mounting bracket as well, the correct part for that is the Replacement Mounting Bracket Kit for Tekonsha Prodigy P3 Trailer...
view full answer... - What Hitch do You Recommend for My 2022 Subaru Forester?Definitely! The main factors that determine the hitch are hitch receiver opening size (either 1-1/4" or 2"), weight capacity offered, and how the hitch installs on your vehicle. For example, if you are looking for a hitch that is compatible with most accessories and provides you with the most weight capacity, I recommend going with a 2" hitch like the Curt Hitch - 2" # C13409. Not only does this hitch provide you with the most weight capacity we offer for your vehicle (525 maximum tongue...
view full answer... - Where to Splice Brake Light Wire From Brake Controller To Stoplight WireSince your vehicle does not have a brake controller port, you will want to use a universal wiring pigtail. For example, if you have a Tekonsha brake controller, you could use a Plug-In Harness for Tekonsha and Draw-Tite Brake Controllers # 20127. You will want to use a circuit tester, like # PTW2993, to test the wires at the stoplight switch at the back of your brake pedal to find the wire that only has signal when the brake pedal is depressed. Once you have found the wire that only produces...
view full answer... - Brake Controller Installation on 2006 Toyota Tacoma w/ 7-Way Trailer ConnectorToyota didn't offer a factory 7-way option for the 2006 Tacoma, so your 7-way was either aftermarket or dealer-installed. I'm assuming that your 7-way is already tapped into the lighting circuits. Look under the dash for a coiled up blue wire, if you find one, it's most likely the brake output circuit connected to the pin in the 5:00 position on your 7-way. You'd need to hardwire the controller, using a kit like our # 5506. If you use a Tekonsha brake controller like the Prodigy P2,...
view full answer... - Identifying Tekonsha Brake Controller that has Number N26802Sounds like you have a Tekonsha Primus IQ brake controller part # TK90160. I attached a link to this page that has the owners manual/install instructions and then for a replacement wiring harness you'd want the part # 20127.
view full answer... - Towing Setup for a 2017 Subaru Outback WagonAccording to my research, your 2017 Subaru Outback Wagon has a max towing capacity of 1,000 lbs if the trailer does not have brakes or 2,700 lbs if the trailer does have brakes. You can improve the towing performance/efficiency of your vehicle with a transmission cooler like part # D13503 but you cannot increase it's capacity. The tongue weight rating of 200 lbs is correct but I cannot recommend you go over this. In order to set your Outback up for towing a trailer with brakes you will...
view full answer... - Moving a Tekonsha Voyager Electric Brake Controller From a 2004 Chevy Silverado to a 2009 GMC SierraYour 2004 Chevy included a connector under the dashboard to plug in an electric brake controller. Unfortunately, GM went away with this feature in all of their trucks for the 2007 to 2014 generation. So there isn't an easy plug and play harness available and you need to hardwire in the Tekonsha Voyager, part # 39510. Luckily, the wires to connect the controller to are all run to the cab of the truck. If you need wiring you can use part # 20127 for a harness to hardwire in. The wires...
view full answer... - Recommended Trailer Hitch And Wiring For 2006 Toyota TundraFor your 2006 Toyota Tundra, I recommend the Curt Trailer Hitch Receiver - Custom Fit - Class III - 2" # C13180. This is a square tube design with a black powder coat finish over a protective base coat for superior rust resistance. This is a no drill installation. For your wiring, I recommend the 4 Pole Harness and Hardwire Kit - Includes Tester # C59496. This will give you a 4 way flat connection. Then you will need to get the Universal Installation Kit for Trailer Brakes # ETBC7....
view full answer... - Hardwiring Tekonsha Prodigy P3 Brake Controller in 2011 Chevy Traverse and 2015 Chevy ColoradoFor your Prodigy P3 # 90195 on your 2011 Chevy Traverse, if you have the factory 7-way then you just need wiring harness # 3026-P. If you don't have that then we recommend using the # ETBC7 kit that will have you hardwire from the battery using a circuit breaker. The circuit breaker used for the brake controller power is a 20 amp like # PK54520. I've attached a video of the 12V power wire connection, but it does not include the brake controller power connection that will be nearly...
view full answer... - Best Brake Controller For Multiple Different VehiclesHi Terry! Just to make sure, are you wanting one brake controller that will work with all 3 vehicles, or a separate brake controller for each vehicle? I have both options listed below, but curious. One Controller For All Three Vehicles (one to rule them all, per se): Tekonsha Prodigy P3 Trailer Brake Controller - 1 to 4 Axles - Proportional # 90195 Wiring Needed For Each Vehicle: 2016 Jeep Wrangler: Universal Installation Kit for Trailer Brake Controller # ETBC7 2020 Jeep Cherokee: Tekonsha...
view full answer... - Best 7-Way Wiring Harness And Brake Controller For 1996 Toyota TacomaHey Callie, thanks for reaching out. We do have an install kit for your 1996 Tacoma as well as brake controller options. For the install kit, use the Universal Installation Kit # ETBC7. This comes with everything you need to upgrade your current 4-flat connection to a 7-way, including all of the necessary wires for a brake controller. The diagram below will show you typical installation for the # ETBC7 kit, and you will also find an install video linked below. For the brake controller,...
view full answer... - Best Brake Controller For 2022 Buick Enclave With Factory 7-WayHello Rod, thanks for reaching out. It sounds like you just need to add a brake controller to your Enclave. We do have options for you, but there are no plug-and-play harnesses available for the 2022 Buick Enclave, meaning the controller will have to be wired in. It is just 4 wires and they should be color coded so nothing difficult. What I recommend for you is the Redarc Tow-Pro Liberty Brake Controller w/ Universal Wiring Harness # RED52VR. I like this controller because it installs...
view full answer... - Replacement Brake Controller for a Hopkins Towing Solutions Brake-Force Brake Controller Thanks for the pictures! I checked with Hopkins and it sounds like your Brake-Force brake controller is going out. The red light shows that all of your connections are good so it's not a wiring issue. The intensity of the light going away means the controller isn't sending enough signal to the brakes. If you want to replace it with a comparable time delayed brake controller, you can use the Tekonsha POD Trailer Brake Controller w/ Plug-In Harness item # TK56ER. I recommend replacing...
view full answer... - Need Brake Controller For 2017 Jaguar F-PaceHello Randy, thanks for reaching out. For your 2017 Jaguar F-Pace I recommend the Redarc Tow-Pro Elite Brake Controller # RED44FR. I like this one because the controller will be completely hidden behind the dash. All you will see is the small LED control knob, so it will have a very clean look. The control knob is also very easy to use once you get the hang of it. If your vehicle is not already equipped with a 7-way, you will need the # 119250KIT and the # ETBC7 kit to complete your wiring....
view full answer...
Do you have a question about this Trailer Brake Controller?
Info for this part was:


At etrailer.com we provide the best information available about the products we sell. We take the quality of our information seriously so that you can get the right part the first time. Let us know if anything is missing or if you have any questions.





Thank you! Your comment has been submitted successfully. You should be able to view your question/comment here within a few days.
Error submitting comment. Please try again momentarily.