


Thank you! Your comment has been submitted successfully. You should be able to view your question/comment here within a few days.
Error submitting comment. Please try again momentarily.
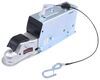
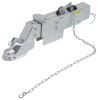
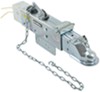
This replacement assembly fits Dexter Model 10 and Model 20 trailer brake actuators for drum brakes.
Features:
Videos are provided as a guide only. Refer to manufacturer installation instructions and specs for complete information.
Speaker 1: Today we're going to be taking a look at and showing you how to install the Replacement Master Cylinder Assembly for Titan Model 10 and Model 20 Brake Actuators. Part Number T2374600. Now this is going to be a replacement for the Titan Model 10 and Model 20 Brake Actuators, and it's going to work for Drum Brakes only.It is going to come with a plastic filler cap, we can fill our brake fluid right here. So our master cylinder is going to send fluid out to our brakes making sure that they apply whenever we need them to. And the reservoir that is built in is going to hold all the fluid making sure that we have enough supply to supply our brakes with enough fluid. The master cylinder is also going to work with the Dico Model 10 and Model 20 Actuators.
And it's going to be a great replacement for your worn or possibly broken master cylinder. As you can see here, ours definitely needed a replacement. We started to have some rust build up, and the rod actually isn't going to go in at all no matter how hard we push, so we're not going to be able to rely on this to actuate our brakes.The brackets on the side are going to be pre-installed making installation that much easier. The hardware to mount the actuator is not included, so you will need to provide that. Now to make sure this will fit your trailer the mounting holes on each side are going to be 4 3/4" set apart center on center.
The first thing you're going to want to do is find the cap on your actuator, remove it and make sure there's no fluid inside the master cylinder. Then we can start removing the line that's at the back of our master cylinder. Now for this you're going to want to grab a 5/8" wrench and either an adjustable wrench or another 5/8" wrench to hold the fitting that's on the back of the master cylinder itself.Then we're going to have two bolts on each side that are going to be holding it in place. We're going to need to remove those and our application it's going to be a 1/2" head. So we're going to grab a 1/2" socket and ratchet and remove those bolts.
And we're going to hold on to these so we can reinstall them with the new master cylinder. Now the master cylinder is freed up and it should be able to come out, but if yours is like ours it may be a little rusty and a little tight to come out. You just want to take your time and work at it until you can pull it all the way out. Now it would be a good idea to clean out any kind of debris, dirt, rust or anything else that would be collecting from maybe storing your trailer outside or just from over years of having your trailer. You want to clean all of that debris out.Now with the master cylinder out you're going to want to make sure that the coupler is pulled all the away from the trailer, you're just going to grab it, pull it out.
And then we can get ready to put our new master cylinder in.So we're going to put it in the same way that we took the old one out. First we're going to remove the cap. And you'll notice that on the brackets here on the side they are labeled. That's going to have an L for left and an R for right. So we can take our master cylinder and making sure that the shaft is pointing toward the coupler, we're going to slide it in place. And again it may be a little bit of a tight fit just because of the rust and debris from over time. We're going to put it in place and we're going to line up the four holes with the holes that we took the bolts out of earlier. So with our holes lined up and our master cylinder inside the coupler we go and take our bolts that we removed earlier and reinstall them.So we're going to come back with our 1/2" socket and wrench and tighten up those four bolts. So if you're going to be hooking your master cylinder up to an already existing brake line or brake assembly is already in place, go ahead and do that. And then we can fill our master cylinder up and begin the bleeding process. However we're going to be replacing the brake lines on our trailer so we're going to get those in place and then we'll show you how to bleed them.So with everything tight and everything in place we can go ahead and fill up our master cylinder and start bleeding our brakes. So you're going to want to grab and extra set of hands and they're going to manually operate the actuator up front while we open up the bleeders at the brake assemblies. Now when you are operating the actuator back and forth you want to make sure that the reservoir stays full of fluid that way you don't get any more air in the lines. Start with the farthest wheel position away from the master cylinder or the longest brake line moving further forward or to the shortest brake line. Our bleeder's going to be right here at the back of our brake assembly, underneath this red cap. So we can just pull off this red cap. I'm going to use a hose with a bottle attached.Now I've got a little bit of brake fluid in here so I can see the bubbles coming out and making sure that it's not just fluid and that the air is coming out of the system. So we can put the end of the hose right on the end of our bleeder but still leave us enough room so that we can open it up. So we're going to use a 3/8" wrench to open up that bleeder valve and we're going to want to do this until we have a solid stream of fluid coming out. Then we're going to close the valve and cycle the actuator so we can see the bubbles coming out of the bottom here which is what we want. It's just going to take a little bit of time to keep pumping until we just get a solid stream of fluid, no more bubbles.And that will finish up your look at the Replacement Master Cylinder Assembly for Titan Model 10 and Model 20 Brake Actuators, Part Number T2374600.
Customer Satisfaction Score:
97% were satisfied with this product
3% of customers were not satisfied
Ratings & Reviews


Jeffn

9/25/2018
Perfect, no problems
Norman O.
8/8/2019
My parts are working very well. Ive been in lots of saltwater and the brakes are working just fine. With regular rinses and a little lubricant all are working good. Thanks.


Tyler M.
3/30/2021
Hi Robert, Thanks for your feedback! Our customer service team will be reaching out to you.


Do you have a question about this Accessories and Part?
Info for this part was:
At etrailer we provide the best information available about the products we sell. We take the quality of our information seriously so that you can get the right part the first time. Let us know if anything is missing or if you have any questions.

























Kevins C.
7/22/2016
Well I installed it on a customers trailer and he hasnt been back to complain, so that makes me happy!????