
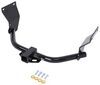
To see if this custom-fit item will work for you please tell us what vehicle you'll use it with.
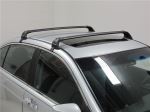
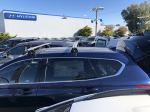
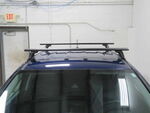
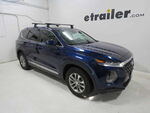
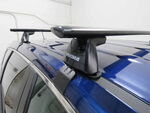
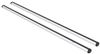
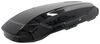
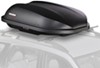
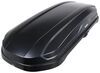
This stylish, aerodynamic Yakima roof rack gives you the space to carry gear on your vehicle. Rubber strips in the top channels push down to load carriers or accessories - no need to trim. Installs on your vehicle's naked roof.
Features:
Specs:
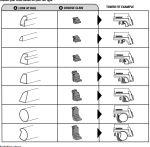
 Alternate Instructions
California residents: click here
Videos are provided as a guide only. Refer to manufacturer installation instructions and specs for complete information.
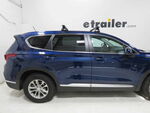
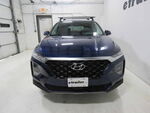
How's it going Acura owners Today we're gonna take a look at the Yakima JetStream roof rack on our 2023 Acura RDX. Now adding a roof rack rack to your RDX is gonna allow you to get more cargo area, 'cause vehicles this size generally don't have a lot of space. It comes outta premium. So this is gonna allow you to get that bigger, bulkier gear on top of your vehicle and allow you to take advantage of that negative space. So let's see how it's put together, how to install it and how well it works. First thing that sticks out to me is the fact that these bars are shaped like a plane wing, like on an airplane.
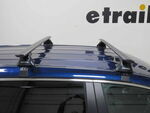
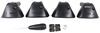
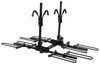
And what that does for you, it helps cut through the wind to reduce the wind noise that you experience from crossbars. Another thing that's really cool about this guy, it has an integrated T track slot that allows you to use your T track accessories. Now, your towers themselves are made of the same types of plastics that the automotive manufacturers use on the exterior of your vehicle. So it's gonna hold up against the hottest heats in the desert and the coldest temperatures in the northeast. So you don't have to worry about that cracking or fading or failing on you.
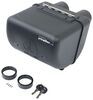
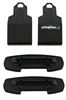
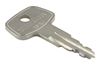
Another thing that's always a good upgrade to, if you're thinking about security, is switching it out to the Yakima Single key system lock cores. Now with the towers, they do sit up kind of high, they contour to the roof pretty well. One thing that I would point out is you do have enough clearance to open your moon roof, but I wouldn't suggest it just based on the fact that you know you're gonna get a lot of wind noise just by the virtue of the bars being on top of the vehicle. Your setup super easy. All you're gonna need is a tape measure.
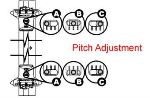
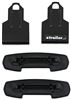
Everything else is included in the box and we'll be able to get this installed. So let's throw it on real quick. So as far as your setup, you just wanna make sure you have the right parts going to the front and rear. Your rear base clip system is gonna go on the back here and your pitching toe is gonna set to C two, and that's gonna allow you to make sure that it has the right angle for the curve of the roof. Now our front one, the kick for that is 154, and that's going to the setting for the pitch and toe is one A.
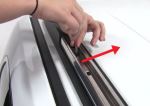
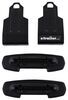
And that's all done right in here. So I'm just going to kick this guy right here to the angle for A, and then we're gonna slide it onto the track and fasten this guy down for one. So we're just gonna slide this guy right down into our track. There's just a cleat that you want to align, and it just slides right in. Now, going from our measurement, I can get this guy sat right here. And then this is where you're actually gonna tighten down that bolt into the position and you're just gonna angle it up and then fasten down until you hear your tool click. (metal clicks) All right, it is not a bad idea to take a tape measure and double check on your spread. And from here we're gonna put our pads on from our front base clip, and it snaps right onto the bottom. But you just wanna make sure that this cutout is pointing towards your door. And we're just gonna push that guy down. And now we're gonna take it up to our rooftop. And you definitely want it to sit like right here along your holes, well, your gutter rather. And now we're gonna install our clip and it's exactly where we need it to be. We're gonna install our clip. Now this small bracket in here is where it's gonna hook in. It's gonna slide it in and feel it, grab it. Now, right here, I'm a little short, so I'm gonna extend it some so it can get down to the lip of our door seal. And now we're gonna tighten this down until we hear to click. Now, one thing that I found with these, well, just about all of the roof racks, they kind of tend to pull. So you want to go from side to side before you completely tighten it down. And from here, your last step is slapping on your covers and installing your optional lock cores. If you want, you take advantage of the Yakima Single key system and now you're equipped to add on those bigger, bulkier items to get out there to your adventure. And once you get to your adventure, we would love for you to share your photos because we just love having that interaction with you. Now again, this is Ed with etrailer.com taking a look at the Yakima JetStream roof rack on our 2023 Acura RDX. Have a great day.


Do you have a question about this Roof Rack?
Info for this part was:
At etrailer we provide the best information available about the products we sell. We take the quality of our information seriously so that you can get the right part the first time. Let us know if anything is missing or if you have any questions.


Thank you! Your comment has been submitted successfully. You should be able to view your question/comment here within a few days.
Error submitting comment. Please try again momentarily.