
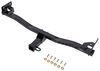
To see if this custom-fit item will work for you please tell us what vehicle you'll use it with.


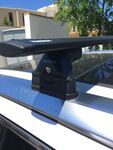
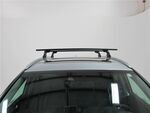
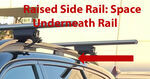
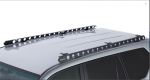
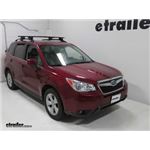
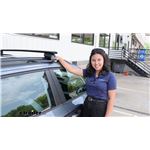
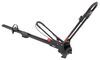
This stylish, aerodynamic Yakima roof rack gives you the space to carry gear on your vehicle. Rubber strips in the top channels push down to load carriers or accessories - no need to trim. Installs to raised rails on your vehicle's roof.
Features:
Specs:

California residents: click here
Videos are provided as a guide only. Refer to manufacturer installation instructions and specs for complete information.
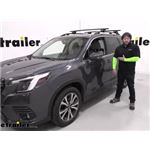
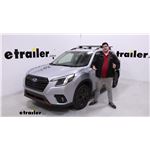
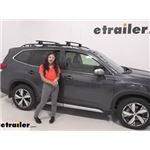
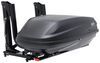
What's up everybody It's AJ with etrailer.com. Today we're gonna be checking out the Yakima Roof Rack System. With this system, you're gonna get the JetStream crossbars and TimberLine Towers, and this is gonna allow you to attach it to your raised rail on your 2022 Subaru Forester. Let's check it out. Now, the reason you wanna get a roof rack system is you don't have enough room in your car for whatever else you wanna throw or take with you. So maybe you wanna throw a cargo carrier up here, load it up with gear, maybe some suitcases, or a ski and snowboard carrier.
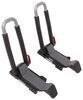
It's much easier to have it up here on the roof than trying to fit it inside your vehicle. Another option would be a kayak carrier. If you wanna throw a kayak up here, these are gonna allow you to use the space on your roof to help you take more stuff. With the system, you're gonna get the JetStream crossbars here. These are gonna be arrow bars.
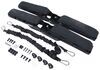
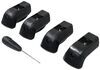
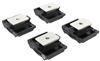
You see how they're thinner back here and wider up front. Helps with that wind resistance. Also, it's gonna be 50 inches long. So from here to that side there before the end cap, that's how much space you have to work with, where your accessories and loading up things on here. You got the TimberLine Towers here that wrap around the raised rails, and those attach really easily.
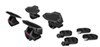
Just got one tool with all to put it on there and it's on there real sturdy. I can shake the whole car back and forth and you see there's no movement here in the bar or the base at all. You have some options with what you wanna throw up on the bars as well. So you can use the wraparound strap method on some of your ski carriers, or even your cargo carrier. You also have the T-Track system here, so you can push down on this rubber strip once you take off the end cap, and slide something in along there.
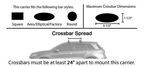
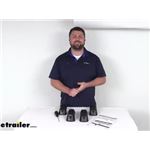
That way there's not gonna be any strap or anything hanging down here. You do have four inches of space from the roof to the bottom of the bar, so that should be plenty, even you have to have hand knobs, putting a roof box up here, or anything like that. You're gonna have the space to be able to do that. The bars themselves are made out of a lightweight aluminum, with a black powder coat finish on there, and also has a weight capacity of 165 pounds. So just keep that in mind if you're putting in a rooftop box or a cargo carry up here, don't overload it. Now, even with our roof rack system on the raised rails, we can still use our sunroof on the Forester. Just to show you. We bring all the way back, and show you that it doesn't get in the way or obstructed at all. The install's not that bad. You have to do a little bit of pre-assembly but they give you the one tool you need to do that. Didn't take me that long. Check it out, I did it. Now, let's assemble the base. So we have it laid out, I've already put one on the other side. It's really easy to do you just need your tool. We're gonna flip it around and insert our plastic adapter with key. So we're gonna flip it like this. You want the ridges to be against the ridges on the inside there. You see this bolt This is gonna tighten up into the centerpiece, so. And push the plastic piece in first. You hear a snap. And that's adapted it so you can put this into place. You'll wanna line up that bolt and start to tighten down just a little bit. You want a little play in there because this is gonna slide into the bottom of the rail. So you can pull back on this bolt that shows you the head of the bolt on the inside. Let's get a couple turns on that, get it started. Looks like it's attached, you see, not gonna fall out. Now we can slide it on our rails. So we come here to the end of the channel, just slide it in. Everybody got their rubber strips installed and cut the length that way. It's gonna cover up any wind noise and I know exactly where to put the foot. So with that in place, now we push this outta the way and tighten it down further. This what's nice about the tool is this gonna click when it'll let you know it's tight enough. There we go. We can put our weather strip here right by the tower. Just push it down into that channel, stays in place and we'll add our incap and also just slides right back on. Now we'll set the bars into place. We got the raised rails, so just be careful with the straps. You wanna just drop it on the roof but you can just carefully set it in the place. I'm gonna take the strap wrap around the bottom, set in the channel. I'm gonna show you on that side what I did. With it set in the place, let's get some measurements real quick and go from center to center to see what your crossbar spread's gonna be. That's gonna be depending on what accessories you want to use. The rule of thumb usually is not going under 24 inches of crossbar spread. We have ours at 31 today, so you'll measure both sides. That also helps you make sure they're even, and then, look at the overhang on the bars as well. We have about four inches of overhang. Again, measure that on each side while it's loose that way you can make sure everything's in the right spot. And I'll bring the band around and attach it here at the bottom of the tower. And since we've already got our measurements, we know it's in place. I'm gonna get a tool and we'll tighten it down. Come back with our tool. We'll go right here to this bottom bolt and start tightening that up. And as I turn you're gonna see the band tighten up against the raised rail. And the same idea with the clicks, it'll let you know when it's tightened down and properly. Now when we're done, we'll just slide on the covers. Overall, not too bad to install. They give you the one tool you need. Didn't take me that long to get them attached to the raised rails. That makes it nice. Just make sure you get those measurements to get even on both sides and that crossbar spread's really important depending on what accessories you're gonna throw up there, so. You're gonna put up a cargo carrier or maybe some ski carriers. Just make sure you've gotten the right spacing for those. Well, I think that does it. Thanks for hanging out and hope this helped.


Do you have a question about this Roof Rack?
Info for this part was:
At etrailer.com we provide the best information available about the products we sell. We take the quality of our information seriously so that you can get the right part the first time. Let us know if anything is missing or if you have any questions.


Thank you! Your comment has been submitted successfully. You should be able to view your question/comment here within a few days.
Error submitting comment. Please try again momentarily.