
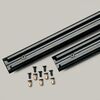
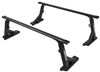
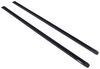
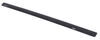
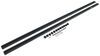
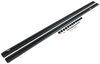
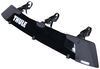
Yakima BaseLine Roof Rack for Naked Roofs - JetStream Crossbars - Aluminum - Black - Qty 2


To see if this custom-fit item will work for you please tell us what vehicle you'll use it with.


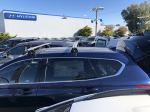
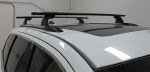
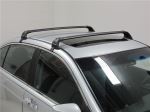
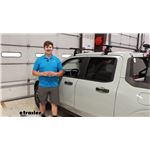
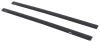
This stylish, aerodynamic Yakima roof rack gives you the space to carry gear on your vehicle. Rubber strips in the top channels push down to load carriers or accessories - no need to trim. Install to your vehicle's naked roof.
Features:
Specs:
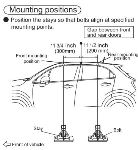
 Alternate Instructions
California residents: click here
Videos are provided as a guide only. Refer to manufacturer installation instructions and specs for complete information.
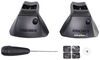
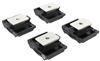
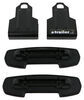
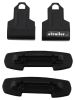
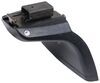
Hi, everyone, Aidan here with etrailer. Today, we're gonna be taking a look at the Yakima BaseClip Fit Kit for your Yakima BaseLine FX Roof Rack Kits. Now, this is gonna be the rubber pad and the clamps that actually hold the whole roof rack system in place and make it a custom fit for your various different vehicles. Now, that being said, there's tons of different kits out there on our website for different vehicles, all of those pads are gonna be molded somewhat differently to adapt to different roof shapes, so do plug in your vehicle information into our fit guide and find the right fit kit for you and your vehicle, but it's gonna be a look at the overall system, how it works, and how it functions with the roof rack. So the main two parts of this are gonna be the rubber pad and the clamp, but let's talk about that rubber pad first. It's gonna be custom molded to your vehicle, so you can see really well right here on this lip, it forms around that ridge on the roof and fits snugly into place there to make sure that nothing is moving around and it's fit custom to that area.
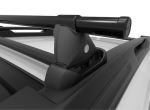
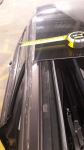
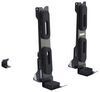
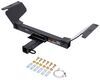
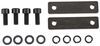
Now, the base of that fit kit is what actually clips into the tower here and serves as the connection point between the crossbar roof rack system and your vehicle. That rubber base to it is going to give you the maximum protection and make sure that you're not scratching or scuffing any paint on your roof, and it keeps things nice and sealed up. Now, the stainless steel clip is what also helps to secure it to our roof, that's gonna be the second main component. It's a stainless steel construction and a black powder coat finish, the finish helps it match the whole roof rack system, but it all helps it resists rust and corrosion. Now, the inside of those clips are gonna have a rubber padding, again, so there's no metal on metal contact with our paint or anything, and then you can see here, it's custom fit, hooking inside our door jam, and whenever I close the door, it'll just fit right around there, making sure that it's a nice custom fit.
It attaches up inside the tower right up through here, and it just tightens down, hooking into a slotted opening hole, and then that's what gets it all secured and what helps it join into the tower system. These fit kits come in pairs, one for the passenger's side and one for the driver's side. Now, the reason they do that is because depending on your vehicle, you're probably gonna have a different fit kit for the front and rear. Yakima does a lot of research and development into making sure it's a custom fit for the vehicle, and the one we have it on here today, the Honda Civic, is a perfect example. You can even visually see how much longer the clamp at the back is compared to this clamp up at the front.
So clearly, we're gonna need a different kit for the front end, because there's just less distance for that clamp to travel. So again, plug in your vehicle information to our fit guide, make sure you find the right kits for you, and make sure that you also have the right set for the front and rear. But that's really all there is to it. The BaseClip system is gonna work really well in tandem with that BaseLine roof rack system, and it's really just coming down to making sure you get the right fit for your vehicle, because without that fit kit, you don't have a roof rack. But that'll do it for our look at these BaseClip Fit Kits for your Yakima BaseLine Roof Rack Systems.
Thanks for watching.
Info for this part was:
At etrailer we provide the best information available about the products we sell. We take the quality of our information seriously so that you can get the right part the first time.


Thank you! Your comment has been submitted successfully. You should be able to view your question/comment here within a few days.
Error submitting comment. Please try again momentarily.