


Thank you! Your comment has been submitted successfully. You should be able to view your question/comment here within a few days.
Error submitting comment. Please try again momentarily.
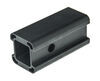
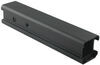
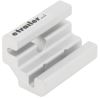
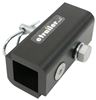
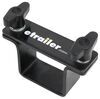
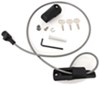
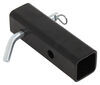
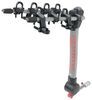
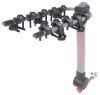
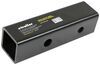
Replaces the 2" hitch adapter bracket and hardware for your Yakima RidgeBack or FullTilt bike rack. Converts the 1-1/4" shank to work with your 2" hitch receiver. Includes the adapter bracket, wedge spacer, M8 bolts, and hex wrenches.
Features:
Fits:
Videos are provided as a guide only. Refer to manufacturer installation instructions and specs for complete information.
Hi everyone. Aiden here with etrailer. Today we're taking a look at and showing you how to replace this two inch shank adapter with the additional wedge piece for your Yakima full tilt or Ridgeback bike racks. Now, maybe you only need to replace this piece or you're looking to replace both. It comes with all the hardware you need and we'll walk you through that process right now. So we're just gonna remove this from the hitch first.
Now, there's nothing wrong with ours, but we'll walk you through the process and let's say maybe part of yours is damaged or completely broken off you'll need to get it removed. You'll take your smaller included Allen wrench to remove the wedge block first. Now the two screws, one on the top and then one on the side that will use our smaller Allen key for and we can set that to the side. And for the actual adapter piece we'll use our larger Allen key again slotting it on the side and removing that screw. Now getting this removed, it's on there really snugly.
Once all the screws are removed you might just have to grab a hammer or a mallet and just give it a little bit of a tap at the bottom here, try to focus that on the edge. You can see it starts to remove itself and then from there you can get a little bit better leverage to pry it off without using any extra persuasive force. And if need be you might have to shove that anti-rattle block back in by hand to get that over 'cause it does kind of wanna pop out like that. Then we can grab our new one and put it in place. The new one will slide over but it all installs in the same reverse order of the pieces we took apart.
All of these screws are provided so, if yours are damaged or you don't have 'em, then no worries. You don't need to go and dig those parts up. It comes with new ones. And when installing the new block just make sure you have it in the correct orientation where this thicker portion here is facing the bottom of the shank and everything will line up just fine. With everything reinstalled, you can go ahead and test it out in the hitch.
Everything slides in perfectly fine. And then we can test out that anti-rattle knob to see if it takes that shake and play out of the hitch like it should. Definitely feel it tightening up and as we turn it, it's getting more tension until finally it's left with no shake or play inside the hitch. So we're good to go. Overall, it's a pretty easy install and replacement process so if it is damaged you can get that part and get it replaced in no time. Thanks for watching..
Customer Satisfaction Score:
94% were satisfied with this product
6% of customers were not satisfied
Ratings & Reviews


John

6/20/2026
After a year, I have gotten much use out of my bike rack!


Do you have a question about this Accessories and Part?
Info for this part was:
At etrailer we provide the best information available about the products we sell. We take the quality of our information seriously so that you can get the right part the first time. Let us know if anything is missing or if you have any questions.

























Chris
5/18/2026
It works just as designed, functionally. And I get to drive to trails to ride easily. And my wife nags me less about exercising.