Drop-in bathroom sink setups make RV swaps straightforward and secure. Verify your cutout and flange dimensions; some installs may need minor trimming or new screw lengths, and sealing with clear silicone is common. If the drain doesn't thread, ABS/PVC cement can be used, and reusing an existing faucet can work when the hole layout matches.
Some RV Drop-In bathroom sinks use a glue-on drain tailpiece rather than threads. Check if yours needs ABS/PVC cement and dry-fit the parts to confirm alignment. If it doesn't thread on, have the cement ready and avoid overtightening. Verify trap size compatibility before bonding.
Installation is typically straightforward for a Drop-In bathroom sink. Directions are easy to follow, but access under the vanity can be cramped, making screws and tabs tricky once the sink is set. Test-fit first, then seal with clear silicone; if the drain isn't threaded, have ABS/PVC cement on hand. Verify faucet hole layout if reusing your faucet.
Silicone sealant is commonly used around the rim to set a Drop-In bathroom sink. Some installs used double-sided tape around the edge, then caulked to seal. Clean the counter, dry-fit first, and tighten mounting tabs or brackets evenly. If hardware isn't included, plan on picking up sealant before starting.
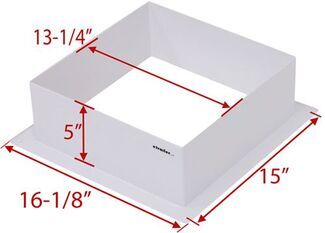
It can, but confirm overall size, cutout size, and flange width for a Drop-In bathroom sink. Use the sink itself as a template if no pattern is provided. Be ready to trim the opening or notch screw holes, and you may need to trim tabs so it sits flush. Check screw length; shorter No. 8s solved a mounting issue.


 10 x 13 Inch
 13-3/4 x 10-3/8 Inch
 14-3/4 x 12-1/4 Inch
 14-7/8 x 12-3/8 Inch
 15 x 12 Inch
 15-3/8 x 12-7/8 Inch
 15-1/2 x 19-1/2 Inch
 15-3/4 x 12-3/8 Inch
 16 x 20 Inch
 17 x 20 Inch
 Filters