
Yakima BaseLine Roof Rack for Naked Roofs - JetStream Crossbars - Aluminum - Silver - Qty 2


To see if this custom-fit item will work for you please tell us what vehicle you'll use it with.


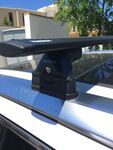
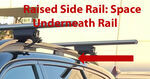
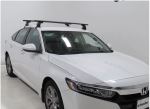
This stylish, aerodynamic Yakima roof rack gives you the space to carry gear on your vehicle. Rubber strips in the top channels push down to load carriers or accessories - no need to trim. Installs on your vehicle's naked roof.
Features:
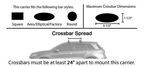
Specs:
 Alternate Instructions
California residents: click here
Videos are provided as a guide only. Refer to manufacturer installation instructions and specs for complete information.
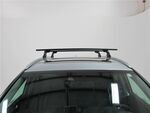
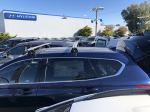
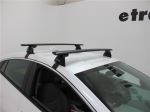
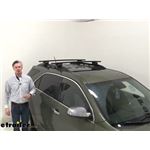
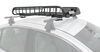
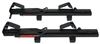
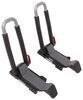
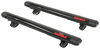
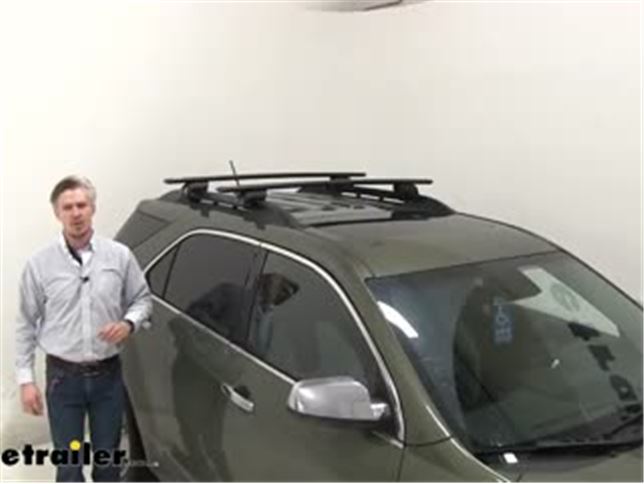
Today on our 2016 Chevrolet Equinox, we're going to be doing a test fit on the Yakima jet frame cross bar Timberline roof rack system. Now this system is specifically designed to fit your raised rails on your Equinox. I've got it set up just to give you a good idea what it looks like. With this system, it's going to allow you to carry roof mounted accessories, things like bike racks, kayak carriers, cargo boxes, and much more.It features 50 inch long cross bars. You can see here how they stretch across the roof of our Equinox. This is going to allow us to carry not one accessory, but maybe multiple accessories.
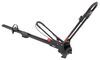
Perhaps you'd like to carry two or even three bike racks up there or maybe even two kayaks. It'll be possible with these. Now I've got the black installed, but they're also available in silver. So if that's something you're interested in, see etrailer.com.Now you'll notice that they're aerodynamic. These are going to be a lot quieter than your traditional round or square bars.
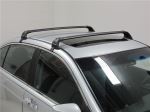
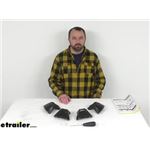
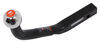
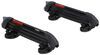
They're going to work with your standard clamp on accessories as well as your T slot accessories. If you'd like to access that T slot, just remove the end cap and we can slide that T bolt right over the top of that rubber strip to our desired location and it'll give us a nice clean look.Four Timberline towers keep our cross bars in place. You can see here how they feature some rubber coating on top and on that strap. Now that strap is not just rubber. It's got stainless steel on the inside and it has a rubber coating on the outside.
That way it has a nice tight fit around those bars. Now the other nice thing about them being rubber is that if we wanted to take it off someday, we don't have to worry about harming or scratching the finish of those raised rails.Here on the inside, you can see here how it's going to protect our hardware from the elements and also help deter theft. It comes with all the tools you need to get these installed. After everything's tightened down, the cover goes on. And if you'd like to upgrade and get more security you can even punch out that plastic core and replace it with a metal core.Now this roof rack system has a weight capacity of 165 pounds.
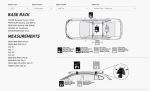
You do however want to check with your Equinox's owner's manual to see if your roof can support that much weight. Now I'm going to give you some clearance measurements. This will give you an idea of how much you've added to the top of your Equinox and it may help you when using those clamp on accessories.From the top of the roof to the under side of the bar is about four and a half inches. From the top of the roof to the top of the bar is about five and a quarter inches. Which as you can see more than enough room between the vehicle and the under side of the bar. We're not going to have any problem using those clamp on accessories.Now that we've gone over the features, I'll go ahead and show you how to get it set up. I've already got my front cross bar mounted to my raised rails on my Equinox. The rear one installs the same way. Let's go ahead and do it together. So I've got one of my Timberline towers in place. We just need to repeat the same process on the other side.The easiest way to do this is to turn the cross bar over. You want to be sure to remove that end cap off the side. And then we want to take our Timberline tower and we need to install these two pieces here so we can adapt it to our jet stream cross bar. We'll take the black plastic portion here first. Listen for the click. Then we'll take the T nut here and we're going to put that down over the top. We'll turn over, we're going to hold it in place as we do so. And we're going to push the strap towards you like that. And that's going to free up that hole so we can access that bolt inside.So we'll take our included tool and we're going to tighten that down. And go ahead and tighten it down all the way. And our tool is going to click when it's properly torqued down. Just like that. Then we can turn it over and we need to make sure it's loose on top of here. That way we can easily slide it into our cross bar. So if it's not loose, we'll need to access the bolt in through here and loosen it up. Go ahead and do a few turns there. There we go it's nice and loose. Then we can turn it over and slide it into the channel. So we've got all of this is going into the channel here. And we want to be sure that they strap, the open side is facing away from the bar.So we'll slide it on. And sometimes as we slide it, that rubber weather seal on the under side gets kind of caught. So push it up underneath with your thumb and then you can slide it on nice and easy like that. And we'll take our end cap and go ahead replace that. Now we don't need to worry about setting this in a location. We'll adjust it once we get it on our Equinox's roof. Let's go ahead and do that.Now when we set this in place, we want to set it up to where we're going to have the widest cross bar spread we can. So you can see we don't have a whole lot of room here. So we're going to set it in place here. We want to be sure the round portion of the bar is facing forward. That's going to be the front. So we'll be sure to set it up to where that strap is going to go underneath our raised rails. Just want to be sure this happens on both sides.Now once our rubber strap is fed underneath our raised rails. We'll then need to connect it to the two T here. So we'll bring it up and set it in place. Now if you can't do that, then you'll need to loosen up the Allen bolt here. So once you've got it loosened up enough, you should be able to set it in place. From there, we'll then need to make sure the Timberline tower is center with the top of the raised rail. So we've actually got a little indicator here. You may not be able to see it, but we want that lined up with the top center of the raised rail.From here, I'm going to tighten it up a little bit. Not all the way just yet, because we need to adjust our cross bar spread or excuse me, our bar overhang. Push it out as far as I can to get that max cross bar spread. And then I'm going to repeat the same process on the other side.With it loosely installed, let's go ahead and work on that bar overhang. We want to make sure it's the same distance from here to here on both sides. You can use a tape measure for this or you can just eye it up. Whichever works best for you. So with it loose, I'm just going to give it a good push and push it over. And that looks pretty close. So then we'll just tighten it down the rest of the way. Now again we're going to listen for that audible click in our tool. That's how we know it's properly torqued down. Feel the resistance just about there and perfect.Now from there we want to tighten down the Allen bolt on the inside. And what that's going to do is tighten the wing, tighten the jet stream cross bar to the Timberline foot. Again listen for those two clicks. Then we'll repeat that same process on the other side.Once everything's tightened down, the last thing to do is to put on our cover on each side and we're all set. We're free to load up our favorite roof mounted accessories and hit the road. But that's going to complete our test fit of the Yakima jet stream cross bar Timberline roof rack system on our 2015 Chevrolet Equinox.


Do you have a question about this Roof Rack?
Info for this part was:
At etrailer.com we provide the best information available about the products we sell. We take the quality of our information seriously so that you can get the right part the first time. Let us know if anything is missing or if you have any questions.


Thank you! Your comment has been submitted successfully. You should be able to view your question/comment here within a few days.
Error submitting comment. Please try again momentarily.