Inno Square Bar Roof Rack for Naked Roofs - Steel - Black - Qty 2
Will this fit?
To see if this custom-fit item will work for you please tell us what vehicle you'll use it with.
- All Info
- Reviews (124547)
- Q & A (0)
- Videos (3)
- Photos
Inno Roof Rack - IN63SR
- Square Bars
- 50 Inch Bar Space
- Complete Roof Systems
- Inno
- Black
- Overhang
- 2 Bars
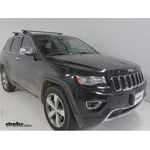
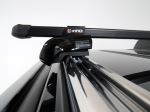
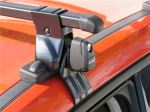
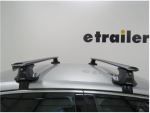
This durable roof rack lets you carry gear and cargo on your vehicle. Hardened steel crossbars accommodate clamp-on accessories. Elastomeric coating protects against corrosion. Installs on your vehicle's naked roof.
Features:
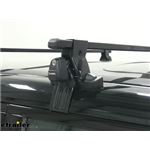
- Complete roof rack system includes 2 square crossbars, 4 square bar feet, and a custom fit kit for your vehicle
- Square crossbars work with accessories and carriers that clamp around the bars
- Lockable leg covers deter theft of the rack
- Hardened steel construction with elastomeric coating protects against corrosion
- Custom installation on your vehicle's naked roof
Specs:
- Crossbar dimensions: 50" long x 1-1/4" wide x 7/8" tall
- Weight capacity: 220 lbs
- Always observe your vehicle's maximum roof load capacity
- Color: black
- Construction: steel
- Limited lifetime warranty
IN-B127 Inno Standard Square Steel Load Bars - 50" Long - Black - Qty 2
IN-SUT Inno Roof Rack Stays for Bare Roofs - Black - Qty 4
K413 Inno Fit Kit Hooks for Flush, Through, and INSU-K5 Stays
Installation Details

Videos are provided as a guide only. Refer to manufacturer installation instructions and specs for complete information.
Video Transcript for Fit Test: Inno Aero Roof Rack for Naked Roofs with 2014 Honda CR-V
Today on our 2014 Honda CRV we are going to be test fitting the inno roof rack system. This is going to be consisting of part numbers INXB108-2. Those are going to be the crossbars. Part number INXS200, those are going to be the flush feet. Part number INK413 and that's going to be the clamp that holds it onto your vehicle. We already have the front one installed. You can see it has a nice shape to it.
It looks like it's part of the vehicle. It has a nice aero-dynamic shape which will cut down on wind noise and drag. Let's go ahead and show you how the rear one installs. We already have it partially assembled on our table here. Let's flip it upside down here. The first thing that we're going to do is slide out this portion here on the side of the arm.
Then we will take our mounting plate and put it into position. You will see that it has a little indentation here at the bottom. That's going to fit into the indentation in our little bracket here. Push that back in and then we will load up our foot. This portion here is going to insert into this area here on our bar. Then we will just slide back a little bit and you're going to look into the instructions, because you want a specific measurement in between each foot.
It is going to be different for both the front and the rear. Once we've got it set to where we need it. We'll take the included allen key, go to the bolt on the inside here and tighten that down in place. Then we will take our foot pad and we will install that as well. That just pushes into position. I'm going to flip this around so you can see it a little bit better.
We will remove this screw at the end, then install our clamp. You just want to get it loosely installed so it stays in place. With that done, we can actually set it onto our vehicle. I'm going to go ahead and open up the two rear doors. Then we will set it on. Be careful not to scratch the roof when you do this. If you are a little nervous that you will, just grab an extra set of hands and that will help you out. Now the next thing I'm going to do is get a measurement for the crossbar spread. That's going to be from the center of the front door jam to the center of our bar. Now let's go to the other side and repeat the same process. That looks good. Now we're just going to double check our first measurement, then we can start tightening it down. Now it also comes with the included tool to tighten this down. First we're just going to snug it up right along this edge here. We will do this on both sides and then we'll tighten it down completely. Once we have it snug, give it five or six turns on both sides to make sure we tighten this down evenly. That's not going anywhere. Now we'll take our covers and place those on and lock them up. With that we have installed our inno roof rack system for our 2014 Honda CRV.
Ratings & Reviews
4.7
879 reviews
See what our Experts say about this Inno Roof Rack
- Cost Effective Roof Rack Recommendation for 2011 Honda AccordWhat we've found with the Sportrack Semi-Custom roof racks like the part # SR1002 is that they don't always fit the best. Reason being they are designed to fit as many vehicles as possible which means they don't fit everything perfectly. The price makes these hard to not be tempted by, but your best option is a fully custom fit roof rack like the Inno part # INB127, # INSUT, and # INK745 otherwise you'll have to get somewhat creative to get the Sportrack to fit right.
view full answer... - Recommended Square Bar Roof Rack Mounts For Ski and Snowboard Rack for 2007 Saab 9-3For your 2007 Saab 9-3 with factory rails, I recommend the Evo Raised Rail Feet for Thule Crossbars - Factory Raised Rails - Qty 4 # TH710401 which is compatible with the bars you mentioned, that are often simply referred to as square bars even though they are rectangular by measurement. I also recommend the Thule One-Key System Lock Cylinders - Qty 4 # TH450400 for increased security. The manufacturer suggests using 50 inch bars which have been discontinued with this system. You can...
view full answer... - Roof Rack for 2010 Toyota Corolla Similar to Thule Square Bar RackThule stopped offering the fit kit you mentioned for your 2010 Toyota Corolla which means that while we have other great roof racks that can be installed on your vehicle we do not have any Thule options. For a rack that is very similar to the Thule square bar racks we have the Inno part # INB127, # INSUT, and # INK593 that fits your vehicle. This rack actually has the exact same crossbar dimensions as the Thule square bars but at a much better price.
view full answer... - Is There Square Crossbar that Can Fit Thule 460 FootHey Dar, so I have good news. The Inno square bars are the exact same dimensions as the old Thule bars so for a set that would fit the 460 feet you have you could use the part # INB127 for a 50 inch set.
view full answer... - Roof Rack Capacity for a 2017 Ford FiestaThe racks you see have a different weight capacity depending on if your 2017 Ford Fiesta is a 5-door hatchback or 4-door sedan. For example, the Rhino Rack that consists of Aero cross bars # RRVA118B-2, legs # RRRLKVA and fit kit # DK046 have a 110 lb capacity if installed on a '17 Fiesta that is a 5-door hatchback but the same rack has a 165 lb capacity if installed on a '17 Fiesta that is a 4-door Sedan. Choosing what model of Fiesta you have will lead you to the correct rack. I've attached...
view full answer... - Recommended Cost-Effective Roof Rack for a 2009 Chevrolet Malibu and a 2012 Nissan MaximaThe SportRack # SR1002 is a Semi-Custom roof rack. It will fit your 2009 Chevrolet Malibu and will work if you are looking for the most cost-effective option out there. If you plan on using the roof rack frequently though I highly recommend going with a custom roof rack for your Malibu. A custom rack is one that uses a fit kit specially designed and tested to fit your roof properly. The most cost-effective option we have in this category is the Inno rack which consists of the Square Crossbars...
view full answer... - Roof Rack Recommendation for 2008 Honda Fit for Carrying Kayak CarrierFor your 2008 Honda Fit the Inno roof rack part numbers # INB127, # INSUT, and # INK219 is a confirmed fit and would do a great job carrying a kayak carrier. For the carrier we have the Thule Hullaport part # TH849000 which will do a great job and is compatible. It's padded, can fold down when not in use, and can be expanded to carry a second kaya if ever needed.
view full answer... - Roof Rack Recommendation for 2006 Chevy UplanderThule does not make a roof rack solution that fits the naked roof versions of the 2006 Chevy Uplander. Closest thing would be the Inno brand roof rack that consists of part numbers # INB127, # INSUT, and # INK585. This won't reuse any of your Thule roof rack but your roof carriers will fit this same square bar style of rack that you had.
view full answer... - Thule Roof Rack Recommendation for 2012 Toyota Camry For a new Thule roof rack that fits your 2012 Toyota Camry the Wingbar Evo rack part numbers # TH711420, # TH710501, and # TH145149 would be a great choice confirmed to fit the vehicle and the bike racks you have as well as long as they can fit aero shaped bars.
view full answer... - Picking Out Fairing for Rhino Rack Aero Roof Crossbars that are 49 inchWhen picking out a fairing you want to go with a length that matches the width of the roof of the vehicle. Since your bars are 49 inches in width you would want to go with a 38 inch fairing # RRRF2 to allow a better match to your vehicle.
view full answer... - Roof Rack Recommendations for the Thule Hullavator # TH898 on a 2010 Toyota FJ Cruiser w/Bare RoofThe absolute best option to mount a Thule Hullavator # TH898 onto your 2010 Toyota FJ Cruiser is by using Inno Square Crossbars. The length of the Inno Square crossbars you need depends on the measurement between the top of your driver's-side door surface to the top of your passenger's-side door surface. This is where the Inno Feet # INSUT mount onto your roof to hold up the crossbars. For example, for the Inno Square 50" Crossbars # INB127 to be the correct size for the Hullavator to...
view full answer... - What Foot Pack Can I Use to Fit My Older Thule Square Bars on My 2014 Subaru XV Crosstrek? If you have older, pre-channel Thule SquareBars, I do have some option for you. If you happen to have raised factory rails on your 2014 Subaru XV Crosstreck, a compatible foot pack that will work is the Inno Feet for Square Crossbars - Raised Side Rails # INFR. This is because the Inno Square Crossbars like # INB127 have the same 7/8" tall x 1-1/4" wide dimensions as the Thule bars. With that being said, there is no solution if you have a bare roof. The only other option is to purchase...
view full answer... - Inno Roof Rack Fit on 2016 Lexus GX 460The Inno square bar roof rack for your 2016 Lexus GX 460 with flush-mounted roof siderails does consist of parts # INB127, # INXP and # INTR152 and it is a complete roof rack system. No other parts are needed to install it. The crossbar spacing for this system on your Lexus is adjustable and the maximum bar spacing is 49-inches between bar centers. You can check the spacing of the installation hardware on your Thule cargo box to confirm that it will be compatible with this bar spread....
view full answer... - Installation Method for Inno Square Bar Roof Rack on 2016 Lexus GX 460If the flush roof side rails on your 2016 Lexus GX 460 do not have a fixed-point mounting system, but rather have tracks like those shown in the linked photo, then the rack crossbars' position will be adjustable. If you see one specific mounting point in the rails then this means the car is intended for a fixed-point rack installation. This Inno rack, composed of parts # INB127, # INTR and # INTR134, works for both roof configurations.
view full answer... - Roof Rack Fit Kit and Feet Compatible with Older Thule Square Bars for 2016 Hyundai SonataI do have a solution for you. It will allow you to use your old Thule crossbars on your 2016 Hyundai Sonata. Your roof rack will consist of the following items: Inno Square Crossbars - Steel - Black - 50" Long - Qty 2, part # INB127 Inno Feet for Square Crossbars - Naked Roofs - Black - Qty 4, part INSUT Custom Fit Kit for Inno XS200, XS250, and INSU-K5 Roof Rack Feet, part # INK602 This roof rack will have a maximum weight limit of 120 lbs. Unfortunately, the new Thule feet do not work...
view full answer... - What Roof Rack is Compatible with My 2015 Toyota Camry's Bare Roof?For a great economic option that will securely fasten to your bare roof of your 2015 Toyota Camry LE, I suggest the following parts: - Inno Square Crossbars - Steel - Black - 50" Long - Qty 2 # INB127 - Inno Feet for Square Crossbars - Naked Roofs - Black - Qty 4 # INSUT - Custom Fit Kit for Inno XS200, XS250, and INSU-K5 Roof Rack Feet # INK872 With this roof rack system, you can leave the crossbars on after installation even when they are not in use. However, I recommend removing the...
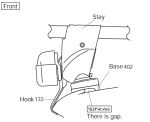
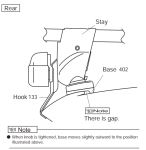
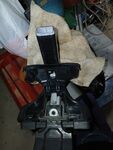
view full answer... - Installing an Inno Roof Rack on a 2007 Saturn IonThe Inno Roof Rack with bar part # INB127 will install its clamps over the trim into the door of the vehicle. Your fit kit, part # INK124 will hook over your door frame and install the foot pack into the bases over the side of your roof's lip. I've included the illustrations from the instructions as a point of reference to how this should look installed. I've included an installation video for the 2017 Nissan Maxima so you can see an installation process on a similar 4 door sedan.
view full answer... - What Roof Rack do You Recommend for My 2013 Toyota Prius with a Naked Roof?For your question, I am assuming you are looking for a roof rack setup on your 2013 Toyota Prius with a naked roof. For a great recommendation that will give you the highest weight capacity for your roof, I suggest the following parts: - Inno Square Crossbars - Steel - Black - 50" # INB127 - Inno Feet for Square Crossbars - Naked Roofs - Black # INSUT - Custom Fit Kit for Inno XS200, XS250, and INSU-K5 Roof Rack Feet # INK865 With this setup, you will get up to 140 pounds of maximum...
view full answer... - Will Inno Square Bar Roof Rack Fit 2015 Honda Fit and Work Well to Carry 2 KayaksThe Inno Square Bar Roof Rack # INB127, # INSUT, # INK876 that you referenced is confirmed to fit your 2015 Honda Fit. This roof rack uses custom fit pads and clamps to provide a secure fit for the roof rack on the naked roof of your Fit. The clamps are designed specifically to fit the curves of your vehicle's doorjambs. The molded pads that install on the bottom of the roof rack feet help to protect your roof from scratches and abrasions. Anytime an accessory installs with direct contact...
view full answer... - Weight Capacity of Inno Square Crossbars on a 2015 Honda Fit The weight capacity, dynamic or static, of any set of crossbars is limited by the lowest part of the system, usually the roof of the vehicle. You will want to verify the weight capacity of your roof in your owner's manual prior to loading the Inno Crossbars, part # INB127 with part # INSUT. According to my research, the roof is only rated to 100lbs. Your total load, including cargo, crossbars and foot pack all together, will need to be less than this capacity, even though the roof system...
view full answer... - What Inno Square Bars do You Carry over 50 Inches Long for My 2022 Chevy Equinox? Yes! We do carry longer Inno Square Crossbars than the # INB127. For longer sizes, here is what we carry: - Inno Square Crossbars - Steel - Black - 58" Long # INB147 - Inno Square Crossbars - Steel - Black - 65" Long # INB165 - Inno Square Crossbars - Steel - Black - 71" Long # IN434 - Inno Square Crossbars - Steel - Black - 79" Long # IN436L It is important to note that Inno recommends the 50" # INB127 maximum crossbar length for your 2022 Chevy Equinox. If you go with longer crossbars,...
view full answer... - Can Hullavator and J-Style Carrier be Used to Carry Two 40 lb Kayaks on a 2003 Honda OdysseyWe do have an option for you to use a roof rack to carry your kayaks but I am unsure as to the weight capacity of the roof of your 2003 Honda Odyssey. The Inno roof rack that we carry has a weight capacity of 140 lbs which would allow you to use the Hullavator # TH898 and the Hull-A-Port # TH834, but if your roof itself doesn't have a weight capacity of at least 135 (weight of the kayaks and both carriers combined) then you will be overloading your roof. The Thule roof rack options for...
view full answer... - Roof Rack Compatible With The Most Roof Mounted AccessoriesThe majority of rooftop mounted accessories such as bike racks and kayaks carrier are universal meaning that a Thule bike rack will work on a Yakima roof rack and vice versa. If you are looking for a roof rack that is compatible with the greatest variety of rooftop mounted accessory, I recommend using the Inno Square Crossbar System part # INB127, part # INSUT, part # INK758 as square crossbars are generally compatible with a greater variety of rooftop accessories in comparison to round/aero...
view full answer... - Cost-Effective Recommendations to Carry 1 Kayak and 2 Bikes with a 2017 Subaru Impreza SedanI checked out the OEM roof rack for your 2017 Subaru Impreza that you inquired about and it doesn't quite look like any of the roof racks that we have to offer. Typically OEM roof racks will get the job done, but going with a brand like Thule or Yakima will last much longer due to the quality of the work. With that being said, the most cost effective roof rack that we currently have to offer for your Impreza is the Inno square bar roof rack which consists of the Crossbars # INB127, Inno...
view full answer... - Will Inno Roof Rack for 2016 Kia Optima Allow Water to Leak in to VehicleThe door clamp style of roof racks like the Inno part # INB137, # INSUT, and # INK685 do not allow water to leak into the vehicle. If you check out the picture I attached you can see that the clamp actually fits above the door seal.
view full answer... - Recommended Roof Rack and Kayak Carrier for 2018 Honda Civic 2 DoorFor your 2018 Honda Civic 2 Door with a bare roof I recommend the Inno Aero Bar Roof Rack because it will provide you with the quietest rack available for your vehicle. This system consists of # INXB130-2 for the two 51 inch Aero Crossbars, # INXS250 for the Inno Through Feet, and # INK683 for the Custom Fit Kit. In addition to reducing noise during travel, the aero-style bars also offer a really sleek appearance and plenty of capacity to support your 2 kayaks. I have attached a short...
view full answer... - How To Determine Crossbar Placement On A 2024 Ford MaverickHello Warren, I can definitely help. Roof rack manufacturers test vehicle roofs to determine the strongest points. They develop their fit kits to fit in this predetermined spot. So, this measurement will vary from vehicle to vehicle. For a 2024 Ford Maverick, the front crossbar will be placed 12-1/4" back from the top edge of the front windshield. The rear crossbar will be placed about 27-1/2" behind the front crossbar. There may be a bit of front/back wiggle room, but generally you will...
view full answer... - Cost Effective Roof Rack Recommendation for 2011 Honda AccordWhat we've found with the Sportrack Semi-Custom roof racks like the part # SR1002 is that they don't always fit the best. Reason being they are designed to fit as many vehicles as possible which means they don't fit everything perfectly. The price makes these hard to not be tempted by, but your best option is a fully custom fit roof rack like the Inno part # INB127, # INSUT, and # INK745 otherwise you'll have to get somewhat creative to get the Sportrack to fit right.
view full answer... - How to Use Older Thule Square Bars with 2017 Toyota Highlander with Naked RoofHey John, I do have a solution for you but the Thule square bar roof racks changed a few years ago and now their current feet don't work with the older style of crossbar. The new crossbar has a channel that runs along the bottom of it whereas old style did not have this. But we have found is that the Inno square bars are exact same dimensions so you can use their feet and fit kit with the bars you have now. For that you'd need the part numbers # INK666 for the correct fit kit and part...
view full answer... - Roof Rack for 2010 Toyota Corolla Similar to Thule Square Bar RackThule stopped offering the fit kit you mentioned for your 2010 Toyota Corolla which means that while we have other great roof racks that can be installed on your vehicle we do not have any Thule options. For a rack that is very similar to the Thule square bar racks we have the Inno part # INB127, # INSUT, and # INK593 that fits your vehicle. This rack actually has the exact same crossbar dimensions as the Thule square bars but at a much better price.
view full answer... - Cost Effective Way to Carry Two Kayaks on the Roof of a 2003 Toyota AvalonFor a roof rack confirmed to fit your 2003 Toyota Avalon SLE I recommend the Inno Square Crossbar Roof Rack System which is composed of part # INB137, part # INSUT, and part # INK202. This is an excellent cost effective system for you. It has square crossbars as the title states that will accept a wide range of different rooftop carriers. The bars have a 140 lb weight capacity though you will need to check the roofs weight capacity before use. The best way to carry two kayaks on the roof...
view full answer... - Roof Rack for 2013 Ford FocusRoof rack # SR1010 is not a fit for a Ford Focus, is this the one you have? If you let me know what year your vehicle is I can recommend the right fit, but this one is not going to work on a Focus.
view full answer... - Replacement Lock Cover for Inno FeetHi Scott; sorry for the delay on this it took a while to hear back from Inno. The part you need is the Replacement Lock Cover Set for Inno Roof Rack Feet Stays for Bare Roofs # IN97YV. This replaces the lock and cover on the # INSUT. However, this will be a random lock so more than likely it won't match the others on your roof rack. We don't have a way to get a specific lock core for it to remain keyed alike.
view full answer... - Roof Rack Capacity for a 2017 Ford FiestaThe racks you see have a different weight capacity depending on if your 2017 Ford Fiesta is a 5-door hatchback or 4-door sedan. For example, the Rhino Rack that consists of Aero cross bars # RRVA118B-2, legs # RRRLKVA and fit kit # DK046 have a 110 lb capacity if installed on a '17 Fiesta that is a 5-door hatchback but the same rack has a 165 lb capacity if installed on a '17 Fiesta that is a 4-door Sedan. Choosing what model of Fiesta you have will lead you to the correct rack. I've attached...
view full answer... - Recommended Cost-Effective Roof Rack for a 2009 Chevrolet Malibu and a 2012 Nissan MaximaThe SportRack # SR1002 is a Semi-Custom roof rack. It will fit your 2009 Chevrolet Malibu and will work if you are looking for the most cost-effective option out there. If you plan on using the roof rack frequently though I highly recommend going with a custom roof rack for your Malibu. A custom rack is one that uses a fit kit specially designed and tested to fit your roof properly. The most cost-effective option we have in this category is the Inno rack which consists of the Square Crossbars...
view full answer... - Roof Rack Recommendation for 2008 Honda Fit for Carrying Kayak CarrierFor your 2008 Honda Fit the Inno roof rack part numbers # INB127, # INSUT, and # INK219 is a confirmed fit and would do a great job carrying a kayak carrier. For the carrier we have the Thule Hullaport part # TH849000 which will do a great job and is compatible. It's padded, can fold down when not in use, and can be expanded to carry a second kaya if ever needed.
view full answer... - Roof Rack Recommendation for 2006 Chevy UplanderThule does not make a roof rack solution that fits the naked roof versions of the 2006 Chevy Uplander. Closest thing would be the Inno brand roof rack that consists of part numbers # INB127, # INSUT, and # INK585. This won't reuse any of your Thule roof rack but your roof carriers will fit this same square bar style of rack that you had.
view full answer... - Roof Rack, Kayak Carrier and Paddleboard Carrier Recommendation for 2011 Ford Edge with Naked RoofDo you have crossbars on your roof already that run from left to right? Or what does you roof look like now? I can see what would be best option from there.
view full answer... - Roof Rack Options For A 2024 Honda CR-VHey Shelby, Roof rack components are all brand and even model specific so I'll need to know exactly what crossbars you have to find any other compatible components. The # INSUT feet you referenced are for Inno square crossbars. If you want to use them then you would need fit kit # IN45RR and 54" Inno sqaure crossbars # INB137. If you can get me more info on what you have or if you're just wanting to go with a whole new rack then let me know and we can figure out what the best options...
view full answer... - Recommended Roof Rack for 2014 Mazda 3 Without Fixed Mounting PointsIf your 2014 Mazda 3 does not have the fixed mounting points, I recommend the Rhino Rack Aero Bar Roof Rack. This system consists of # RRVA126B-2 for the two 49 inch Vortex Aero Crossbars, # RRRLKVA for the 2500 Series Legs, and # DK406 for the Custom DK Fit Kit. This will provide an extremely quiet roof rack system with a weight capacity of 165 pounds. If you find that your vehicle does in fact have fixed mounting points, you can use the same crossbars and 2500 Series Legs as above,...
view full answer... - Thule Roof Rack Recommendation for 2012 Toyota Camry For a new Thule roof rack that fits your 2012 Toyota Camry the Wingbar Evo rack part numbers # TH711420, # TH710501, and # TH145149 would be a great choice confirmed to fit the vehicle and the bike racks you have as well as long as they can fit aero shaped bars.
view full answer... - What is the Inno Roof Rack Weight Capacity for My 2016 Toyota Tacoma Limited Double Cab?Hello Dana, Yes, the Inno Square Bar Roof Rack for Naked Roofs - Steel - Black - Qty 2 # IN79TR will be a great fit for your 2016 Toyota Tacoma Limited Double Cab without factory rails. As for the weight rating, you are only as strong as the weakest link, the feet are actually rated for 132 pounds, so I cannot recommend putting more weight on the roof rack than that. As you already know, you will want to check your owners manual to see what Toyota says you can put up there, based on my...
view full answer... - Weight Capacity For The Inno Square Bar Roof Rack System For My 2019 Kia SportageThe Inno Square Bar System # INB137 # INSUT # INK686 you will have 132 lbs of dynamic weight capacity. That is the amount of weight you can have on the roof rack system while driving. Plenty of weight for a cargo basket like this one # Y07138.
view full answer... - How to Mount Old Thule Square Bars to 2020 Toyota CamryThanks for the pictures. What you have there are the old Thule square bars. Since none of the current Thule feet are compatible with those crossbars you will need to use the Inno Feet for Square Crossbars # INSUT. The Inno bars are the same as the old Thule so they're compatible with the feet. You will also need the Custom Fit Kit # INK498 to attach them to your 2020 Camry.
view full answer... - Parts Needed to Install Old Thule Square Bars on 2000 Toyota Tundra Access Cab SR5Hey Chris! To install your Thule square bars on the roof of your Tundra you will need the Inno Feet for Square Crossbars # INSUT along with the Custom Fit Kit # INK153. What will you be using the solar for?
view full answer... - Can Old Thule Square Bars Be Mounted On A 2008 Honda Civic 4-Door LX?Hey Matt, thanks for reaching out. There is a solution for using the old-style Thule square crossbars on a 2008 Honda Civic, and it involves using parts from an Inno roof rack. The Inno square bars have the same dimensions as the old Thule bars and they do not have a bottom channel, so they mount the same way. To mount them on your 2008 Civic, you will need the following: - Inno Feet for Square Crossbars - Naked Roofs - Black - Qty 4 # INSUT - Custom Fit Kit for Inno XS200, XS250, and...
view full answer... - Parts Needed To Mount Thule Square Crossbars On 2016 Honda CR-VHello Chad, thanks for reaching out. I do have a solution for you, but first I will need to know exactly what kind of Thule square bars you have. Basically there are new-style and old-style bars. The new-style bars have a bottom channel for mounting the towers. The old-style bars are just a solid bar and do not have a bottom channel. We have solutions for both, just select from the following depending what kind of bar you have. New Style bars: - Evo Clamp Feet for Thule Crossbars - Naked...
view full answer... - Will Inno Ski and Snowboard Roof Rack Fit On Roof Of 2013 Ford Flex Without a Roof Rack? I was able to verify with Inno that you will need a roof rack to use the Inno Ski and Snowboard Roof Rack # INTX726 on your 2013 Ford Flex with the bare roof. They do not have a way to install the rack the way you see in the image you found. The Inno Square bar rack consisting of the Crossbars # INB147, Feet # INSUT and Fit Kit # INK263 will allow you to mount their carrier. The mounts for the roof rack are very similar in the way they clamp to the door frames. We do have the SeaSucker...
view full answer... - Parts Needed To Mount Thule Square Crossbars On 2016 Honda CR-VHello Chad, thanks for reaching out. I do have a solution for you, but first I will need to know exactly what kind of Thule square bars you have. Basically there are new-style and old-style bars. The new-style bars have a bottom channel for mounting the towers. The old-style bars are just a solid bar and do not have a bottom channel. We have solutions for both, just select from the following depending what kind of bar you have. New Style bars: - Evo Clamp Feet for Thule Crossbars - Naked...
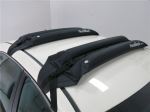
view full answer... - Will Malone HandiRack Universal Fit Roof Rack Fit 2014 Honda CR-VThe Malone HandiRack Universal Fit Roof Rack - Inflatable # MPG452 is a universal fit which will absolutely fit on your 2014 Honda CR-V. In regards to the straps on this rack coming apart, that was in fact due to how it was stored. The manufacturer has detailed in the linked instructions - part of which I have cut out - that it needs to be removed, deflated and stored appropriately. That means it needs to be dry and away from extreme heat or cold, because it doesn't have the strength of...
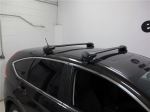
view full answer... - Economical Roof Rack Recommendation for 2014 Honda CR-V With Naked RoofThe roof rack I recommend for your 2014 Honda CR-V with a naked roof is from Inno because it is the most economical option as well as highly functional and safe. The rack consists of: - Inno Square Crossbars # INB127 - Inno Feet for Square Crossbars # INSUT - Custom Fit Kit for Inno # INK413 These are 50 inch square crossbars that are made of steel, have an elastomer coating to prevent corrosion and come with a lifetime warranty. Since you mentioned you wanted to leave the rack on for...
view full answer... - Will Inno Square Roof Rack for 2016 Honda CR-V Carry Two KayaksFor your 2016 Honda CR-V the Inno Roof Rack part numbers # INB127, # INSUT, and # INK413 is a confirmed fit and would be a really great choice to carry a couple kayaks like you mentioned. This uses door frame clamps to secure the rack to the vehicle roof which is a very solid place to attach to. The roof of a vehicle is reinforced quite a bit for safety reasons and even more so at the door frame. Then to carry the two kayaks the # TH830 would be a great option as well as it can carry both...
view full answer... - Inno Fit Kit for a 2013 Honda CR-V with Square BarsIt looks like you have the Inno Square Bar setup on your old Scion. The fit kit you referenced, part # INK225, is not the one that is confirmed to fit your 2013 Honda CR-V. The proper part number for your fit kit is # INK413. These have the parts for the fit kit. Of course, I cannot confirm if this will work for you since I cannot 100% confirm that you have the square bar and the Inno Feet, part # INSUT. If this is the setup you have, then the # INK413 will work.
view full answer... - Thule Roof Rack, Cargo Box and Cargo Basket Fits for 2013 Honda CR-VThank you for your purchase of Thule's Hitching Post Pro 4-bike hitch-mount rack # TH934XTR, which is among their best values in a hitch bike carrier. You'll have no trouble using this bike rack along with a Thule rooftop cargo box. Roof cargo carriers, whether enclosed boxes like the Force XT # TH6356B or metal basket carriers like their Canyon XT # TH859XT, will require a roof rack for installation. This can be a factory-installed OEM roof rack that came on the vehicle or it can be...
view full answer... - Recommended Roof Rack For 2016 Honda CR-V With Naked Roof For Carrying KayaksWe can get your 2016 Honda CR-V with a naked roof set up with a roof rack to carry a couple kayaks, and the option I really like is from Inno. The reason I recommend the Inno is because it uses long 54 inch crossbars, which not only gives you enough space for mounting two kayaks, it also makes mounting them easier, particularly on J-carriers like the etrailer J-Style Kayak Carrier # e98878. The closer you can get the kayak carriers to the edge of your CR-V, the simpler it will be to put...
view full answer... - Will the SportRack Semi-Custom Roof Rack Fit My 2013 Honda CR-V?I have a great alternative rack for you. Unfortunately, the SportRack Semi-Custom Roof Rack for Naked Roofs - Square Crossbars # SR1005 will not fit your 2013 Honda CR-V with a naked roof. With that being said, I recommend the following roof rack system: - Inno Square Crossbars - Steel - Black - 50" Long - Qty 2 # INB127 - Inno Feet for Square Crossbars - Naked Roofs - Black - Qty 4 # INSUT - Custom Fit Kit for Inno XS200, XS250, and INSU-K5 Roof Rack Feet # INK413 The great thing about...
view full answer... - Is there an Inno Fit Kit for the 2018 Honda CR-V Naked RoofI spoke with Inno to check on this for you. There is not a fit kit available for the 2018 Honda CR-V naked roof from them so instead you will need to get a new roof rack from another manufacturer. I recommend using the Yakima JetStream Crossbars, part # Y00425. They're aero-style crossbars with T-slots so they're compatible with most accessories. To mount them, you'll need the BaseLine Towers, part # Y28TR, and the two fit kits, part # Y06188 and # Y06189. I've linked to a video review...
view full answer...
Do you have a question about this Roof Rack?
Info for this part was:


At etrailer.com we provide the best information available about the products we sell. We take the quality of our information seriously so that you can get the right part the first time. Let us know if anything is missing or if you have any questions.










Thank you! Your comment has been submitted successfully. You should be able to view your question/comment here within a few days.
Error submitting comment. Please try again momentarily.