
To see if this custom-fit item will work for you please tell us what vehicle you'll use it with.


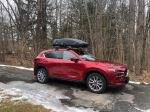
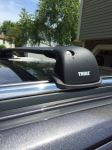
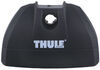
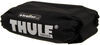
This strong Thule roof rack lets you carry gear on your vehicle. Galvanized steel crossbars accommodate clamp-on accessories. Polymer coating provides extra grip for your cargo. Installs on your vehicle's naked roof.
Features:
Specs:
 Alternate Instructions
California residents: click here
Videos are provided as a guide only. Refer to manufacturer installation instructions and specs for complete information.
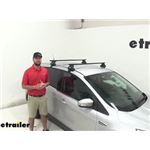
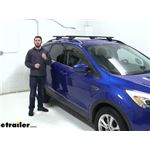
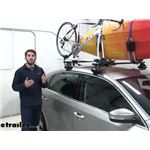
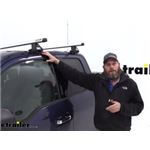
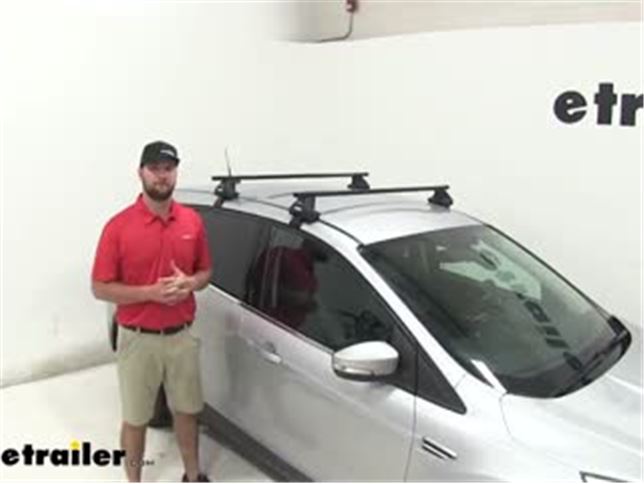
Jake: Hey guys, it's Jake here with etrailer. Today we'll be showing you a little bit more on this 2014 Ford Escape. How to install the Thule Evo Clamp Feet with the square bar crossbar and our custom fit kit for our Escape. This is going to allow you to carry any of those elongated items or a bike or a cargo basket. You're going to be able to put that up on top of your roof rather than hauling it inside your car. It's just going to make more space for any family members or pets.
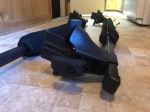
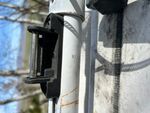
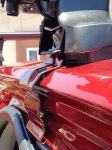
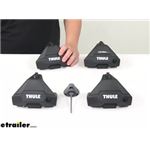
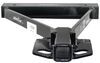
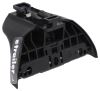
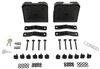
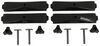
Starting here at the bottom, you're going to have a fit kit that's customized to your Ford Escape. It's going to have these contours. It's going to match those contours of your vehicle. This is going to be a rubber coated steel hook. That's going to clamp on the underside of your door and it's designed to fit a specific spot on the door.So make sure you get those measurements right.
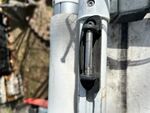
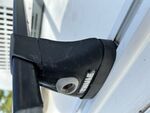
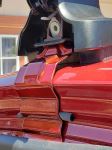
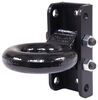
Moving up the scale here, we have our Evo Clamp Foot. You can see on the inside here, you're going to have your bolt, to which you tighten it down with. And the way this tightens down to your crossbar is you're going to slide it into the end of your crossbar. And it's going to pull that crossbar down onto the clamp foot, holding everything nice and tight, and that's going to ensure for a nice clean look. And up here on our top crossbar, we're going to have this nice rubber coating on the outside of your crossbar to protect her from any scratches or abrasions and to help things from sliding on it when you put those accessories on top.
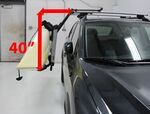
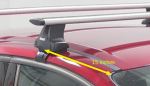
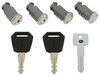
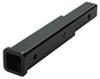
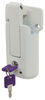
When you're all done, you can put your end cap on and you can replace this with Thule lock cores, if you want more security for your roof rack. Now the crossbars we have on our Escape today are going to be our 53 inch crossbars.These are going to have little to no overhangs, so you're not going to be able to put anything on the outer most edge. If you want more overhang, you can get overhang all the way out to your mirrors. I wouldn't go any further than that though. And this is going to allow you to put accessories on the outermost edge.
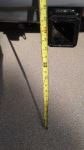
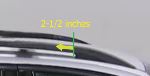
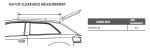
On the outside of your feet. This square bars are going to have a 220 pound weight capacity. They're going to have a more rugged look than the arrow bars or round bars, but with that comes a little bit more wind noise and drag. So just keep that in mind. Now just a couple of measurements for you guys, from the top of your roof to the bottom of the crossbar, it's going to be about two and a half inches. So this is going to be more than enough space to be able to operate a sunroof.If you have one, just want to be sure you get these accessories on there before you open your sunroof. From the top of your roof to the top of your crossbar is going to be three and a half inches. So just keep that in mind, because you have added that much space to the top of your roof for any of those close quarter situations. And with all that being said, let's go ahead and take a closer look at how to get it installed. It's an easy assembly. We'll go ahead and show you how to get it installed. First, you'll start with your foot pack and we'll take your Evo Foot Clamp, and you can put your fit kit on it.Make sure you push it down and around on until this part hooks onto the actual clamp itself. And you can take your clamp and slide it into place. You're going to want to hear that click and that's it and it won't come out. Now we'll do the same for the other foot and then get them on our bars. So in order to get in place on the bottom of our crossbar, you're going to want to push in on those two gray buttons. The buttons are going to be on the outside then slide it into the T slot. So per your instructions, they're going to give you a measurement to where it's going to fit either the front or the rear crossbar. We're doing the rear, so you're going to want it at 40 and a half on the little marker scale there. And we can go ahead and get our bar in place.Now, in order to get it in place, you're going to want to open both doors. Just want to kind of loosely set it in place until you get your measurement for your crossbar spread. So your first crossbar, when you put it in place, it's going to be 12 inches from the edge of your windshield to the front of your foot pack. And then we can measure from the front of our crossbar to the front of the rear crossbar and that's how we're going to get our second measurement. That measurement is going to be 27 and a half inches. Looks like we we're a little off there, move it back. Now we can adjust the other side. Now with our crossbars in their correct spots, you can go ahead and begin tightening down our crossbar.And you want to tighten down a couple of turns on each side, you're going to want to make sure that your foot pack is in the right spot. You'll see there's a little notch that's made for this slot here, and I'll pull it over and then continue tightening. But you want to go back and forth to make sure you get it even on both sides. Now what's really cool about this tool, that Tooley supplies you with, is it's going to let you know when it's torque to the right specifications.You're going to hear that clicking noise, which means it's tight enough. I'm going to go ahead and get our end cap in place and put the end cap on our bar..


Do you have a question about this Roof Rack?
Info for this part was:
At etrailer.com we provide the best information available about the products we sell. We take the quality of our information seriously so that you can get the right part the first time. Let us know if anything is missing or if you have any questions.


Thank you! Your comment has been submitted successfully. You should be able to view your question/comment here within a few days.
Error submitting comment. Please try again momentarily.