

 Arrives before Christmas
 To see if this custom-fit item will work for you please tell us what vehicle you'll use it with.
Thank you! Your comment has been submitted successfully. You should be able to view your question/comment here within a few days.
Error submitting comment. Please try again momentarily.


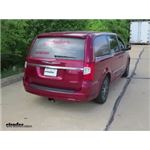
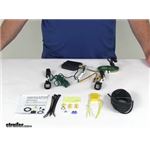
Quickly and easily install a 4-way trailer connector on your Chrysler Town and Country with this custom harness. T-connector plugs directly into existing wiring. Powered converter reduces strain on wiring system and is made using SMT to ensure superior performance.
Features:
Specs:
Installation
This custom-fit T-connector plugs into your vehicle's wiring harness, which is located behind the driver's-side and passenger's-side tail lights. You will have to remove the tail light assemblies to access this harness. Once you've plugged in the T-connector, run the hot lead up to your car battery. Connect the lead to the included fuse holder, and then connect the fuse holder to the positive terminal on your battery.
Once installation is complete, the 4-way connector will be stowed in an out-of-the-way location within your cargo area.
It is recommended that you use a small amount of grease on all electrical connections - the plugs on your automobile and the 4-pole connector itself - to help prevent corrosion.
A tail light converter is built into this T-connector. This converter is a circuit-protected, battery-powered unit that bypasses the electrical routes that are used by a basic wiring harness. As a result, there is virtually no draw on your tail light circuits.
Curt builds each tail light converter using surface-mount technology (SMT). This method of construction involves soldering electronic components directly to the surface of a printed circuit board. SMT eliminates the need for leads, which are used in older through-hole technology. The result is a circuit board that is smaller yet provides more routing area and that offers superior performance, reliability and durability.
Circuit boards constructed using SMT have been shown to perform better under rough conditions with excessive vibration than those made using the through-hole method. And where would vibration be more likely to occur than in towing applications? Curt converters also produce less heat, leading to increased durability and longer life. In addition, lower levels of resistance ensure better performance, especially for parts that operate at higher frequencies.
Each Curt circuit board is made using high-quality components that are pieced together in the most technologically savvy fashion, leading to greater predictability and reliability in functioning.

California residents: click here

Great products, cheapest prices, free and fast shipping (over $150.00). You can't go wrong.
I purchased this Curt wiring harness (made in USA) over the other cheaper option, and it was a good decision. The installation went reasonably well and most importantly when I got all done it worked. You really need to plan where all the wires are going to be routed before you start. The flat connector and the black power wire I routed inside the car, and the right light taillight under the frame. I put the flat connector inside the compartment where the jack is stored and when I need it I just pull it out.
Hints:
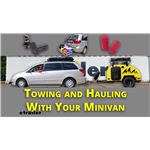
Review the online video before you start, it gives you a good overview of what to expect.
Make sure you install the control box as low as possible in the light well otherwise you will not have enough green wire to run to the other light.
Use black tape on all the connectors to make sure they do not come apart.
Running the wire inside the vehicle was pretty easy. I fished the wire under all the inside trim panels and went through the firewall in the same place the hood release cable did. It was a lot cleaner and I did not have to deal with where to attach the wire under the car.
Areas that could be better:
The installation instructions are pretty basic, and could use some help. Make sure you stare at the wiring diagram before you start the install.
The green wire that goes to the right side light needs to be at least a foot longer. You have to be real creative in routing the wire to get it to fit. I had to re-run the wire several times to get it to fit.
The double stick tape to attach the control box to the light compartment does not work well. The area you need to put the box in is not flat thus making the tape unusable. I ended up putting two strips of duct tape on it to hold it in place
Howdy, I installed this on a 2016 town and country touring, when I ran the positive wire unlike the guy showing the video install running the bare black wire I chose to cover it with 1/4 Inch Wire Loom Split Tubing then wrapped it friction tape, I also covered the green wire from left side light to the rite side with 1/4 Inch Wire Loom Split Tubing, I used 1/2 Inch Wire Loom Split Tubing from the base of wire box down to hitch.
Yes the install took much longer than the video but the wires are far better protected from vibration. The only reason I didn't give 5 stars was the lack of suggestion of protecting the wires but again that was my choice.

Everything was easy to install. But a year in the reverse light on one side didn’t work and the turn signal was out to. So I disconnected the whole trailer wiring from the main harness on the van and then the lights worked.
Service from e-trailer was awesome. I'm giving this product a 4.5. my reasons are personal to me since I was an aircraft electrician for Boeing. I really prefer to have protective sleeving on wiring that may be subject to abrasion,and/or heat. I added sleeving where I could to the harness. Just something perhaps to pass on to the manufacturer.
My husband is very pleased with the new hitch & was ESPECIALLY HAPPY about the clear installation instructions on the video that showed him exactly what to do. EXCELLENT. THANKS!!
Quite a challenge to self-install because I installed it on my driveway without any lifting of the frame. I did take the driver side rear wheel off to ease the installation over the axle.
The instructions and a sticker on the power wire greatly stresses the importance of mounting the module in the cabin of the vehicle or somewhere similarly protected from the elements. The way it is made would require using an 1 1/4 hole saw to pass the module through or wire connectors if you pass it through from the inside to the outside. I reviewed the two videos one trailers website. I had to laugh as one guy sticks it right to the hitch and the other guy sticks it in the tail light well. The tail light well was my thought prior to viewing the videos so I felt better about putting it there even though it was clear from the water marks that water does enter the week when it rains or during a car wash. I took a chance. It says it can cause it to start a fire if in contact with water.
I also felt the could have provided additional wire ties to secure the power wire fro the rear to the battery. I purchased more to get it done. I didn’t like running that power wire from back to front but I am not well schooled in the newer LED electrical requirements so I installed as directed. It works fine. My trailer has incandescent bulbs. It seems to power them ok . I haven’t tested in for more than a few minutes. Hopefully I’m good to go.

Victoria H.
3/20/2025
Thanks for taking the time to share your insight Rick! It’s always a bit of a gamble when it comes to water exposure, but the mounting location you chose shouldn't be an issue. This install can be tedious but you got it done, and it sounds like its working fine and is ready for a trip. Keep up posted on how this works long term!
This is necessary if you order a Towing hitch.
Great product. While I did wire it up, I did have my local oil change and car guy slap the receiver up and bolt it in. I am hitting 75, and just don't have the muscle for that anymore....real easy when it was up for its oil change!!!
After reviewing what must be a dozen different tow hitches I finally decided on this one for several reasons. First, its custom made for my application, which happens to be a 2011 Town n Country. But there are several years with this configuration. Unfortunately I was alone in my driveway to do this install. But because it was made just for my situation in went right in like it should. In fact all the holes lined up so perfectly I was able to hand tighten the screws back in. Too easy. They also provide how-to videos which are very useful. I bought the light package and it too was a no-brainer to hook up since they've taken most the work out of the struggle of figuring out what goes where. The only problem was in the UPS delivery where they had torn a large cash in the box and the instructions must've fell out in transit since there were none. etrailer's video says to reference those instructions for the correct torque. I wasn't worried tho' as I tightened them real tight and then welded to my satisfaction. And if, like me, you've ever had a hitch come loose out on the road you'll learn to tack those on after you've bolted them up. Either way this was a great fix for my application and I would do it again without hesitation. Good luck!
Lance

5/10/2021
Its working exactly like it should. And really, when you buy a custom hitch made for your vehicle and follow up with a few welds there really is nothing to go wrong. If I get another vehicle and need another hitch I wont hesitate to get it here and I wont have to spend the usual two hours researching the market first.
The hitch has worked flawlessly! It is sturdy, dependable, and easy to hook up to. Electric hook up works great also.
Excellent! Fits perfect with slightest trimming of air dam, as stated in instructions.
This wiring kit was easy to install and I do recommend it. Also eTrailer was quick in answering questions.
Install was straight forward and easy.
Fit factory plugs perfectly.
I mounted the box behind the drivers tail light and since my van is a Ram CV, it doesn't have anything in the back, and I found a factory plug for the 3rd row entertainment system tucked in the quarter panel for the 12v power so I didn't even have to run a new power wire for it.
Plug and play easy install. Fast shipping. Videos on trailer website make it easy to install like a pro and save a ton of money.
Installing this without a lift would have been much more of a challenge. Routing the power lead wire from the battery to the rear of the vehicle was the hardest part. I followed the brake lines. The actual harness was very nice, but the lead on the drivers side should have been longer to allow for easier mounting of the control box. All in all, not too bad
Your wiring harness worked flawlessly.. ..thanks
Connectors and wire length fit great. About 15 to 20 minutes installation
The hitch and accessories are great and were easy to install. Videos helped a lot. The only thing I would say is the packaging was very beat up upon arrival. Nothing was damaged or scratched but the entire contents of the Curt T-Connector kit was spilled out into the bottom of the box which had numerous holes it obviously from UPS handling. Nothing was missing but that's surprising considering the size of the holes ripped in the box.
Easy install and worked great! A bit hard to route the 12v wire woth the vehicle on the ground, but doable.
It’s sure beefy and strong. Easy to install according to the directions and movie short. Haven’t installed it yet. Appointment 1 days from now.
Easy install. Finding the clip to undo the taillight wiring harness was the most difficult part!
Do you have a question about this Custom Fit Vehicle Wiring?
Info for this part was:
At etrailer.com we provide the best information available about the products we sell. We take the quality of our information seriously so that you can get the right part the first time. Let us know if anything is missing or if you have any questions.


Heather A.
5/5/2025
Hi Matt, thank you for the picture. The plug that you will need to plug into is behind the taillight not on the taillight itself. You are plugging into the black plug that you disconnected that gray plug from. Let me know if you need anymore help.