


Trouble Removing The Locking Nut On The Yakima ForkLift Roof Mounted Bike Carrier
Updated 07/29/2024 | Published 02/25/2019
Products Featured in This Question
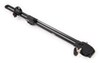
Question:
I want to remove the bike rack for the winter, but I cant get the locking nut to release. Any suggestions?
asked by: Cary
Expert Reply:
In regards to the Yakima ForkLift Roof Mounted Bike Carrier part # Y02098, you will first want to make sure that the lock core is in the unlocked position. If you can't get the lock core in the unlocked position then please let me know as this is a separate issue. In order to remove the locking nut on the ForkLift you will first want to spray it down with some lubricant and let it sit for around an hour or so.
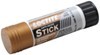
After the lubricant has had time to soak into the threads you can try to give the bolt and or nut a light tap with a hammer to release some of the dirt. If the tap with a hammer did not allow you to release the locking nut by hand then what you are going to want to do is take a towel, wrap it around the grooved part of the nut, and then take a set of pliers (preferably channel locks) and use them to turn the nut until it breaks loose. Over time dirt and debris can get inside and on the threads which will cause it to become difficult to remove as with any nut and bolt exposed to the elements. In order to prevent this occurring the next time you need to remove the bike rack you can use anti-seize like part # LT37616 on the threads of the bolt.


Product Page this Question was Asked From
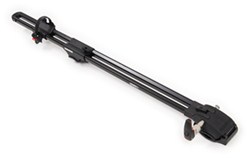
Yakima ForkLift Roof Mounted Bike Carrier - Fork Mount

- Roof Bike Racks
- Fork Mount
- Locks Not Included
- Aero Bars
- Factory Bars
- Round Bars
- Square Bars
- Clamp-On
- Yakima
more information >

Continue Researching
- Q&A: Bike Stuck In Yakima Forklift By Skewer Bolt
- Shop: Replacement Hitch Hardware for Yakima HoldUp Bike Racks for 2" Hitches
- Shop: Replacement SKS Lock Core for Yakima Racks and Carriers - A147
- Shop: Replacement 2" Hitch Shank for Yakima HoldUp Bike Racks
- Q&A: Replacing the Anti-Rattle Nut in a Yakima HoldUp or DryDock Shank
- Video: Firestone Ride-Rite Air Bags with Easy Mount Compressor Feature Breakdown
- Shop: Curt Powered Tail Light Converter with 4-Pole Flat Trailer Connector
- Search Results: trailer hitch
- Q&A: What is the Difference Between a Class II and a Class III Hitch?
- Shop: Trailer Hitch
- Article: Trailer Wiring Diagrams
- Shop: Trailer Wiring
- Shop: Universal Installation Kit for Trailer Brake Controller - 7-Way RV and 4-Way Flat - 10 Gauge Wires
- Search Results: trailer wiring
- Article: Brake Controller 7- and 4-Way Installation Kit (ETBC7)
- Q&A: Lug Nut Torque Chart for Trailer Wheels
- Q&A: What is the Difference Between a 4-Way and 7-Way Trailer Connector
- Shop: Roadmaster 4-Diode Universal Wiring Kit for Towed Vehicles - 7-Way to 6-Way Coiled Adapter Cord
- Article: How to Measure for Trailer Hitch Drop
- Shop: Suspension Enhancement
- Search Results: trailer tires and wheels
- Search Results: trailer jack
- Q&A: Does etrailer Carry Furrion Chill Cube w/ Heat Pump to Replace Dometic Duo-Therm
- Article: Wiring Trailer Lights with a 7-Way Plug (It's Easier Than You Think)
- Video: How to Choose a Trailer Brake Controller
- Shop: Brake Controller
- Shop: etrailer Anti-Rattle Hitch Collar for 2" Hitch Receivers
- Search Results: trailer lights
- Video: An In-Depth Look at the Roadmaster Battery Charge Line Kit for Towed Vehicles
- Q&A: Installation Time for Blue Ox BX1128 Flat Tow Base Plate Kit for 2016 Jeep Grand Cherokee

on Roof Bike Racks














Mckillio
7/27/2024
I also can't get this thing off. I followed your instructions but the threaded part just spins everything and now I can't get it back into the locked position either, so now it's just spinning around while driving.