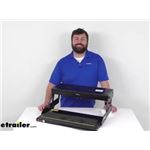
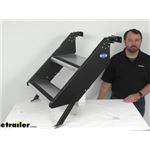
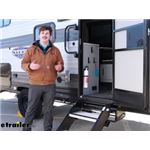
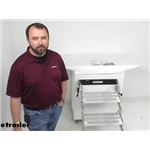
Hey Steven, thanks for all of the info you listed on your Grand Design 310GK! Based on that the correct Lippert SolidStep RV Steps are the #LC791574 that you referenced. This matches your doorway width and is a 4 step like you have as well. Is your…
Hello Brian, Thanks for finding a reason to write into us. Based on your orders, looks like you working on quite the project! Our etrailer 12V Power RV Patio Awning - 15' Wide - 8' Projection - 4-Layer Vinyl - Black Fade #e24QV will come with…
Hey Brian, the correct MORryde Stepabove for your doorway width and height would be the part #MR85RR. This also has a strut assist that comes with it to make it a little easier to raise and lower as well. What kind of steps do you have now and what…
Appreciate you reaching out Juan! Lippert confirmed that your LCI number is a 1621 pin box. Rota-Flex 5th Wheel Pin Box #LC328330 is going to be a direct replacement and bolts right on. The Rota-Flex pin box is highly rated because it has a pivoting…
You are right on. The 8" rise/drop on the MORryde StepAbove Fold-Down Steps #MR98RR is the height between the steps. The #MR48RR you were looking at has a 9" rise/drop meaning the distance between the steps is 9". The #MR98RR is…
Hey Vernan! Since your Coleman-Mach AC is a 48000 series you need the Soft Start Kit for Coleman-Mach RV Air Conditioners #CM56RR. This is specifically designed to fit Coleman-Mach Series 45000, 47000, and 48000 air conditioners like yours. What kind…
Welcome back Brad! All of our camper steps like the TorkLift GlowStep item #TLA7505 come straight out of the back. We do not have any that go to the side nor do I know of such a product existing. The TorkLift GlowStep item #TLA7505 has 5-step…
I spoke with MORryde and they stated the item number you were given does not match anything they have. Possibly it's the item number that the RV shop uses instead of the manufacturer number? Based on your photos it appears to me that you have a…
If you are measuring at the lip that the screen door rests on, you are likely shorting yourself a little bit. You want to measure from the inside of the door flange to inside of the door flange. I have included a couple pictures that show the…
Yes, the correct replacement part for steps, motor, and control for Kwikee RV Electric Steps, 25 Series at 24" Wide is, #LC369552 for an 8" deep step that has a drop/rise of 7". You can also select the #LC3658373 for the same the…
Hey Sherri, thanks for all of the info from your RV door! Knowing all that yes the MORryde step part #MR48RR that you referenced would be the correct fit and will work great as a set of stairs to get in and out of your RV. What camper do you have?
Hey Cody. As long as you’re mounting to a solid support part of the frame, you’ll be good to install the MORryde Safe-T-Rail #MR54BR on your camper without any issues. Your RV should have a frame around the door to support the door as well as the…
The sales associate I spoke with was very, very helpful. I know very little about cars/trucks and, in my opinion, he went above and beyond to help me determine what I needed to buy! Thank-you so much for your help and especially for your speedy shipment! : I will definitely buy from this company again.
Step Up Your RV Experience with 24-Inch Wide Steps
24-inch wide RV steps offer a perfect blend of safety and convenience, making them ideal for campers and motorhomes. These steps are easy to install, often requiring minimal adjustments, and provide a stable entry point, especially for those with mobility concerns. Enhance your RV's accessibility and safety with these robust steps.
24-inch wide steps provide a broader surface area, making it easier and safer to enter and exit your RV. This is especially beneficial for those with mobility issues or when carrying items. The wider steps offer more stability and reduce the risk of slipping, enhancing overall safety.
Yes, these steps are generally straightforward to install. Many find them to be a plug-and-play solution, though some may require minor adjustments like drilling new holes. The installation process is often quick, allowing you to enjoy your new steps in no time.
Absolutely! While these steps fit most standard RVs, they can be customized with minor modifications like cutting or drilling to suit unique setups. This flexibility ensures a secure fit, even for non-standard applications, making them a versatile choice for any RV enthusiast.
These steps enhance safety by providing a stable and wide platform, reducing the risk of falls. They are particularly useful when paired with handrails or grab bars, offering additional support. This setup is ideal for ensuring safe entry and exit, especially in wet or uneven conditions.
Maintenance is minimal. Regular checks for secure fittings and occasional cleaning to remove dirt or debris are usually sufficient. Ensuring the steps are free from obstructions and the mounting is secure will keep them functioning smoothly for years.


 Filters