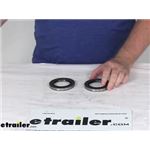
The Replacement Standard Dual Rack Repair Kit for Lippert RV In-Wall Slide-Outs - Fixed Side, #LC84FR is the left side of the slide-out as looking at it, facing it, from the outside. The float side, #LC26VR, will of course be the right side as facing…
Hey Stephen, we have the 16 foot etrailer awning part #e84QV that would work great on your car hauler. How tall is the side of the trailer? It shouldn't be a problem but the arms of this awning are 69 inches tall. We spent a lot of time on our…
Hey John! Since you have the same number of teeth the Replacement 24 Tooth Pinion Spur Gear for Power Gear RV Slide Outs #LC86EX will likely work as a replacement. I would measure the outer diameter as well. If it matches the 1.417" measurement…
Hey Jared, the pass through amp rating of the Rich Solar NOVA 3K12 3000W 12V Pure Sine Wave Inverter with Built-in Transfer Switch for RVs #RS79VR is 30 amps. What AC units do you have? This should be more than enough for that.
Unfortunately, I cannot tell you what wiper seal you would need for your 2004 Keystone Outback. This is not something that is known just from the RV information. It depends on your particular slide-out. The best way to determine what wiper seal you…
There sure is Fran and welcome back! The Blue Ox Tow Bar Cover item #BLU53QV is exactly what you need. This cover will fit the Blue Ox Alpha Non-Binding Tow Bar item #BX7380 perfectly. The Blue Ox Tow Bar Cover item #BLU53QV is made of heavy duty…
Hey Kyle, yes the Flair-It High Pressure Hose #FL37FR does fit on the 1/2 barb fitting of the Flair-It PEXLock Female Elbow Fitting #FL44ZR that you also referenced.
Hello Andrew, good question. Basically the only difference between the composite kits and the standard (non-composite) kits is the application they are used for. Composite are used in motorhomes, the other are used on towable campers. It has to do…
Hello Sandi, Thank you for sending over the pictures. They were very helpful in confirming the correct replacement. Based on the photos, the Lippert Replacement RV Slide-Out Venture Actuator with 18:1 Motor, 24" Long #LC119128 will work as a…
Hi Frank, The In-command system does limit our options for what air conditioners we have that'll work with that system. You can replace your Coleman AC with the Dometic FreshJet 3 RV Air Condition part #DMC94JF and install the Dometic Climate…
Hey Derek, We do have what you are looking for. The correct replacement for the 1510000236 is the Replacement Auto-Programmable Controller Panel #LC26TF. What RV do you have?
You've got both a wiper seal and a bulb seal here with the wiper seals having a track for the bulb seal to slide onto. The Rubber Wiper Seal with Track for RV Slide Out #SR87FR you were already looking at is most likely the closest option to what…
The Replacement Standard Dual Rack Repair Kit for Lippert RV In-Wall Slide-Outs - Fixed Side, #LC84FR is the left side of the slide-out as looking at it, facing it, from the outside. The float side, #LC26VR, will of course be the right side as facing…
Hey Stephen, we have the 16 foot etrailer awning part #e84QV that would work great on your car hauler. How tall is the side of the trailer? It shouldn't be a problem but the arms of this awning are 69 inches tall. We spent a lot of time on our…
Hey John! Since you have the same number of teeth the Replacement 24 Tooth Pinion Spur Gear for Power Gear RV Slide Outs #LC86EX will likely work as a replacement. I would measure the outer diameter as well. If it matches the 1.417" measurement…
Hey Jared, the pass through amp rating of the Rich Solar NOVA 3K12 3000W 12V Pure Sine Wave Inverter with Built-in Transfer Switch for RVs #RS79VR is 30 amps. What AC units do you have? This should be more than enough for that.
Unfortunately, I cannot tell you what wiper seal you would need for your 2004 Keystone Outback. This is not something that is known just from the RV information. It depends on your particular slide-out. The best way to determine what wiper seal you…
There sure is Fran and welcome back! The Blue Ox Tow Bar Cover item #BLU53QV is exactly what you need. This cover will fit the Blue Ox Alpha Non-Binding Tow Bar item #BX7380 perfectly. The Blue Ox Tow Bar Cover item #BLU53QV is made of heavy duty…
Hey Kyle, yes the Flair-It High Pressure Hose #FL37FR does fit on the 1/2 barb fitting of the Flair-It PEXLock Female Elbow Fitting #FL44ZR that you also referenced.
Hello Andrew, good question. Basically the only difference between the composite kits and the standard (non-composite) kits is the application they are used for. Composite are used in motorhomes, the other are used on towable campers. It has to do…
Hello Sandi, Thank you for sending over the pictures. They were very helpful in confirming the correct replacement. Based on the photos, the Lippert Replacement RV Slide-Out Venture Actuator with 18:1 Motor, 24" Long #LC119128 will work as a…
Hi Frank, The In-command system does limit our options for what air conditioners we have that'll work with that system. You can replace your Coleman AC with the Dometic FreshJet 3 RV Air Condition part #DMC94JF and install the Dometic Climate…
Hey Derek, We do have what you are looking for. The correct replacement for the 1510000236 is the Replacement Auto-Programmable Controller Panel #LC26TF. What RV do you have?
You've got both a wiper seal and a bulb seal here with the wiper seals having a track for the bulb seal to slide onto. The Rubber Wiper Seal with Track for RV Slide Out #SR87FR you were already looking at is most likely the closest option to what…
Match your slide-out's wiper or bulb profile and length, then choose the mounting style you need—glue-on, peel-n-stick, press-in, push-on, or slide-on. These seals can be thicker and more solid than flimsy originals and create a great seal. Expect tight spaces during install; a small amount of silicone or seal lubricant helps, and some are sold per inch, so measure your run and leave a little overhang to block daylight.
Yes. Rubber can be hard to slide in tracks, so use a small amount of seal lubricant or silicone spray in the track. Too much makes it hard to grip. For longer slides, push the seal in and then pull from the other side to keep it moving smoothly.
Match the seal to your slide, not the RV make or model. Peel back a section of the old seal to identify the mounting style—Glue On, Peel-N-Stick, Press-In, Push-On, or Slide-On—and note if it's a wiper only or wiper with bulb. Check the side profile and measure the flange or track (example fits include 1/4" thick pinch-weld or 3/16" flange).
Measure the total length where the seals are installed and add a couple inches more for each slide for a slight overhang. That extra bit helps create a good seal so you don't see any daylight. Match the style and dimensions to your original before cutting to length.
If leaks continue after replacing seals, inspect and reseal the roof and seams as needed. Verify track orientation; some point outward and can block a screw-cover strip—use caulk over screw heads to protect the bubble seal. After install, cycle the slide and confirm the wiper isn't curled and is contacting the surface.


 RV Slide Out Parts Parts or Accessories
 Filters