
To see if this custom-fit item will work for you please tell us what vehicle you'll use it with.


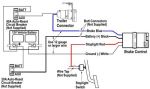
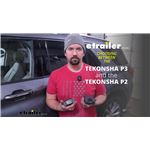
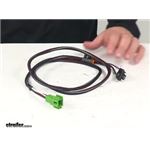
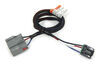
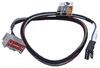
The Tekonsha P3 is a brake controller beloved for its reliability and useability. You're able to save your settings and multiple profiles. It's easy to install, and with the custom harness, it's plug-and-play.
Features:
Specs:
Braking output is the maximum amount of power that will be applied to your trailer's brakes. How much braking output you need is determined by the weight of your trailer; a heavier trailer will need more power to bring it to a stop. You want to go as high as you can without the trailer brakes locking up.
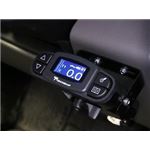
Use the arrow buttons on the front of the module to set the output.
The boost setting controls the aggressiveness of your trailer's braking, meaning how quickly the brakes reach the maximum braking level. If your vehicle takes too long to come to a stop, increase the setting. If it stops too abruptly, decrease the setting.
Depending on the level of boost, your trailer brakes can start at either 13 percent or 25 percent of the set braking output. So instead of starting at 0, the brakes will start at 25 percent and get to 100 percent sooner. This keeps the trailer from pushing your tow vehicle forward.
Boost Levels:
| Approximate Gross Trailer Weight | Boost Level | Increase in Initial Power Output |
|---|---|---|
| Less than tow vehicle GVW | B1 | 13% |
| Equal to tow vehicle GVW | B1 or B2 | 13% or 25% |
| Up to 25% more than tow vehicle GVW | B2 or B3* | 25% |
| Up to 40% more than tow vehicle GVW | B3* | 25% |
*Both B2 and B3 offer a 25-percent boost in initial power. But the braking curve for B3 is more aggressive than that of B2. This means that, even though you will start out with the same intensity when using these boost levels, you will get an overall more aggressive braking experience with the higher level. So if you use B3, you will reach maximum braking sooner than if you use B2.
To engage the manual override, twist the rotary-style lever from right to left. This will activate the trailer's brakes and brake lights independently of your vehicle, great for stopping sway or controlling your trailer's momentum in an emergency.
The P3 is able to store your settings in multiple profiles so that you can have them ready to go for different trailers and drivers. Even the display is super customizable: you can change the screen color, brightness, and language to make it easy to use.
The P3 makes it easy to troubleshoot problems as they come up, with comprehensible and detailed diagnostics displayed on the screen.
Diagnostic troubleshooting messages include:
Diagnostic warning signs include:
The Prodigy P3 offers advanced safety features to prevent damage to various components of your towing setup.
-Integrated reverse battery protection shields the brake controller and your trailer's breakaway system from shorts.
-When the P3 is not in use, it draws only 3.6 milliamps, minimizing drain on your vehicle's battery.
-Any time your vehicle and trailer are at a standstill with the brakes applied for more than 5 seconds, the hold feature will kick on and reduce power to just 25 percent. This will keep your trailer in place without your brakes overheating.
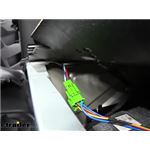
Installing the P3 is incredibly simple. You'll mount the bracket to your dashboard then mount the unit to the bracket. Plug the custom harness into your vehicle and into the unit. Done!
Keep in mind that the P3 must be horizontally level and parallel with the direction of travel to work correctly.
With a replacement wiring harness (sold separately) and replacement bracket (TK5906 - sold separately), you can even transfer the Prodigy P3 to another vehicle.
Note: If you don't already have a 7-way plug at the back of your vehicle, take a look at our exclusive 7- and 4-way brake controller installation kit (ETBC7 - sold separately).
Proportional braking means that your trailer brakes mimic your tow vehicle's brakes. If you slam on the brakes, your trailer brakes will activate with the same intensity; if you brake lightly, your trailer brakes lightly too. The trailer's braking is in proportion to your vehicle and trailer.
The Prodigy P3 uses an internal inertia sensor to detect how your vehicle is braking so it can send the right amount of braking power to your trailer. It measures the inertia of your tow vehicle and activates the trailer's brakes to slow at the same rate. The result is uniform braking across your towing setup. No push-pull action - just smooth, proportional braking every time.
 Alternate Instructions
California residents: click here
Videos are provided as a guide only. Refer to manufacturer installation instructions and specs for complete information.
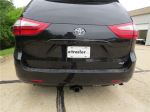
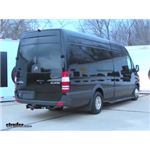
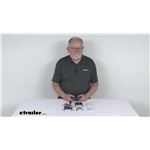
Today on our 2016 Mercedes Benz Sprinter 3500, we're going to take a look at and also show you how to install the Tekonsha Prodigy P3 proportional trailer brake controller for one up to four axles. It's part number is 90195. We're also going to be using the electronic trailer brake installation kit, part number ETBC7 to complete our install. Now here's what our Prodigy P3 is going to look like installed. This is an excellent choice in brake controllers. It's one of my favorites. Basically this is going to handle from one up to four axles.
Now a great thing about the proportional system as opposed to the older time delayed style is that this gives us immediate braking response. If it's just a mild braking situation, the internal sensor picks up on that and it's going to send out medium to low range power back to our trailer. Now in the event that maybe somebody slams on the brakes in front of us and we've really got to get the hammer down on the brakes and get stopped quickly, this is also going to recognize that. It's going to send back to our trailer the maximum that we have set using gain adjustment, which is going to be here. Now you see we're able to set this by tenth, which is going to allow us to really fine tune it. The nice thing about the adjustability is that when your load or your trailer gets lighter or you're in flatter terrain, we'll be able to turn this down.
As we start to get more into a hilly situation, maybe the trailers bigger, it's a heavier load we can adjust this up. That's going to give us more or less braking power back there. We won't have to worry about maximum power going back each time, locking up the tires on the trailer and causing flat spots. Now the button here on the top right, this is our boost control button. Right now you can see there's a truck there with just a small trailer behind it. That's not going to really require any boost.
If we go into boost level one, you're going to see now we've got a truck and it's got a tandem trailer behind it. Boost level two, we're getting into gooseneck stuff and boost level three's going to be more your triple or quad axle trailers. Now this boost level changes the quickness and aggressiveness in which our brakes are going to be applied. It's going to change that aggressiveness level and how quickly it's going to ramp up. The heavier the trailer, the quicker we want that affect. Another great feature's going to be the manual override lever here on the bottom.
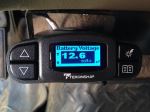
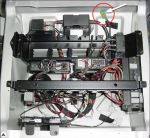
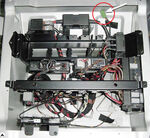
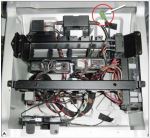
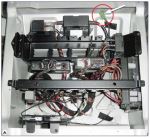
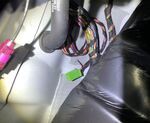
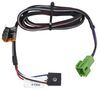
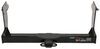
You can see that's going to allow the power output up to whatever we've got set. If there's some kind of an emergency situation like a sway event or something like that, we're going to be able to manually apply the brakes on our trailer without the requirement of applying the brakes on our vehicle. It is removable if you want to switch it from car to car with the removable bracket here. You can do that, storage case is included if you do. They also offer the standard style metal bracket. This is going to make for a more permanent installation, which people prefer. This is typically the way I go. Unless the customer plans on switching it in and out. You won't have to worry about it coming loose or anything like that. We've got our pig tail here. Now to wire up a brake controller, you only need four basic wires. You need a 12 volt power wire. The red wire that needs to go to the cold side of the brake light switch. The white wire needs to go to ground and the blue wire is sending the output or the power out to the brakes to operate it. They're pretty simple in how we connect them but without a vehicle being pre-wired, we are going to have to add a few things. Now in doing that, that's where the ETBC7 kit's going to come in. Not only is this going to allow us to get brake controller power to the rear of our vehicle. But we can also pick up 12 volt constant power and reverse light signal if required. You can see it's going to offer a seven pole round plug and also a four flat plug, if you have different type trailer connections it's going to work on most of those. Then we've go tour bracket for mounting. Now if your hitch has a tab on it already, you should be set. If it doesn't have a mounting tab on it, part number 18140 be what you're looking for. It's just a universal mounting bracket. They give us some butt connectors here to use to make our connections. Now in making these connections outside of the vehicle we're going to switch these for heat shrink. If it's inside the vehicle we're going to be fine to use those. The heat shrink option is DW05745. We also have a couple of quick connects here. Now this is going to allow us to splice in but we have found sometimes with the tabs and the way they work that, that can cause damage to the wire. We typically switch these out and make a splice with a butt connector rather than a quick splice. We'll show you how that works. Also, a test light, if you decide to pick up that reverse signal. You can test for that right here and know exactly where to hook up your purple wire. Customer has not requested that on this on, so we're going to skip over it. But that does allow you to find that signal. I'm going to start here by doing a few things. One we're going to attach the bracket to our plug. We've got four attachment points. You can see we've already got three of them in there. Just want to take the screw, has kind of like that cylinder shaped head on it. Those are designed to be recessed down in the plug. We've got a lock nut with a serrated lock washer on it. Just get that up so it makes contact and then most of the time, if you just hold that with your finger we can tighten that up. That's going to be attached to that bracket. They've also provided the screws for you to use to do that. We want to place our bracket right up on our screws there. We need to add on a flat washer, a lock washer and a nut. Now we'll use a 3/8 socket on the bottom here and you'll just want to hold the top with your screwdriver. You can see that's going to give us a nice solid attachment point. Now we do want a working four pole for the system to work. If you don't have a working four pole on the back, you want to get part number 118649. That'll give you your working four pole flat trailer connector here in the back. You can simply plug that right in the back side of the plug. With those connections made, lets take the jacketing off of our duplex wire here. Be careful not to hurt the wires underneath, you don't want to cut those, just want to cut the jacket off. You're going to strip the ends of these off. Now on the end of each of these, we're going to add on DW05745. Now the black wire we're going to connect to the black wire coming out of our plug and the white's going to go to the blue wire. Get that crimped down. Then we can use a heat source. That can be a heat gun, it can be a mini torch or like I've got here just a simple lighter. You can see how that's going to shrink down. We'll know we've got it done properly because it's going to be a little bit of clear gel that'll run out of the end there. You can see we just want to kind of clean this up. We're going to get everything taped up nicely. Most applications you're not going to have this. This is a air conditioning unit for the limo conversion that this has. What I would recommend to you would be to bring this up and then use some loom clamps running up along your frame rail until you get in front of the axle then you've got your brake lines and things like that that you can follow up. Back here it's pretty sparse though for connections. But if you use like a number 12 self tapping screw part number A0250, it's going to be a small loom. Should fit around your duplex wire there and you can zip tie it off and just self tapping screw right up there. Space them out so you don't have anything hanging down. Then again once you're in front of the axle you're going to have a few more things to kind of run along with. We've got our ground wire here. We want to get this connected up to our frame. Now this one you can see it's got quite a bit of under coating on it, scrape just a little bit of that away. That way be sure we get a good connection to the metal below it. That should be tight enough so when you try to move your ring terminal you won't be able to. Once we get up underneath the drivers seat area here, you'll see the bottom of the battery box. That's that 12 volt connection we're going to be using. We want to separate our wiring at this point because we still need our white wire in the passenger compartment. I'm just going to separate our jacketing there. We're going to mount our breaker right up here on this panel. We'll trim off our wire there appropriately. We'll strip back both ends of it. Now onto the end of each of our wires here, you're going to add one of the ring terminals with the small hole. Now we'll grab our 40 amp breaker, we're going to use our self tapping screws right through both the mounting tabs. We'll mount it right up here on the frame. All right now we can pull the nuts off the breaker there. They're going to have those serrated lock washers attached to them. The wire coming from the plug, we want to connect to the silver side of the breaker. Then we'll connect the side that goes to our battery on the copper side. We'll use a 3/8 socket and just get those tightened down. Cover on the stud, this is also where we connected our 12 volt power for our four pole wiring. We take that off and got a stud right there we use a 13 millimeter to remove. We can cut this wire off to length and we'll add to it one of the ring terminals with the larger diameter to fit over that stud. Put that on the stud and then put your nut back on and get that tightened down. We can place that over, you can see it's not going to fit on there perfectly. If you want to you can modify it by removing a little bit of it just to get it to slide over. White wire, we're getting close to running out but we're just going to continue forward here. You'll probably be going along with the fuel lines here or the brake lines here. All of the fuel lines do look a little bit easier to get to. Now the white wire we're going to continue running this up to the passenger compartment. There's a few grommets on the front of the fire wall that are pretty easy to get to. But we're going to need to extend it out. I'm just going to add on the length of black wire that we're able to cut off there and we'll recycle it. Now right here, this is your steering shaft. This is going to move and rotate. Use special care not to have your wire touching up against that. What you'll do is, right up here there's a couple of brake lines. If we tuck over top of those especially that one that makes the 90 degree bend. That should keep us up and over that steering stem. Then it'll just be a matter of going up top there and finding our wire and pulling it up to us. Now we'll bring that on up. We want to be sure we get all the slack out of it there. Now once we get on top here, we need to use a single zip tie to go around our wire. We can get that anchor out of above that steering stem location. On our lower grommet here, we're just going to make a very tiny cut. We'll pass our wire through that to the inside of the vehicle. That'll give us plenty of clearance room there. Once we get inside we'll find another anchor point so we won't have to worry about any slack coming out this direction. Now our brake controller wire, you see it's going to come in right through our dashboard, comes right down here. It's going to be easy to connect up. Everything else we're going to do is going to happen inside of the vehicle. It's going to have three T25 torque screws holding it in place. We want to get those out of there. Lift that up, you'll see under our area there's going to be a little cover there. We need to take that cover out and we'll take this floor mat out. Now for these screws we need a T30 torque bit, so we need to go up a size. We're going to get all four of these removed. There you'll see our battery. All right now three of our connections, we're going to have right here for our brake controller. This is the output that sends our brake signal out, that's the blue wire. We've got our ground connection here, so the white wire we're going to be able to ground out. The black wire we're going to get our power from right underneath this cover, that's our positive stud. Now in order to get the brake light signal that you're going to need for your brake controller. We need to put in a new stop light switch. Now there's not one made for this vehicle. If you want a brake controller mounted in the Sprinter you're going to have to change the bracket up a little bit. But this is really the only safe way to put a brake controller in here if it's not pre-wired for it. Typically, right about here this would be bent up at about a 90 degree angle. At that point you can see the little bent there. We need to flatten that out. There's going to be a little bit of a bend here that you'll need to flatten out. But once you've got that done, see we've changed the angle up here slightly. That should mount right up to the metal on top allowing us to safely put in a stop light switch that we'll be able to connect our brake controller to safely. To anchor it out I'm going to use a large self tapping screw. Just want one with a head that's large enough to fully cover that opening there. You can see we'll have a little bit of end of adjustment with it. That's going to mount directly above the brake pedal. There's actually a large piece of steel there that's flat. Just has that slight angle on it, that's where we'll be installing it. Now we're going to take our brake light switch and going to place that in the back. Once we've confirmed our positioning there, on the other side of the bracket we're going to place the serrated lock washer and nut that comes with the kit. You see with it in the appropriate position, you see how our plunger is in. Then as we get to the pedal that allows it to extend. Then we come back it's going to push that plunger back in. Once we have it in that spot we can get it tightened down. Now from one side of our switch we're going to be connecting 12 volt power. To do that we're going to add on our short length of red wire that comes with the kit using one of the blue butt connectors with the kit. Now it doesn't matter, which side we connect that to, just one of the two wires. Always give them a good pull to make sure they're connected properly. Just butt connect on that green wire, that's the one that we can connect to our brake controller. Now I'm going to use a couple of zip ties here. These aren't part of the break away kit, just some we have here in the shop. I'm going to zip tie these up and out of the way. Then you'll see here, where the customer wants the brake controller mounted. Our green wire we can just leave in that area. We can make our connection there. The red wire we're going to take it right down in this fuse panel. There's a fuse panel right here, typically there's a cover over it. If we go right down in this edge, right down there it's going to come out in that panel. Now it's time to grab our test light. Yours is going to be smaller, it's just going to have a red LED on it. This one actually has an audible and a light that comes on just to make it a little bit more visible on camera here. You can see once we have that grounded out to our battery. As you go through, you're going to find a couple of live fuses here. But there are also a couple of open slots potentially like here on number 18 and on number 17. Where they do have them pinned that means you're going to see a little copper in there but they don't follow through and they don't go to anything. If you can find one of those with power, that's going to be good too. You can see there's one right here. That's got power, this one here has power. We're just going to use this one right here number 18. The wire can come down to about there. Snip that off. We'll twist it and we're going to connect it on to what's called the fuse tab. Basically that's just going to be something that looks just like a fuse. The bottom row would be if you remove one of these fuses and place that in. Then you'd put that fuse back in there and your new fuse on top. Position it that way so our fuses stick inside. You can see how that just slides in position there. Our fuse 10 amps more than enough to control that little switch. We're going to place that next top set, push it in just like that. Now to test that out we just want to press on the pedal. Now see that's going to activate then we release it should go right back off. All right now that's going to be what we call the cold side of our brake light switch. Now it's time to start making our connections with the pig tail from our brake controller here. Strip those back just a little bit further. Now the first one to be connected is going to be the one that goes back to our plug. That's going to carry the signal to tell the brakes when to operate and how much braking power to apply. Now we're going to be connecting that to the blue wire from our brake controller pig tail. The green wire, remember that's the one gives us our brake light signal. That needs to be connected to the red wire. For that we use one of the blue butt connectors in our kit. Now the white's going to run to the negative side of our battery. In order for that to reach we're going to have to extend that slightly. To extend it we're going to use 12 gauge wire, it's available on our website 12-1-1, that's going to be by the foot. Probably going to need about six foot or so. It's not going to be a great deal additionally that you're going to need but you will need a little bit of extra. We're going to do the same thing for our black wire and get it extended. It's going to be running to our passenger side terminal on our battery. Now we're going to take a little bit of tape here and at least for about the first 12 inches or so, we're going to get that taped up. Now on our power wire side, take that cover off, we're going to be mounting it right in underneath here. We're going to use this stud right here. I want to preassemble slightly my wiring here. What I'm going to do is just take off the length I'll need to get from this stud to that panel where we're mounting our breaker. A small hole ring terminals on one side there. We'll trim the wire we're using for our positive signal and add a small one on there as well. We should be able to mount our breaker right in this location without interfering with the removal of the battery. There's a small area for them to slide it back and out. We'll go in right there with it. We'll connect that ring terminal from the brake controller pig tail to the silver side of our breaker there. The smaller jumper is going to go on the copper side. We're not going to connect that to the battery until our last step, we'll wait til we get it all grounded out. That will be able to connect to that stud right there with one of the provided ring terminals. Now this post will need a 10 millimeter socket. Take that nut off of there. Then in this case you'll see it's going to be possible to kind of sandwich this between two leads, which is ideal. Now with it grounded out, let's go ahead and connect our power side of the breaker. This we need a 13 millimeter for. Now we'll be ready to get all our floor coverings and everything put back in position there. We'll get our brake controller mounted. Looks like positioning wise about right there will be good. Now the customer requested it on this side. If it we're me I would definitely be putting it on the other side that way my knee wouldn't bump into it every time I was getting out of the vehicle. But everybody's got their own ideas on where they want it, so that's where it's going to go. Then for the actual controller we're going to use those finer machine head screws. Before I tighten that down fully I'm going to plug it in and that's just a matter of taking our pig tail, sliding it in right there in the middle just like that. See it's going to come alive, tells us we got power. We'll get that positioned where we want it. Just snug down our machine screws there. Now our excess pig tail, just going to zip tie that up and out of the way to keep it nice and neat looking. Now we'll take just a second, move our manual override lever and we should see the no trailer connection flashing. It indicates that we've got power. Now we'll plug up our trailer tester and see that switch to a different screen. Now to test the system out we'll just operate our manual override lever. You'll see the voltage and current on that going up. It's nice because wherever you have your manual override lever, that's the power you'll receive. You can see just a little bit and you can gradually work to whatever braking power you would need. Now we know with the ETBC7 kit and our brake controller installed, we know we're getting the brake current and voltage. We can also test our 12 volt battery charge, you see that's right at 12 volts which is ideal. Now lets run through and test our lights to make sure everything's working there as far as our clearance lights, our left and right turn signal. Remember we did not connect our back up light signal. Here we have our running lights. We've got our left blinker, our right blinker, and our brakes. Now with everything working properly that's going to complete our installation of the Tekonsha Prodigy P3 proportional trailer brake controller, part number 90195. Also using the electronic trailer brake controller kit part number ETBC7. Both on our 2016 Mercedes Benz Sprinter 3500.


Do you have a question about this Trailer Brake Controller?
Info for this part was:
At etrailer.com we provide the best information available about the products we sell. We take the quality of our information seriously so that you can get the right part the first time. Let us know if anything is missing or if you have any questions.


Thank you! Your comment has been submitted successfully. You should be able to view your question/comment here within a few days.
Error submitting comment. Please try again momentarily.